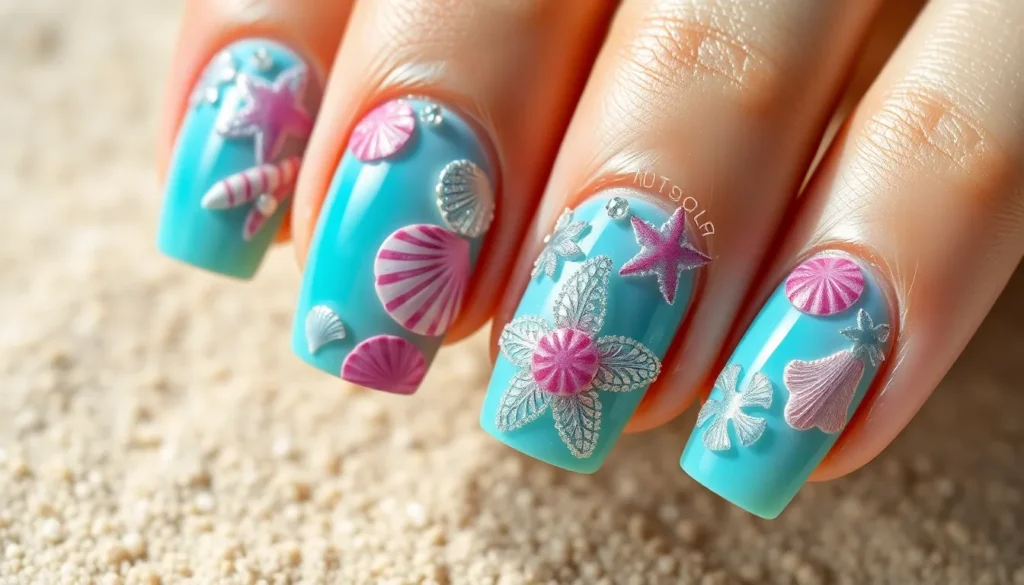
Summer vibes don’t have to end when the beach vacation’s over. We’re bringing the ocean’s treasures right to your fingertips with stunning seashell nail art that’ll make waves wherever you go. This trendy manicure style captures the ethereal beauty of the sea with delicate shell patterns, iridescent finishes, and coastal-inspired designs that transform your nails into miniature masterpieces.
Whether you’re a nail art novice or a seasoned pro, seashell designs offer endless creative possibilities. From subtle pearl accents to bold 3D shell sculptures, these aquatic-themed manicures work perfectly for beach weddings, summer parties, or whenever you’re craving that mermaid aesthetic. We’ll show you how to achieve salon-quality results at home using simple techniques and affordable materials.
Ready to jump into the industry of oceanic nail art? Let’s explore the tools, techniques, and design ideas that’ll help you create breathtaking seashell manicures that capture the magic of the sea in every brushstroke.
Essential Tools and Materials for Creating Stunning Seashell Nail Art
Creating professional looking seashell nail art requires the right foundation and specialized materials. We’ll guide you through each essential component to achieve those coveted ocean inspired designs.
Base Coat and Top Coat Essentials
Base coats protect your natural nails while ensuring your seashell designs last longer on your fingertips. We recommend using a ridge filling base coat that smooths nail imperfections and creates an even canvas for detailed artwork. Quality base coats like Essie First Base or OPI Natural Nail Base Coat prevent staining and extend wear time up to 14 days.
Top coats seal your seashell masterpieces with professional durability and shine. Fast drying formulas like Seche Vite or Sally Hansen Insta Dri save time while providing chip resistant protection. Matte top coats offer an alternative finish that makes pearl accents and shell textures appear more realistic and dimensional.
Nail Polish Colors That Mimic Ocean Vibes
Neutral shades form the perfect backdrop for intricate seashell details and oceanic themes. Creamy whites like OPI Alpine Snow and soft beiges such as Essie Mademoiselle create the ideal shell base colors. Sandy tones including Sally Hansen Nude Now and Zoya Rue perfectly capture that beachy foundation.
Blue variations bring authentic ocean depth to your seashell nail art designs. Turquoise shades like China Glaze For Audrey and teal options such as Essie Turquoise & Caicos mirror tropical waters. Deep navy polishes including OPI Navy Blue and powder blues like Essie Borrowed & Blue add realistic wave effects.
Coral and pink hues represent the vibrant marine life found alongside seashells in nature. Soft corals like Essie Peach Side Babe and dusty roses such as OPI Tickle My France y complement shell designs beautifully. Bright pinks including China Glaze Pink Voltage create stunning contrast against neutral shell backgrounds.
Specialized Brushes for Detailed Seashell Designs
Detail brushes with ultra fine tips enable precise seashell ridges and intricate spiral patterns. We suggest investing in brushes with 0.5mm to 1mm tip widths for maximum control over delicate shell features. Brands like Winstonia and Born Pretty offer professional quality detail brushes that maintain their shape through multiple uses.
Fan brushes create realistic shell textures and gradient effects that mimic natural patterns. These brushes blend colors seamlessly to achieve the subtle color variations found in real seashells. Use fan brushes to apply shimmer powders and create the characteristic ridged texture of scallop shells.
Dotting tools in various sizes help create perfect pearls and bubble effects around your seashell designs. Metal dotting tools with interchangeable heads ranging from 1mm to 5mm offer versatility for different pearl sizes. Wooden toothpicks serve as budget friendly alternatives for creating smaller dots and fine details.
Real Seashells and Decorative Elements
Miniature seashells ranging from 2mm to 8mm in size can be directly applied to nail surfaces for authentic texture. Small conch shells, tiny scallops, and micro starfish create dimensional focal points on accent nails. Create stores like Michaels and Hobby Lobby stock affordable seashell variety packs perfect for nail art applications.
Pearl embellishments in white, cream, and iridescent finishes add elegant sophistication to seashell themed manicures. Half pearls with flat backs adhere easily to wet nail polish or nail glue for secure placement. Sizes from 2mm to 6mm work best for fingernail applications without overwhelming the design.
Glitter and shimmer elements replicate the sparkling effect of sunlight on ocean water and wet shells. Fine iridescent glitters in blue and white tones create magical underwater effects. Holographic flakes and chrome powders applied over shell designs produce that coveted rainbow reflection found in abalone shells.
Simple Seashell Nail Art Designs for Beginners
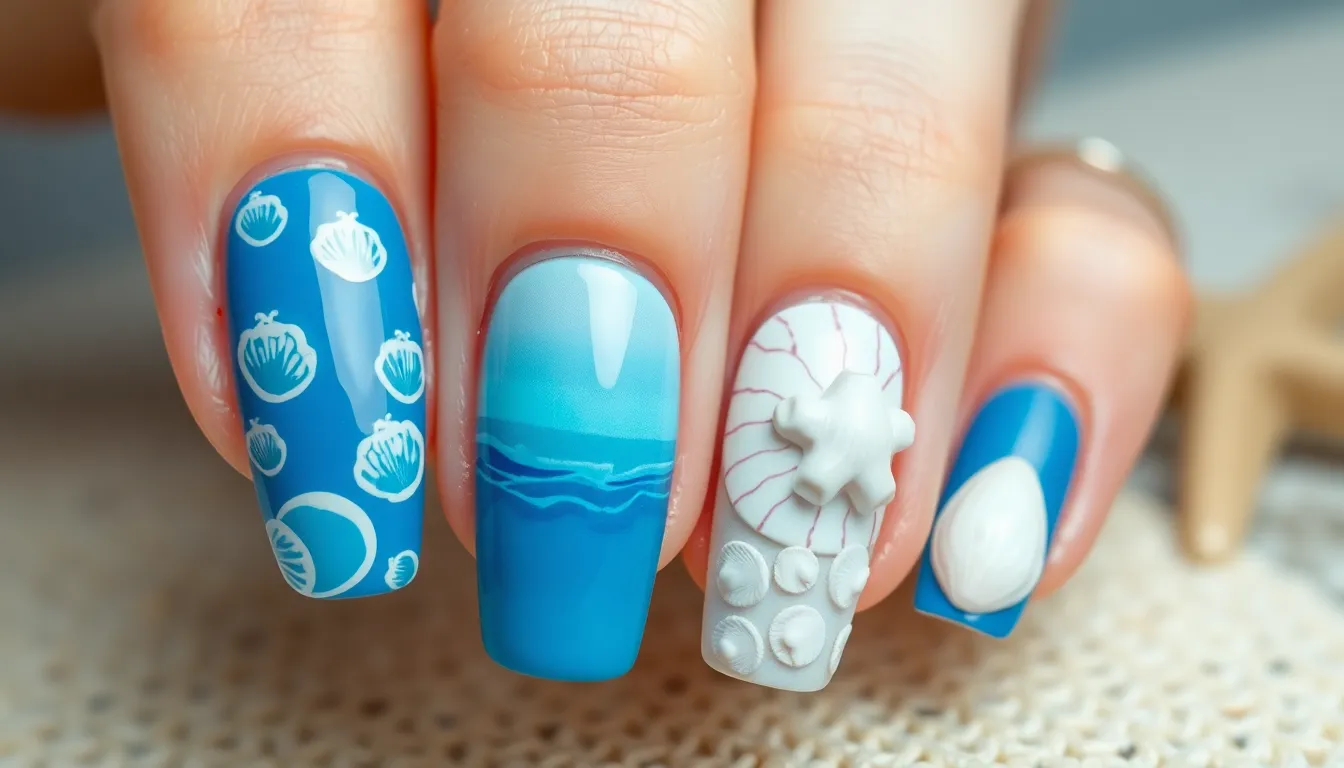
We’ve curated three beginner-friendly seashell nail art designs that’ll transform your nails into ocean-inspired masterpieces. These techniques require minimal experience while delivering stunning results.
Classic White Shell Outlines on Blue Base
Starting with a blue gel polish creates the perfect ocean foundation for your seashell art. Apply two thin coats of blue gel polish to achieve even coverage that mimics deep ocean waters. Create shell outlines using white gel polish and a detail brush to draw simple curved lines that form classic shell shapes.
Design the shells by painting elongated fan shapes with gentle ridges radiating from the base. Use nail art stickers as an alternative if freehand painting feels challenging for your skill level. Finish with a clear top coat to seal your design and add protective shine that lasts for days.
Gradient Ocean Background with Shell Accents
Blend blue and green gel polishes using a makeup sponge to create a realistic ocean gradient effect. Start with the darker blue at your cuticle area and gradually lighten toward the nail tip with green tones. Apply the gradient in thin layers to achieve smooth color transitions without streaky lines.
Add shell-shaped accents using white or pearlescent gel polish once your gradient base completely dries. Paint the shells freehand or apply pre-made shell stickers for consistent shapes across all nails. Enhance the design with chrome powder applied over the wet top coat for extra shimmer that catches light beautifully.
Single Statement Shell on Ring Finger
Choose your ring finger as the focal point for an eye-catching statement shell design. Build a raised shell texture using builder gel or acrylic to create dimensional depth that stands out. Paint the raised shell with a combination of white and gray gel polish to achieve realistic shading and depth.
Keep your remaining nails simple with neutral base colors like soft beige or pale pink. Add rhinestones or fine glitter around the statement shell to create sparkle that draws attention. Apply your finishing top coat carefully around the raised elements to maintain the dimensional effect while sealing the entire design.
Intermediate Seashell Nail Art Techniques to Master
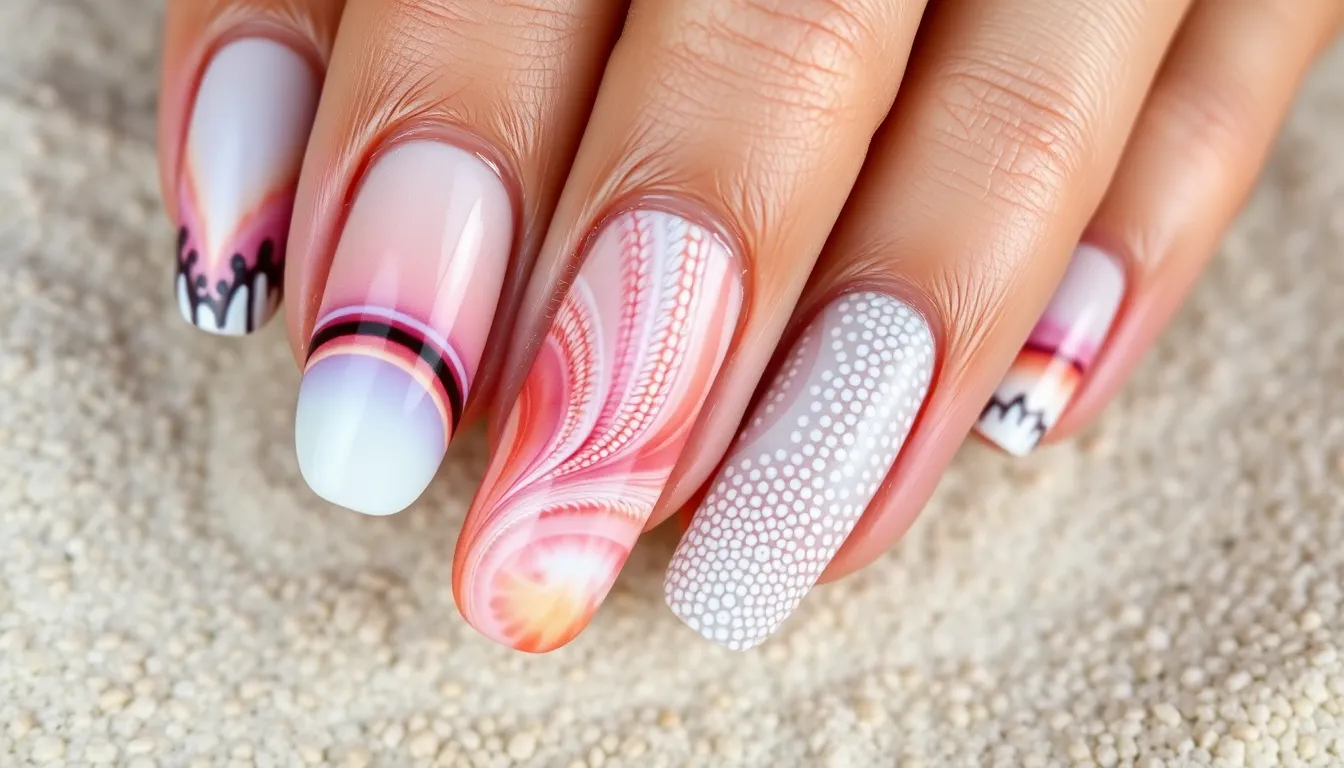
Once you’ve mastered the basics, we’re ready to explore more sophisticated techniques that’ll elevate your seashell nail art to professional levels. These intermediate methods require precision and patience but deliver stunning results that capture the intricate beauty of ocean treasures.
Layered Shell Designs with Depth and Dimension
Layered shell designs create realistic depth that makes your nail art appear three dimensional. We start by applying our base coat and allowing it to fully cure under UV or LED light. Next, we use gel polishes in varying opacities to build gradual layers that mimic natural shell formation.
Builder gel becomes our secret weapon for creating raised ridges that follow authentic seashell patterns. We apply thin lines of gel mixed with polish, curing each application separately to maintain crisp definition. This technique requires multiple thin coats rather than thick applications, allowing us to control the dimensional effect precisely.
The key lies in patience during the curing process. We cure each layer completely before adding the next, preventing smudging and maintaining the structural integrity of our raised elements. Multiple gel polish shades create natural color variations found in real shells, while the raised texture catches light beautifully.
Ombré Seashell Effects Using Multiple Colors
Ombré seashell effects capture the natural color transitions found in ocean treasures through seamless blending techniques. We begin by selecting gel polishes that represent the natural color spectrum of shells, from pale creams to deeper coral tones.
Application starts with the lightest shade at our nail tips, gradually transitioning to darker colors near the cuticle area. We work quickly while the gel remains workable, blending edges with gentle brush strokes before curing. Each color layer requires individual curing to lock in the gradient effect permanently.
Thin coat application ensures smooth transitions without visible lines between colors. We build intensity gradually rather than applying heavy coats, creating the subtle color shifts that make real seashells so captivating. The UV or LED lamp becomes essential for setting each gradient layer before proceeding to the next.
Textured Shell Patterns with Dotting Tools
Textured shell patterns using dotting tools recreate the natural surface variations found on different seashell species. We select dotting tools in various sizes to create realistic scale patterns, spiral formations, and organic textures that mirror nature’s designs.
Different dot sizes and spacing create authentic shell textures when applied strategically across the nail surface. We vary our pressure and gel polish consistency to achieve dots with different opacity levels, mimicking the natural color variations in real shells. Larger dots near the nail base transition to smaller ones toward the tip, following natural growth patterns.
Color mixing becomes crucial for authentic results. We use multiple gel polish shades within a single design, applying lighter dots over darker bases or vice versa. The UV or LED lamp cures each dotting session, allowing us to layer additional texture elements without disturbing previous work.
Experimentation with dot placement creates unique patterns that reflect different seashell varieties. We study real shell photographs for inspiration, recreating exact textures like scallop ridges or conch spirals through strategic dot positioning and sizing.
Advanced Seashell Nail Art Creations for Experts
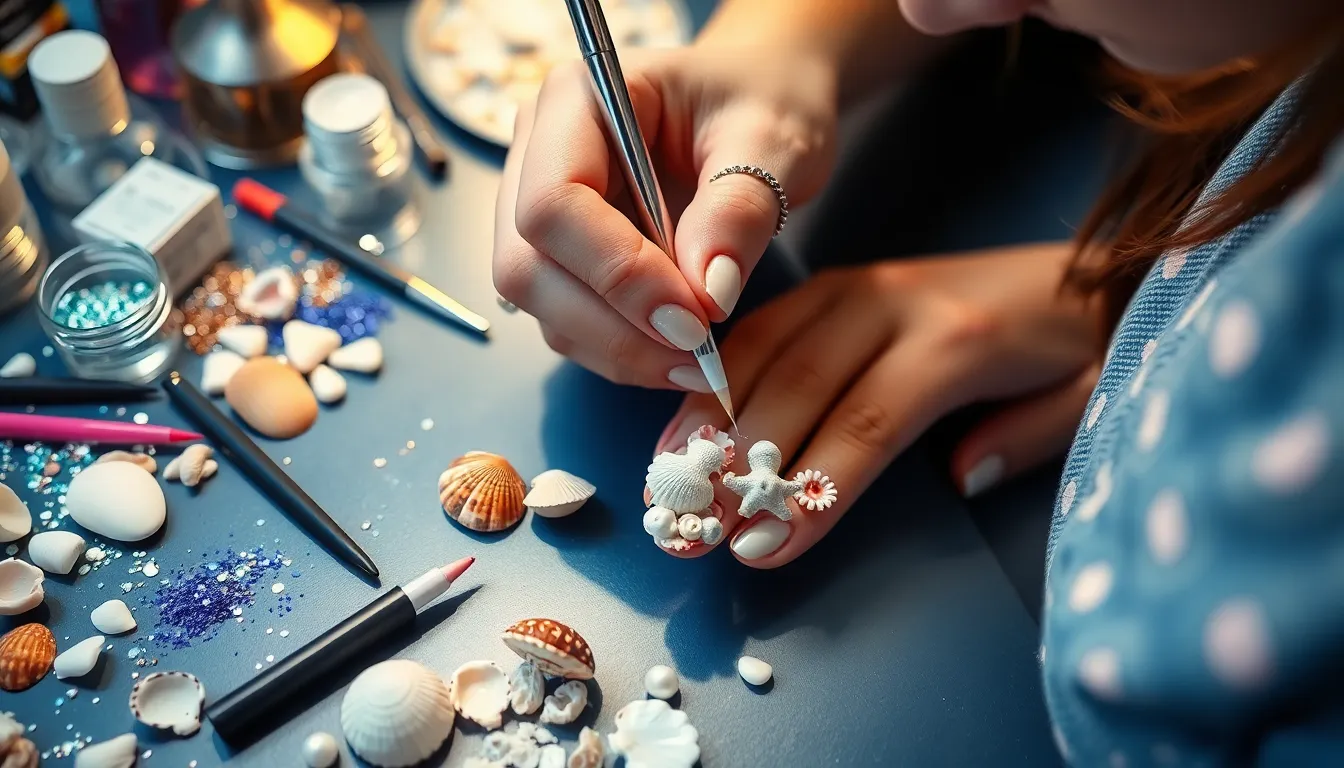
We’re diving deep into expert-level seashell nail art techniques that transform your nails into stunning underwater masterpieces. These advanced methods require precision and patience but deliver breathtaking results that showcase true artistic skill.
3D Seashell Sculptures Using Gel and Acrylic
Creating three-dimensional seashell sculptures elevates your nail art to gallery-worthy status. We begin with essential materials including gel polish, acrylic, and authentic seashell fragments to achieve maximum realism. Our process starts with a protective base coat application, followed by careful acrylic sculpting to form realistic shell shapes.
Building each sculpture requires patience as we allow proper drying time between layers. We create the dimensional structure using builder gel to create raised ridges and valleys that mimic natural shell formations. Texture plays a crucial role in authenticity, so we press real shell fragments into the soft acrylic for genuine surface patterns.
Color application comes next as we paint the sculptures with gel polish in realistic shell tones. Blending multiple shades creates natural variations that mirror actual seashells found on beaches. Final sealing with a quality topcoat protects the intricate work while adding professional shine.
Intricate Underwater Scenes with Multiple Shell Types
Underwater scene creation showcases various shell types including scallop, clam, and conch shells across the nail surface. We establish the oceanic environment using stamps and freehand techniques to add seaweed, tropical fish, and coral formations. Our color palette centers on deep blues and emerald greens that capture underwater lighting effects.
Scene building requires strategic placement of different shell species to create visual interest. We incorporate sandy beige accents and coral pink highlights to break up the blue-green base. Layering techniques help establish depth perception, with background elements appearing softer than foreground shells.
Detail work involves using various brush sizes to paint individual shell characteristics. We add texture lines, growth rings, and natural imperfections that make each shell unique. Finishing touches include subtle shading and highlighting to enhance the three-dimensional appearance of our underwater industry.
Mixed Media Seashell Art with Glitter and Pearls
Mixed media techniques combine glitter application and pearl embellishments for luxurious seashell designs. We strategically place glitter to simulate sunlight filtering through ocean water, creating natural sparkle effects. Pearl placement requires precision as we embed genuine pearls or high-quality alternatives into gel layers.
Encapsulation methods involve layering small shells and pearls between gel coats for impressive depth. We cure each layer thoroughly to prevent shifting or air bubbles that compromise the final result. Dimensional effects emerge as we build up multiple transparent layers around our embedded elements.
Final protection comes through clear topcoat application that seals all mixed media components. We ensure smooth coverage over raised elements while maintaining the textural interest of our embedded shells and pearls. This sealing process prevents chipping and extends the wear time of these intricate artistic creations.
Color Combinations That Enhance Seashell Nail Art
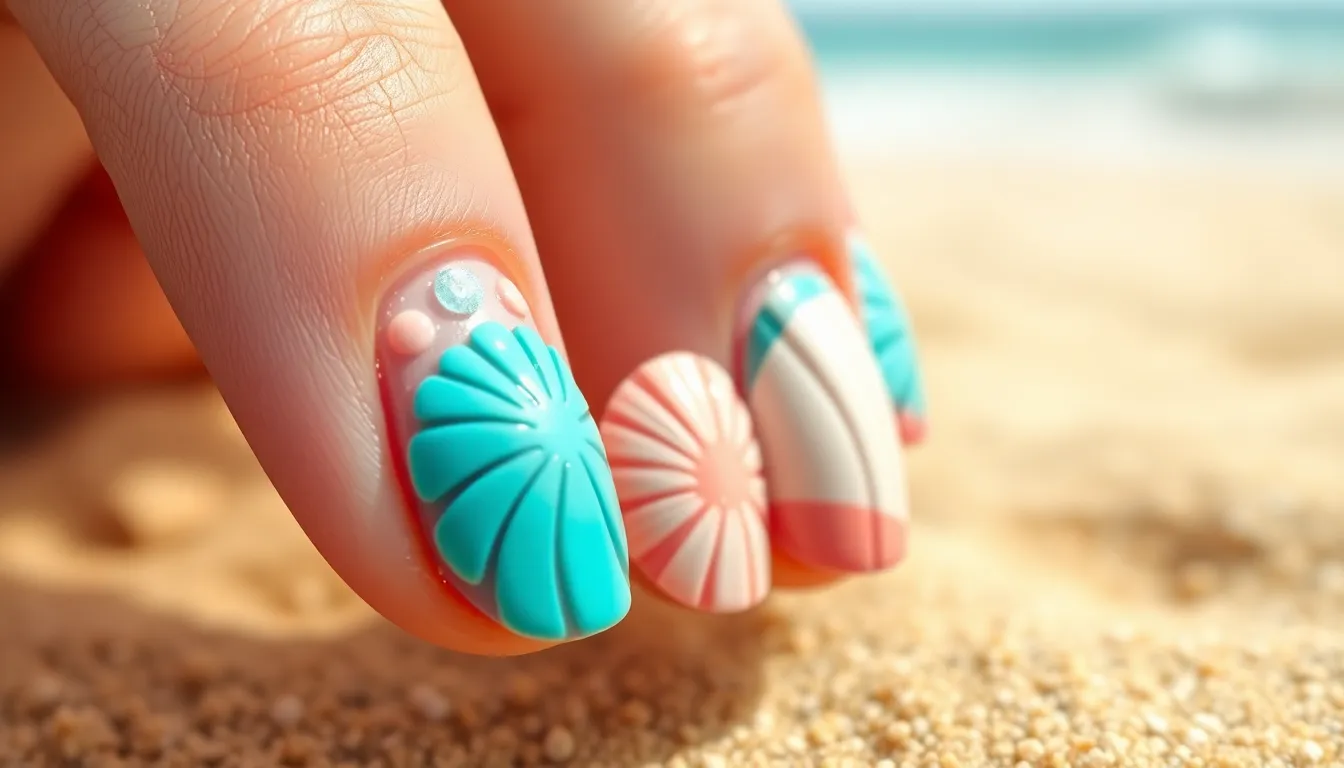
Choosing the right color palette transforms your seashell nail art from simple designs into breathtaking oceanic masterpieces. Each color combination captures different aspects of coastal beauty while complementing the intricate shell patterns you’ve mastered.
Ocean-Inspired Blue and Turquoise Palettes
Ocean blue shades create the perfect foundation for realistic seashell nail art, ranging from soft morning sky hues to rich depths that mirror the sea itself. We recommend layering different blue tones to achieve that ever-changing ocean effect, starting with lighter shades as your base and gradually adding darker blues for depth. Turquoise adds vibrant pops of color that make shell designs truly stand out, while navy provides sophisticated contrast that works beautifully for evening occasions.
Pairing blues strategically enhances your shell patterns by creating natural shadows and highlights. Apply lighter blues around shell edges to mimic sunlight reflection, then use deeper ocean blues in the background areas. This technique makes your dimensional shell work appear even more realistic and professionally crafted.
Turquoise and white combinations evoke fresh ocean waves lapping against pristine beaches, offering that clean and lively aesthetic perfect for summer events. The contrast between these colors makes shell details pop while maintaining that fresh coastal vibe we all love.
Sunset Beach Colors with Coral and Pink Tones
Coral pink seashell nails work exceptionally well on almond shaped nails, where the elongated canvas showcases both the vibrant coral base and intricate shell features. This feminine and energetic combination captures the warmth of tropical beaches while maintaining elegance for formal occasions. We’ve found that coral serves as an ideal backdrop for white shell outlines and pearl accents.
Sunset escape palettes combine coral and turquoise to recreate those magical beach sunset moments when warm colors meet cool ocean tones. Apply coral as your primary base color, then incorporate turquoise accents through shell details or gradient transitions. This tropical approach works particularly well for vacation themed nail art or summer wedding celebrations.
Pink gradient effects enhance shell patterns by creating natural depth that mimics real seashell coloration. Start with pale pink at the cuticle area and blend into deeper coral tones toward the nail tips, then add your shell designs over this gradient base.
Neutral Sandy Hues for Subtle Elegance
Nude base coats provide the perfect canvas for luxurious gold and white shell accents, creating sophisticated looks that work for professional settings and special occasions alike. We recommend choosing nude shades that complement your skin tone, then layering metallic shell details for that upscale finish.
Shimmering pearl nails elevate neutral palettes through strategic gold and pearl embellishments that catch light beautifully. Apply your neutral base color first, then use fine detail brushes to add pearl highlights along shell ridges and gold accents in shell crevices. This technique creates stunning dimensional effects without overwhelming the design.
Sandy beige combinations capture authentic beach vibes while maintaining workplace appropriate aesthetics. These earthy tones serve as perfect backgrounds for cream colored shell patterns and subtle shimmer accents that add interest without being too bold.
Step-by-Step Tutorial for Popular Seashell Designs
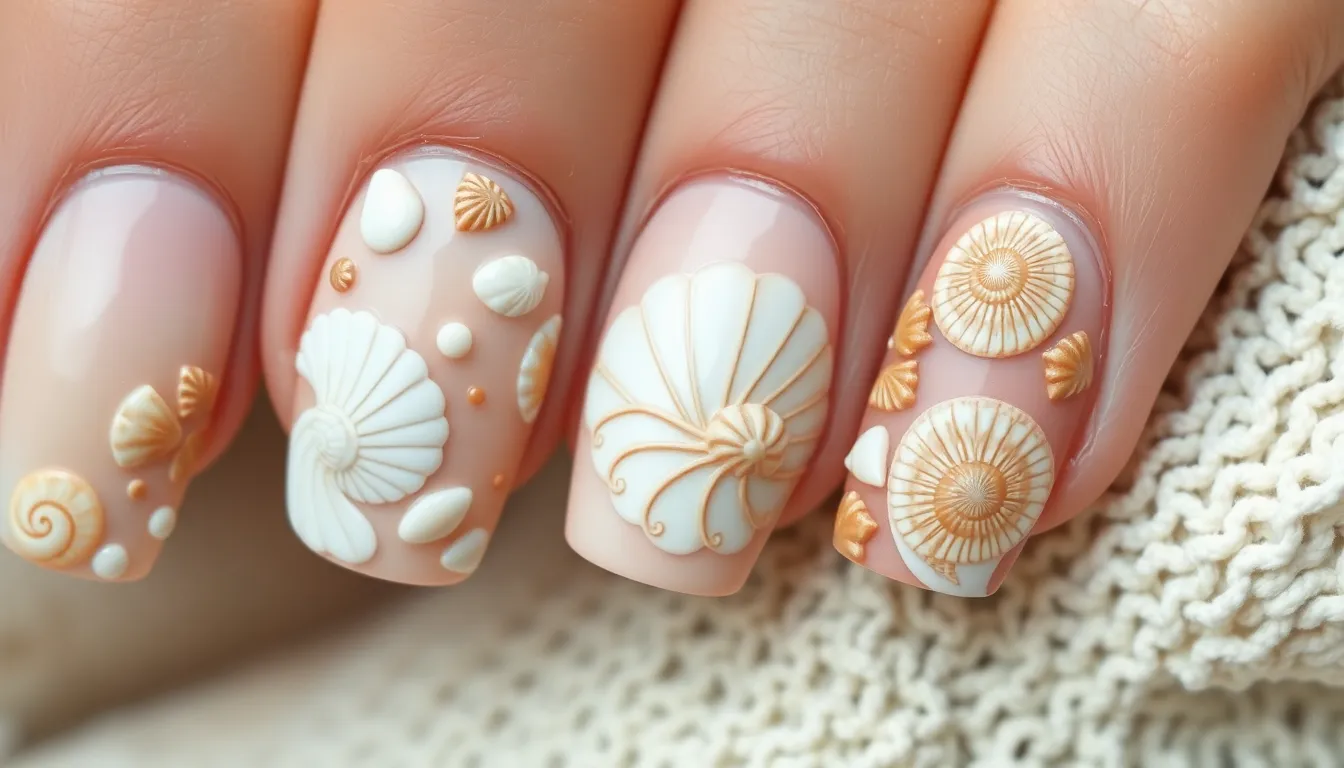
We’ll walk you through detailed techniques for creating three stunning seashell designs that showcase different shell species. Each tutorial builds upon fundamental skills while delivering professional results.
Creating Realistic Conch Shell Patterns
Start by mixing a custom off-white gel polish to achieve that authentic conch shell base color. Apply two coats of this mixture, curing each layer under your LED or UV lamp for proper adhesion.
Use a detailer brush to paint raised lines that mimic the natural ridges found on conch shells. Create these lines by starting at the tip of your nail and pulling the brush toward the cuticle in gentle curves.
Build dimension by applying a second layer of white art gel over the initial lines. This technique creates the raised texture that makes conch shells so recognizable in nature.
Add realistic aging effects by applying a thin layer of grayish-brown gel polish near the cuticle area. Blend this darker shade gently to simulate the natural weathering patterns found on real conch shells.
Finish with a glossy top coat to enhance the shell’s natural luster and protect your detailed artwork.
Designing Delicate Scallop Shell Motifs
Begin with a nude or pale pink base coat that complements the subtle beauty of scallop shells. This neutral foundation allows the shell details to stand out beautifully.
Paint alternating scallop patterns using a fine brush loaded with white or soft pastel gel polish. Create fan-shaped ridges by drawing lines from a central point at the nail tip outward toward the sides.
Layer your design by applying a thin coat of transparent gel polish over the painted ridges. This blending technique softens harsh lines and creates the delicate appearance characteristic of scallop shells.
Add subtle shimmer by dusting a small amount of pearl powder over the wet gel polish before curing. This step replicates the natural iridescence found on real scallop shells.
Seal your design with a thin layer of clear top coat, ensuring all ridges remain visible while providing lasting protection.
Painting Spiral Snail Shell Details
Create the signature spiral pattern by starting with a small dot at the center of your nail using a detail brush. Build the spiral outward by painting continuous curved lines that gradually increase in size.
Establish color gradation by beginning with lighter shades at the center and progressively using darker tones as you move outward. This technique creates the dimensional effect that makes snail shells appear three-dimensional.
Paint alternating bands of color within each spiral section to replicate the natural banding patterns found on various snail species. Use browns, tans, and cream colors for the most realistic appearance.
Add texture by stippling a slightly darker shade along the edges of each spiral band using a small dotting tool. This creates the rough, weathered look of aged shells.
Complete your snail shell design with a matte top coat to enhance the realistic texture and prevent the overly glossy appearance that can make shells look artificial.
Maintenance Tips for Long-Lasting Seashell Nail Art
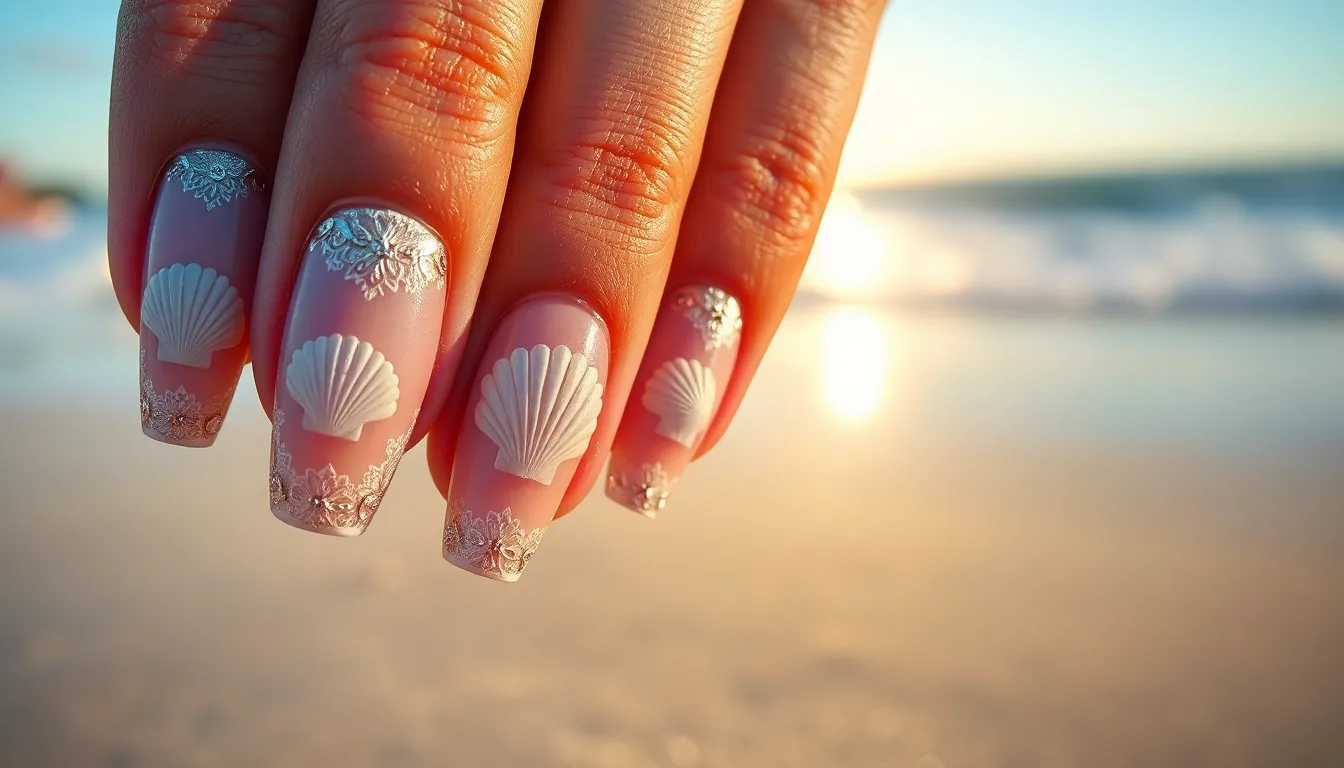
We’ve mastered creating stunning seashell designs, but proper maintenance ensures our oceanic masterpieces stay vibrant for weeks to come.
Proper Sealing Techniques for Durability
Curing forms the foundation of lasting seashell nail art, requiring thorough exposure under UV or LED lamps to prevent lifting and chipping. Each gel layer needs complete polymerization before adding the next element, with proper timing varying between 30-60 seconds depending on your lamp’s wattage.
Top coat application demands precision to seal intricate shell details without pooling around cuticles or creating uneven surfaces. We recommend applying thin layers rather than thick coats, as this prevents bubbling and ensures even coverage across raised shell textures.
Edge sealing protects vulnerable areas where chips typically begin, so we carefully brush top coat along nail tips and sidewalls. This technique creates a protective barrier that extends wear time significantly, especially important for dimensional seashell elements.
Temperature control during curing prevents gel shrinkage that can cause premature lifting around detailed shell work. Keep your workspace at room temperature and avoid exposing freshly cured nails to extreme heat or cold immediately after application.
Touch-Up Methods for Extended Wear
Filling techniques restore damaged areas without redoing entire designs, using matching gel polish colors applied with fine detail brushes. We identify the exact shade needed for repairs by comparing against our original color palette under natural lighting.
Recoating maintains surface integrity every 4-5 days, applying fresh top coat layers to preserve shine and protect underlying artwork. This simple step prevents dullness and maintains the lustrous finish that makes seashell designs so captivating.
Spot repairs address minor chips before they spread, carefully cleaning affected areas with rubbing alcohol before applying base coat and matching polish. We cure each repair layer thoroughly to ensure seamless blending with existing design elements.
Cuticle oil application prevents lifting by keeping nail beds hydrated and flexible, reducing stress on gel polish bonds. Daily moisturizing routines extend wear time while maintaining nail health beneath intricate seashell artwork.
Removal Process Without Damaging Natural Nails
Soaking preparation loosens gel bonds safely using acetone-soaked cotton pads wrapped around each nail for 10-15 minutes. We secure wraps with aluminum foil to prevent evaporation and maintain consistent moisture levels throughout the removal process.
Gentle scraping removes softened gel using cuticle pushers or wooden orange sticks, never forcing stubborn areas that could damage nail plates. Patience during this step prevents thinning or scratching that compromises natural nail health.
Moisturizing treatments restore hydration immediately after removal, using rich cuticle oils and nail strengthening formulas to replenish lost moisture. We recommend applying treatment products twice daily for the first week after gel removal.
Buffer smoothing eliminates residue without over-filing natural nails, using fine-grit files to address any remaining gel particles. This final step prepares nails for their next seashell adventure while maintaining optimal nail bed condition.
Seasonal Variations of Seashell Nail Art Designs
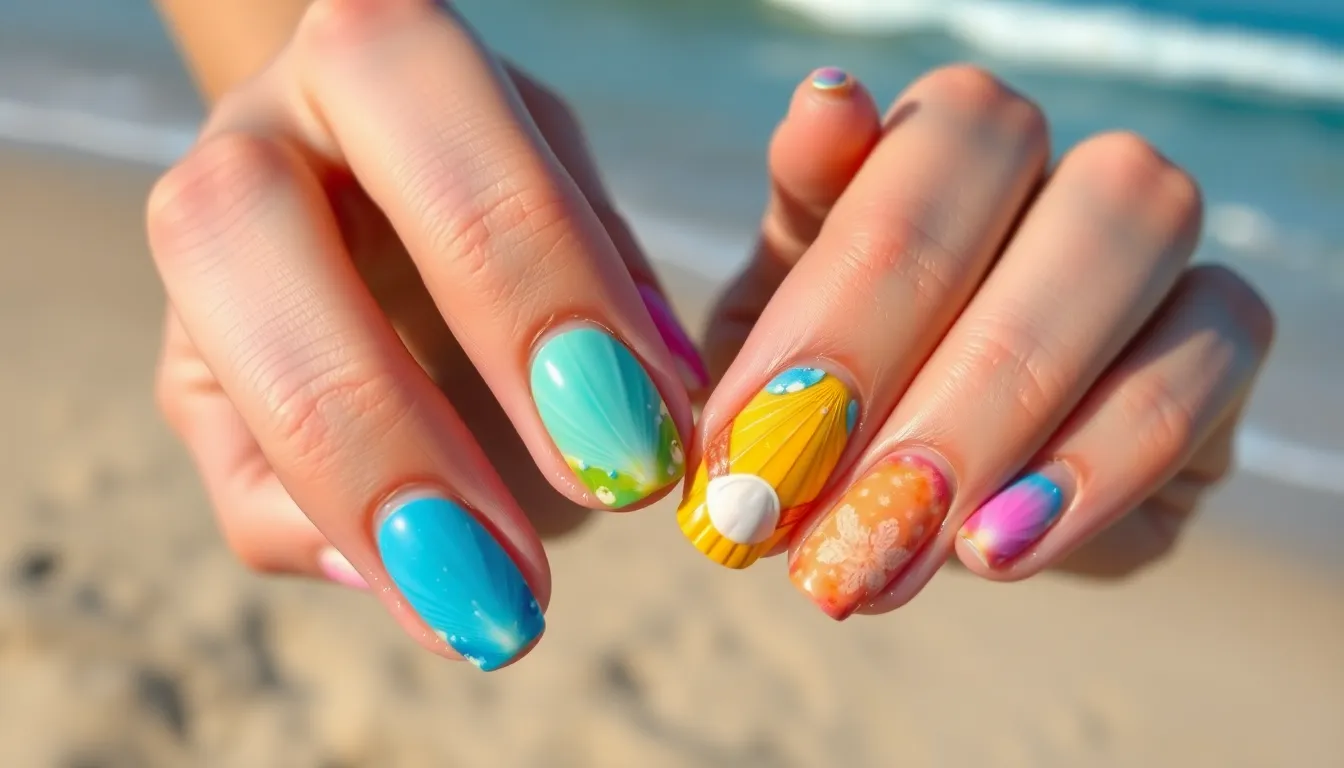
We can transform our seashell nail art to match the changing seasons by adjusting color palettes and design elements. Different times of the year call for unique approaches that capture the essence of each season while maintaining the oceanic theme we love.
Summer Beach Vacation Themes
Summer seashell nail art embraces vibrant energy with bold ocean blues, sunny yellows, and coral pinks that reflect the warmth of beach vacations. We love incorporating realistic shell images alongside playful embellishments like rhinestones and glitter to mimic sunlight sparkling on water. Hand painted techniques work beautifully for creating detailed shell motifs while ombre backgrounds add depth to our designs.
Chrome powder finishes give our summer nails that coveted mermaid effect we’re all seeking. Iridescent topcoats enhance the magical underwater feeling that makes these designs perfect for poolside gatherings. Bold color combinations make our summer seashell art stand out against sun kissed skin.
Winter Ocean-Inspired Frost Effects
Winter transforms our seashell nail art into sophisticated masterpieces using cooler tones like silver, white, and icy blue. We create subtle shell outlines that evoke frost and snow while maintaining the oceanic connection through delicate textures. Shimmer topcoats add elegance without overwhelming the minimalist aesthetic.
Matte finishes work exceptionally well for winter seashell designs because they create that frosty appearance we want. Silver accents highlight shell ridges and curves while maintaining the chilly sophistication perfect for winter occasions. These refined designs complement our winter wardrobe beautifully.
Spring Pastel Seashell Collections
Spring brings soft pastel colors like lavender, mint, pale pink, and baby blue to our seashell nail art palette. We combine delicate shell motifs with whimsical floral elements or tiny dots to create fresh, lighthearted designs. These gentle color schemes reflect the renewal and growth that spring represents.
Pastel seashell art requires less intricate detailing than summer designs but maintains the shell theme through soft, seasonal touches. Small embellishments work better than bold statements during spring because they complement the gentle aesthetic. Fresh mint and lavender combinations create particularly stunning effects for spring celebrations.
Conclusion
Seashell nail art offers endless possibilities for expressing our love of ocean beauty right at our fingertips. From simple beginner designs to intricate 3D sculptures we’ve explored techniques that suit every skill level and artistic vision.
The key to stunning results lies in choosing quality materials and taking time to perfect each layer. Whether we’re creating subtle sandy neutrals or vibrant coral masterpieces proper preparation and sealing ensure our oceanic designs stay beautiful for weeks.
We encourage you to experiment with different seasonal variations and color combinations to make each design uniquely yours. With practice these techniques become second nature allowing us to capture the mesmerizing allure of seashells in every manicure.
Start with the basic designs we’ve outlined then gradually work toward more advanced techniques. Your journey into seashell nail art will be as rewarding as discovering treasures along the shore.
Frequently Asked Questions
What tools do I need to create seashell nail art at home?
You’ll need a quality base coat (like Essie First Base), gel polish in ocean-inspired colors, detail and fan brushes for intricate designs, and a fast-drying top coat such as Seche Vite. Optional embellishments include real seashells, pearls, glitter, and builder gel for 3D effects. These accessible tools help achieve professional-looking results.
Which nail polish colors work best for seashell designs?
Ocean-inspired colors work perfectly: creamy whites, sandy beiges, vibrant corals, and tropical blues. For realistic effects, use blue and turquoise palettes. Coral and pink tones create tropical vibes, while neutral sandy hues offer subtle elegance. Mix and layer these colors to create depth and authentic oceanic appearances.
Can beginners create beautiful seashell nail art?
Absolutely! Start with simple designs like white shell outlines on blue bases, gradient ocean backgrounds with shell accents, or single statement shells on ring fingers. These beginner-friendly techniques require minimal experience but deliver stunning results. Practice basic brush control and layering for best outcomes.
How do I make my seashell nail art last longer?
Ensure proper sealing by curing gel layers thoroughly and applying top coats with precision. Use edge sealing techniques to prevent chips, and consider matte top coats for realistic shell textures. Proper preparation with quality base coats and careful application will extend your design’s longevity significantly.
What’s the difference between beginner and advanced seashell techniques?
Beginner techniques focus on simple outlines and basic color application. Advanced methods include 3D sculpting with gel and acrylic, creating layered designs with depth, ombré effects, textured patterns, and mixed media incorporating glitter and pearls. Advanced techniques require more patience, precision, and specialized tools.
How can I adapt seashell nail art for different seasons?
Summer designs use vibrant colors and playful embellishments. Winter focuses on cooler tones and sophisticated textures. Spring features soft pastels combined with floral elements. Each season maintains the oceanic theme while adjusting color palettes and design elements to reflect seasonal moods and aesthetics.
What’s the best way to remove seashell nail art safely?
Use proper gel removal techniques with acetone and foil wraps. Avoid forcing or peeling off designs to prevent nail damage. After removal, apply moisturizing treatments and smooth nails with a buffer. This careful process maintains nail health and prepares them for future seashell art applications.

