The holiday season calls for festive fingertips that capture Christmas magic, and nothing says “holiday cheer” quite like classic red and green nail designs. We’ve all felt that excitement when December arrives and it’s finally time to transform our nails into miniature Christmas masterpieces that spread joy wherever we go.
Red and green Christmas nails aren’t just a beauty trend – they’re a celebration of tradition that instantly elevates any holiday outfit. Whether you’re attending office parties, family gatherings, or cozy nights by the fireplace, these timeless color combinations create the perfect seasonal statement that’ll have everyone asking about your manicurist.
We’re diving into the most stunning red and green nail art ideas that’ll make your hands the star of every holiday photo. From elegant candy cane stripes to sophisticated holly leaf designs, these festive manicures prove that Christmas spirit looks absolutely gorgeous at your fingertips.
Classic Red and Green Christmas Nail Designs for Traditional Holiday Style
Traditional Christmas nail designs bring timeless elegance to your holiday look with classic red and green combinations. We’ll explore three beloved patterns that never go out of style during the festive season.
Candy Cane Striped Patterns
Candy cane stripes transform your nails into festive holiday treats with alternating red and white diagonal lines. Start with a bright red base coat and allow it to dry completely before creating the white stripes. Use striping tape or nail art brushes to achieve clean, even lines that mimic the classic candy cane pattern.
Diagonal stripes work best for this design, as they create the authentic candy cane spiral effect. Apply the white polish in thin, precise lines across each nail at a 45 degree angle. Finish with a glossy top coat to make the colors pop and ensure the design lasts through all your holiday activities.
Holly and Berry Motifs
Holly leaves paired with bright red berries create stunning nail art that captures the essence of Christmas greenery. Begin with a deep forest green base and use a small detail brush to paint holly leaf shapes with darker green polish. Add serrated edges to make the leaves look realistic and dimensional.
Red berries complete this traditional design by adding small dots of bright red polish near the holly leaves. Use a dotting tool or the end of a bobby pin to create perfectly round berries. Apply 2 to 3 berries per leaf cluster to maintain the natural holly appearance.
Traditional Plaid Designs
Plaid patterns bring cozy holiday warmth to your nails with intersecting red and green lines. Create the base using alternating red and green vertical stripes, then add horizontal lines in the opposite colors to form the classic plaid grid. Use a thin nail art brush for precise line work.
Scottish tartan inspired designs work particularly well for Christmas nails when you incorporate deep hunter green and burgundy red. Add thin gold accent lines to elevate the plaid pattern and give it a more sophisticated holiday look. Seal the design with a matte top coat for a textile like finish that mimics real plaid fabric.
Elegant Red and Green Christmas Nails with Metallic Accents
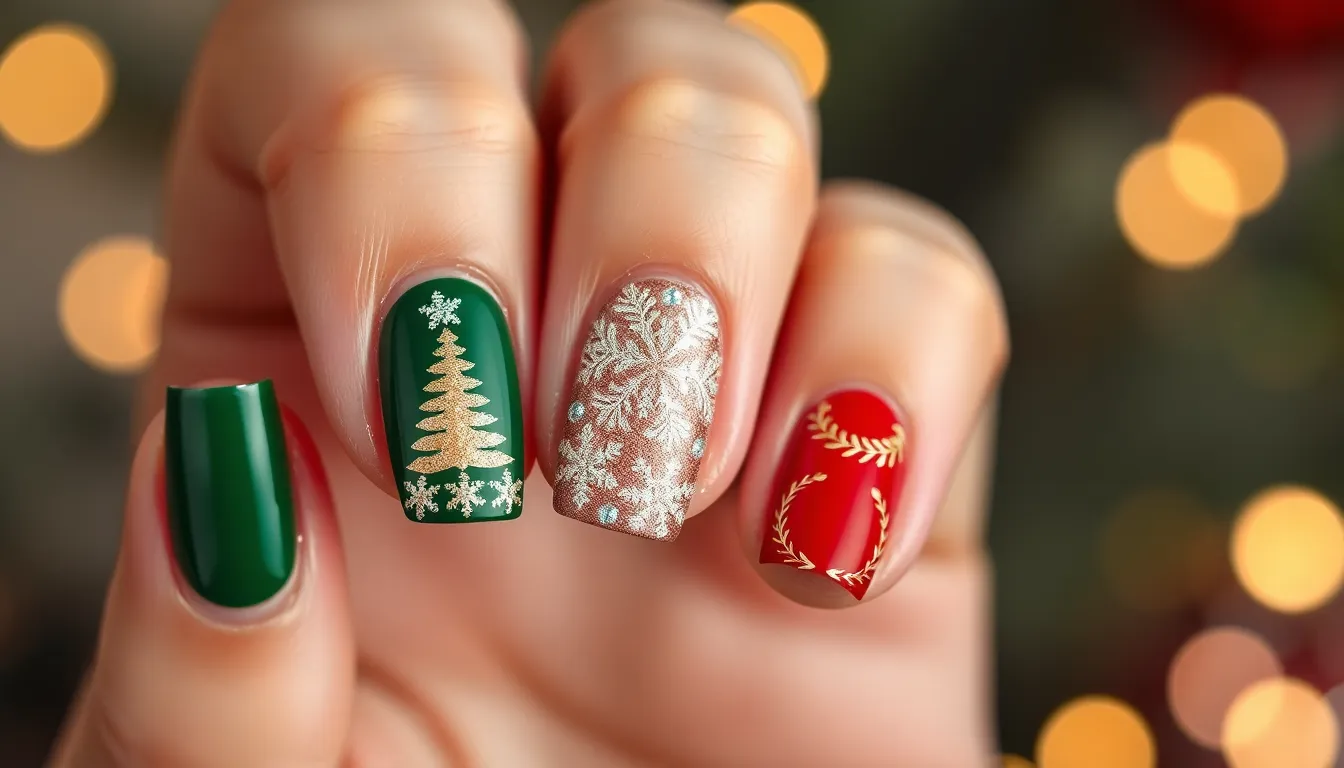
Metallic accents transform traditional red and green holiday nails into sophisticated masterpieces that catch light beautifully. We’ll explore three stunning metallic approaches that elevate your festive manicure to elegant new heights.
Gold Glitter Christmas Tree Designs
Gold glitter polish creates luxurious depth when applied to Christmas tree nail art. We start by painting the base in deep forest green, then use a fine brush to outline triangular tree shapes. Sparkling gold glitter adds dimension as we dab it generously over the tree design, creating a shimmering effect that mimics tinsel.
Accent nails work perfectly for this design since gold glitter tends to be eye catching. We recommend applying gold glitter to just one or two nails per hand to maintain balance. Brown polish serves as the perfect tree trunk, while tiny gold dots represent ornaments scattered across the branches.
Silver Snowflake Embellishments
Silver accents bring a frosty winter wonderland atmosphere to red and green holiday nails. We create delicate snowflake patterns using silver glitter polish applied with a dotting tool in radiating lines. Rhinestones add extra sparkle when placed at the center of each snowflake design.
Frosted effects emerge when we blend silver glitter with clear topcoat before application. We paint the base in deep red or emerald green, then use a small brush to create intricate snowflake patterns. Silver foil pieces pressed onto wet polish create stunning geometric snowflake shapes that reflect light beautifully.
Rose Gold Holiday Wreath Patterns
Rose gold brings modern sophistication to traditional Christmas nail designs through circular wreath motifs. We apply rose gold glitter polish in gentle circular motions to create the wreath’s base shape. Contemporary flair emerges as we blend this trendy metallic with classic holiday colors.
Wreath patterns start with a thin brush dipped in rose gold polish to outline the circular shape. We fill in the circle with small dabbing motions, leaving the center hollow like a traditional wreath. Tiny red dots represent berries while small green leaves complete the festive design around the rose gold base.
Fun and Festive Red and Green Christmas Nail Art Ideas
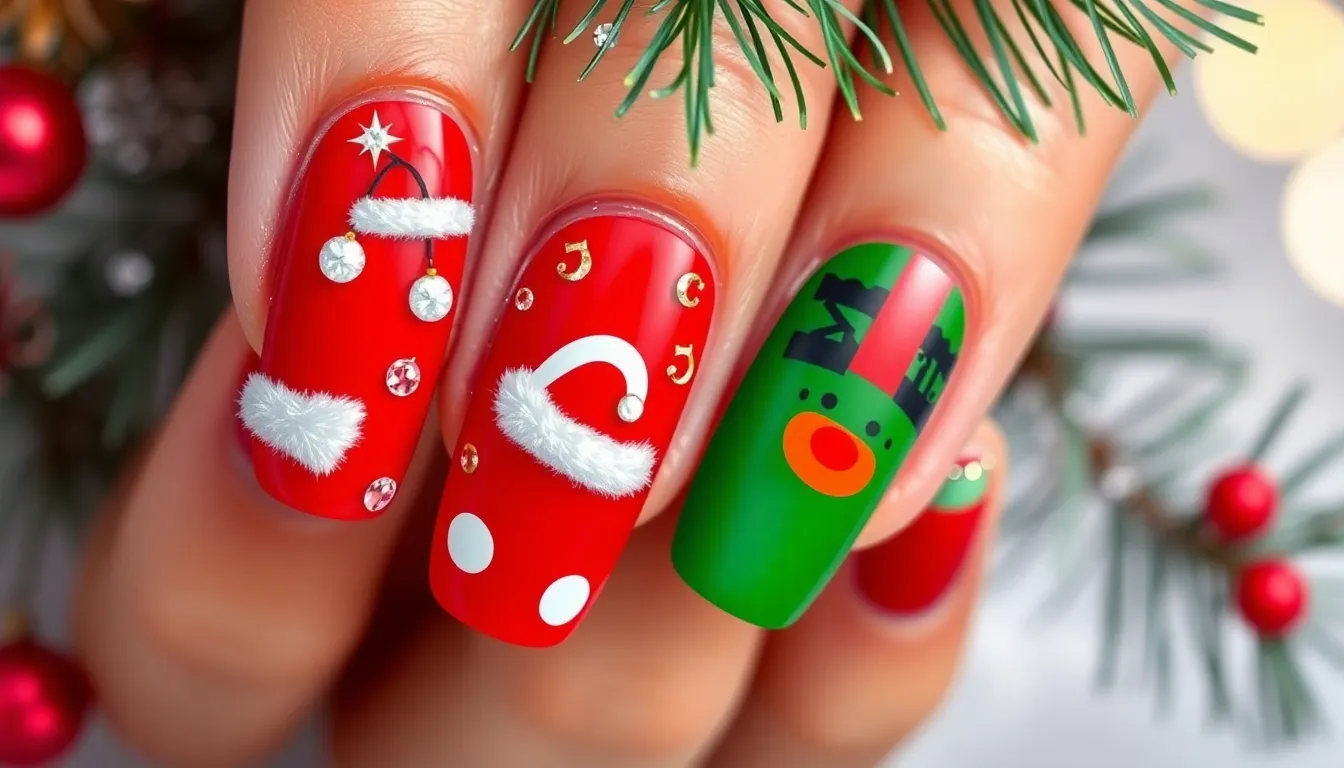
We’re bringing playful holiday characters to life with these whimsical nail art designs that capture the magical spirit of Christmas celebrations.
Santa Hat Nail Designs
Santa hat motifs transform individual nails into miniature holiday masterpieces with their iconic red base and white trim details. We start with a bright red base color covering three quarters of each nail, leaving space at the tip for the distinctive white furry cuff. Creating the white pom pom at the very tip requires a small dotting tool or fine brush to achieve that perfect circular shape.
Accent nails featuring Santa hat designs pair beautifully with solid green or red companions across your other fingers. We recommend using a gel liner brush for the cleanest white trim lines, ensuring each hat looks crisp and professional. Adding tiny rhinestones to the white cuff creates extra sparkle that catches holiday lighting perfectly.
Variations of Santa hat designs include miniature versions on shorter nails or oversized hats that span the entire nail surface. We’ve found that applying a white base coat first makes the red color more vibrant and helps the design pop against your skin tone.
Christmas Stocking Patterns
Christmas stockings come alive on your nails with red backgrounds and distinctive white furry cuffs at the base. We paint the majority of each nail in festive red, then add the characteristic white trim where a real stocking would have its opening. Green holly accents or tiny ribbon details complete the authentic stocking appearance.
Detailed elements like heel and toe sections in contrasting colors add realistic touches to these charming designs. We use darker red or burgundy shades to create depth and dimension, making each stocking look three dimensional. Small green holly leaves with red berries scattered across the white cuff area bring traditional Christmas elements together.
Pattern placement works exceptionally well on accent nails while keeping remaining fingers in coordinating solid colors. We suggest alternating between red and green base colors across different fingers to create a cohesive holiday color story throughout your manicure.
Reindeer and Rudolf Motifs
Reindeer faces feature warm brown tones as the foundation with distinctive features that bring these beloved Christmas characters to your fingertips. We create the basic face shape using light brown polish, then add darker brown details for ears, antlers, and facial features. Rudolf designs get special treatment with his signature bright red nose created using a small dotting tool.
Background colors in deep green or rich red provide perfect contrast for the brown reindeer elements while maintaining our festive color scheme. We’ve discovered that adding white highlights to the eyes makes these designs more expressive and lifelike. Small green or red accents around the reindeer create winter scenery that completes the magical look.
Antler details require steady hands and gel liner brushes to achieve those delicate branched shapes extending from the reindeer’s head. We recommend practicing the antler pattern on paper first before applying it to your nails. Adding tiny gold glitter dots along the antlers creates the illusion of sparkling snow caught in winter light.
Simple Red and Green Christmas Nails for Beginners
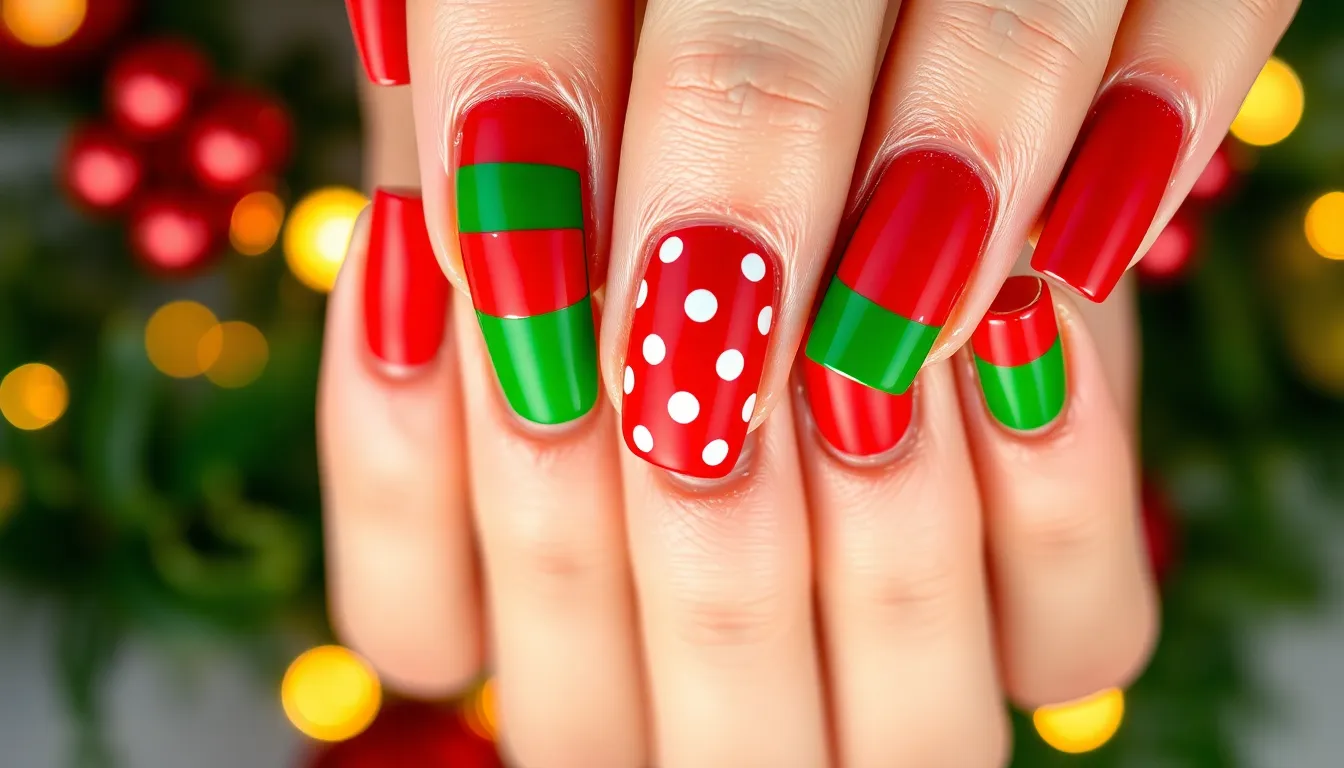
Beginners can master stunning red and green Christmas nails without complex techniques or professional tools. These straightforward designs let you embrace the holiday spirit while building your nail art confidence.
Two-Tone Color Block Designs
Basic color blocking creates bold holiday statements with minimal effort. Paint two nails vibrant red and two nails festive green, leaving your accent nail for creativity. We recommend applying a clear base coat first to protect your natural nails and ensure smooth polish application.
Glitter accent nails elevate simple color blocking to glamorous heights. Add sparkling gold polish to one finger on each hand while maintaining your red and green base colors. This technique creates visual interest without overwhelming the design, perfect for holiday parties and family gatherings.
Alternating patterns offer endless customization possibilities for your Christmas manicure. Try painting your thumb and ring finger red while keeping your remaining nails green, or create diagonal splits across each nail for geometric appeal. The key lies in maintaining consistent color placement across both hands for a polished appearance.
Basic Polka Dot Patterns
Red and green dots transform plain manicures into playful holiday masterpieces. Use a dotting tool or simple toothpick to create small circles in contrasting colors across your nails. Start with a neutral base coat, then add clusters of dots near your cuticles or scatter them randomly for whimsical charm.
Glitter polka dots add extra sparkle to traditional dotting techniques. Apply your red or green base color first, then use glitter polish to create shimmering dots that catch holiday lights beautifully. We suggest varying dot sizes by using different tools like bobby pins for tiny dots and pencil erasers for larger ones.
Gradient dot placement creates sophisticated nail art through strategic positioning. Place larger dots near your nail tips and smaller ones toward your cuticles for dimensional effects. This technique works especially well when alternating between matte red dots and glossy green ones for textural contrast.
Easy Gradient Techniques
Simple sponge gradients blend red and green seamlessly from cuticle to tip. Apply your base coat, then dab a makeup sponge in both colors and gently press it across your nail surface. The natural texture of the sponge creates smooth color transitions that look professionally done.
Glitter gradient overlays transform basic gradients into dazzling holiday statements. Layer gold or silver glitter polish over your red and green gradient while it’s still slightly tacky. This creates depth and catches light beautifully during holiday celebrations and winter gatherings.
Vertical gradient strips offer modern twists on traditional blending techniques. Paint thin vertical sections of red and green next to each other, then use a clean brush to gently blend where colors meet. This creates sophisticated ombre effects that complement both casual and formal holiday outfits.
Bold and Dramatic Red and Green Christmas Nail Combinations
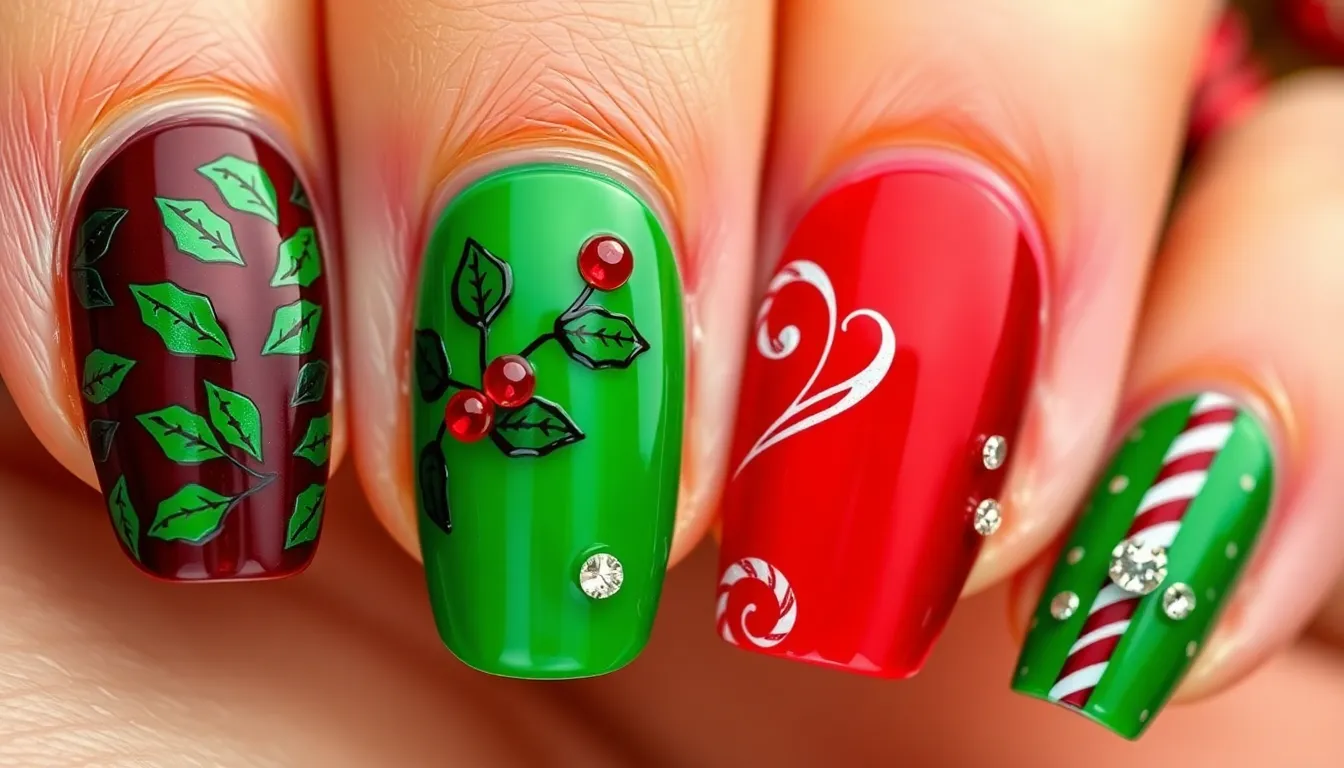
Transform your holiday manicure with rich, sophisticated color pairings that command attention at every festive gathering.
Deep Burgundy and Forest Green Pairings
Sophisticated earthy tones create the most elegant foundation for festive nail art. Deep burgundy offers warmth and richness while forest green brings depth and natural beauty to your holiday look. French manicures become instantly elevated when we incorporate these luxurious shades instead of traditional white tips.
Accent nails work beautifully with this pairing, allowing you to highlight one or two nails with intricate holly patterns. Christmas tree designs take on new dimension when painted in forest green with burgundy ornament details. Subtle foliage patterns featuring tiny leaves and berries create an understated yet festive appearance that’s perfect for both casual and formal holiday events.
Bright Cherry Red with Emerald Green
Vibrant combinations deliver maximum visual impact for those who love bold statement nails. Cherry red provides the perfect backdrop for candy cane patterns when paired with white accent stripes. Emerald green creates stunning contrast that makes peppermint inspired designs pop with festive energy.
Christmas tree nail art reaches new heights when we use emerald green as the base color and bright cherry red for ornament details. Glitter overlays enhance these vibrant shades, creating extra sparkle that catches light beautifully. Rhinestone embellishments add luxurious touches to this already eye catching combination, making your nails the perfect accessory for holiday parties.
Matte Finish Holiday Designs
Modern twists on traditional colors create sleek, contemporary nail art that stands out from glossy alternatives. Matte finishes transform classic red and green combinations into sophisticated statements that feel current and fresh. Polka dot patterns become more refined when applied with matte topcoats, creating subtle texture variations.
Stripe designs gain visual interest through matte finishes, making simple patterns appear more complex and artistic. Snowflake nail art takes on elegant simplicity when painted with matte red and green polishes. Berry patterns featuring tiny dots and leaf details create charming holiday scenes that feel both festive and modern.
Red and Green Christmas Nails with Rhinestone and Gem Details
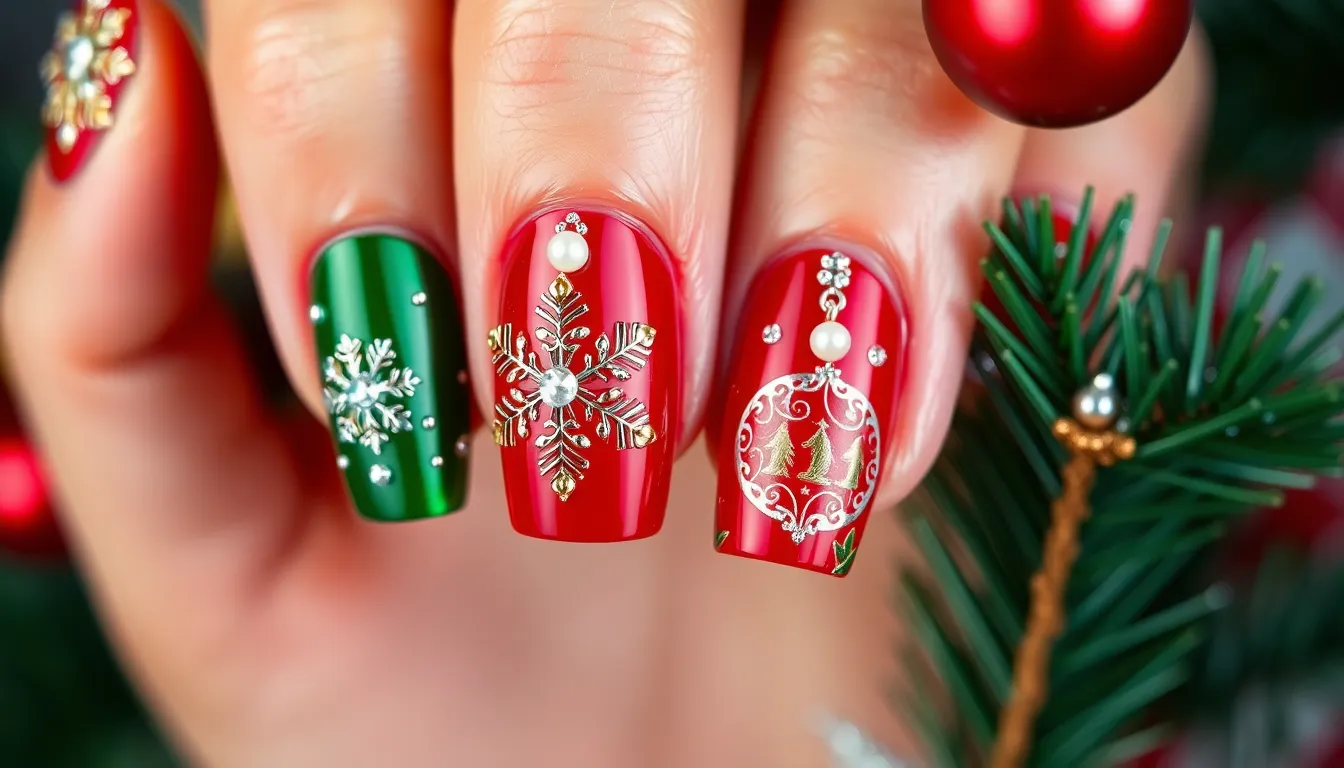
Elevating your red and green Christmas nails with luxurious rhinestone and gem details transforms simple holiday designs into sophisticated masterpieces. These sparkling embellishments add depth and elegance to traditional festive colors, creating nail art that catches light beautifully during holiday celebrations.
Crystal Snowflake Accents
Crystal snowflake accents bring delicate winter magic to your red and green Christmas manicure with intricate patterns that shimmer like fresh snow. We recommend starting with a deep forest green base on your accent nails, then carefully placing small clear crystals in snowflake formations using tweezers and nail glue. Each snowflake design can vary in size and complexity, from simple six pointed stars to more elaborate geometric patterns that span the entire nail surface.
Adding crystal or glitter polish enhances the snowflake effect by creating subtle sparkle between the rhinestone placements. We suggest using a fine detail brush to paint delicate connecting lines between crystals, mimicking the natural branching patterns of real snowflakes. The contrast between rich red nails and crystal adorned green accent nails creates a stunning winter wonderland effect that’s perfect for holiday parties.
Pearl Holiday Ornament Designs
Pearl holiday ornament designs incorporate sophisticated elegance into your red and green Christmas nail art through classic round embellishments that mimic traditional tree decorations. We position small pearls strategically on red base nails to create circular ornament shapes, using nail glue for secure attachment that lasts throughout the holiday season. These pearls can serve as the centerpiece for ornament designs or as accent details that add texture and dimension.
Creating ornament caps requires painting small metallic gold or silver details above each pearl using a fine brush and steady hand technique. We recommend varying pearl sizes across different nails to create visual interest, with larger pearls on accent nails and smaller ones on supporting fingers. The combination of glossy red polish and lustrous pearls creates a luxurious finish that captures the essence of elegant holiday decorating.
Jeweled Christmas Tree Nail Art
Jeweled Christmas tree nail art makes bold statements through carefully placed rhinestones and gemstones that transform simple green triangles into dazzling holiday centerpieces. We start by painting Christmas tree shapes using deep forest green polish on accent nails, creating triangular forms that serve as the foundation for our sparkling embellishments. Red and green jewels are then strategically placed along the tree branches to simulate ornaments and lights.
The tree design gains dimension when we layer different sized rhinestones, using larger gems at the base and progressively smaller ones toward the tree top. We complete each jeweled tree with a bright star shaped rhinestone at the peak, secured with strong nail glue for durability. This elaborate design works best on longer nail shapes like stiletto or coffin styles, where there’s ample surface area to showcase the intricate jeweled details.
French Tip Red and Green Christmas Nail Variations
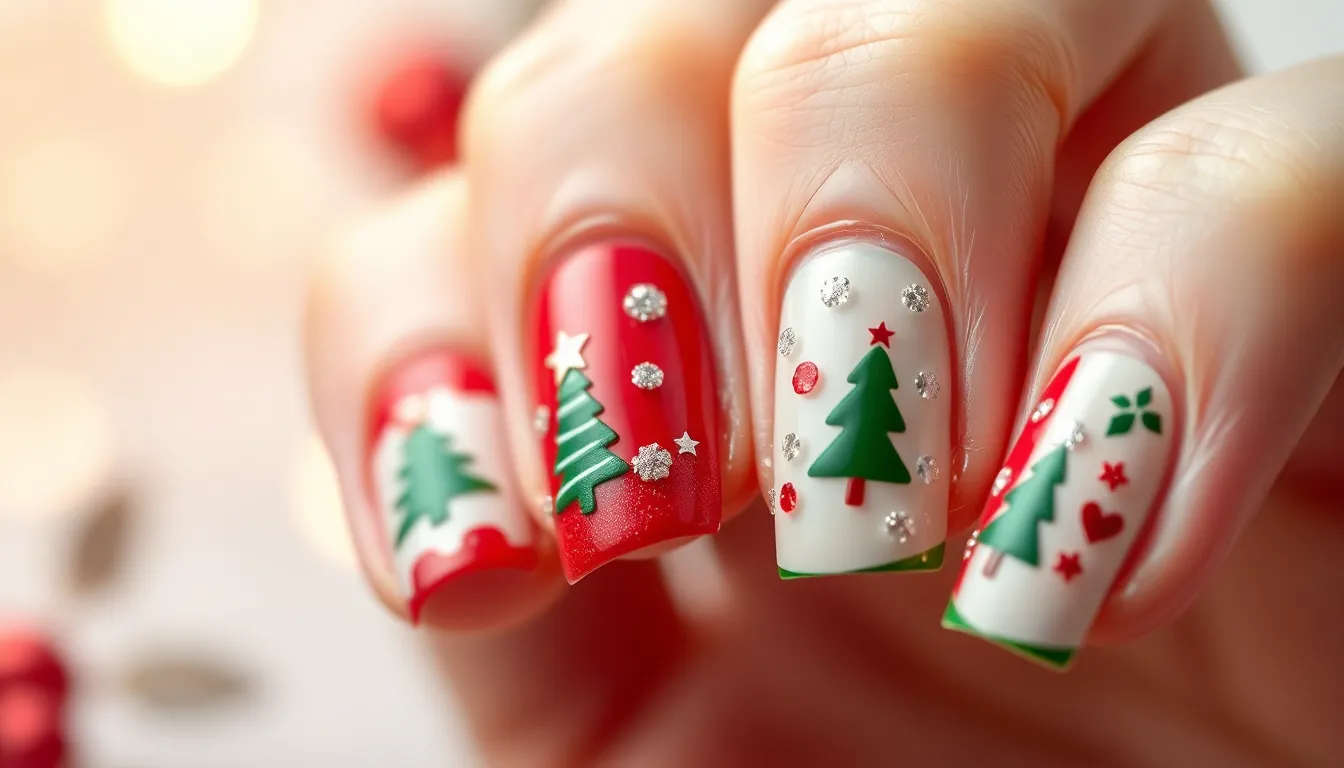
French manicures receive a festive makeover when we incorporate traditional Christmas colors into these timeless designs. These elegant combinations blend sophistication with holiday cheer to create stunning seasonal nail art.
Holiday-Themed French Manicures
Candy cane inspired designs transform classic French tips by adding red and white stripes to the nail ends while incorporating green accents for complete holiday charm. We love how this design creates miniature candy canes right on your fingertips using simple striping techniques with gel liners.
Grinch themed French manicures bring beloved holiday characters to life using red, green, and white gel liners for whimsical nail art. Create this playful look by painting green tips with red hearts or white accent details that capture the Grinch’s mischievous spirit.
Classic French twists combine red and green tips with crisp white accents to maintain the traditional French manicure structure while adding festive flair. Holly motifs work beautifully as accent details on one or two nails to complete this sophisticated holiday look.
Reverse French Tip Christmas Designs
Reverse French tips involve painting contrasting colors at the nail base rather than the traditional tip area for a modern twist on classic designs. Red or green bases paired with white or silver accents create sleek holiday manicures that feel fresh and contemporary.
Base painting techniques allow us to experiment with deeper forest greens or rich burgundy reds while keeping the tips neutral for balance. These designs work especially well when we add subtle shimmer or pearl finishes to enhance the overall elegance.
Modern applications of reverse French tips include gradient effects that blend Christmas colors seamlessly from base to tip. Silver accent details or tiny rhinestones along the color transition add extra sophistication to these contemporary holiday nails.
Colored French Tips with Festive Accents
Glitter accents elevate traditional colored tips by adding sparkle and dimension to red and green French manicures. Green glitter on red tips creates stunning contrast while red glitter over green bases delivers equally impressive results for holiday nail art.
Festive motifs like tiny Christmas trees, holly leaves, or delicate snowflakes transform simple colored tips into detailed holiday masterpieces. Nail art tools and quality stickers make these intricate designs achievable for both beginners and experienced nail artists.
Rhinestone embellishments add luxurious touches to colored French tips when strategically placed along the color line or clustered at accent points. These sparkling details catch light beautifully and create eye catching focal points that enhance any festive outfit or holiday gathering.
Ombre Red and Green Christmas Nails for Gradient Effects
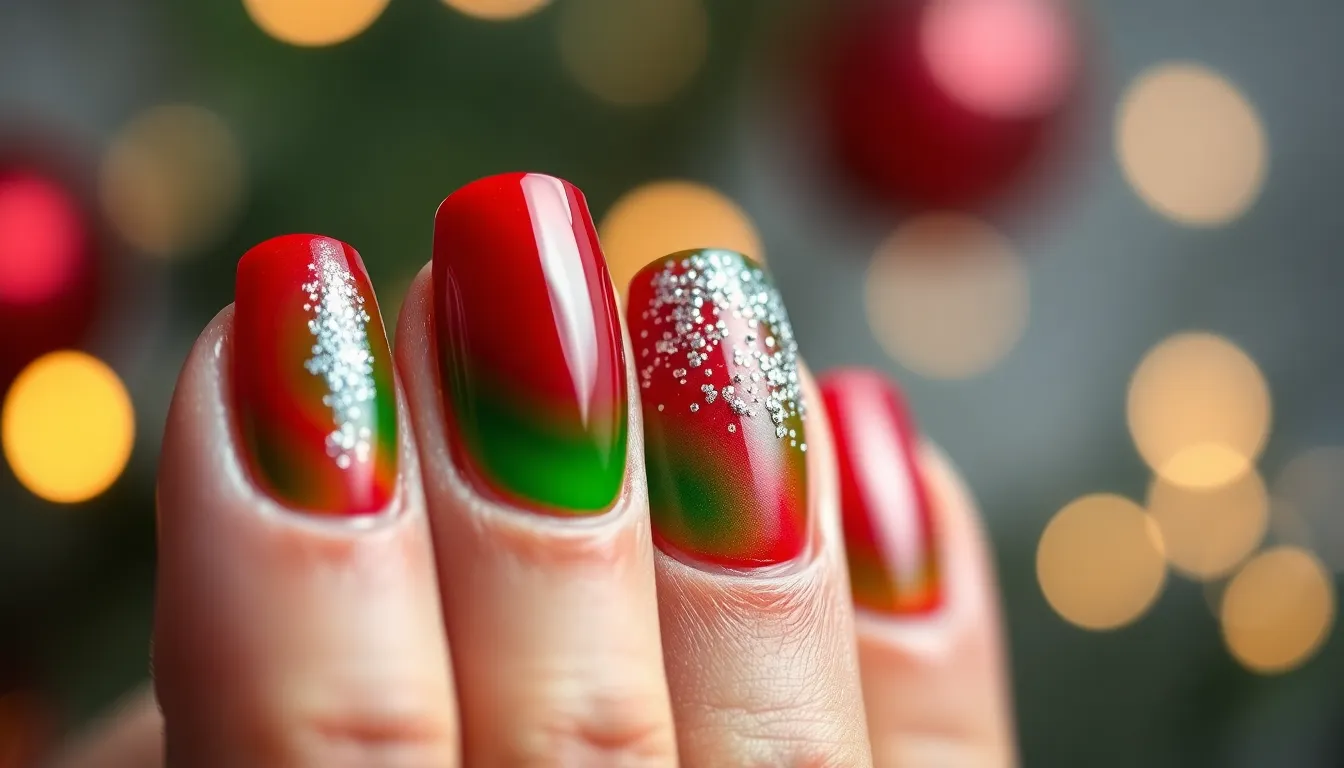
Ombre red and green Christmas nails create stunning gradient effects that seamlessly blend holiday colors. We’ll explore techniques that transform your festive manicure into a smooth color transition masterpiece.
Smooth Color Transition Techniques
Layering technique delivers professional results by applying your base color first, then gradually building the second shade over part of the nail while blending as you work. Start with deep forest green at the cuticle area, then layer bright red polish toward the nail tip, creating a natural fade between colors.
Sponge technique offers easier blending for beginners by using a makeup sponge to dab colors onto the nail surface. Apply both red and green polish to a damp sponge, then gently press and roll it across your nail to achieve that coveted gradient effect. Clean your sponge between applications to maintain color clarity and prevent muddy transitions.
Brush blending method requires quick work while polish remains wet, using a clean, flat brush to stroke between color boundaries. Work in gentle back and forth motions to soften harsh lines and create that smooth Christmas color flow we’re after.
Glitter Ombre Holiday Designs
Glitter ombre adds festive sparkle to traditional red and green gradients by incorporating shimmer elements throughout the design. Apply your base gradient using the layering technique, then use a sponge to dab gold or silver glitter polish over part of the nail for extra holiday magic.
Concentrated glitter placement works best when applied heavily at the nail tips and gradually faded toward the cuticle area. This technique mimics fresh snow falling on evergreen trees, creating depth and visual interest that catches light beautifully.
Multi toned glitter combinations enhance the festive appeal by mixing red glitter over green base areas and green glitter over red sections. Layer different glitter sizes from fine shimmer to chunky hexagonal pieces for texture variation that screams holiday celebration.
Vertical Gradient Christmas Patterns
Vertical gradient patterns create unique twists on traditional horizontal ombre by applying colors in an up and down direction across the nail surface. Position red polish on one side of the nail and green on the other, then blend toward the center using your preferred technique.
Side to side blending requires steady hand movements as you work the sponge or brush from left to right rather than base to tip. This orientation creates candy cane inspired effects that feel fresh and modern while maintaining that classic Christmas color story.
Diagonal vertical transitions offer artistic flair by angling your gradient at 45 degree slopes across each nail. Apply red at the upper left corner fading to green at the lower right, or reverse the pattern for visual variety across your manicure that turns heads at holiday parties.
DIY Red and Green Christmas Nails Tutorial and Tips
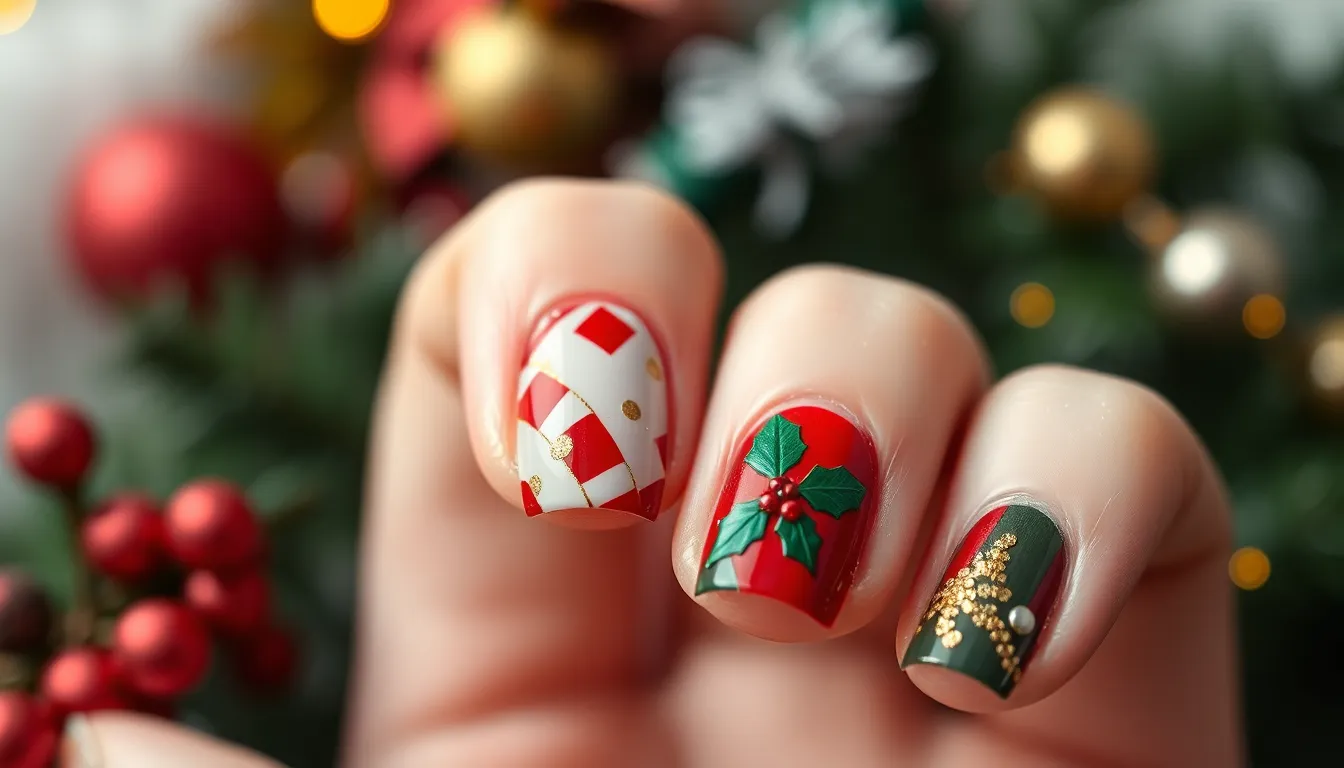
Creating stunning red and green Christmas nails at home becomes effortless when you have the right tools and follow proven techniques. We’ll guide you through everything needed to achieve professional-looking holiday nail art in your own space.
Essential Tools and Supplies Needed
Base and finishing products form the foundation of any long-lasting manicure. We recommend investing in a quality base coat to protect your natural nails and a durable top coat to seal your festive design for up to two weeks.
Nail polish collection should include vibrant red, deep forest green, crisp white, and shimmering gold glitter shades. These four colors provide endless combinations for creating traditional holiday patterns like candy canes, holly leaves, and Christmas trees.
Application tools make the difference between amateur and professional results. Thin nail art brushes allow precise line work for stripes and details, while dotting tools create perfect circles for berries and ornaments.
Cleanup essentials include nail polish remover and small cleanup brushes for correcting mistakes. We suggest keeping cotton swabs and a nail art mat nearby to catch any spills during your creative process.
Step-by-Step Application Process
Preparation begins with applying a protective base coat to clean, shaped nails. This crucial step prevents staining and helps your polish adhere properly for longer wear.
Base color application involves choosing either vibrant red or deep green as your foundation shade. Apply thin, even coats rather than one thick layer to avoid bubbling and ensure smooth coverage.
Design creation offers multiple festive options depending on your skill level:
- Horizontal stripes using a thin brush for classic candy cane patterns
- Layered dots with a dotting tool for holly berry clusters
- Gold glitter accents on accent nails for sparkling focal points
Final sealing requires a generous layer of clear top coat over your completed design. This step locks in your artwork and adds professional shine that lasts throughout the holiday season.
Common Mistakes to Avoid
Uneven polish thickness ruins the overall appearance of your manicure. We’ve found that applying multiple thin coats creates smoother, more professional results than attempting to achieve full coverage in one application.
Premature layering leads to smudging and ruined designs when polish hasn’t dried completely. Allow each layer to cure for at least five minutes before adding additional colors or details.
Design placement errors occur when patterns don’t align properly across all nails. Practice your chosen design on a nail wheel or fake nails before applying to your actual manicure to ensure consistent results.
Professional Red and Green Christmas Nail Ideas from Salons
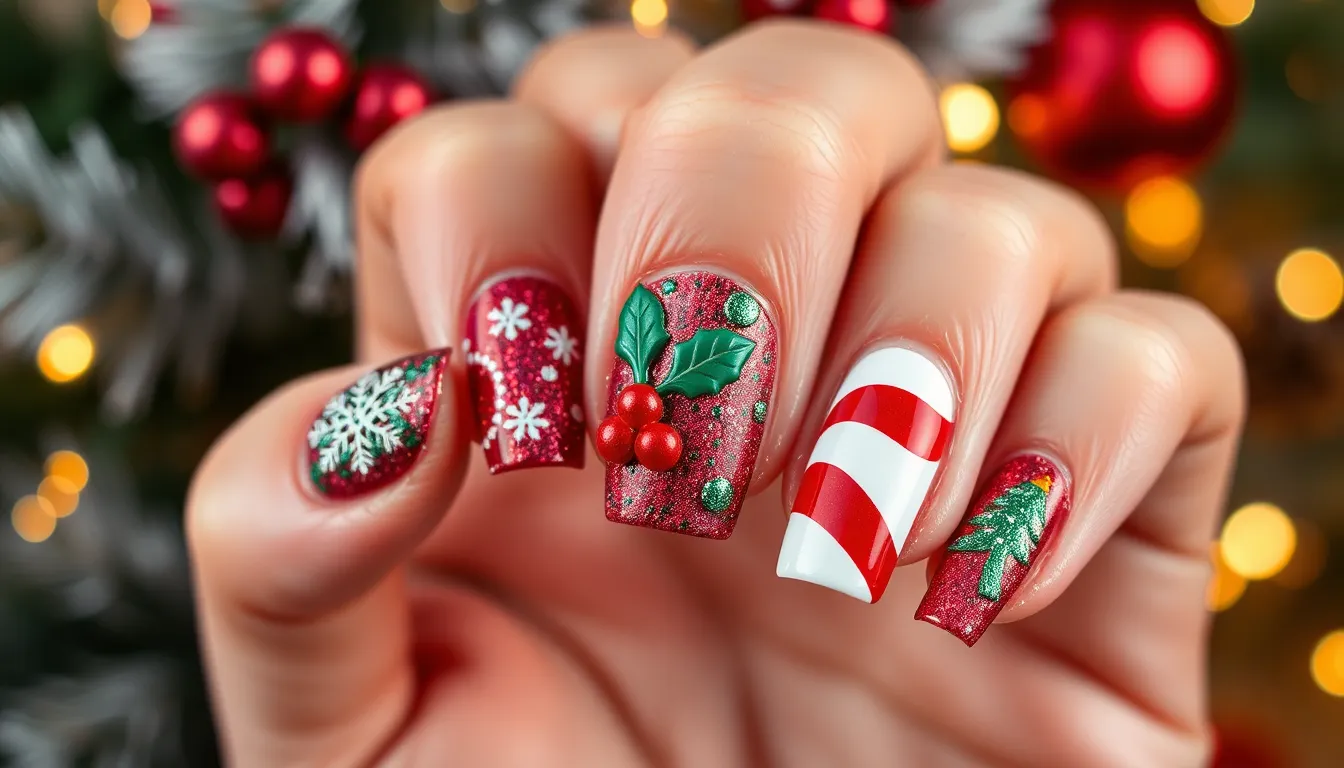
Salons offer sophisticated techniques that elevate red and green Christmas nail designs beyond what’s achievable at home. Professional nail technicians use specialized methods and high-quality products to create stunning holiday manicures that last longer and look more polished.
Gel Polish Holiday Designs
Gel polish provides the perfect foundation for creating vibrant red and green Christmas designs that maintain their brilliance throughout the holiday season. Professional nail artists use gel polish to paint intricate snowflakes with precise white details, creating candy cane stripes with perfect alignment, and building 3D effects that bring Christmas trees and ornaments to life on your nails.
We’ve seen salons achieve stunning results by layering different gel polish colors to create depth and dimension. Techniques include using thin brushes to paint delicate holly leaves, applying gel in multiple coats to build raised Christmas tree shapes, and incorporating glitter gel to add festive sparkle that catches the light beautifully.
Temperature changes won’t affect gel polish designs, making them ideal for holiday parties and outdoor winter activities. Professional application ensures smooth, even coverage that resists chipping for up to three weeks, giving you worry-free holiday nails that maintain their professional appearance.
Acrylic Christmas Nail Extensions
Acrylic extensions provide the perfect canvas for elaborate red and green Christmas nail art while adding extra length and durability to your holiday manicure. Nail technicians customize these extensions with intricate holly leaf patterns, festive stripe designs, and detailed Christmas motifs that would be impossible to achieve on shorter natural nails.
We recommend acrylic extensions for clients who want dramatic holiday nail art that makes a statement. Professional application allows for precise shaping and sculpting, creating the ideal nail length and shape to showcase complex red and green designs like miniature Christmas scenes or detailed ornament patterns.
Strength and longevity make acrylic extensions perfect for busy holiday schedules filled with parties, gift wrapping, and cooking. These extensions can withstand daily activities while maintaining their beautiful red and green Christmas designs for four to six weeks with proper care.
Dip Powder Red and Green Combinations
Dip powder offers a quick and durable solution for achieving professional red and green Christmas nail art with exceptional longevity. This technique creates vibrant color combinations through layering different colored powders, allowing nail technicians to create beautiful ombre effects that blend red and green seamlessly from cuticle to tip.
Professional application of dip powder enables creative striping patterns, playful polka dots, and geometric designs that maintain their crisp edges and bright colors. We’ve observed that dip powder red and green combinations often incorporate gold or silver accent powders to create luxurious holiday designs that rival traditional gel polish applications.
Durability sets dip powder apart from other nail enhancement methods, with red and green Christmas designs lasting up to four weeks without chipping or fading. Quick application time makes this technique ideal for busy clients who want professional holiday nail art without spending hours in the salon chair.
Conclusion
Red and green Christmas nails offer endless possibilities to showcase your holiday spirit through creative nail art. Whether you’re drawn to simple color-block designs or intricate rhinestone masterpieces there’s a festive look that matches your style and skill level.
We’ve explored everything from DIY techniques you can master at home to professional salon treatments that deliver long-lasting results. The beauty of Christmas nail art lies in its versatility – you can create stunning looks with basic tools or invest in premium services for special occasions.
This holiday season let your nails become a canvas for expressing joy and celebration. With these techniques and design ideas you’re ready to create memorable manicures that’ll complement every festive gathering and holiday tradition.
Frequently Asked Questions
What are the most popular red and green Christmas nail designs?
The most popular designs include candy cane striped patterns with alternating red and white diagonal lines, holly and berry motifs featuring deep green leaves and bright red berries, and traditional plaid designs with intersecting red and green lines. These classic patterns capture the festive Christmas spirit perfectly.
How can I add metallic accents to my red and green Christmas nails?
You can enhance your Christmas nails with gold glitter Christmas tree designs on forest green bases, silver snowflake embellishments with rhinestones, or rose gold holiday wreath patterns. These metallic touches add luxury and sophistication to traditional red and green color schemes.
Are there simple Christmas nail designs for beginners?
Yes! Beginners can try two-tone color block designs, basic polka dot patterns with contrasting colors, or easy gradient techniques using sponges. These straightforward designs build confidence while still achieving beautiful festive nail art that captures the holiday spirit.
What tools do I need for DIY Christmas nail art at home?
Essential supplies include quality base coat, vibrant red and green nail polishes, thin brushes for detail work, dotting tools, sponges for gradients, and a top coat for sealing. Having the right tools ensures professional-looking results when creating festive designs at home.
How long do professional Christmas nail designs last?
Professional salon designs using gel polish, acrylic extensions, or dip powder typically last 2-4 weeks depending on the technique used. Gel polish offers vibrant colors and durability, while acrylic extensions allow for more dramatic designs that maintain their brilliance throughout the holiday season.
Can I create ombre effects with red and green Christmas colors?
Absolutely! You can achieve stunning ombre effects using layering techniques for smooth transitions, sponge methods for easier blending, or brush blending for quick results. Adding glitter or creating vertical gradients offers unique twists on traditional Christmas color combinations.
What are some creative character designs for Christmas nails?
Popular character designs include Santa hat motifs, Christmas stocking patterns with red backgrounds and white furry cuffs, and reindeer designs with warm brown tones. These whimsical designs bring holiday characters to life and add playful elements to your festive manicure.
How can I incorporate rhinestones into my Christmas nail art?
Add crystal snowflake accents for winter magic, pearl holiday ornament designs that mimic tree decorations, or jeweled Christmas tree nail art with sparkling embellishments. Rhinestones and gems transform simple designs into sophisticated masterpieces perfect for holiday gatherings.

