We’ve all been there – staring at our nails wondering how to create those stunning geometric designs we see all over social media. The secret weapon that’s revolutionizing DIY manicures? Nail tape. This simple yet powerful tool transforms ordinary polish into professional-looking nail art that’ll have everyone asking where you got your nails done.
Nail tape opens up endless creative possibilities without requiring steady hands or artistic skills. Whether you’re craving clean lines sharp chevrons or intricate patterns you can achieve salon-quality results at home. We’re talking about designs that look like they took hours but actually take minutes.
Ready to elevate your nail game? We’ve compiled the most stunning nail tape ideas that’ll transform your manicure routine forever. From beginner-friendly geometric patterns to advanced color-blocking techniques these creative concepts will help you master the art of tape manicures and create Instagram-worthy nails every single time.
Classic French Manicure With a Twist
We’re taking the timeless French manicure beyond its traditional boundaries using nail tape to create modern, sophisticated variations that’ll turn heads.
Traditional White Tips With Colored Base
Elevate your classic French by swapping the nude base for bold, vibrant colors that complement your white tips perfectly. We recommend using nail tape to create crisp, clean lines between your colored base and white tips, ensuring professional results every time. Apply your chosen base color first, then position the tape about 2-3mm from your nail tip once it’s completely dry. Paint the white tips over the tape, remove it while the polish is still slightly wet, and you’ll achieve salon-quality precision at home.
Experiment with seasonal colors like deep burgundy for fall, coral for summer, or soft pastels for spring to keep your French manicure fresh and current. Consider metallic bases like rose gold or silver for special occasions, as they create stunning contrast against crisp white tips.
Reverse French Using Nail Tape Lines
Transform the traditional French by placing your accent color at the base of your nails instead of the tips using precise nail tape application. We position the tape about 3-4mm from the cuticle area, creating a clean line that frames your nail bed beautifully. Choose contrasting colors like black base with white accent, or try complementary shades like navy blue with gold for a sophisticated look.
Remove the tape immediately after applying your accent color to prevent peeling or smudging, revealing sharp, defined lines that rival professional manicures. Add thin striping tape over the accent area for extra detail, creating multiple thin lines that enhance the reverse French effect.
Double French Tips for Extra Elegance
Create two distinct tip lines using nail tape to achieve this sophisticated double French technique that adds visual interest to your manicure. We apply the first tape line about 4-5mm from the nail tip, paint the first color, then add a second tape line 2mm below the first for the second accent color. Use complementary colors like white and gold, or pink and silver for a luxurious finish that catches light beautifully.
Ensure each layer dries completely before applying the next tape line to prevent smudging or color bleeding between sections. Finish with a high-quality top coat to seal your design and enhance the dimensional effect of your double French tips, making them last up to two weeks with proper care.
Geometric Patterns and Shapes

Now that we’ve mastered French manicure techniques, let’s explore how nail tape opens up endless possibilities for creating stunning geometric designs that’ll make your nails the center of attention.
Triangle and Diamond Designs
Square nail shapes provide the perfect canvas for triangular patterns that create dramatic visual impact. We recommend starting with a solid base color and applying nail tape to form triangular sections across each nail. Diamond shapes emerge when you layer multiple triangular patterns or create intersecting lines that meet at precise points.
Metallic accents enhance the sophistication of these angular designs. Silver or gold tape creates striking contrast against darker base colors like navy or black. We’ve found that leaving some triangular sections unpainted while filling others creates an elegant negative space effect that’s both modern and timeless.
Precision matters most when creating these intricate geometric shapes. Press the tape firmly against the nail surface to prevent polish from bleeding underneath. Remove the tape while the polish is still slightly wet to achieve those crisp, clean lines that make diamond and triangle designs so visually appealing.
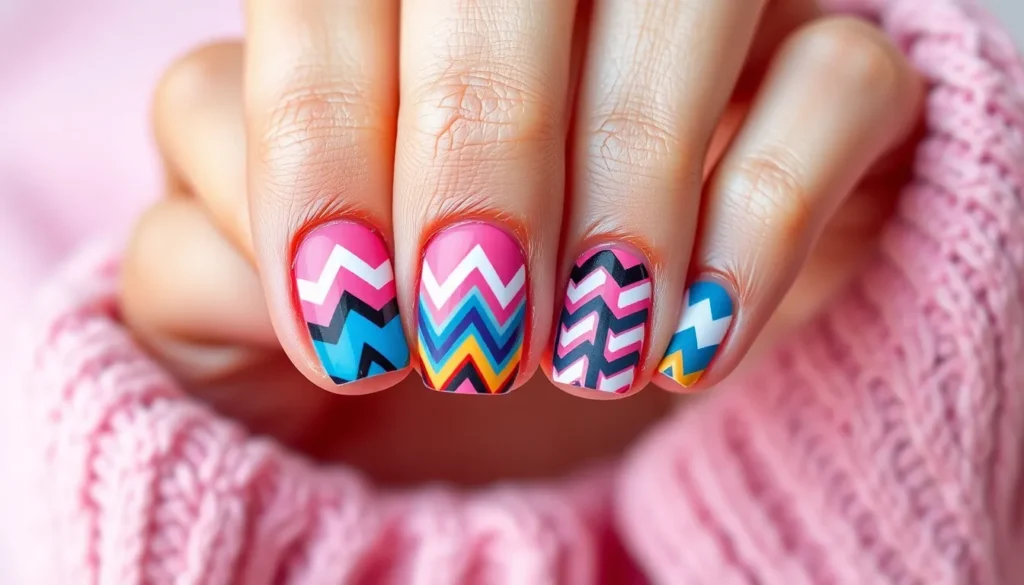
Chevron and Zigzag Patterns
Bold chevron patterns deliver maximum impact when you adjust the angle and width of your tape strips. We love creating accent nails with single gold or silver chevrons against contrasting base colors for an instantly stylish look. The ever-changing appearance of these patterns makes them perfect for both casual and formal occasions.
Multicolored zigzags transform every nail into a vibrant work of art. Apply different colored polishes between tape sections to create rainbow effects or stick to a cohesive color palette for a more refined appearance. Diagonal placement of the tape creates more dramatic angles than horizontal applications.
Subtle variations in chevron width create sophisticated depth. Vary the spacing between your tape strips to generate different visual textures across your nails. We suggest practicing the angle placement on a practice surface first, as consistent angles across all nails elevate the overall professional appearance of your manicure.
Abstract Geometric Art
Mixed pattern combinations showcase your creativity while maintaining design cohesion. Blend chevrons, triangles, and stripes across different nails to create a complex yet unified look. We recommend choosing a consistent color palette of 3-4 shades to tie disparate geometric elements together seamlessly.
Color blocking techniques use nail tape to separate distinct color zones for striking abstract effects. Apply tape to create irregular geometric sections, then fill each area with different polish colors. This approach works particularly well when you alternate between matte and glossy finishes within the same design.
Layering geometric shapes builds dimensional abstract art that catches light beautifully. Start with larger shapes as your foundation, then add smaller geometric elements on top using thinner tape strips. We’ve discovered that metallic accent lines between color blocks add professional polish to these artistic creations.
Striped Nail Art Techniques

Now that we’ve mastered geometric patterns, let’s explore how striped nail art can transform your manicure with simple tape placement techniques.
Vertical Stripes for Lengthening Effect
Vertical tape placement creates the optical illusion of longer, more elegant nails. We recommend starting with a solid base coat in your chosen color and allowing it to dry completely. Position the striping tape vertically from cuticle to tip, ensuring straight lines that run parallel to your nail’s natural shape.
Apply your contrasting color over the exposed sections for maximum impact. Two-toned combinations work best for this lengthening technique, with light and dark contrasts providing the most dramatic effect. Remove the tape immediately while the polish is still wet to prevent peeling or chipping.
Press the tape down firmly along the edges to prevent polish bleeding. We’ve found that using a small tool like an orange stick helps secure the tape’s edges for crisp, professional lines. Finish with a quality top coat to seal your design and add lasting shine.
Horizontal Stripes for Bold Statement
Horizontal tape applications create eye-catching designs that make a bold fashion statement. We position the striping tape across the nail width, creating bands that draw attention and add visual interest to shorter nail lengths. Space your tape evenly for the most polished appearance.
Multiple color combinations allow for creative gradient effects or classic nautical themes. Alternate between three colors for a vibrant rainbow effect, or stick with two complementary shades for a more sophisticated look. Navy and white combinations never go out of style for this technique.
Even spacing ensures a uniform, professional appearance across all nails. We measure the distance between tape strips using the tape width itself as a guide, creating consistent bands from thumb to pinkie. This attention to detail separates amateur attempts from salon-quality results.
Diagonal Stripes for Ever-changing Look
Diagonal tape placement adds movement and energy to traditional striped designs. We angle the tape at approximately 45 degrees to create the most visually appealing slant, though you can adjust this based on your nail shape and personal preference. This technique works exceptionally well on longer nail lengths.
Light and dark shade combinations create depth and dimension in diagonal patterns. Metallic colors paired with matte finishes add extra visual interest to this ever-changing technique. We suggest using a light base color with darker diagonal stripes for the most striking contrast.
Modern, edgy aesthetics emerge from carefully angled tape applications. Position your tape consistently across all nails, maintaining the same angle for a cohesive look that appears intentionally designed rather than randomly placed. The result transforms simple stripes into sophisticated geometric art.
Color Blocking Nail Designs

Color blocking transforms ordinary manicures into bold, graphic statements using precise tape placement to create sharp geometric sections. We’ll explore how this technique delivers professional results through strategic color contrasts and clean lines.
Two-Tone Color Combinations
Two-tone nails offer the perfect starting point for color blocking beginners who want maximum impact with minimal complexity. We recommend dividing each nail into two distinct sections using striping tape, then painting each area with high-contrast colors for the most striking effect. Classic combinations like black and white create timeless elegance, while pink and blue deliver a playful modern vibe.
Vertical placement lengthens the appearance of shorter nails and creates a sophisticated look that works for any occasion. Horizontal divisions make a bold statement and work particularly well on longer nail shapes. Diagonal arrangements add ever-changing energy and movement to your design.
The key to flawless two-tone results lies in proper drying time between color applications. We always let the first section completely dry before applying tape for the adjacent area, which prevents smudging and ensures those crisp, clean lines that make color blocking so appealing.
Rainbow Color Block Patterns
Rainbow color blocking brings vibrant joy to your fingertips through strategic tape placement that creates multiple colorful segments. We plan our tape arrangement before applying any polish, ensuring each rainbow hue gets equal space and visual weight across the nail surface. This preparation step prevents uneven distribution and maintains the balanced look that makes rainbow designs so eye-catching.
Horizontal stripes work beautifully for rainbow patterns, allowing each color to shine while creating a cohesive flow across all ten nails. Vertical arrangements offer a different aesthetic that can make fingers appear longer while showcasing the full spectrum. Custom arrangements let you adapt the pattern to different nail shapes, from square to almond to coffin styles.
Each segment requires careful attention to prevent color bleeding, so we remove tape immediately after applying each polish layer. This technique ensures every rainbow stripe maintains its distinct identity while contributing to the overall cheerful effect.
Monochromatic Gradient Blocks
Monochromatic gradient blocks create sophisticated elegance through varying shades within a single color family separated by precise tape lines. We use this technique to achieve modern, refined looks that work perfectly for professional settings while still showcasing your nail art skills. The subtle variation between light and dark tones within the same hue family produces visual interest without overwhelming boldness.
Pink families work beautifully for this technique, progressing from soft blush to deep rose across different nail sections. Blue gradients range from powder blue to navy, creating depth and dimension. Gray variations offer neutral sophistication that complements any outfit or season.
Sharp lines between each gradient block distinguish this technique from traditional ombre effects, creating a more structured and intentional appearance. We ensure each shade has completely dried before applying tape for the next section, which prevents the colors from muddling together and maintains the crisp definition that makes this design so polished and elegant.
Negative Space Nail Art

Negative space nail art creates stunning designs by strategically leaving portions of your natural nail exposed, using tape to achieve those coveted crisp edges. This technique transforms your manicure into a modern masterpiece where unpainted areas become part of the design itself.
Cut-Out Heart and Star Shapes
Heart shaped cutouts bring romantic flair to your negative space designs through precise tape placement. Position small pieces of tape in heart formations across your nail bed, paint around the covered areas with your chosen polish, then carefully remove the tape to reveal perfect heart shapes underneath. Star cutouts add celestial charm to any manicure, requiring you to arrange tape strips in star patterns before applying your base color.
Both designs work beautifully with metallic polishes or bold colors that contrast sharply with your natural nail tone. We recommend sealing these looks with a quality topcoat to protect the clean lines and prevent chipping around the exposed areas.
Window Pane Grid Designs
Grid patterns resembling elegant window panes create sophisticated negative space effects using thin strips of tape arranged in geometric formations. Apply multiple tape strips both horizontally and vertically to form uniform squares or rectangles across your nail surface. Paint carefully between each tape section with your selected polish color, ensuring complete coverage without bleeding under the tape edges.
Remove all tape strips while the polish remains slightly wet to achieve the sharpest lines possible. This technique works exceptionally well with neutral tones or monochromatic color schemes that let the grid pattern take center stage.
Minimalist Negative Space Accents
Small negative space accents add subtle sophistication to any nail design without overwhelming the overall look. Place tiny pieces of tape strategically to create delicate lines, dots, or mini geometric shapes that complement your main polish color. These accents work particularly well near the cuticle area or along the nail’s outer edges.
Minimalist designs shine when you use them sparingly across just one or two accent nails per hand. The key lies in maintaining balance between painted and unpainted areas, ensuring your negative space elements enhance rather than compete with your chosen color palette.
Ombre and Gradient Effects

We’ll explore how nail tape transforms simple polish application into breathtaking gradient masterpieces. These techniques create smooth color transitions that rival professional salon results.
Horizontal Gradient Blending
Horizontal gradients create stunning color transitions that flow seamlessly across your nails. We recommend applying liquid nail tape around your cuticles first to protect your skin and ensure clean lines. Place your chosen colors on a palette or piece of foil, then use a damp makeup sponge to blend them together.
Start with the lightest shade at the base of your nail and gradually work toward the darker color at the tip. Dab the sponge gently in overlapping motions rather than dragging it across the surface. Multiple thin layers work better than attempting to achieve the perfect gradient in one application.
Focus on creating smooth transitions between each color by blending while the polish remains slightly wet. We’ve found that working quickly prevents the polish from drying too fast and creating harsh lines. Practice this technique on a practice wheel or your non-dominant hand first to perfect your blending motion.
Vertical Ombre Transitions
Vertical ombre effects add dramatic flair by transitioning colors from one side of the nail to the other. Apply nail tape in vertical strips down the center of each nail to create distinct color sections. This method works especially well on longer nail shapes where you have more surface area to showcase the gradient.
Paint each section with your chosen colors, ensuring you leave a small gap between the tape and the color application. Remove the tape while the polish is still slightly wet to prevent peeling. Blend the edges where colors meet using a small brush or clean makeup sponge for a natural transition.
We suggest using shades within the same color family for the most cohesive look. Blues transitioning to greens or pinks fading to purples create particularly striking vertical gradients. Allow each layer to dry completely before applying the next to prevent smudging.
Multi-Color Gradient Techniques
Multi-color gradients showcase three or more colors in a single design for maximum visual impact. Use nail tape to section your nails into equal parts, creating designated spaces for each color in your gradient. Apply thin coats of polish in each section, starting with the lightest shade and progressing to the darkest.
Blend adjacent colors using a clean makeup sponge while the polish remains workable. We recommend having multiple sponges ready so you can switch between clean sections as colors mix. Press the sponge lightly rather than rubbing to avoid lifting the polish underneath.
Rainbow gradients work particularly well with this technique, transitioning through red, orange, yellow, green, blue, and purple. Metallic accents between colors add sophistication and help define each transition point. Always finish with a high-quality top coat to smooth any texture created during the blending process and enhance the overall shine.
Holiday and Seasonal Themes

Transform your nail art throughout the year with festive designs that capture the spirit of every season. Holiday themed nail tape creations let you celebrate special occasions while showcasing your creativity.
Christmas and Winter Patterns
Snowflakes become magical nail art when we use masking tape to create intricate crystalline designs. Position the tape in intersecting lines across your nail, then remove carefully after painting to reveal delicate snowflake patterns that sparkle against winter colored bases.
Striped candy cane designs emerge effortlessly with striping tape applied in alternating red and white sections. Apply the tape vertically or diagonally across your nails, paint the exposed areas, and remove the tape while polish is slightly wet for crisp holiday stripes.
Christmas tree silhouettes take shape when we use Scotch tape to outline triangular tree forms on our nails. Create layered triangle sections with tape, paint each section in different shades of green, and add tiny rhinestones as ornaments for festive flair.
Summer Beach and Tropical Designs
Palm tree silhouettes capture vacation vibes when we use striping tape to outline tropical scenes. Position thin strips to create trunk and frond shapes, paint around the tape with sunset colors, and remove to reveal stunning beach themed nail art.
Seashell patterns come alive through creative Scotch tape application techniques. Cut the tape into curved shell shapes, apply to painted backgrounds, and use contrasting colors to highlight the shell details for authentic oceanic designs.
Ocean wave stripes flow across nails when we apply blue and white striping tape in wavy horizontal patterns. Layer different shades of blue between tape sections to create depth and movement that mimics rolling waves.
Halloween and Fall Inspired Art
Pumpkin designs emerge through strategic masking tape placement in circular and curved patterns. Create round pumpkin shapes with tape, paint in classic orange, and add vertical line details with thin striping tape for authentic jack o’lantern effects.
Fall foliage patterns burst with seasonal color when we use striping tape in leaf shaped configurations. Apply tape in organic leaf outlines, paint with autumn shades of orange, yellow, and red, then remove to reveal beautiful fall inspired nail art.
Spider web designs create spooky elegance through precise Scotch tape application in radiating patterns. Position tape strips from a central point outward, add curved connecting lines, and paint around the web structure for hauntingly beautiful Halloween nails.
Metallic and Glitter Accents

We’ll elevate your nail art to luxury levels with metallic and glitter accents that catch light beautifully. These sophisticated finishing touches transform simple designs into stunning statement pieces.
Gold and Silver Tape Combinations
Combining gold and silver tape creates sophisticated looks that work for any occasion. Apply vertical strips alternately across each nail for a classic striped pattern that elongates your fingers. Create horizontal bands by placing the tapes at equal intervals from cuticle to tip for a bold geometric statement.
Mix different tape widths to add visual interest to your design. Use thin gold strips paired with wider silver bands for an asymmetrical look that’s uniquely yours. Experiment with diagonal placement by applying both metallic tapes at 45 degree angles for ever-changing movement.
Seal your metallic combination with a high quality top coat to prevent peeling. The contrast between warm gold and cool silver tones creates depth that photographs beautifully under various lighting conditions.
Glitter Gradient With Tape Borders
Creating clean glitter gradients becomes effortless when you use tape to define precise borders. Position strips along your nail edges before applying glitter polish to prevent messy application around cuticles and sidewalls. Paint your glitter gradient from heavy concentration at the tips fading toward the base for classic elegance.
Reverse the gradient by concentrating glitter at the nail base instead of tips for a modern twist. Use liquid nail tape around your cuticles for extra protection during the glitter application process. Apply the glitter polish in thin layers while the tape is in place to build up opacity gradually.
Remove the tape immediately after painting while the polish is still wet for the cleanest lines. This technique works particularly well with chunky glitters that can be difficult to control without proper borders.
Metallic Geometric Patterns
Metallic tape transforms ordinary geometric patterns into eye catching masterpieces that demand attention. Create triangle designs by applying three strips to form the shape before filling with contrasting colors. Use gold tape to outline diamond patterns on square shaped nails for maximum geometric impact.
Chevron patterns become more striking when executed with metallic tape strips placed at consistent angles. Apply silver tape in zigzag formations across the nail surface for modern edginess. Create interlocking rectangular patterns by layering different colored metallic tapes at perpendicular angles.
| Pattern Type | Tape Placement | Best Nail Shape |
|---|---|---|
| Triangles | Three intersecting strips | Square or coffin |
| Diamonds | Four diagonal strips | Almond or oval |
| Chevrons | Angled parallel strips | Any shape |
| Rectangles | Perpendicular layers | Square or round |
Finish all metallic geometric patterns with a glossy top coat to enhance the reflective properties and ensure longevity. The key to professional results lies in removing tape while polish remains slightly tacky for perfectly crisp edges.
Advanced Nail Tape Techniques

Mastering complex tape techniques unlocks professional level nail art possibilities. These sophisticated methods require patience and precision but deliver stunning results that rival salon quality designs.
Layering Multiple Tape Designs
Layering multiple tape patterns creates intricate designs with remarkable depth and complexity. We start with a base coat and apply our first tape strips in the desired pattern, then paint over them with our chosen color. After removing the first layer of tape, we apply a second set of strips at different angles or positions and repeat the process with contrasting colors.
Each layer builds upon the previous one, creating overlapping geometric shapes and color intersections. We work quickly but carefully, removing each tape layer immediately after painting to prevent polish from drying underneath. This technique allows us to combine chevrons with stripes, triangles with circles, or any pattern combination we can imagine.
The key lies in planning our design sequence beforehand and allowing adequate drying time between layers. We recommend starting with lighter colors and progressing to darker ones for maximum impact.
Curved Line and Wave Patterns
Curved line patterns add flowing elegance to nail designs that straight lines simply cannot achieve. We use thin strips of flexible tape, gently bending them into smooth curves across the nail surface. The tape must adhere completely to prevent polish from seeping underneath and creating jagged edges.
Creating wave patterns requires strategic placement of multiple curved strips at varying heights. We position each strip to mirror the natural curve of the nail, ensuring smooth transitions between peaks and valleys. Pressing firmly along the entire length of each curve eliminates air bubbles that could compromise the final result.
These flowing designs work exceptionally well with gradient colors or metallic polishes. We often combine curved patterns with straight geometric elements to create ever-changing contrast and visual movement across the entire manicure.
3D Effect Using Tape Shadows
Dimensional shadow effects transform flat nail art into visually striking three dimensional masterpieces. We achieve this by strategically layering tape to create artificial shadows and highlights using contrasting polish colors. The technique involves applying tape over a base coat, then painting with a darker shade to simulate depth.
Multiple polish layers in gradually lighter or darker tones build the illusion of dimension. We position tape strips to block certain areas during each color application, creating natural looking shadows and raised surfaces. The contrast between light and dark sections tricks the eye into perceiving actual depth on the nail surface.
Metallic polishes enhance the dimensional effect dramatically, as they reflect light differently across shadowed and highlighted areas. We finish these designs with a high gloss top coat to amplify the three dimensional appearance and create maximum visual impact.
Conclusion
We’ve shown you how nail tape can transform your at-home manicure game from basic to brilliant. With these techniques in your toolkit you’ll never look at plain nails the same way again.
The beauty of nail tape lies in its versatility and accessibility. Whether you’re mastering your first French tip or creating complex layered designs these methods work for every skill level.
Remember that practice makes perfect and each design you create builds your confidence. Don’t be afraid to experiment with color combinations and mix different techniques to develop your unique style.
Your nails are now ready to become your personal canvas. Grab that nail tape and start creating the stunning manicures you’ve always admired!
Frequently Asked Questions
What is nail tape and how does it help with nail art?
Nail tape is a thin adhesive strip specifically designed for creating precise lines and geometric patterns on nails. It acts as a stencil, allowing anyone to achieve professional-looking results regardless of artistic skill level. The tape helps create clean, sharp edges and perfect geometric shapes that would be difficult to paint freehand.
Can beginners use nail tape for nail art?
Absolutely! Nail tape is perfect for beginners because it eliminates the need for steady hands or artistic experience. Simple patterns like stripes, French tips, or basic geometric shapes are easy to create. The tape guides your design and ensures clean lines, making it an ideal starting point for nail art newcomers.
How do I achieve salon-quality results with nail tape at home?
The key to professional results is precise tape application and proper drying times. Apply base coat and let it dry completely, place tape carefully without air bubbles, paint your design, and remove tape while the polish is slightly wet. Always seal with a top coat for durability and shine.
What types of geometric patterns can I create with nail tape?
You can create numerous geometric patterns including triangles, diamonds, chevrons, zigzags, stripes (vertical, horizontal, diagonal), color blocking designs, and abstract geometric art. Advanced techniques allow for layering multiple patterns and creating 3D effects with tape shadows for added depth and dimension.
How can I modernize a French manicure using nail tape?
Use nail tape to create bold, colorful French tips instead of traditional white. Try reverse French manicures where the base of the nail is colored, double French tips with two different colors, or diagonal French lines. Experiment with metallic colors, glitter accents, or geometric French variations for contemporary looks.
What is negative space nail art and how does nail tape help?
Negative space nail art involves leaving portions of the natural nail exposed as part of the design. Nail tape helps create precise cut-out shapes, minimalist accents, and clean boundaries between painted and unpainted areas. This technique creates modern, sophisticated looks with strategic use of empty space.
Can I create ombre and gradient effects with nail tape?
Yes! Nail tape can help create stunning gradient effects by sectioning off areas for different color intensities or creating sharp transitions between colors. You can also use tape to create geometric ombre patterns where gradients are contained within specific shapes rather than covering the entire nail.
How do I incorporate seasonal themes into my nail tape designs?
Adapt your tape patterns to match holidays and seasons. Use red and green geometric patterns for Christmas, pastel color blocking for spring, bold stripes in summer colors, or metallic accents for New Year’s Eve. The same tape techniques work year-round with different color combinations and themes.
What are some advanced nail tape techniques I can try?
Advanced techniques include layering multiple tape designs for intricate patterns, creating curved lines and wave patterns for elegant looks, and using tape to create 3D shadow effects. You can also combine tape with other nail art tools like dotting tools or stamps for complex, multi-dimensional designs.
How do I prevent nail tape from damaging my manicure?
Remove tape while the polish is still slightly tacky to prevent peeling. Press tape edges down firmly but gently to avoid air bubbles. Use high-quality nail tape designed for nail art, and don’t leave it on too long. Always apply a base coat before taping to protect your nails.


