Your nails are more than just a canvas for polish – they’re a powerful form of self-expression that can completely transform your overall look. We’ve all stood in nail salons wondering which shape would best complement our fingers and lifestyle, only to settle for the same old round or square cut we’ve always chosen.
The truth is that nail shape dramatically impacts how your hands appear and how your manicure holds up throughout the week. From elegant almond shapes that elongate your fingers to trendy coffin nails that scream confidence, each style offers unique benefits and aesthetic appeal.
We’re here to break down the most popular nail shape ideas that’ll revolutionize your manicure game. Whether you’re dealing with short natural nails or blessed with lengthy extensions, there’s a perfect shape waiting to enhance your personal style and make your hands look absolutely stunning.
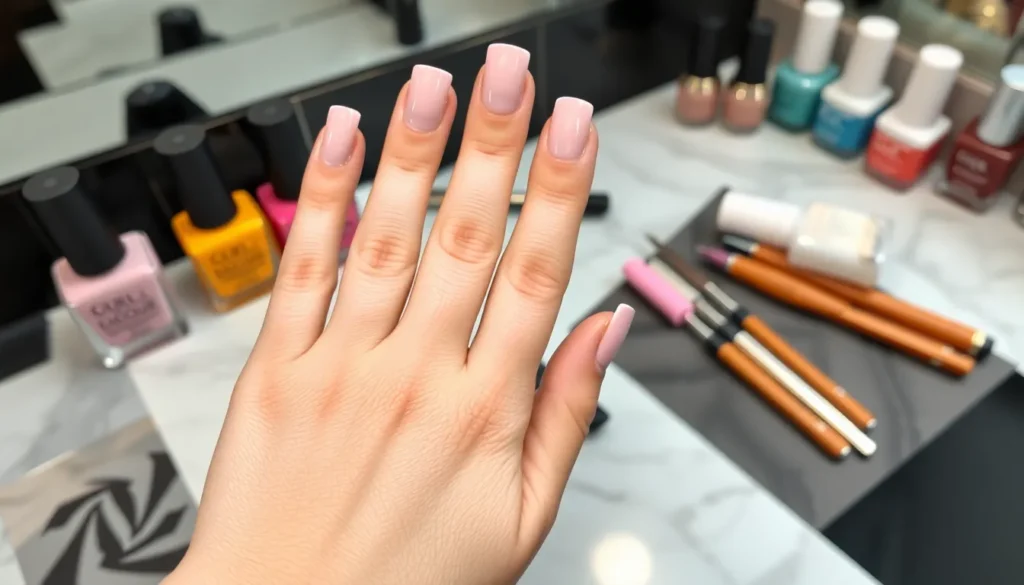
Square Nail Shape Ideas for a Classic Look
Square nails offer timeless elegance that never goes out of style. We love how this versatile shape complements both casual and formal looks with its clean, geometric lines.
Perfect for Short to Medium Length Nails
Square shapes work exceptionally well for shorter nail lengths because they create the illusion of wider nail beds. We find that this style makes small nails appear more substantial and polished.
Medium length square nails provide the perfect canvas for showcasing nail art without overwhelming your hands. The balanced proportions make your fingers look longer while maintaining a professional appearance.
Wide nail beds benefit most from square shaping since the straight edges enhance the natural width. We recommend this style for anyone wanting to maximize their nail’s surface area for creative designs.
Brittle or weak nails gain strength when filed into square shapes because the edges distribute pressure evenly. The sturdy corners resist chipping better than rounded alternatives.
Best Nail Art Designs for Square Shapes
French manicures look stunning on square nails with their crisp white tips perfectly complementing the geometric edges. We suggest trying colored French tips in pastels or metallics for a modern twist.
Geometric patterns shine on square nail surfaces because the straight edges create natural guidelines for designs. Stripes, checkerboards, and abstract shapes align beautifully with the nail’s architecture.
Negative space designs work brilliantly when you leave portions of the square nail unpainted to create interesting visual contrasts. We love combining nude bases with bold geometric cutouts.
Ombre effects transition smoothly across the flat surface of square nails, creating stunning gradient looks. Blend complementary colors from cuticle to tip for professional results.
Filing Techniques for Sharp Square Edges
Start with a coarse nail file to remove length and create the basic square outline. We recommend filing from the outer edges toward the center to prevent splitting.
Perfect the corners using precise perpendicular strokes to ensure both sides match exactly. Hold the file at a 90-degree angle to create those signature sharp edges.
Smooth rough spots with a fine-grit buffer to eliminate any jagged areas along the nail’s perimeter. We suggest gentle circular motions to blend harsh lines.
Maintain the shape by filing straight across the nail tip without rounding the corners. Check your progress frequently to keep both hands symmetrical.
Round Nail Shape Ideas for Natural Beauty

Round nails offer a refreshing departure from angular designs, delivering an effortlessly chic look that enhances your natural nail bed shape. We love how this versatile style creates endless possibilities for creative nail art while maintaining a polished, professional appearance.
Ideal for Weak or Brittle Nails
Round nails distribute pressure evenly across the nail surface, making them perfect for those struggling with weak or brittle nails. This natural shape follows your finger’s curve, reducing stress points that often cause breakage in sharper nail shapes. We recommend round nails for anyone dealing with nail damage, as they minimize the risk of splits and chips while your nails grow stronger. Unlike square or stiletto shapes that concentrate pressure at corners, round nails provide structural support throughout the entire nail bed.
Everyday Wear and Professional Settings
Round nails seamlessly transition from casual weekend activities to important business meetings without missing a beat. Their understated elegance makes them workplace appropriate while still allowing for creative expression through nail art designs. We find that round nails complement both simple nude polishes and bold statement colors equally well. Professional environments particularly favor this shape because it appears neat and well maintained without drawing excessive attention. Whether you’re typing at a computer or shaking hands with clients, round nails provide the perfect balance of style and practicality.
Maintenance Tips for Round Nails
Keeping nails short prevents unnecessary breakage and makes daily maintenance significantly easier to manage. We suggest applying nail strengtheners regularly to fortify weak or brittle nails from the inside out. Harsh chemicals can weaken nail health over time, so limiting exposure to cleaning products and acetone based removers helps preserve nail integrity. Regular trimming every two weeks prevents overgrowth and maintains the desired round shape. Filing in one direction rather than back and forth reduces the risk of creating microscopic tears that lead to splits and breaks.
Oval Nail Shape Ideas for Elegant Sophistication

Oval nails represent the perfect balance between sophistication and practicality, offering a refined aesthetic that complements any style. This classic shape creates a naturally elongated appearance while maintaining durability and elegance.
Lengthening Effect for Shorter Fingers
Proportional length creates the most flattering appearance for shorter fingers when working with oval nails. We recommend maintaining a balanced nail length that doesn’t overwhelm your finger size while still providing that coveted elongating effect.
Vertical design elements work wonders for creating the illusion of longer fingers. Consider incorporating vertical stripes, gradients, or linear patterns that draw the eye upward along the nail bed.
Strategic color placement enhances the lengthening benefits of oval nails. Darker shades at the base transitioning to lighter tones at the tips create visual depth and extension.
Versatile Design Options for Oval Nails
French tip manicures showcase the timeless elegance that oval nails naturally provide. This classic combination features white tips on neutral bases, creating a clean and refined appearance that suits any occasion.
Abstract patterns in pastel shades add a glamorous touch while maintaining the sophisticated appeal of oval nails. These designs offer endless creativity while preserving the shape’s inherent elegance.
Animal print accents provide a playful contrast to the sophisticated oval shape. Leopard spots, zebra stripes, or snake patterns create striking focal points without overwhelming the nail’s natural beauty.
Geometric nail art introduces modern flair through clean lines and structured patterns. Triangles, diamonds, and angular designs create contemporary appeal while complementing the oval’s curved edges.
Marble and glitter combinations deliver trendy glamour perfect for special occasions. These techniques add texture and visual interest while maintaining the oval shape’s sophisticated foundation.
Neutral and chrome finishes offer sleek sophistication for professional settings. These polished looks emphasize the oval’s natural elegance while providing versatility for daily wear.
Creating the Perfect Oval Curve
Even symmetry forms the foundation of a perfect oval nail shape. We ensure both sides mirror each other exactly, creating a harmonious curve that flatters the natural nail bed.
Careful filing technique requires patience and precision to achieve smooth, professional results. Start with a coarse file to establish the basic shape, then progress to finer grits for refinement.
Gradual shaping prevents overcutting and maintains nail strength throughout the process. Work in small increments, checking your progress frequently to maintain symmetrical curves on both sides.
Professional tools make the difference between amateur and salon quality results. Invest in high quality glass or crystal files that won’t damage the nail surface while creating precise curves.
Almond Nail Shape Ideas for Dramatic Flair

Almond nails combine elegance with edge, creating a sophisticated silhouette that’s perfect for making a statement. We’ll explore how this versatile shape opens up endless possibilities for dramatic nail art and stunning color combinations.
Achieving the Pointed Almond Silhouette
Filing technique makes all the difference when creating the perfect almond shape. Start by shaping the sides of each nail with a quality nail file, gradually tapering toward the tip to form that distinctive pointed oval. Work slowly and check your progress frequently to ensure both sides remain symmetrical.
Gentle pressure prevents damage while you file from the outer edges toward the center. Avoid aggressive back-and-forth motions that can weaken the nail structure. The natural heart-like shape of almond nails requires patience and precision to achieve that coveted pointed silhouette.
Regular nail care keeps your almond shape looking its best between manicures. Apply cuticle oil daily to maintain flexibility and prevent breaks at the stress points. Strong, healthy nails hold their shape longer and resist chipping better than brittle ones.
Trendy Color Combinations for Almond Nails
French tip almond nails offer a timeless foundation with endless customization options. Traditional white tips look elegant, but we love experimenting with monochrome French tips using chunky shimmer polish in bold blues, pinks, or reds for a modern twist.
Pastel French tips paired with tiny black dots create visual interest without overwhelming the classic design. This combination works beautifully for both casual and formal occasions, adding just the right amount of personality to your manicure.
Galaxy-inspired designs using cat-eye polish deliver a reflective glow that’s absolutely mesmerizing. The magnetic properties of these polishes create stunning dimensional effects that shift and change as you move your hands.
Bold red almond nails remain a showstopper choice that adds instant drama to any outfit. Soft pink almond nails provide a more subtle approach while still maintaining that sophisticated edge. Dark florals featuring black daisies create a chic contrast against the pointed shape.
Strengthening Tips for Pointed Shapes
Nail strengtheners serve as your first line of defense against breaks and chips. Apply a strengthening base coat before your color to create a protective barrier that prevents brittleness. This extra step significantly extends the life of your almond manicure.
Avoid over-filing during maintenance sessions, as excessive filing weakens the nail structure. Focus on gentle touch-ups rather than dramatic reshaping once you’ve achieved your desired almond silhouette. Preserve the integrity of your nails by working with their natural growth pattern.
Moisturizing becomes even more critical with pointed shapes that experience more stress at the tips. Regularly apply cuticle oil to keep both nails and surrounding skin healthy and flexible. Well-hydrated nails bend rather than break when faced with daily wear and tear.
Strategic color placement can actually help strengthen the appearance of your almond nails. Croc effect designs using different hues on each nail distribute visual weight evenly, while black hearts use the natural almond shape to create sophisticated patterns that draw attention away from any minor imperfections.
Coffin Nail Shape Ideas for Bold Statements

Coffin nails offer a dramatic tapered silhouette that creates the perfect canvas for bold nail art statements. We love how this edgy shape combines sophistication with modern flair.
Long Length Requirements for Coffin Nails
Extended lengths work best for showcasing the coffin shape’s distinctive tapered design. We recommend growing or extending nails beyond the natural nail bed to emphasize the characteristic narrowing effect.
Natural nails rarely achieve the ideal coffin proportions without extensions or important growth. Professional nail technicians typically suggest acrylic or gel extensions to create the proper length foundation.
Minimum length requirements vary by hand size, but most coffin designs need at least 1/4 inch beyond the fingertip. We find that shorter lengths don’t provide enough space for the tapered effect to develop properly.
Popular Coffin Nail Art Trends
Floral designs flourish on long clear coffin extensions, allowing intricate flower patterns to showcase their full beauty. These botanical elements create stunning focal points that complement the nail’s elegant shape.
Black glitter combinations remain a classic choice, featuring long coffin shaped nails with sparkly finishes that catch light beautifully. We see this trend dominating both casual and formal occasions.
Light pink shades offer timeless femininity that enhances the coffin shape’s natural elegance. This versatile color choice works seamlessly with various skin tones and outfit combinations.
Purple aura designs paired with chrome finishes create modern, eye catching looks that blend contemporary nail art techniques. These combinations deliver high impact visual appeal.
Fall themed patterns incorporate seasonal tortoiseshell designs with gold foil details for autumn inspired elegance. We love how these warm tones complement the coffin shape’s dramatic silhouette.
Cat eye finishes use magnetic polish technology to create reflective, shimmering effects that dance across the nail surface. This trend adds dimensional depth to coffin shaped nails.
Flower gem accents combine green tips with multicolored floral elements for fresh botanical inspired looks. These designs celebrate nature while maintaining sophisticated appeal.
Nude color palettes elongate nail appearance by matching natural skin undertones perfectly. We recommend this approach for clients seeking understated elegance.
Cheetah print tips add dramatic flair with metallic base details that create striking contrast patterns. These animal inspired designs make bold fashion statements.
Balancing Width and Length Proportions
Proper length ratios ensure coffin nails showcase their tapered shape without overwhelming hand proportions. We calculate ideal measurements based on individual finger width and palm size.
Width considerations help maintain visual balance by avoiding shapes that appear too narrow or wide for the hand. Professional assessment determines the most flattering proportions for each client.
Balanced dimensions create visually appealing nail designs that enhance rather than overpower natural hand beauty. We focus on achieving harmony between nail size and finger length for optimal results.
Stiletto Nail Shape Ideas for Maximum Impact

Stiletto nails deliver the most dramatic statement in nail fashion, transforming your hands into fierce accessories that command attention. These extreme pointed shapes create an edgy sophistication that’s perfect for those who want to push beauty boundaries.
Creating Ultra-Sharp Points
Filing techniques are crucial for achieving the perfect stiletto point that won’t break or chip. We start by using a coarse nail file to shape the sides of the nail, creating straight lines that angle toward the tip. Buffing the edges smooth prevents snags while maintaining that razor sharp appearance.
Professional nail tips provide the foundation for ultra long stiletto designs that natural nails can’t support. We apply these extensions carefully, ensuring they align perfectly with your nail bed before filing them into the signature pointed shape. Building the structure gradually prevents weak spots that could lead to breakage.
Shaping tools like electric files help create precise angles that hand filing can’t achieve. We recommend working slowly and checking both sides frequently to ensure symmetry. Testing the point’s sharpness by gently tapping it confirms you’ve achieved that perfect stiletto edge.
High-Fashion Stiletto Design Inspiration
Negative space designs create striking contrasts that make stiletto nails appear even more dramatic and sculptural. We love how bare sections of the nail bed play against bold colors, especially on dark stiletto shapes that emphasize the pointed silhouette.
Detailed cat eye effects using swirly reflective polishes add sophisticated dimension to the already impressive stiletto shape. Chrome finishes in blue create 3D effects that catch light beautifully, while pink glitter combinations offer playful contrast to the sharp edges.
Gold accent details complement jewelry perfectly and add luxury touches that elevate any stiletto design. Sunset inspired color combinations like pink and orange create customizable palettes that work with any skin tone. Hot pink chrome specifically accentuates the stiletto’s dramatic angles, while classic red delivers timeless boldness.
Light blue shades create beautiful contrast against the sharp points, proving that soft colors can look stunning on extreme nail shapes. Glitter ombre effects transition from intense sparkle to softer finishes, creating visual balance that tones down the overall look.
Structural Support for Extreme Lengths
Nail reinforcement becomes essential when creating stiletto nails longer than your natural nail bed can support. We apply nail glue strategically at stress points where the nail curves toward the tip, preventing cracks that typically start at the sides. Multiple thin layers work better than one thick application for building lasting strength.
Nail stabilizers and forms provide crucial support during the shaping process, especially for lengths exceeding one inch beyond the fingertip. We position these tools to maintain the nail’s natural curve while supporting the dramatic point. Professional nail forms designed specifically for stiletto shapes ensure consistency across all ten nails.
| Reinforcement Method | Best For | Application Time |
|---|---|---|
| Nail glue overlay | Medium length stilettos | 5-10 minutes |
| Acrylic extensions | Ultra long designs | 45-60 minutes |
| Gel builder base | Natural nail strengthening | 15-20 minutes |
| Fiberglass wraps | Crack prevention | 20-30 minutes |
Base coat applications with strengthening formulas create the foundation for stiletto longevity. We recommend nail strengtheners containing calcium or keratin for natural nails attempting the stiletto shape. Regular maintenance every two weeks keeps these extreme lengths looking fresh while preventing structural damage.
Squoval Nail Shape Ideas for Versatile Style

Squoval nails blend the straight edges of square nails with the softened, rounded corners of oval shapes, creating a modern hybrid that flatters both long and short fingers. This versatile shape offers the perfect foundation for any nail color or design while maintaining practical benefits for everyday wear.
Combining Square and Oval Benefits
Squoval nails deliver the durability and clean lines of square shapes while incorporating the gentleness and elongation effect of oval designs. This combination reduces the risk of snagging or breakage at the tips, making them ideal for people with fragile nails or those who frequently use their hands throughout the day. The shape provides structural integrity through its straight edges while softening harsh corners that might catch on clothing or objects.
Benefits extend beyond just practical considerations, as squoval nails create visual appeal across different hand types. The straight sides maintain nail bed width while rounded corners add elegance and sophistication to any manicure. This balance makes squoval nails suitable for both professional settings and casual occasions, adapting seamlessly to various style preferences and nail art designs.
Easy Maintenance for Busy Lifestyles
Squoval nails require minimal upkeep compared to more complex shapes, making them perfect for individuals with demanding schedules. Filing involves simple, smooth edges that don’t require intricate shaping or frequent touch-ups. The straightforward maintenance routine includes basic filing to maintain the square sides and gentle rounding of corners when needed.
Versatility shines through in the shape’s adaptability to any nail length, from short, neat styles to long, bold looks. This flexibility allows for easy growth management without dramatically altering the overall appearance. Regular maintenance simply involves filing straight across the nail tip and softening the corners with gentle, curved strokes.
Transitioning Between Different Shapes
Squoval nails serve as an excellent transitional shape when experimenting with different nail styles. Moving from square to squoval requires only filing the corners into soft curves, while transitioning from rounded or oval styles involves gently defining the tip to create a subtle squoval effect. This adaptability allows individuals to explore new looks without committing to dramatic changes in their nail routine.
Customization becomes effortless with squoval nails, as they provide a neutral foundation that works with various nail colors and designs. The shape’s balanced proportions complement both bold, statement looks and subtle, everyday styles. This versatility makes squoval nails an ideal choice for those seeking a flattering, low-maintenance manicure that adapts to changing preferences and occasions.
Ballerina Nail Shape Ideas for Unique Appeal

Ballerina nails create an elegant silhouette with their distinctive tapered sides and flat, straight tips that mirror the shape of ballet pointe shoes. We love how this nail shape combines sophistication with modern edge, offering endless possibilities for creative designs and color combinations.
Achieving the Tapered Coffin Effect
Filing the sides of your nails straight while tapering them towards the tip creates the signature ballerina shape that’s both dramatic and refined. We recommend using a fine-grit nail file to gradually shape each side, maintaining symmetry as you work toward the flat tip. Start by filing from the outer edges inward, creating those sleek tapered sides that distinguish ballerina nails from other shapes.
Shaping the tip requires precision to achieve that characteristic straight edge rather than a pointed or rounded finish. We suggest filing the tip completely flat, ensuring it’s perpendicular to the nail’s length for that authentic ballerina look. This technique sets ballerina nails apart from coffin nails, creating a more structured and geometric appearance.
Feminine Design Elements for Ballerina Nails
Soft colors in pastel shades and delicate nude tones enhance the feminine appeal of ballerina nails while complementing their elegant shape. We find that matte polish in neutral tones particularly emphasizes the nail’s architectural beauty, creating a sophisticated backdrop for any occasion. These gentle hues mirror the ethereal quality of ballet attire, making them perfect for everyday wear.
Delicate patterns add visual interest without overwhelming the nail’s natural elegance. We love incorporating subtle floral designs or geometric patterns that follow the nail’s natural lines, creating harmony between shape and decoration. These feminine touches work beautifully with the ballerina’s structured silhouette, adding softness to its bold edges.
Length Considerations for Optimal Shape
Longer lengths showcase the ballerina shape most effectively, allowing the tapered sides and flat tip to create maximum visual impact. We recommend maintaining a length that feels comfortable while still highlighting the nail’s distinctive architecture, as shorter versions can lose some of the shape’s dramatic appeal. The extended length provides more canvas space for intricate designs and allows the tapered effect to be fully appreciated.
Regular filing becomes essential as your nails grow to maintain those defined tapered sides that make ballerina nails so striking. We suggest scheduling weekly maintenance sessions to keep the shape crisp and prevent the sides from becoming too rounded or losing their precise angles. This consistent care ensures your ballerina nails retain their ballet-inspired elegance throughout their wear cycle.
Mountain Peak Nail Shape Ideas for Edgy Looks

Mountain peak nails offer a bold departure from traditional nail shapes, creating angular silhouettes that demand attention. We’re exploring this trending style that combines sharp geometric lines with dramatic flair.
Creating the Angular Mountain Silhouette
Filing your nails into mountain peak shapes requires precision and patience to achieve those coveted sharp angles. We start by growing nails to medium or long lengths, then carefully file each side to create steep declines from the center peak to the nail edges. Professional nail files work best for creating clean, symmetrical angles that won’t chip or break easily.
Emphasizing the peak becomes crucial for achieving the full mountain effect on your nails. We recommend using contrasting nail colors or strategic nail art placement to highlight the angular shape. Matte finishes particularly enhance the geometric structure, while adding metallic accents along the peak edges can create stunning visual depth.
Alternative Pointed Nail Options
Stiletto nails provide the most dramatic pointed alternative, featuring extremely long and thin shapes that create bold statements. We find these work exceptionally well for special occasions when you want maximum impact from your manicure. The ultra-sharp points require careful maintenance but deliver unmatched edginess.
Almond shaped nails offer a softer pointed alternative that balances elegance with subtle edge. We prefer this option for everyday wear since it provides pointed appeal without the maintenance challenges of extreme shapes. The gentle taper from base to tip creates a naturally flattering silhouette on most hand shapes.
Geometric Patterns for Mountain Peaks
Triangular patterns work perfectly with mountain peak nails, creating cohesive designs that mirror the shape itself. We suggest using contrasting colors to paint triangular sections that emphasize the angular structure. Bold color combinations like black and gold or navy and silver create particularly striking effects.
Chevron designs add ever-changing energy to mountain peak nails through their inverted V-shaped patterns. We layer multiple chevrons in different sizes to create depth and visual interest across the nail surface. These patterns work especially well when painted in gradient colors that shift from light to dark.
Zigzag patterns bring playful energy to the dramatic mountain peak shape, softening the harsh angles with rhythmic movement. We apply these patterns horizontally across the nail to create contrast with the vertical peak lines. Neon colors or metallic finishes make zigzag designs particularly eye-catching on mountain peak nails.
Lipstick Nail Shape Ideas for Trendy Asymmetry

We’re diving into one of the most fashion-forward nail trends that’s taking the beauty industry by storm. Lipstick nails feature a sleek, elongated shape with a sharp, pointed tip and a distinctively slanted edge that creates an intentionally asymmetrical look perfect for those seeking trendy sophistication.
Slanted Edge Filing Techniques
Filing at a 45-degree angle creates the signature lipstick nail silhouette that’s both modern and eye-catching. Position your nail file at approximately a 45-degree angle to the nail’s edge rather than filing straight across. Move the file in one direction toward the center of the nail to prevent weakening or splitting that can compromise your manicure’s longevity.
Gentle strokes with even pressure maintain control while achieving the desired slanted effect. Apply smooth, consistent movements rather than aggressive back-and-forth motions that could damage the nail structure. Keep your filing technique measured and deliberate to avoid excessive force that might cause breaks or uneven edges.
Creating slight asymmetry involves filing one side longer than the other while maintaining overall balance. Make one edge of the nail slightly longer to achieve that trendy off-center look that defines the lipstick shape. Balance remains key even with intentional asymmetry, so we recommend checking your progress frequently during the filing process.
Modern Art Designs for Lipstick Nails
Geometric patterns like chevrons and triangles add contemporary flair to the already striking lipstick shape. These angular designs complement the nail’s natural slanted edge, creating cohesive visual appeal. Consider using contrasting colors to make geometric elements pop against your base shade.
Abstract designs featuring swirling colors or ombre effects enhance the trendy aesthetic of lipstick nails. These flowing patterns create beautiful contrast against the sharp, defined edges of the nail shape. Gradient techniques work particularly well since they follow the nail’s natural directional flow.
Color blocking techniques emphasize the asymmetrical nature of lipstick nails through strategic placement. Use different shades on each side of the diagonal cut to highlight the unique shape. Metallic accents along the slanted edge can also draw attention to the nail’s distinctive silhouette.
Maintaining the Diagonal Cut
Regular filing sessions preserve the desired shape and prevent uneven growth from compromising your look. Schedule touch-ups every 10 to 14 days to maintain the crisp diagonal edge that defines lipstick nails. Consistent maintenance prevents the shape from becoming too rounded or losing its signature asymmetry.
Monitoring nail growth ensures the shape remains consistent without becoming too long or misshapen. Watch for changes in the diagonal angle as nails grow, since natural growth patterns can alter the intended asymmetrical effect. Trim length as needed to keep proportions balanced and visually appealing.
Professional maintenance tools help achieve precise results when reshaping your lipstick nails. Invest in high-quality nail files and buffers designed for detailed work on pointed shapes. Crystal or glass files work exceptionally well for maintaining sharp edges without causing damage to the nail structure.
Conclusion
We’ve explored twelve distinct nail shapes that can transform your manicure game and express your unique personality. From the timeless elegance of square and oval designs to the dramatic flair of stiletto and mountain peak styles each shape offers its own advantages and aesthetic appeal.
The key to finding your perfect nail shape lies in considering your lifestyle nail strength and personal preferences. Whether you’re drawn to the practical beauty of squoval nails or the bold statement of coffin shapes there’s a style that’ll complement your hands beautifully.
Remember that nail shapes aren’t permanent decisions – they’re opportunities to experiment and evolve your style. We encourage you to try different shapes throughout the year and discover which ones make you feel most confident and comfortable.
Frequently Asked Questions
What nail shapes are best for beginners?
Round and squoval nail shapes are ideal for beginners. Round nails are easy to file and maintain, while squoval combines the durability of square nails with the softness of rounded edges. Both shapes are forgiving if you make filing mistakes and work well on natural nails without requiring extensions.
Which nail shapes make fingers look longer?
Almond and oval nail shapes create the illusion of longer fingers. These elongated shapes draw the eye upward and provide a naturally flattering silhouette. Stiletto nails also lengthen finger appearance, though they require more maintenance and are better suited for special occasions.
What nail shapes are strongest and least likely to break?
Square and round nail shapes are the strongest options. Square nails distribute pressure evenly across the nail bed, while round shapes eliminate sharp corners that typically catch and break. These shapes are perfect for those with weak or brittle nails who want durability.
How often should I reshape my nails?
Most nail shapes should be maintained every 2-3 weeks, depending on your nail growth rate. Square and round shapes may last longer between appointments, while pointed shapes like stiletto and almond require more frequent touch-ups to maintain their precise silhouette and prevent breakage.
Can short nails work with dramatic shapes like coffin or stiletto?
Dramatic shapes like coffin and stiletto typically require longer nail lengths to achieve their distinctive look. Short natural nails work better with round, square, or oval shapes. However, acrylic or gel extensions can help achieve dramatic shapes on shorter natural nails if desired.
What’s the difference between almond and oval nail shapes?
Almond nails have a more pronounced point and tapered sides, creating a sharper, more dramatic look. Oval nails are gentler with softer curves and a rounded tip. Almond shapes require more precise filing and maintenance, while oval shapes are more forgiving and natural-looking.
Which nail shapes work best for nail art?
Coffin, almond, and stiletto shapes provide the most canvas space for intricate nail art designs. Square and squoval shapes also work well for geometric patterns and French manicures. Round and oval shapes are perfect for simple, elegant designs that complement their natural curves.
How do I choose the right nail shape for my hand type?
Consider your finger length, nail bed width, and lifestyle. Longer fingers can handle most shapes, while shorter fingers benefit from elongating shapes like oval or almond. Wide nail beds look great with square or coffin shapes, while narrow beds suit round or oval styles.


