Spring’s here and we’re ready to ditch those dark winter shades for something fresh and vibrant! There’s nothing quite like a gorgeous manicure to kickstart the season and boost our confidence as we transition into warmer weather.
We’ve curated the most stunning nail trends that’ll have you feeling fabulous from your fingertips to your toes. From soft pastels that whisper elegance to bold florals that scream statement-maker these designs capture spring’s essence perfectly. Whether you’re heading to brunch with friends or planning that perfect garden party your nails will be the conversation starter everyone’s talking about.
Get ready to discover nail art that’s not just beautiful but also surprisingly achievable. We’ll show you how to create salon-worthy looks right at home plus share insider tips that’ll make your manicure last longer than your favorite spring playlist.
Fresh Floral Nail Designs That Bloom With Spring Spirit
Floral nail art captures the essence of spring’s renewal and brings nature’s beauty directly to our fingertips. These designs transform ordinary manicures into stunning botanical masterpieces that celebrate the season’s most beloved blooms.
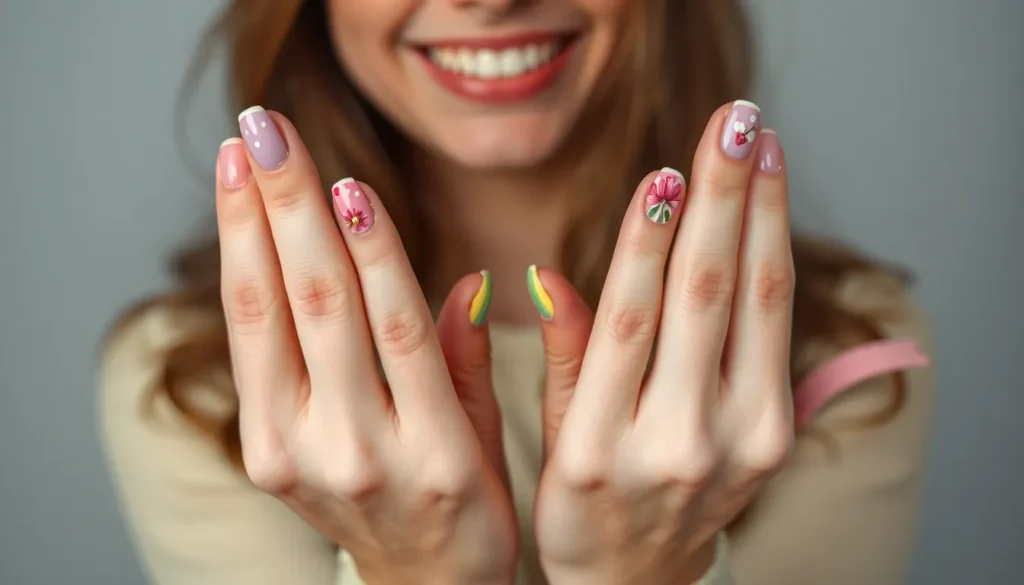
Delicate Cherry Blossom Patterns
Cherry blossom nails create an ethereal look that perfectly embodies spring’s gentle elegance. We recommend starting with a soft pink or nude base coat to mimic the natural backdrop of cherry tree branches. Apply small clusters of white and pale pink petals using a thin nail art brush or dotting tool, focusing on creating an organic scattered pattern across 2-3 nails per hand.
Enhance the design by adding thin brown lines to represent delicate branches using a striper brush. Complete the look with tiny yellow dots at each flower’s center to represent the stamens. This design works beautifully on almond or oval shaped nails and typically lasts 7-10 days with proper top coat application.
Bold Sunflower Accent Nails
Sunflower accent nails bring vibrant energy and warmth to any spring manicure. Create these eye catching designs by painting a bright yellow base on your ring finger or thumb, then adding golden petals around the nail’s outer edge using a small fan brush. The center requires a rich brown or black circular shape filled with tiny dots to mimic the sunflower’s distinctive seed pattern.
Pair sunflower accents with complementary colors like sage green, cream, or burnt orange on remaining nails. Add small green leaves at the base of each sunflower using a liner brush for extra botanical detail. These statement nails photograph beautifully and serve as perfect conversation starters during spring gatherings.
Minimalist Daisy Chain Designs
Daisy chain designs offer a clean, modern take on floral nail art that suits both casual and professional settings. Start with a clear or sheer pink base coat across all nails, then paint simple white daisies using five small oval petals around a yellow center dot. Connect 2-3 daisies with thin green stems to create the chain effect on accent nails.
Vary the daisy sizes between small, medium, and large to add visual interest while maintaining the minimalist aesthetic. This design requires only white, yellow, and green nail polish plus a thin detail brush, making it accessible for beginners. The subtle nature of daisy chains complements any spring outfit while adding a touch of whimsical charm to our everyday look.
Pastel Color Palettes Perfect for Spring Nails

Soft pastels capture spring’s gentle awakening while creating sophisticated nail looks that complement any wardrobe. We’ll explore three stunning color combinations that perfectly embody the season’s fresh energy.
Soft Lavender and Mint Green Combinations
Lavender and mint green create a calming and fresh look that’s ideal for spring according to current trend forecasts. We recommend applying lavender as your base color on most nails, then adding mint green accents on one or two fingers for visual interest. Alternating these colors in a checkerboard pattern across your nails delivers a playful yet sophisticated appearance.
Gradient techniques work beautifully with this combination, starting with deep lavender at the cuticle and fading to mint green at the tips. We suggest using a makeup sponge to blend the colors seamlessly for professional results. Matte topcoats transform this duo into a dreamy, velvety finish that’s perfect for everyday wear.
Peachy Pink and Cream Gradients
Peachy pink transitions to cream add warmth and vibrancy to your spring manicure with their sunset inspired appeal. We love how these gradual color shifts create depth and movement on shorter nails. Starting with peachy pink at the base and blending upward to cream creates an elongating effect that flatters all nail shapes.
Ombre techniques using these shades work exceptionally well on accent nails paired with solid cream on remaining fingers. We recommend building the gradient in thin layers, allowing each coat to dry completely before adding the next. Glossy topcoats enhance the dimensional quality of this color combination while protecting your manicure.
Baby Blue and Yellow Color Blocking
Baby blue and yellow color blocking brings bright and playful energy reminiscent of sunny garden scenes to your fingertips. We suggest dedicating two nails to baby blue, two to yellow, and using one accent nail with both colors in geometric patterns. Diagonal splits across individual nails create modern, Instagram worthy designs that photograph beautifully.
Striping tape helps achieve clean lines when creating blocked patterns with these cheerful spring shades. We find that alternating colors on each hand rather than clustering them together provides better visual balance. Adding tiny white dots or thin white lines between color sections elevates this playful look into something more refined and artistic.
Vibrant Rainbow Nail Art to Celebrate Warmer Weather

Rainbow nail designs bring an explosion of color that perfectly captures spring’s vibrant energy and works beautifully for Pride celebrations throughout the season.
Multi-Color Gradient Techniques
Gradient nail art creates stunning visual impact by seamlessly blending rainbow shades from one nail edge to another. We achieve this dreamy ombre effect using sponging techniques that allow colors to melt together naturally. Professional results come from applying each color while the previous shade remains slightly wet, ensuring smooth transitions between hues.
Airbrushing offers another excellent method for creating flawless rainbow gradients on longer nails. This technique works exceptionally well with both gel and regular polish formulations. Vertical gradients flowing from cuticle to tip create elegant elongation, while horizontal blends across the nail width offer a more dramatic statement look.
Bold Striped Rainbow Patterns
Striped rainbow designs deliver maximum visual punch through crisp lines of distinct colors placed side by side. We recommend using striping tape or nail art brushes to achieve perfectly straight edges between each vibrant hue. Vertical stripes create a lengthening effect that flatters shorter nails, while horizontal patterns add width and drama.
Diagonal rainbow stripes offer a modern twist that feels fresh and contemporary. These graphic patterns work beautifully when repeated across multiple nails or combined with negative space designs. Contemporary nail artists often alternate striped nails with solid accent colors to balance the bold pattern throughout the manicure.
Subtle Rainbow French Tips
Rainbow French tips transform the classic manicure into a colorful celebration while maintaining sophisticated elegance. Each fingertip receives a different rainbow color, creating a playful twist on the traditional white tip design. We suggest using thin nail art brushes to achieve precise application along the nail’s natural curve.
Single tip rainbow arcs offer another beautiful variation where all rainbow shades appear horizontally across one nail tip. This subtle approach allows color lovers to embrace the trend without overwhelming their overall look. Both techniques work perfectly for professional settings where a touch of personality enhances rather than distracts from polished appearance.
Nature-Inspired Nail Ideas for Spring Adventures

When we step outdoors this spring, our nails can mirror the natural beauty surrounding us. These organic designs transform our fingertips into miniature canvases celebrating the season’s awakening.
Butterfly Wing Nail Art
Butterfly wing nail art captures the delicate beauty of these spring messengers through vibrant colors and intricate patterns. We recommend starting with a clear base coat before applying the stunning visual effects that make this design so captivating. Gradient techniques work beautifully for creating the natural color transitions found in real butterfly wings.
Orange and black combinations mimic monarch butterflies perfectly, while blues and purples evoke the ethereal quality of swallowtails. We suggest using fine detail brushes to add the characteristic wing patterns and veining that make each nail unique. Shimmery topcoats enhance the iridescent quality that butterflies naturally possess.
Garden Leaf and Vine Designs
Garden leaf and vine designs bring the lushness of spring gardens directly to our fingertips through various shades of green. We love incorporating different leaf shapes like maple, oak, and ivy to create dimensional botanical artwork. These designs work exceptionally well when complemented by delicate floral patterns that add pops of seasonal color.
Deep forest greens provide excellent base colors for creating realistic vine effects across multiple nails. We recommend using dotting tools to create small buds and flowers along the vine patterns. Matte finish topcoats give these designs an authentic, natural appearance that mimics real garden foliage.
Ocean Wave and Beach Themes
Ocean wave and beach themes transport us to coastal paradises through flowing water patterns and seaside elements. We create these designs using blue and white marbling techniques that capture the movement of rolling waves. Seashells, starfish, and sand dollar accents add authentic beach vibes to complete the coastal aesthetic.
Turquoise and seafoam green gradients work beautifully for creating depth in wave patterns. We suggest adding tiny pearl accents or shell decals to enhance the oceanic feel. Glossy topcoats are essential for these designs as they mimic the wet, reflective surface of ocean water.
Trendy Geometric Patterns for Modern Spring Looks

Geometric nail art brings a contemporary edge to our spring manicures while perfectly complementing the season’s fresh energy. Sharp lines and bold shapes create stunning visual impact that transforms simple nails into modern masterpieces.
Angular Lines and Sharp Edges
Angular line designs incorporate modern geometric shapes that add sophistication to our spring nail looks. Crisp diagonal stripes create ever-changing movement across the nail surface while maintaining clean aesthetic appeal. Zigzag patterns bring playful energy to neutral base colors like soft pastels or nude tones. Sharp chevron designs work beautifully with contrasting colors such as white against baby pink backgrounds. Asymmetrical line placement creates unique focal points that draw attention without overwhelming the overall design. Metallic tape or thin brushes help us achieve perfectly straight edges for professional looking results.
Circular Dot Patterns and Polka Dots
Circular dot patterns add a playful touch to our spring nail designs while maintaining timeless charm. Classic polka dots in varying sizes create visual interest when applied over butter yellow or lavender base colors. Gradient dot placement from large to small generates movement and depth across the nail surface. Negative space dots allow our natural nail to peek through colored backgrounds for modern minimalist appeal. Clustered dot arrangements mimic flower petals or bubbles for organic spring inspired looks. Dotting tools in different sizes help us create precise circles while nail art brushes work well for smaller accent dots.
Triangle and Diamond Accent Designs
Triangle and diamond shapes add visual interest through their bold geometric forms and striking angles. Pointed triangle accents at the nail tips create modern French manicure alternatives using spring appropriate colors. Diamond cutout designs showcase multiple colors within single geometric frames for complex layered effects. Stacked triangle patterns build upward from the cuticle area creating ever-changing vertical movement. Scattered diamond shapes across nude bases add subtle sparkle without overwhelming delicate spring aesthetics. Geometric tape helps us mask off precise shapes while steady hands and thin brushes create freehand triangle designs with professional precision.
Easter and Spring Holiday Themed Nails

Spring holidays bring unique opportunities to showcase festive nail art that celebrates seasonal traditions. We’ll explore enchanting designs that capture the spirit of Easter and spring equinox celebrations.
Pastel Easter Egg Designs
Create stunning Easter egg manicures using soft pastels like pink, blue, and yellow. These gentle hues mirror traditional Easter aesthetics while maintaining spring’s delicate beauty. Apply a light base coat in cream or nude tones before adding pastel egg shapes using dotting tools or small brushes.
Design intricate patterns within each egg shape for added visual interest. Consider adding tiny polka dots, diagonal stripes, or delicate swirl patterns inside your Easter egg designs. We recommend using contrasting pastels to make each pattern pop against the base color.
Combine Easter egg motifs with floral elements for comprehensive spring themes. Small daisies, cherry blossoms, or tiny tulips complement the egg designs beautifully. This combination creates cohesive nail art that celebrates both Easter traditions and spring’s natural awakening.
Bunny and Chick Nail Art
Transform your nails into adorable bunny scenes using white or cream backgrounds. Start with a clean base coat, then use fine brushes to create bunny silhouettes or full character designs. We suggest focusing on one or two accent nails to avoid overwhelming the overall look.
Add cute chick designs alongside bunny motifs for complete Easter storytelling. Yellow chicks with tiny orange beaks create perfect companions to white bunnies. These cartoon style characters work exceptionally well on shorter nails where detailed artwork might be challenging.
Incorporate realistic animal textures for sophisticated holiday nail art. Use sponging techniques to create fluffy bunny fur textures or add dimensional elements with matte top coats. We find that subtle shading with slightly darker tones creates depth and professional looking results.
Spring Equinox Celebration Patterns
Celebrate balance and renewal with sun and moon designs representing equal day and night. Golden suns paired with silver moons create striking contrast while honoring the spring equinox’s symbolic meaning. Position these celestial elements on opposite nails for visual harmony.
Feature vibrant floral patterns that reflect spring’s growth and renewal energy. Bold tulips, daffodils, and crocuses in bright yellows, purples, and greens capture the season’s awakening spirit. We recommend using these flowers as statement pieces on ring fingers or thumbs.
Design nature inspired scenes with branches, leaves, and emerging buds. These organic patterns celebrate new growth and can be painted in various green shades with brown branch details. Adding tiny white or pink buds suggests the promise of upcoming blooms and perfectly captures spring’s anticipation.
Quick and Easy DIY Spring Nail Ideas for Beginners

We’re making spring nail art accessible for everyone with these foolproof techniques that require minimal tools and experience. Even if you’ve never tried nail art before, these methods will help you create beautiful spring designs at home.
Simple Ombre Techniques
Ombre nails create stunning gradient effects that perfectly capture spring’s gentle transitions. Start with a light base color like soft pink or cream and let it dry completely. Gradually layer darker shades using small amounts of polish on a makeup sponge for better blending. Press the sponge gently onto each nail in a rocking motion to create smooth color transitions. Clean the sponge frequently to prevent muddy colors and apply a top coat to seal your gradient masterpiece.
Basic Polka Dot Applications
Polka dots bring playful spring energy to any manicure with just a few simple steps. Use nail polish in contrasting colors like white dots on pastel bases or bright yellow spots on mint green backgrounds. Employ a dotting tool for perfectly round, precise dots that maintain consistent sizing across all nails. Alternatively, use a toothpick for a more rustic, hand crafted appearance that adds charm to your spring design. Vary dot sizes by applying different pressure amounts or using the tool’s opposite end for smaller accents.
Easy Striping Tape Designs
Striping tape transforms basic manicures into professional looking geometric patterns. Apply your base nail polish color and allow it to dry completely before placing the tape. Position striping tape in desired patterns such as diagonal lines, chevrons, or intersecting designs for modern spring looks. Paint over the entire nail with a contrasting color while the tape remains in place. Remove the tape immediately while the polish is still wet to reveal crisp, clean lines that rival salon quality work.
Professional Spring Nail Trends from Top Salons

Top nail salons are elevating spring manicures with sophisticated techniques that go beyond basic polish application. We’re seeing a shift toward luxurious finishes and dimensional artistry that transforms nails into stunning accessories.
Chrome and Metallic Finishes
Soft chrome with subtle pearlescent finish dominates salon menus this spring, offering an elevated alternative to traditional metallics. We love how this technique creates depth without overwhelming brightness, making it perfect for both professional settings and special occasions. Nail technicians achieve this look by layering specialized chrome powders over gel base coats, then sealing with high-gloss topcoats for maximum shine.
Rose gold and champagne tones complement spring’s warm undertones beautifully, especially when paired with nude base colors. Salons report these shades work particularly well for clients wanting metallic impact without bold statement colors. The application process involves careful buffing and multiple thin layers to prevent streaking or uneven coverage.
Mirror-like reflective surfaces require advanced application skills that professional nail artists perfect through specialized training. We’ve noticed clients requesting these finishes for wedding seasons and graduation celebrations, where photos capture the dramatic light reflection. The technique demands precise timing during the curing process to achieve that flawless mirror effect.
3D Textured Elements
Micro studs and geometric embellishments create sophisticated dimension without compromising wearability for daily activities. Salon professionals strategically place these elements using precision tweezers and medical-grade adhesives for lasting hold. We see clients choosing subtle placement along cuticle lines or as single accent details rather than full nail coverage.
Raised floral patterns using gel sculpting techniques bring spring botanicals to life on nail surfaces. Expert technicians build these designs layer by layer, allowing each section to cure properly before adding additional elements. The result creates touchable texture that catches light from multiple angles throughout the day.
Velvet and magnetic powder applications offer unique tactile experiences while maintaining professional appearance standards. We’re impressed by how magnetic polishes create mesmerizing cat-eye effects when activated with specialized magnets during the curing process. These finishes work exceptionally well over darker base colors, creating striking contrast with spring’s typical light palette.
Advanced Nail Extension Techniques
Glass nail finishes on extended lengths create the ultimate spring statement, combining translucent bases with high-gloss sealers for maximum shine. Professional technicians achieve this look through careful preparation of the natural nail bed and precise application of building gels. We recommend this technique for clients seeking dramatic length without compromising the delicate aesthetic spring demands.
Structured gel overlays provide strength and longevity while maintaining natural nail flexibility for extended wear. Salon experts build these extensions using anatomically correct curves that enhance hand movement and prevent breakage during daily activities. The technique works particularly well for clients transitioning from shorter winter nails to longer spring styles.
Sculpted almond and coffin shapes showcase advanced shaping skills that create elegant silhouettes perfect for spring fashion trends. We observe how professional nail artists use forms and careful filing techniques to achieve symmetrical results across all ten nails. These shapes provide ideal canvases for the season’s trending nail art designs while maintaining sophisticated appeal.
Conclusion
Spring offers endless opportunities to refresh our nail game with creative designs that capture the season’s vibrant energy. We’ve explored everything from delicate florals and soft pastels to bold geometrics and professional chrome finishes that’ll keep our manicures on-trend.
Whether we’re beginners trying simple DIY techniques or experienced nail artists ready for advanced 3D textures and sculpted shapes these spring nail ideas provide something for every skill level. The key is experimenting with colors and patterns that make us feel confident and celebrate the season’s renewal.
Our nails are the perfect canvas to showcase spring’s beauty so let’s embrace these fresh trends and make this season our most stylish yet.
Frequently Asked Questions
What are the most popular spring nail trends for 2025?
The most popular spring nail trends include vibrant floral designs like cherry blossoms and daisies, soft pastel color palettes, rainbow gradient art, nature-inspired themes featuring butterflies and leaves, and trendy geometric patterns. These styles perfectly capture spring’s fresh, renewal energy and work for both casual and special occasions.
Can beginners create professional-looking spring nail art at home?
Yes! The article provides easy DIY techniques specifically designed for beginners, including simple ombre gradients, basic polka dots, and striping tape designs. These methods require minimal tools and experience while delivering salon-quality results that last longer with proper application techniques.
What colors work best for spring manicures?
Spring manicures shine with gentle pastels like soft pinks, lavenders, and mint greens, as well as vibrant colors that reflect the season’s energy. Popular combinations include pastel Easter egg tones, bold rainbow gradients, and nature-inspired hues that mirror blooming flowers and fresh greenery.
How can I make my spring nail art last longer?
To extend your manicure’s lifespan, use proper base and top coats, apply thin polish layers, seal edges carefully, and avoid excessive water exposure. The article includes specific techniques for achieving professional durability, ensuring your beautiful spring designs stay vibrant for weeks.
What tools do I need for DIY spring nail art?
Basic DIY spring nail art requires minimal tools: quality nail polish in spring colors, dotting tools or toothpicks for details, striping tape for geometric patterns, and basic brushes for flowers. Most designs can be created with household items, making spring nail art accessible and budget-friendly.
Are there spring nail designs suitable for short nails?
Absolutely! Many spring trends work beautifully on short nails, including minimalist daisy chains, simple geometric patterns, pastel color blocks, and delicate floral accents. The article specifically addresses how to adapt various designs for shorter nail lengths while maintaining their visual impact.
What’s the difference between DIY and professional spring nail techniques?
Professional techniques include advanced chrome finishes, 3D textured elements, sculpted nail extensions, and complex application methods requiring specialized tools. DIY methods focus on achievable results using basic supplies, while professional services offer luxury finishes like mirror-like surfaces and structured gel overlays.


