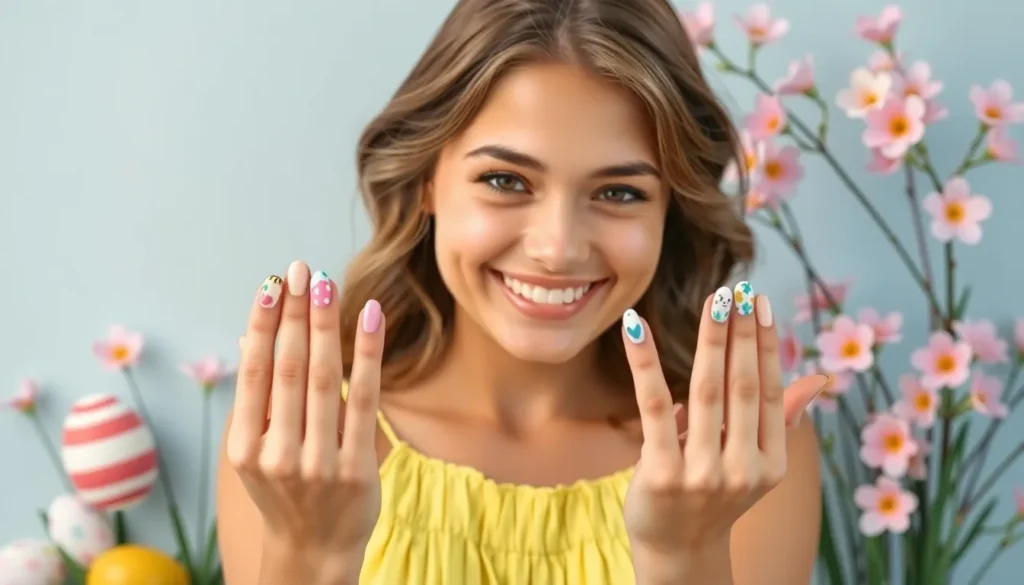
Spring’s arrival brings fresh blooms and Easter celebrations that deserve equally stunning nail art to match. We’re diving into the most adorable and trending Easter nail designs that’ll have your fingertips looking absolutely egg-ceptional this season.
From pastel ombres to bunny silhouettes we’ve gathered creative ideas that range from simple DIY designs to intricate masterpieces. Whether you’re planning an Easter brunch or hunting for eggs with the kids these nail art concepts will add that perfect festive touch to your spring style.
We’ll show you how to incorporate classic Easter elements like soft pastels cute chicks and delicate florals into your manicure routine. Get ready to transform your nails into tiny canvases that celebrate everything we love about this joyful holiday season.
Pastel Paradise: Soft Easter Nail Colors That Capture Spring’s Essence
Spring’s softest hues create the perfect foundation for Easter nail art that embodies the season’s gentle awakening. These delicate color combinations transform your fingertips into a celebration of renewal and freshness.
Baby Pink and Lavender Combinations
Baby pink and lavender create an ethereal Easter nail combination that whispers spring romance. We recommend alternating these colors across your nails for a subtle ombre effect that catches light beautifully throughout your day.
Blend these shades using a makeup sponge to achieve seamless gradient transitions from pink to purple. The technique works especially well on longer nails where you have more canvas space to showcase the color flow.
Consider adding tiny white dots or delicate floral accents over this base for extra Easter charm. These colors pair wonderfully with silver or rose gold nail accessories that complement the soft feminine aesthetic.
Mint Green and Butter Yellow Pairings
Mint green and butter yellow capture Easter’s fresh garden vibes with colors that remind us of new leaves and spring sunshine. These cheerful hues work beautifully together whether you choose color blocking or gentle blending techniques.
Create stunning accent nails by painting your ring fingers in mint while keeping other nails in soft yellow. The contrast feels playful yet sophisticated enough for any Easter celebration or spring gathering.
Try incorporating small bunny silhouettes or tiny egg shapes using these colors as your base palette. The combination photographs beautifully in natural light and complements most spring fashion choices perfectly.
Powder Blue and Peach Gradient Designs
Powder blue and peach gradients evoke cotton candy skies and Easter sunrise moments that make your nails feel like wearable art. These colors blend naturally together creating smooth transitions that look professionally done.
Start with powder blue at your cuticle area and blend upward into soft peach at your nail tips. Use a damp beauty sponge to dab the colors together while they’re still wet for the smoothest gradient effect.
Add subtle shimmer over the gradient for extra dimension that catches Easter sunlight beautifully. These colors work particularly well with white French tip accents or delicate pearl embellishments for special Easter events.
Bunny-Inspired Nail Art: Adorable Easter Rabbit Designs
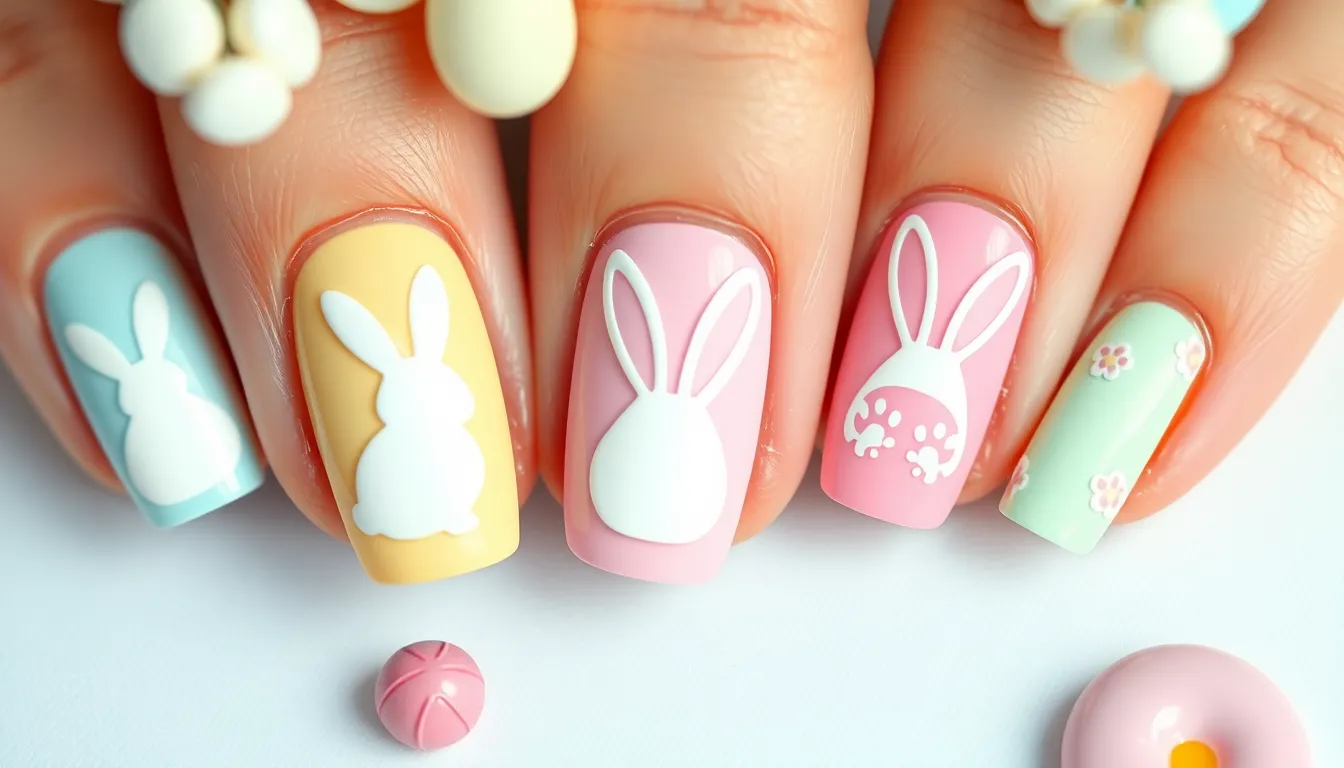
Bunnies represent the heart of Easter nail art, bringing whimsical charm to our spring manicures. We’ll explore three delightful bunny designs that’ll make your nails the perfect Easter accessory.
Simple White Bunny Silhouettes
Simple white bunny silhouettes offer a minimalistic approach to Easter nail art that’s both elegant and playful. We recommend starting with pastel backgrounds like baby pink, lavender, or mint green to create the perfect canvas for your white bunny shapes. Paint tiny bunny profiles using white nail polish and a thin brush, focusing on the distinctive ears and rounded body shape.
These silhouettes work beautifully on accent nails paired with solid pastel colors on remaining nails. You can add small white dots around the bunnies to represent cotton tail details. The design stays clean and sophisticated while maintaining that festive Easter spirit we’re all seeking.
3D Bunny Ear Accent Nails
3D bunny ear accent nails bring dimensional magic to your Easter manicure with their playful, eye-catching appeal. We suggest using small pieces of nail art foam or acrylic to create tiny bunny ears that actually stick up from your nail surface. Position these ears on one or two accent nails while keeping other nails in coordinating pastel shades.
The technique involves cutting small oval shapes and attaching them with nail glue to create realistic bunny ear effects. Paint the ears in white or light pink, then add tiny inner ear details with a slightly darker pink shade. This 3D approach transforms ordinary nails into adorable miniature rabbit faces that’ll surely spark conversations at your Easter gathering.
Bunny Footprint Trail Patterns
Bunny footprint trail patterns create whimsical pathways across your nails using simple white or pastel colored prints. We love this design because it tells a story of Easter bunnies hopping through spring gardens. Start by painting your base in soft colors like cream, powder blue, or pale yellow.
Create the footprints using a small dotting tool or thin brush to make oval shapes for the main foot pad and smaller dots for toes. Arrange these prints in trailing patterns that flow from one nail to another, creating the illusion of bunny tracks. You can vary the sizes slightly to add realism, and consider adding tiny carrot or egg accents along the trail for extra Easter charm.
Easter Egg Extravaganza: Creative Egg-Themed Nail Designs
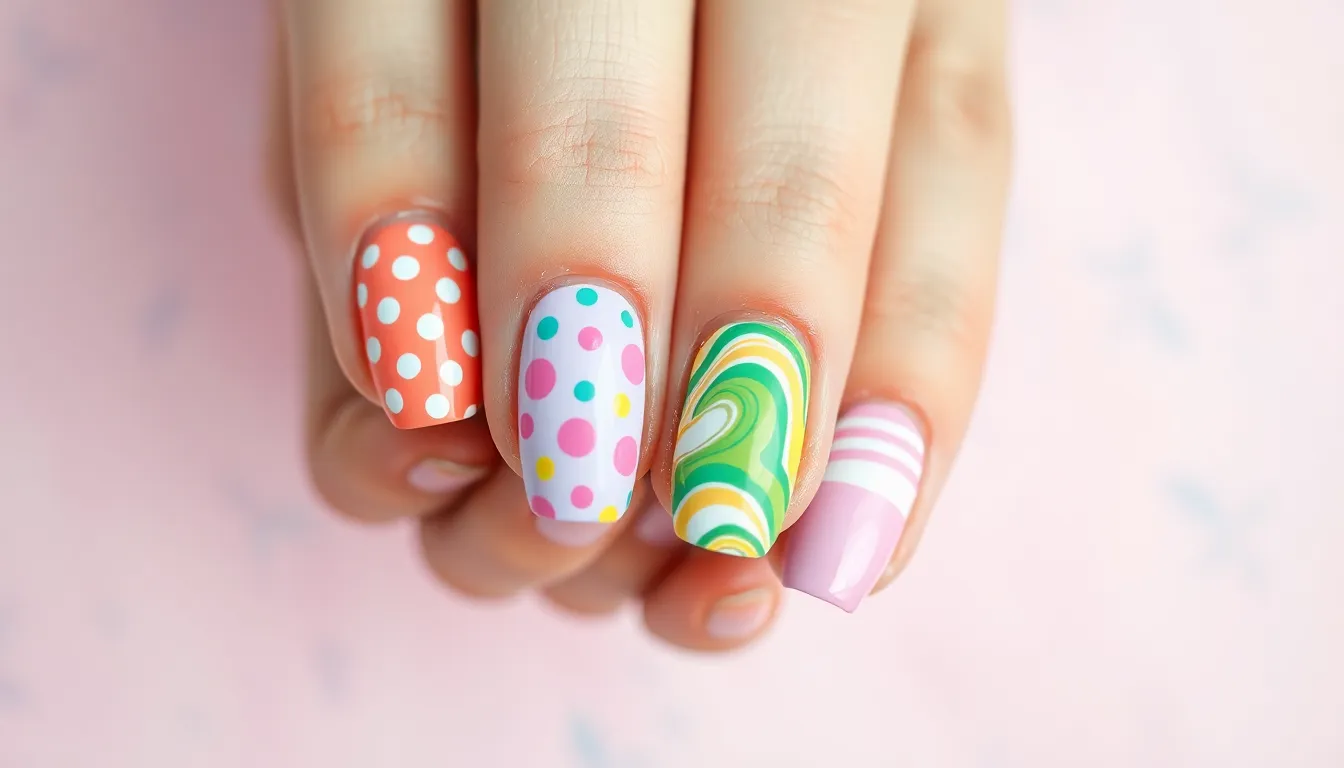
Egg motifs take center stage as we explore imaginative nail art techniques that capture Easter’s playful spirit. Transform your nails into miniature canvases featuring hand-painted Easter eggs complete with intricate floral or animal patterns.
Classic Polka Dot Easter Eggs
Polka dots create timeless Easter egg nail designs that never go out of style. We recommend using dotting tools to apply white, pastel blue, pink, or purple dots atop contrasting base colors to perfectly mimic the appearance of dyed Easter eggs.
Classic white dots on pastel backgrounds deliver an elegant yet festive appearance that’s perfect for Easter celebrations. Matching dots against solid color bases offer another stunning variation that maintains the playful, whimsical look we’re aiming for. These designs work beautifully when you want something simple yet eye-catching for your Easter festivities.
Marbled Easter Egg Effects
Marbling techniques recreate the unique patterns found on naturally dyed Easter eggs with stunning results. Water marbling involves swirling nail polish colors in water, then dipping your nail to achieve that distinctive marbled effect that looks professionally done.
Sponge blending offers another approach where we sponge multiple colors onto the nail for a soft, blended finish that resembles real eggshells. This technique creates beautiful gradients and organic patterns that capture the essence of traditional Easter egg dyeing methods. Both methods produce one-of-a-kind designs since no two marbled nails will look exactly alike.
Striped and Chevron Egg Patterns
Stripes and chevrons bring a modern twist to traditional Easter egg nail art. Vertical stripes created with thin brushes or striping tape offer bold or subtle pattern options that mirror classic Easter egg decorating styles.
Chevron designs painted on accent nails or used as borders add geometric sophistication to your Easter manicure. We particularly love these patterns executed in pastel color palettes that maintain the seasonal theme while adding contemporary flair. These structured designs contrast beautifully with the organic shapes of other Easter elements like florals and bunnies.
Floral Fantasy: Spring Bloom Nail Art for Easter
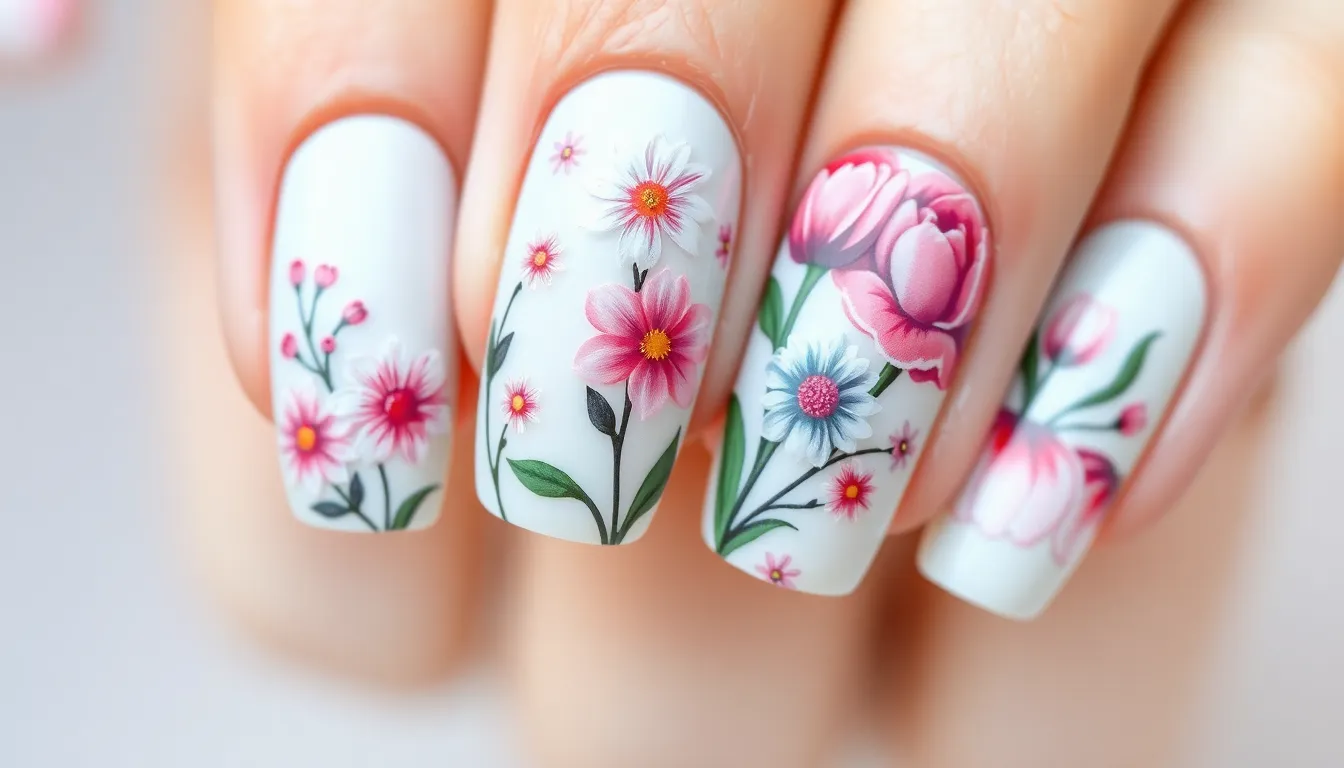
Floral nail art stands as the leading trend for Easter 2025, transforming nails into vibrant canvases that celebrate spring’s renewal. We’ll explore three stunning approaches that capture the essence of seasonal blooms.
Cherry Blossom Branch Designs
Cherry blossom motifs symbolize renewal and perfectly embody Easter’s spirit of rebirth. Artists create these designs by starting with soft pink and white ombre backgrounds that mimic the delicate sky behind blooming trees. Fine brushes become essential tools for hand painting spring branch lines across the nail surface.
Tiny blossoms complete the design using either dotting techniques or small floral stamps for precision. The contrast between the flowing branches and delicate petals creates a sophisticated look that’s both elegant and seasonally appropriate. We recommend focusing these intricate designs on accent nails to maintain balance while showcasing the artistry.
Tiny Daisy and Tulip Accents
Dainty daisy and tulip accents offer a charming alternative that works beautifully on one or two nails per hand. These miniature floral elements can be achieved through gel nail strips, decorative stickers, or careful hand painting for those seeking a DIY approach.
Pastel backgrounds in mint green, pale yellow, or lilac provide the perfect complement to these delicate motifs. Mismatched manicures featuring different floral designs on each nail are trending for their playful variety and creative expression. The balanced approach prevents overwhelming the overall look while still delivering maximum floral impact.
Watercolor Flower Techniques
Watercolor techniques create softer, more ethereal effects that mimic hand painted artwork. Artists blend pastel polishes directly on the nail surface, then add delicate flower outlines using fine brushes for precise detailing. This approach results in nails that appear fresh and artistic with a dreamy, painted quality.
Minimalist backgrounds work best with watercolor styles, allowing the soft blended colors to take center stage. Tiny rhinestones or subtle glitter accents can enhance the overall sparkle factor without competing with the watercolor effect. The technique pairs beautifully with the season’s dominant pastel palette of soft pinks, blues, and lavenders.
Religious Reverence: Faith-Inspired Easter Nail Ideas
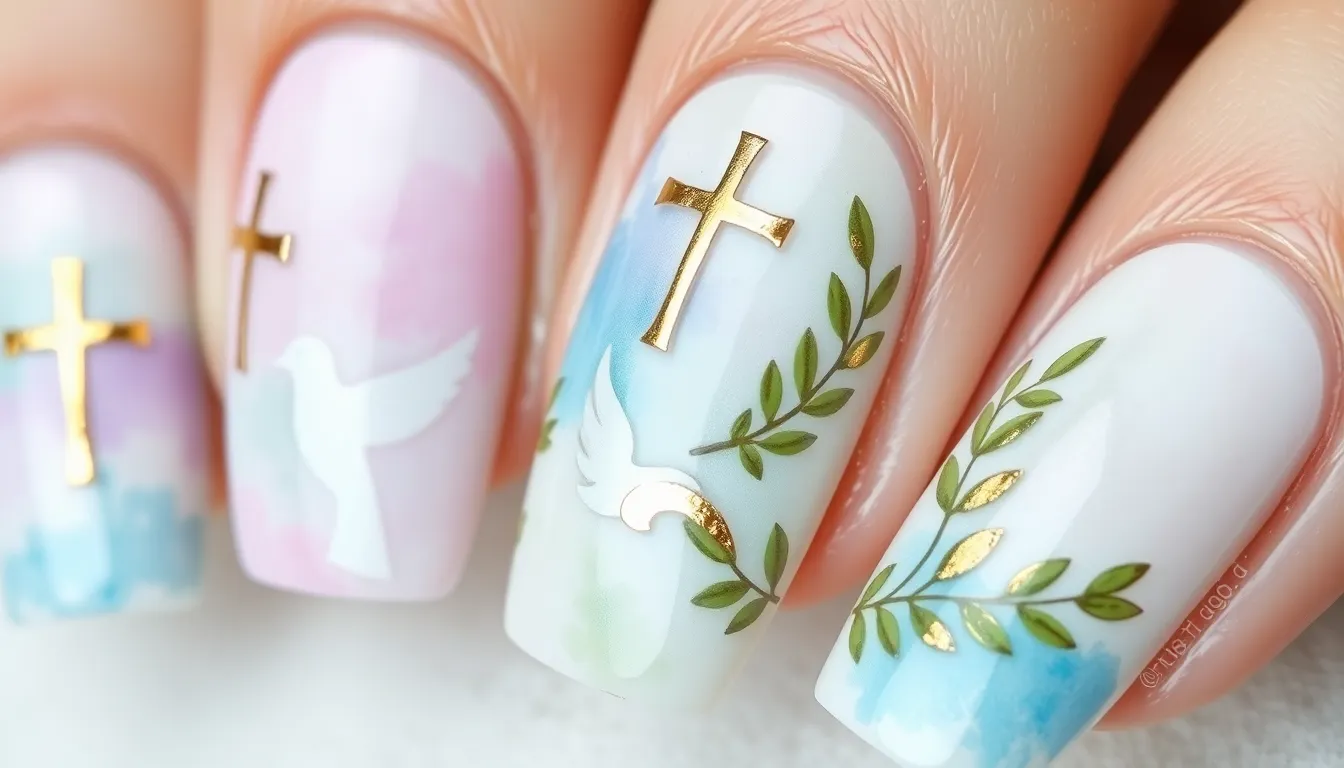
While Easter’s joyful spirit often finds expression through playful designs, we can also honor the holiday’s deeper spiritual meaning through faith-inspired nail art. These sacred symbols allow us to celebrate Easter’s religious significance while maintaining elegant and meaningful style.
Cross Symbol Accent Nails
Cross Symbol Accent Nails transform our fingertips into powerful expressions of faith during Easter season. We can create simple cross outlines using thin nail art brushes and metallic gold or silver polish against soft pastel backgrounds like dove gray or cream. Adding delicate details enhances the design’s spiritual impact – tiny rhinestones positioned at intersection points create elegant sparkle, while hand-painted thorns or small roses around the cross base symbolize Christ’s sacrifice and resurrection. Cross designs work beautifully as accent pieces on ring fingers or thumbs, allowing the sacred symbol to stand out without overwhelming our overall Easter look.
Dove and Olive Branch Motifs
Dove and Olive Branch Motifs bring profound symbolism to our Easter nail designs, representing the Holy Spirit and peaceful new beginnings. We achieve stunning dove silhouettes by painting white bird shapes against soft blue or lavender backgrounds, creating serene sky-like canvases on our nails. Olive branches complement dove imagery perfectly when painted in gentle green tones with tiny leaves extending across nail surfaces like delicate botanical illustrations. Combining both elements creates cohesive designs that speak to Easter’s themes of peace, hope, and spiritual renewal. Watercolor techniques work exceptionally well for these motifs, allowing colors to blend naturally and creating ethereal, heavenly effects that capture the dove’s graceful movement and the olive branch’s gentle sway.
Scripture Verse Nail Art
Scripture Verse Nail Art personalizes our Easter celebration by incorporating meaningful biblical passages directly onto our nails. We can paint short phrases like “He is Risen” or “New Life” using fine-tip nail art pens in elegant script fonts across accent nails. Golden or silver lettering creates striking contrast against soft pastel backgrounds, making the words stand out beautifully while maintaining reverent elegance. Longer verses work well when split across multiple nails, creating a cohesive message that unfolds across our entire hand. Adding subtle decorative elements like small crosses or dove silhouettes around the text enhances the spiritual message without competing with the scripture’s importance.
Chick and Duckling Delight: Baby Animal Easter Nails
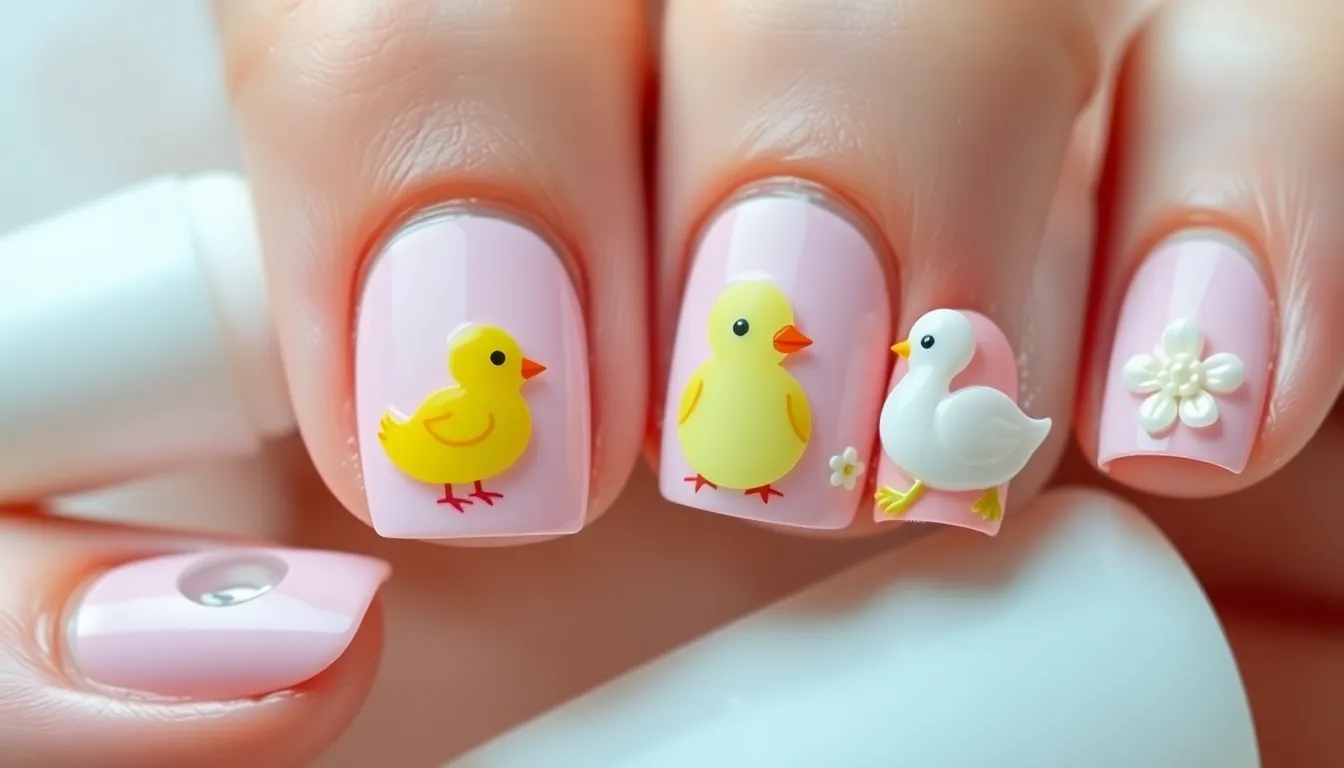
We’re embracing the playful spirit of Easter 2025 with adorable baby animal designs that transform nails into miniature works of art. These trending motifs feature cheerful chicks and ducklings against pastel backdrops, often enhanced with 3D embellishments like tiny beads or sculpted gel for added texture and realism.
Yellow Chick Face Designs
Yellow nails create the perfect foundation for charming chick face art that captures Easter’s joyful essence. Simple dot eyes paired with triangular orange beaks bring these tiny creatures to life, while delicate feather details add authentic texture to each design. Hand-painted versions offer artistic flair, though stickers provide an accessible option for beginners seeking professional-looking results.
Accent nail placement works beautifully for showcasing a single chick face as the focal point of your manicure. Multiple chicks distributed across several nails create a cohesive theme using yellow, white, and peach tones that embody spring’s renewal. These designs perfectly complement other Easter elements when incorporated into broader seasonal nail art themes.
Fluffy Duckling Silhouettes
Duckling silhouettes painted in soft yellow and white tones capture the gentle essence of these beloved baby animals. Subtle shading techniques create realistic fluffy textures that make each duckling appear three-dimensional against pastel backgrounds. Minimalist line art appeals to those preferring clean, modern aesthetics, while glitter and rhinestone accents satisfy bolder style preferences.
Single duckling silhouettes work elegantly on accent nails, though multiple ducklings across various fingers create ever-changing visual interest. Delicate water droplets and tiny flowers often accompany these designs, reinforcing the spring theme with natural elements. Artists frequently pair duckling motifs with other Easter symbols to create comprehensive seasonal manicures.
Hatching Egg with Baby Animals
Cracked egg designs featuring emerging chicks or ducklings represent new beginnings and Easter’s renewal symbolism. White or pastel nail bases serve as realistic eggshells, with baby animals peeking out through carefully crafted cracks and openings. Fine brushes enable precise line work for authentic details, though decals offer consistent results for those preferring professional application methods.
Hatching egg motifs complement floral arrangements and patterned backgrounds beautifully, creating layered compositions that tell Easter stories on your fingertips. These designs work particularly well when combined with other seasonal elements like spring flowers or decorative Easter patterns. The emerging animal concept adds narrative depth to manicures while maintaining the holiday’s celebratory spirit through bright pastels in yellow, blue, and pink.
Glitter and Shimmer: Sparkly Easter Celebration Nails
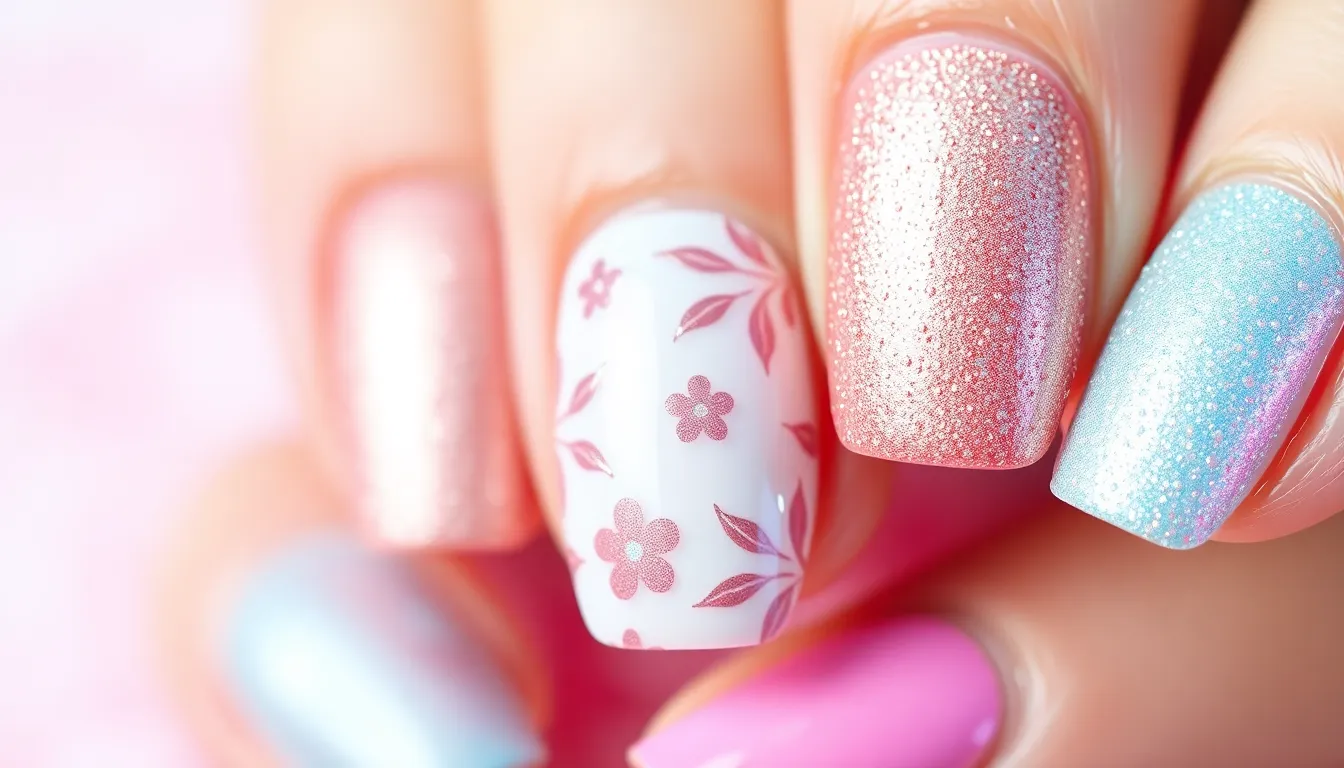
We’re elevating our Easter nail game with dazzling glitter and shimmer techniques that capture the magic of spring celebrations. These luminous designs add glamour to traditional Easter themes while maintaining the holiday’s festive spirit.
Holographic Easter Egg Effects
Creating holographic Easter egg nails transforms your fingertips into mesmerizing rainbow reflections. We recommend using holographic nail polishes that shift between multiple colors as light hits them at different angles. Apply a base coat of white or light pink polish first to enhance the holographic effect’s vibrancy.
Holographic stickers offer another approach for achieving this stunning look. Cut egg shaped pieces from holographic vinyl or purchase pre made Easter egg decals from nail art suppliers. Position these elements strategically across your nails, leaving some fingers solid colored for balance.
Layering techniques amplify the holographic intensity we’re seeking. Start with two thin coats of holographic polish, then add a third layer only to the center of each nail. This creates depth while allowing the edges to remain more subtle and wearable.
Rose Gold Spring Shimmer
Rose gold polish brings luxurious warmth to our Easter nail celebrations. This metallic shade complements spring pastels beautifully while adding sophisticated shimmer that catches light elegantly. We suggest choosing rose gold formulas with fine particles rather than chunky glitter for a refined finish.
Combining rose gold with floral motifs creates stunning contrast against the metallic backdrop. Paint delicate white or cream flowers over dried rose gold base coats using thin nail art brushes. Add tiny green leaves and stems to complete the spring garden aesthetic we’re cultivating.
Gradient techniques work exceptionally well with rose gold shimmer polishes. Blend rose gold with soft pink or champagne shades using makeup sponges to create seamless transitions. This approach gives us that coveted sunset effect perfect for Easter brunches and celebrations.
Iridescent Pastel Glitter Gradients
Iridescent glitter gradients showcase multiple pastel colors flowing seamlessly across our nails. Begin with a white or nude base coat to ensure the pastel colors appear true and vibrant. We recommend working with three complementary pastels like lavender, mint, and peach for cohesive Easter themed looks.
Sponge application creates the smoothest gradient transitions we desire. Dab each pastel color onto a makeup sponge in overlapping sections, then press gently onto your nails starting from the cuticle area. Repeat this process two to three times, allowing each layer to dry completely between applications.
Adding iridescent glitter over our gradient base amplifies the magical effect. Sprinkle fine iridescent glitter while the top pastel layer remains slightly tacky, or apply iridescent top coat for more controlled sparkle distribution. Focus the heaviest glitter concentration at the tips, gradually decreasing toward the cuticles for natural looking dimension.
DIY Easter Nail Techniques: Easy At-Home Methods
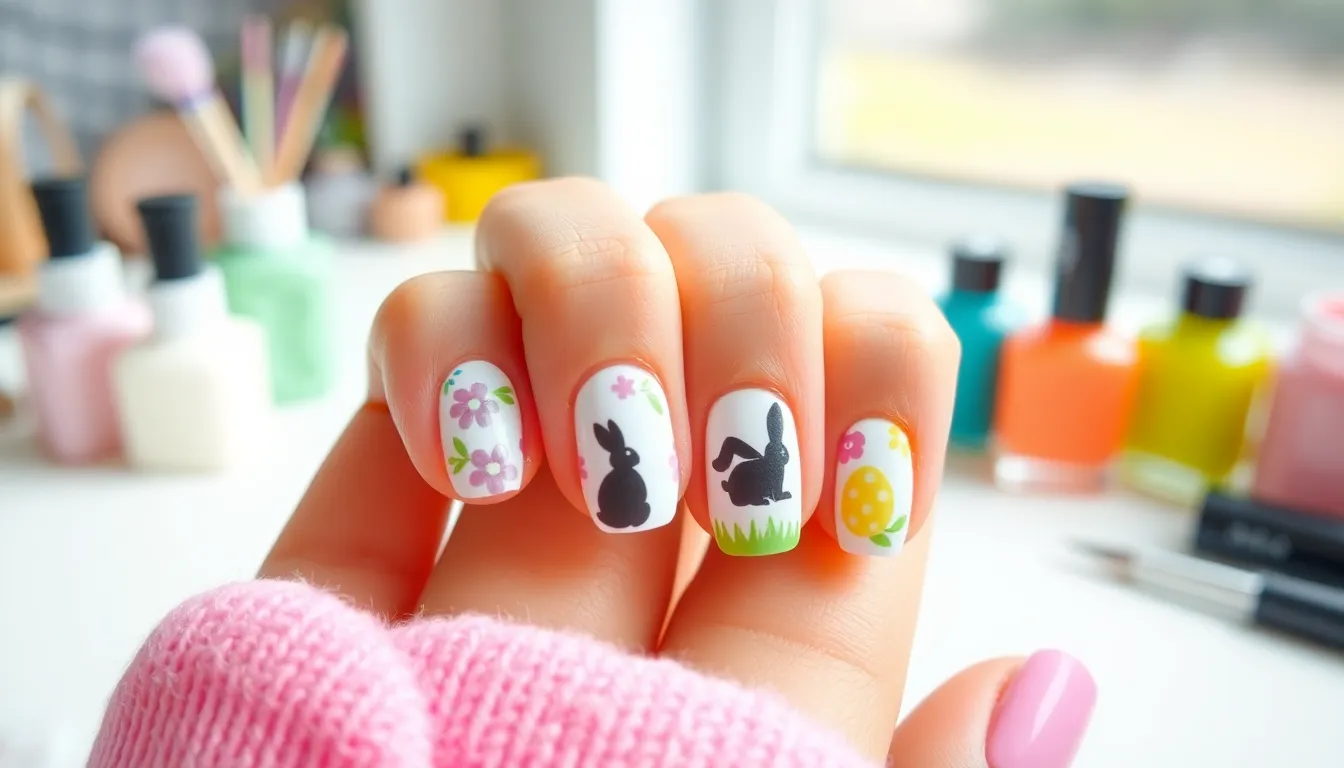
We’ll show you three foolproof methods that transform your nails into Easter masterpieces without needing a salon appointment.
Stamping Plate Easter Designs
Stamping plates offer the quickest way to achieve professional-looking Easter nail art at home. We recommend starting with a quality base coat to protect your natural nails and ensure better adhesion.
Easter-themed stamping plates feature intricate designs like decorated eggs, playful bunnies, spring flowers, and religious symbols that would take hours to paint by hand. Pick up your stamping tool and press it firmly onto the plate after applying polish to transfer crisp, detailed images.
Layer different colors to create depth in your Easter designs. Apply a soft pink base coat, then stamp white bunny silhouettes for a classic spring look that complements your pastel wardrobe.
Finish each nail with a high-quality top coat to seal the stamped design and add lasting shine. This technique works especially well for creating matching sets across all ten nails.
Water Marble Easter Patterns
Water marbling creates stunning organic patterns that mimic the natural beauty of dyed Easter eggs. Fill a small container with room temperature water and add 2-3 drops of different pastel nail polishes.
Swirl the polish colors together using a toothpick to create unique marble patterns in the water. Work quickly since the polish will begin to form a film on the water’s surface within 30 seconds.
Dip your prepared nail straight down into the water, ensuring the entire nail surface captures the marbled design. Clean up excess polish from your skin using a small brush dipped in acetone.
Each nail will have a completely unique pattern, making this technique perfect for creating one-of-a-kind Easter egg effects. Combine soft lavender, mint green, and butter yellow for a dreamy spring marble design.
Dotting Tool Flower Creations
Dotting tools transform simple nail art into delicate spring flowers with minimal effort and maximum impact. Start with a light pastel base coat that serves as your garden canvas.
Create daisy petals by making five small white dots arranged in a circle around a central yellow dot. Press the dotting tool straight down for perfect circular petals every time.
Build cherry blossom designs using a small dotting tool for pink petals and an even smaller tool for brown branch details. Add tiny white highlights to each blossom for dimensional depth.
Vary your flower sizes across different nails to create a natural garden effect. Place larger blooms on accent nails and scatter smaller flowers across the remaining nails for balanced Easter nail art that celebrates spring’s renewal.
Easter Basket Inspired: Woven and Textured Nail Art

We’re transforming traditional Easter baskets into stunning nail art masterpieces that capture the intricate details of woven textures. These sophisticated designs elevate your Easter manicure beyond simple pastels into dimensional works of art.
Basket Weave Pattern Techniques
Creating authentic basket weave patterns starts with layering different shades of brown polish to mimic natural wicker. We recommend using a medium brown base coat followed by strategic placement of nail strips or tape to form intersecting lines. Remove the tape while the polish remains slightly wet for clean, crisp edges that replicate actual basket weaving.
Advanced techniques involve using nail art brushes to hand paint intricate weave patterns across each nail. Layer lighter brown shades over darker bases to create depth and dimension. Professional nail artists suggest practicing the crosshatch pattern on practice wheels before attempting the full design on natural nails.
Textured polishes enhance the woven effect by adding physical dimension to your basket weave design. Apply these specialty polishes using dabbing motions rather than smooth brush strokes to maintain the rough, natural texture of woven materials.
Grass Texture Base Designs
Building realistic grass texture begins with selecting the right green base coat that mimics fresh spring grass. We prefer using mint or sage green as the foundation color before adding texture elements. Multiple thin coats create better coverage than single thick applications.
Specialized texture polishes designed for grass effects work exceptionally well for Easter basket nail art. These polishes contain small fibers or particles that create an authentic grass like appearance when applied with gentle dabbing motions. Allow each layer to dry completely before adding additional texture.
Sponge techniques offer an alternative method for achieving grass texture without specialty polishes. Dab a makeup sponge into various shades of green polish and gently press onto the nail surface. This creates organic variation that closely resembles natural grass patterns found in Easter basket arrangements.
Ribbon and Bow Accent Details
Delicate ribbon accents transform simple basket weave nails into elegant Easter masterpieces. We suggest using thin nail art brushes to paint ribbon details in soft pastel colors that complement traditional Easter themes. Pink, lavender, and butter yellow ribbons work particularly well against brown basket backgrounds.
Three dimensional bow elements add sophisticated finishing touches to Easter basket nail art. Small rhinestones or nail studs positioned strategically create the illusion of gathered fabric at bow centers. Secure these embellishments with clear top coat for lasting wear throughout your Easter celebrations.
Nail stickers provide an easier alternative for those less confident with freehand ribbon painting. Choose high quality Easter themed stickers featuring pastel ribbons and bows that coordinate with your basket weave base design. Apply these accents to one or two accent nails rather than every finger for balanced visual impact.
Professional Easter Nail Trends: Salon-Quality Ideas
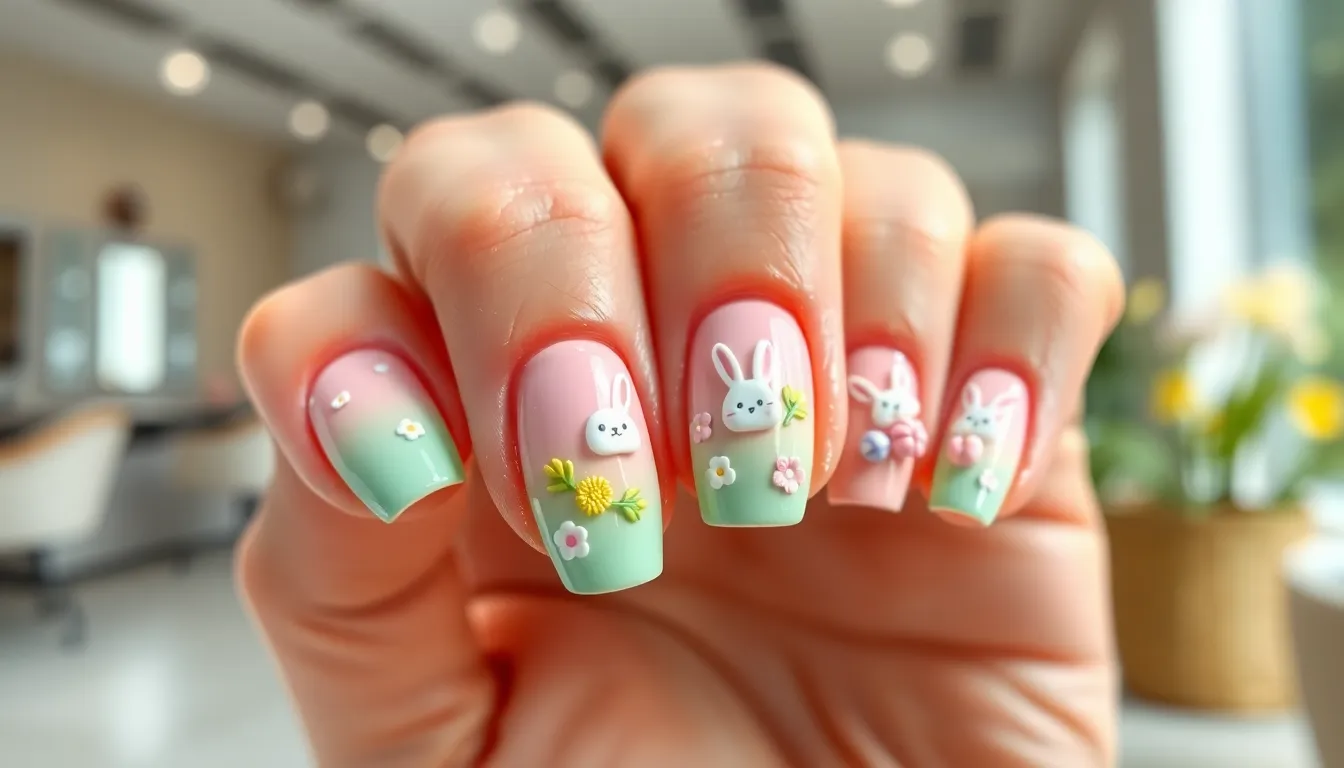
Elevating your Easter nail art to professional standards requires mastering advanced techniques that create stunning, long-lasting results. We’ll explore three essential salon-quality approaches that transform simple Easter themes into sophisticated masterpieces.
Gel Polish Easter Ombre
Gel polish ombre techniques deliver the smooth color transitions that make Easter nails truly captivating. Baby pink, sky blue, mint green, and lavender create the perfect pastel palette for achieving this elegant effect. We recommend starting with your lightest shade at the cuticle and gradually blending toward your chosen accent color at the tip.
Combining different pastel hues adds depth while maintaining that playful yet sophisticated aesthetic Easter celebrations demand. Professional gel systems cure under UV light for 30-60 seconds per coat, ensuring your ombre gradient stays vibrant for up to three weeks. Sponge blending between each cured layer creates seamless transitions that rival any high-end salon finish.
Multiple thin coats work better than attempting dramatic color changes in single applications. Blending while the gel remains tacky allows colors to merge naturally before curing. Top coat application seals the design and provides that glossy, professional finish that makes Easter ombre nails photograph beautifully.
Hand-Painted Easter Scenes
Hand-painted Easter motifs require steady brushwork and quality acrylic paints designed for nail art applications. Bunnies, eggs, and flowers become intricate focal points when we use bright, cheerful colors that capture spring’s renewal energy. Fine detail brushes sized 000 to 2 give us the precision needed for creating realistic Easter scenes.
Incorporating multiple Easter elements on different nails tells a complete story across your manicure. We suggest painting meadow backgrounds first, then adding foreground elements like hopping bunnies or blooming tulips. Layering techniques build dimensional scenes that appear to have depth and movement.
Professional acrylic paints stay workable longer than regular polish, allowing time for blending and detail work. Sealing each painted layer with thin topcoat applications protects your artwork while building toward that salon-quality finish. Practice on nail wheels helps perfect your brushstrokes before working on actual nails.
3D Easter Charm Applications
3D charms transform flat nail designs into textured Easter celebrations that catch light beautifully. Easter eggs, bunnies, and flower charms create whimsical focal points when we strategically place them on accent nails. Quality nail glue ensures these decorative elements stay secure throughout your Easter festivities.
Pairing 3D charms with complementary nail art creates cohesive designs that look professionally planned. We recommend limiting charms to one or two accent nails per hand to avoid overwhelming the overall aesthetic. Rhinestones and micro pearls can bridge the gap between charmed nails and simpler designs on remaining fingers.
Professional application involves slightly embedding charms into wet topcoat for maximum adhesion. Filing around charm edges creates smooth transitions that prevent snagging on clothing or hair. Multiple topcoat layers over and around 3D elements provide durability while maintaining that glossy, salon-finished appearance that makes Easter nail art truly special.
Conclusion
We’ve explored countless ways to transform your nails into Easter masterpieces that celebrate spring’s arrival. From delicate pastels and whimsical bunny designs to faith-inspired crosses and shimmering holographic effects there’s truly something for every style preference and skill level.
These Easter nail ideas offer the perfect opportunity to express your creativity while honoring the season’s spirit of renewal. Whether you’re heading to brunch with family or participating in community egg hunts your nails can become beautiful conversation starters that capture the joy of this special holiday.
Don’t hesitate to mix and match techniques or put your own spin on these designs. The beauty of Easter nail art lies in its versatility and the personal touch you bring to each creation. Your fingertips are ready to bloom with the season!
Frequently Asked Questions
What nail colors are best for Easter nail art?
Soft pastel colors are perfect for Easter nail designs. Consider baby pink and lavender for an ethereal look, mint green and butter yellow for cheerful vibes, or powder blue and peach for gradient effects. These spring-inspired shades capture the fresh, renewal spirit of Easter and complement traditional holiday themes beautifully.
How can I create bunny-themed Easter nails at home?
Start with simple white bunny silhouettes on pastel backgrounds for elegance. Try 3D bunny ear accent nails for added dimension, or create bunny footprint trails across your nails. Use dotting tools for simple shapes and nail art brushes for details. These whimsical designs are perfect for celebrating Easter’s playful spirit.
What are some easy DIY Easter egg nail designs?
Hand-paint Easter eggs with floral or animal patterns, or try classic polka dots using pastel colors. Use marbling and sponge blending techniques to recreate naturally dyed egg patterns. Striped and chevron patterns offer modern twists on traditional designs, all achievable with basic nail art tools at home.
How do I create floral Easter nail art?
Try cherry blossom branches with soft pink ombre backgrounds, add dainty daisy or tulip accents using gel strips or hand painting, or experiment with watercolor flower techniques. Blend pastel polishes for ethereal effects and use fine brushes for delicate outlines. These designs perfectly embody spring’s renewal spirit.
Can I incorporate religious themes into Easter nail art?
Absolutely! Create cross symbol accent nails using simple outlines and metallic polishes, add dove and olive branch motifs representing peace, or incorporate scripture verses with elegant fonts. Use serene color palettes and delicate details like rhinestones to create reverent yet stylish expressions of Easter’s spiritual significance.
What tools do I need for DIY Easter nail art?
Essential tools include dotting tools for flowers and details, nail art brushes for painting, stamping plates for professional patterns, and water marbling supplies for organic designs. Quality base and top coats are crucial, along with pastel polishes, nail strips, and optional 3D embellishments for enhanced designs.
How can I add shimmer to my Easter nails?
Use holographic polishes or stickers for rainbow effects on Easter egg designs. Try rose gold polish for luxurious warmth, or create iridescent pastel glitter gradients. Layer different shimmer effects for intensity, and consider adding glitter accents to traditional Easter themes while maintaining the holiday’s festive spirit.
What are some advanced Easter nail art techniques?
Professional techniques include gel polish ombre for smooth transitions, hand-painted Easter scenes combining multiple elements, and 3D charm applications for texture. Basket weave patterns using layered polishes, grass texture bases with specialized techniques, and water marbling for unique organic patterns elevate designs to salon-quality standards.
