We’ve all been there – staring at our nails and craving something more exciting than basic polish. Glitter nails are the perfect solution to transform your manicure from ordinary to absolutely stunning. Whether you’re preparing for a special occasion or simply want to add some sparkle to your everyday look, glittery nail designs offer endless possibilities.
From subtle shimmer to bold statement nails, we’ll explore the most creative and trendy nail glitter ideas that’ll make your fingertips the center of attention. These dazzling designs aren’t just for special events – they’re versatile enough to complement any style or mood.
Ready to discover how a little sparkle can completely elevate your nail game? We’ve gathered the most inspiring glitter nail art techniques that are surprisingly easy to achieve at home, plus pro tips to make your glittery manicure last longer than ever.
Classic Silver Glitter Nail Ideas for Timeless Elegance
Silver glitter remains the ultimate choice for sophisticated nail art that never goes out of style. We’ve curated these classic silver designs that work beautifully for any occasion.
Full Coverage Silver Sparkle
Full coverage silver glitter creates maximum impact with minimal effort required from your nail art routine. Apply a clear base coat first, then use a dense silver glitter polish to cover each nail completely from cuticle to tip. Build up the coverage with 2-3 thin coats rather than one thick application to avoid clumping and ensure even distribution.
Fine silver glitter particles create an elegant shimmer that catches light beautifully under both natural and artificial lighting conditions. We recommend brands like Essie’s “Set in Stones” or OPI’s “My Voice is a Little Norse” for professional quality results. Seal the look with a high-quality top coat to smooth the texture and extend wear time up to 10 days.
Silver Glitter French Tips
Silver glitter French tips offer a modern twist on the classic French manicure that’s perfect for special occasions or everyday elegance. Start with a nude or clear base color that complements your skin tone, then apply silver glitter polish only to the tips of your nails using a steady hand or nail guides for precision.
Create clean lines by using a thin nail art brush dipped in silver glitter polish, working from one side of the nail to the other in smooth strokes. We suggest making the glitter tips slightly thicker than traditional white French tips to showcase the sparkle effect properly. This technique works especially well on almond or oval nail shapes that naturally elongate the fingers.
Accent Nail Silver Shimmer
Accent nail designs with silver shimmer provide the perfect balance between subtle elegance and eye-catching detail. Choose one nail on each hand, typically the ring finger, to feature full silver glitter coverage while keeping the remaining nails in a complementary solid color like soft pink, nude, or classic white.
Mix different silver glitter textures on your accent nails by layering fine shimmer polish with larger holographic pieces for added dimension. We recommend applying the base glitter coat first, then strategically placing larger glitter pieces with a dotting tool or tweezers before sealing with top coat. This creates a custom jewelry-like effect that elevates any outfit.
Bold Gold Glitter Nail Designs for Glamorous Looks
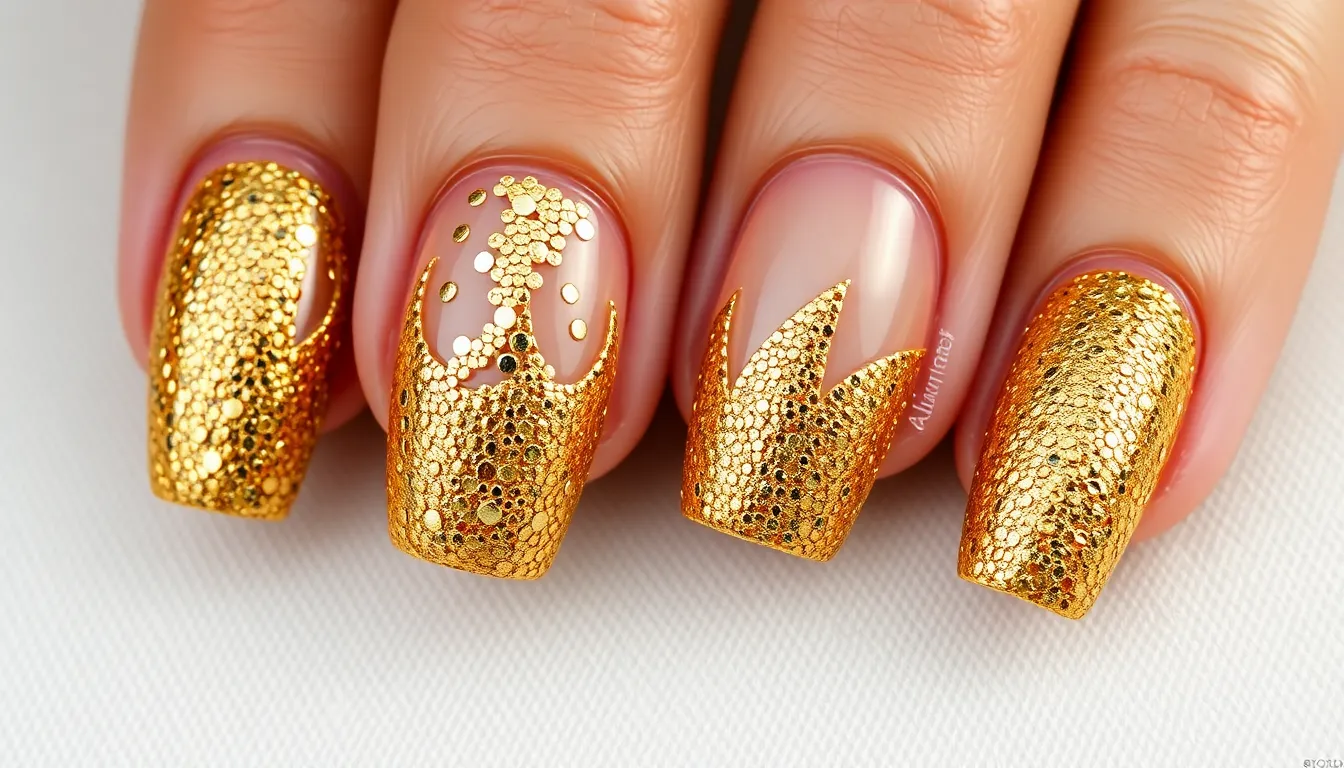
Gold glitter transforms your nails into luxury statements that command attention. We’ve curated these show-stopping designs that blend sophistication with bold glamour.
Chunky Gold Glitter Overlay
Creating this dramatic overlay requires layering chunky gold pieces for maximum impact. Start with a clear base coat to protect your natural nails from staining. Apply gold glitter polish generously or place individual chunky glitter pieces across the entire nail surface for textural dimension. Build up the glitter in thin coats rather than one thick application to prevent bubbling. Seal everything with a quality top coat to lock in the glitter and ensure your manicure lasts longer without chipping.
Gold Leaf and Fine Glitter Combo
Combining delicate gold leaf with fine glitter creates an upscale nail art design. Begin with your protective base coat before applying gold leaf pieces to half of each nail for sophisticated elegance. Press the leaf gently onto tacky polish to ensure proper adhesion. Fill the remaining nail space with fine gold glitter to create beautiful textural contrast. This technique works especially well on accent nails paired with solid colors. Finish with a smooth top coat to blend the different textures seamlessly.
Gradient Gold Glitter Fade
Achieving the perfect gradient requires building glitter intensity from cuticle to tip. Apply your base coat first, then start with light gold polish near the cuticle area. Gradually increase the glitter density as you work toward the nail tip using progressively heavier glitter concentrations. Use a makeup sponge to dab and blend the transition areas for smooth color flow. This ombre effect creates stunning depth that catches light beautifully from every angle.
Rainbow Glitter Nail Art for Colorful Expression
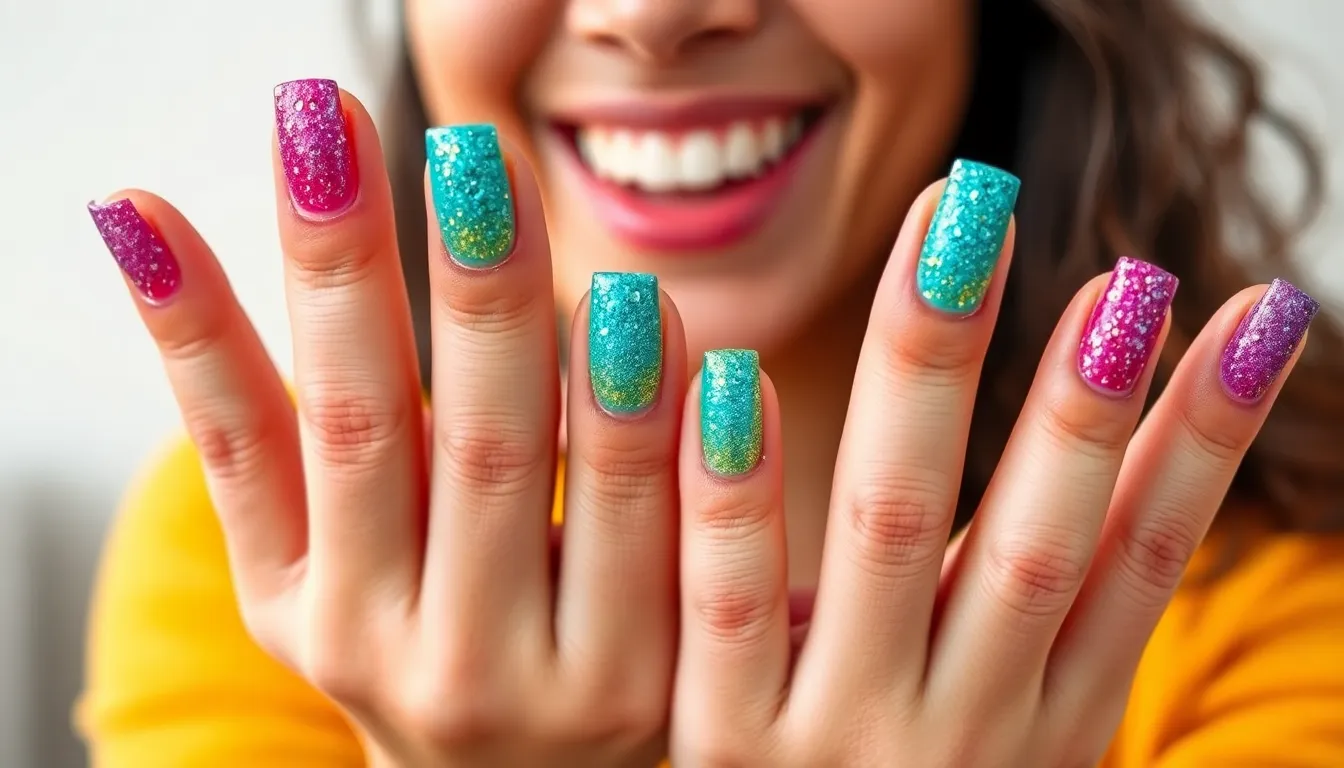
We’re taking glitter nail art to the next level with vibrant rainbow designs that showcase your personality through color.
Multi-Color Glitter Ombre
Ombre glitter techniques create stunning gradient effects that blend multiple rainbow colors seamlessly from cuticle to tip. Start with your lightest shade at the base and gradually build intensity with darker hues toward the nail tips. We recommend using a makeup sponge to dab on each color layer, creating smooth transitions between shades like turquoise, pink, yellow, and purple.
Color selection matters significantly for achieving professional looking ombre results. Choose colors that naturally fade into each other, such as pastel rainbow shades for a soft look or bold primary colors for dramatic impact. Apply thin coats and allow each layer to dry completely before adding the next shade to prevent muddying.
Rainbow Confetti Scatter Design
Confetti nail effects bring playful celebration vibes to any manicure using small dots of different colored glitters scattered across the nail surface. This technique works perfectly for parties, festivals, or whenever you want to add joy to your look. Use a dotting tool or toothpick to place individual glitter pieces in random patterns over a clear or nude base coat.
Random placement creates the most authentic confetti appearance rather than structured patterns. Mix various glitter sizes and colors like red, blue, green, and gold to mimic real confetti pieces. We suggest concentrating more dots near the cuticle area and spacing them out toward the tips for a natural scattered effect.
Holographic Rainbow Glitter Effects
Holographic finishes create mesmerizing rainbow spectrums that shift colors as light hits your nails from different angles. Apply a holographic glitter top coat over any base color to instantly transform your manicure into a prismatic masterpiece. These polishes contain special particles that reflect light into rainbow patterns.
Layering multiple holographic products enhances the rainbow intensity and creates more complex dimensional effects. We recommend starting with a dark base color like black or navy to make the rainbow spectrum pop more dramatically. Apply two thin coats of holographic glitter polish, allowing each layer to dry completely for maximum shine and color payoff.
Seasonal Glitter Nail Ideas for Year-Round Inspiration
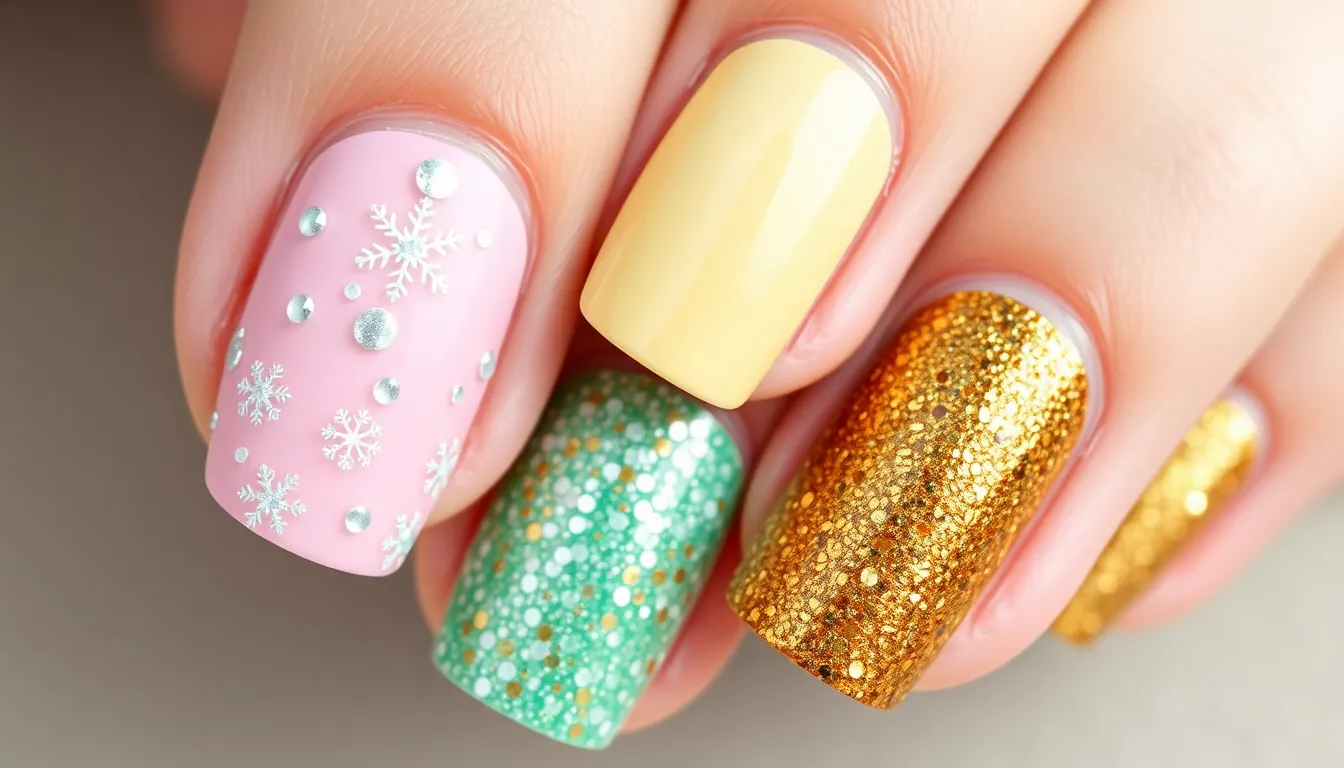
We’re excited to share how seasonal glitter nail designs can keep your manicure fresh throughout every month of the year. Each season brings unique color palettes and themes that perfectly complement glitter nail art.
Winter Snowflake Glitter Patterns
Winter snowflake patterns transform your nails into a frosty wonderland using strategic glitter placement. White and light blue glitter create the perfect base for capturing that crisp winter atmosphere we all love during the colder months. Apply these cool tones over a nude or clear base to mimic the delicate appearance of actual snowflakes.
Gold and silver snowflakes elevate winter nail art to luxurious heights when layered over white or light blue polish. Position metallic glitter pieces to form snowflake shapes using a small brush or dotting tool. Dark blue glitter ombré adds dramatic flair by concentrating deeper sparkles at the nail tips and gradually fading toward the cuticles.
Spring Pastel Glitter Combinations
Spring pastel combinations bring soft elegance to your fingertips as flowers begin to bloom. Mix pastel pink, blue, and yellow glitters with clear polish to create a dreamy rainbow effect that captures spring’s gentle beauty. Layer these delicate shades over white or cream bases for maximum color impact.
Floral glitter accents complement hand-painted flower designs by adding sparkle to petal edges and centers. Dust fine pastel glitter over wet topcoat to create a subtle shimmer that enhances your spring nail art. Choose complementary pastel shades that match your floral color scheme for cohesive seasonal designs.
Summer Beach-Inspired Glitter Nails
Summer beach themes capture ocean vibes through carefully selected aquatic glitter combinations. Seafoam green and gold glitter create stunning beach-inspired looks when applied over neutral bases like beige or white. Apply gold accents strategically to mimic sunlight dancing on ocean waves.
Mermaid scales glitter uses shifting colors in turquoise and purple shades to recreate that magical underwater effect. Layer different sizes of iridescent glitter pieces to build texture and depth. Create scale patterns by applying glitter in overlapping curved lines using a fan brush for authentic mermaid nail art.
Fall Autumn Leaf Glitter Designs
Fall autumn themes celebrate nature’s changing colors through warm glitter combinations that mirror falling leaves. Golden and copper glitters work beautifully over earthy base colors like brown, burnt orange, and deep red. Apply these metallic shades in gradient patterns to replicate the natural color variation found in autumn foliage.
Berry red and orange glitter combinations create vibrant autumn displays perfect for seasonal celebrations. Mix different glitter sizes to add texture and visual interest to your fall manicure. Concentrate deeper colors near the cuticle area and blend toward lighter tones at the nail tips for a natural leaf-like appearance.
Minimalist Glitter Nail Concepts for Subtle Sparkle
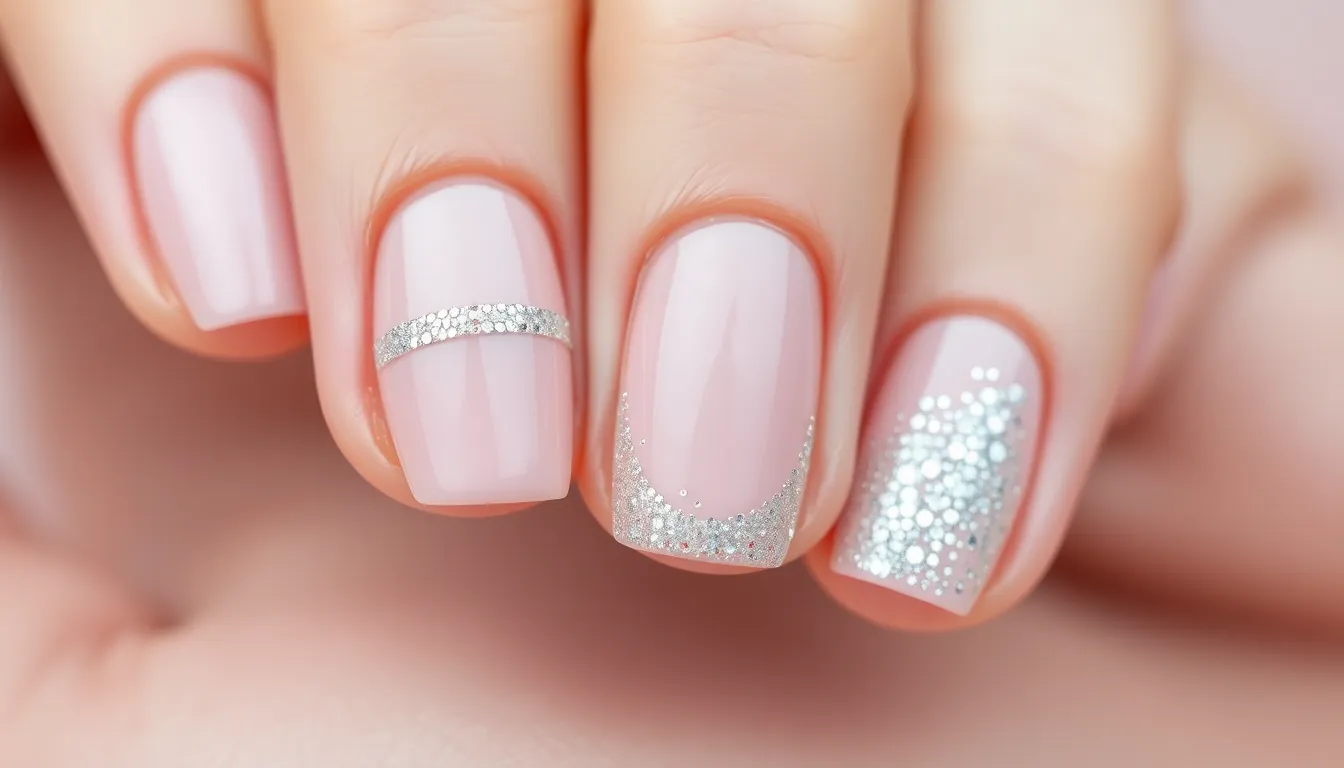
When we want to add sparkle without overwhelming our nail design, minimalist glitter concepts offer the perfect solution. These techniques create sophisticated looks that complement any style while maintaining elegance.
Single Glitter Accent Stripe
Single glitter accent stripes transform ordinary manicures with just one precise line of sparkle. We recommend applying this stripe across your ring finger to create a focal point that draws attention without overpowering the entire design. Using a thin brush ensures the stripe maintains clean edges and professional appearance.
Choosing glitter colors that complement your base polish creates visual harmony throughout your manicure. Silver glitter works beautifully with cool tones like blues and purples, while gold glitter enhances warm shades such as corals and peaches. We’ve found that positioning the stripe horizontally across the nail center creates the most balanced look.
Delicate Glitter Cuticle Line
Delicate glitter cuticle lines add sophistication through subtle placement near the nail base. This technique requires painting a thin line of glitter polish just above the cuticle area to create an elegant accent that catches light beautifully. Small dotting tools or specialized nail art brushes help us achieve the smooth, even lines essential for this minimalist design.
We suggest using micro glitters for cuticle lines since they provide sparkle without appearing chunky or overwhelming. Clear base coats prevent the glitter from adhering directly to the nail plate, making removal easier while protecting nail health. Sealing the design with a quality top coat ensures the delicate line stays intact for days.
Micro Glitter Dot Patterns
Micro glitter dot patterns create textured nail art through carefully placed sparkly accents. We apply small dots of micro glitter polish across the nail surface using dotting tools to achieve uniform size and spacing. Even distribution is key to maintaining the minimalist aesthetic while adding visual interest.
Strategic dot placement can enhance nail shape and create optical illusions. Placing dots along the nail edges makes fingers appear longer, while concentrating them near the cuticle draws attention upward. We recommend limiting patterns to 5-7 dots per nail to maintain the subtle, refined appearance that defines minimalist glitter nail art.
Testing dot spacing on practice surfaces helps perfect the technique before applying to actual nails. Different sized dotting tools create varied effects, with smaller tools producing delicate patterns perfect for everyday wear.
Statement Glitter Nail Looks for Special Occasions
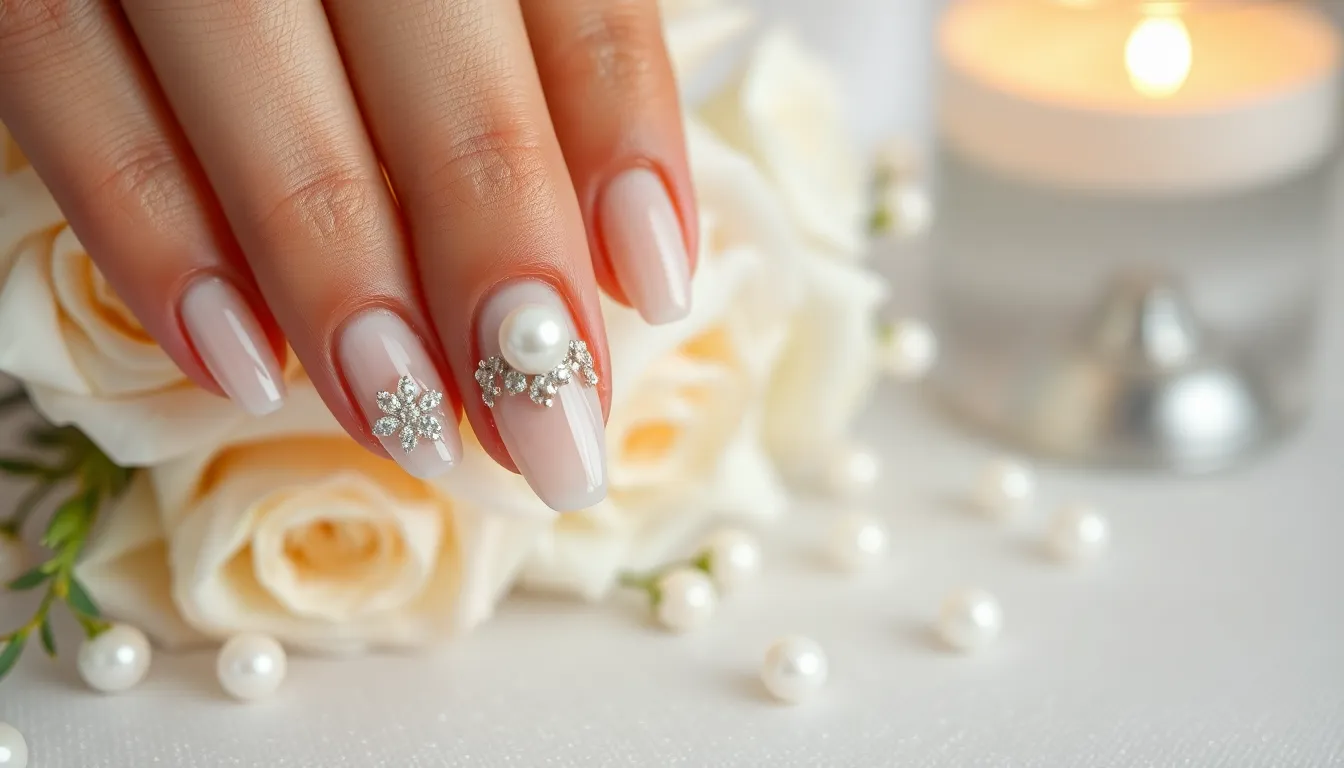
Special occasions call for glamorous nails that make an unforgettable impression. We’ve curated these show-stopping glitter designs to help you shine at life’s most memorable moments.
Wedding Day Pearl and Glitter Mix
Wedding ceremonies deserve nail art that captures elegance and sophistication perfectly. We recommend starting with a clear base coat to create the ideal foundation for this luxurious combination. Pearl details suspended in clear polish create texture and depth when applied as the second layer. Glitter polish layered on top transforms the entire look into a shimmering masterpiece that photographs beautifully.
This classic design works exceptionally well with both white and ivory wedding gowns. We suggest using fine silver or champagne glitter to complement traditional bridal jewelry. Pearl accents can be placed strategically near the cuticle area or scattered across each nail for varied visual interest.
Party Night Chunky Glitter Explosion
Party environments demand bold nail statements that catch light from every angle. We start with vibrant base colors like deep purple, electric blue, or rich burgundy to make chunky glitter pieces pop dramatically. Chunky glitter polish should be applied in thin layers to prevent bubbling and ensure smooth coverage across the nail surface.
Multiple glitter sizes create the most ever-changing visual impact for evening events. We recommend using hexagonal and square glitter pieces mixed with traditional round shapes for maximum sparkle effect. Glossy top coat application is essential to seal everything in place and enhance the overall shine factor.
Holiday Themed Glitter Extravaganza
Holiday celebrations provide perfect opportunities to incorporate seasonal colors into glitter nail designs. We match glitter selections to exact holidays for maximum festive appeal. Christmas designs feature red and green glitter combinations, while Easter calls for soft pastel glitter in pink, yellow, and lavender shades.
Creative pattern applications make holiday nails even more special and memorable. We suggest applying glitter in stripes, polka dots, or geometric shapes rather than full coverage for unique visual interest. Halloween designs work beautifully with orange and black glitter, while Fourth of July nails shine with red, white, and blue combinations that celebrate patriotic spirit perfectly.
DIY Glitter Nail Application Techniques and Tips

Mastering professional glitter nail application starts with understanding the fundamentals. We’ll walk you through proven techniques that ensure stunning results every time.
Proper Base Coat Preparation
Base coat preparation sets the foundation for flawless glitter application. We recommend applying a thin layer of clear or colored base coat to create a smooth surface that prevents uneven glitter adhesion. Allow the base coat to dry completely before proceeding with glitter application, as wet base coats can cause streaking and irregular coverage.
Clean nails provide the best canvas for glitter polish. We suggest pushing back cuticles and buffing nail surfaces gently to remove ridges. Dehydrating the nail plate with rubbing alcohol eliminates oils that could interfere with polish adhesion.
Glitter Placement Methods
Dunking technique delivers the most even glitter coverage for full nail designs. We apply a small amount of wet nail polish to the nail, then dip the finger directly into loose glitter while tilting to coat evenly. This method ensures comprehensive coverage without gaps or thin spots.
Brush application works perfectly for precise glitter placement. We mix loose glitter with clear top coat and apply directly using a flat brush, working quickly since the mixture dries fast. This technique offers excellent control for gradient effects and accent placement.
Sponging creates beautiful textured glitter effects. We use makeup sponges to dab glitter polish onto nails, building up layers gradually for dimensional looks. Pat the sponge gently rather than wiping to avoid disturbing previously applied glitter.
Gradient placement adds sophisticated depth to glitter manicures. We apply glitter from nail tips downward, using progressively less glitter as we move toward the cuticles. This creates a natural fade effect that’s both elegant and eye catching.
Top Coat Sealing Strategies
Clear top coat sealing protects glitter and extends manicure longevity. We apply generous layers of high quality clear top coat to completely encapsulate glitter particles and create a smooth finish. Multiple thin coats work better than one thick application for preventing bubbles.
Thick brush application ensures even top coat coverage over textured glitter surfaces. We use wide, flat brushes to distribute top coat evenly across the entire nail surface. This technique prevents streaking and fills in gaps between glitter pieces effectively.
Edge sealing prevents glitter from lifting at nail tips. We cap the free edge of each nail with top coat, wrapping slightly underneath for maximum durability. This extra step significantly extends the life of glitter manicures.
Glitter Nail Maintenance and Removal Best Practices
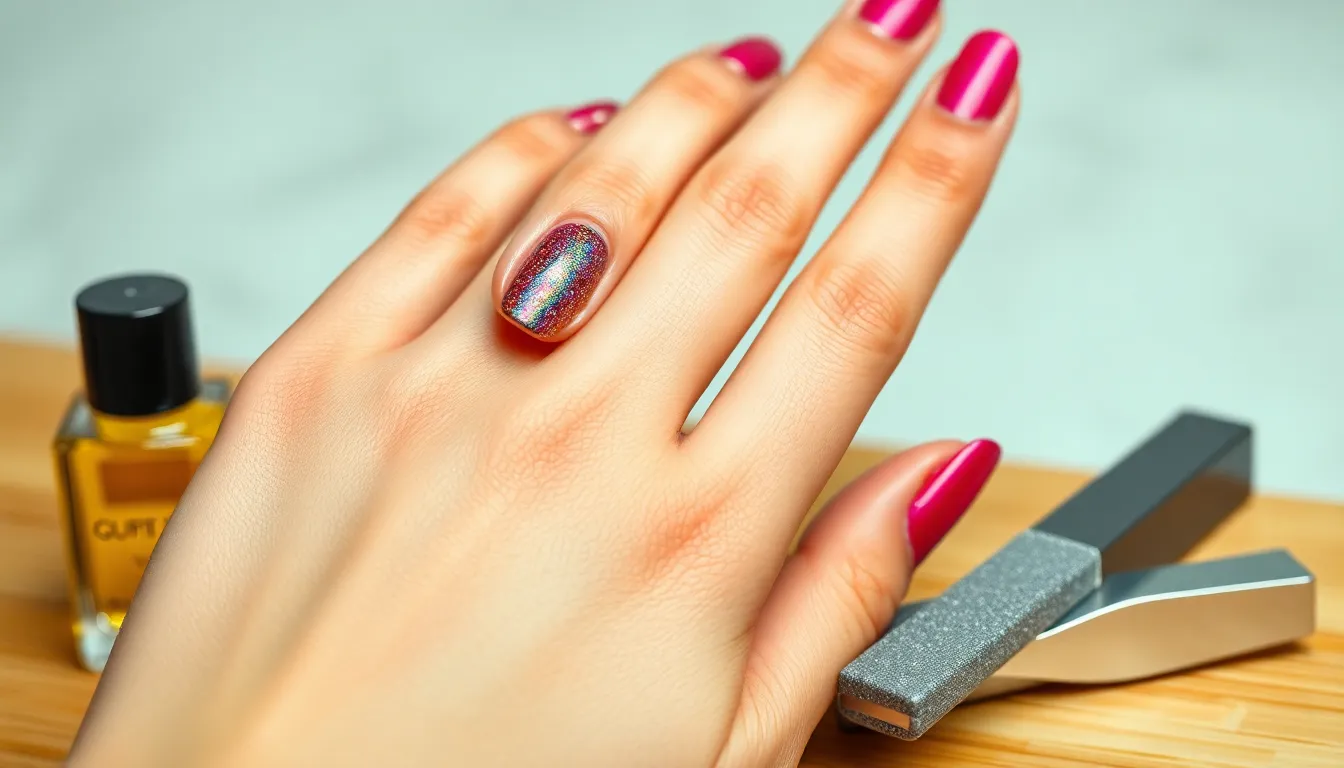
Proper care for your glitter manicure ensures beautiful nails that last longer while keeping your natural nails healthy. We’ll share expert techniques that make maintaining and removing glitter polish effortless.
Extending Glitter Manicure Longevity
Base coat application forms the foundation of a long-lasting glitter manicure by protecting your natural nails and extending polish life. Apply one thin layer of quality base coat before your glitter polish to create a smooth surface that prevents chipping and staining.
Regular touch-ups maintain the shine and prevent chipping when we apply a top coat every 3-4 days. Professional nail technicians recommend using a fast-drying top coat to seal the glitter particles and restore the glossy finish that makes your manicure look fresh.
Nail oil treatments keep cuticles moisturized and prevent drying around glitter polish edges. Massage a few drops of cuticle oil around your nail beds daily to maintain flexibility and prevent the polish from lifting at the edges.
Edge sealing prevents premature chipping by running your top coat brush along the nail tips to create a protective barrier. This technique locks the glitter particles in place and extends your manicure by several extra days.
Safe Glitter Polish Removal Methods
Acetone soaking method provides the most effective way to dissolve stubborn glitter polish without excessive scrubbing. Soak cotton balls in pure acetone, place them directly on each nail, and wrap with aluminum foil for 10-15 minutes to soften the glitter completely.
Top coat layering technique makes removal easier by applying a non-glitter top coat over your glitter manicure before using regular nail polish remover. This method allows both layers to dissolve together, reducing the time and effort needed for complete removal.
Gentle buffing removes any remaining glitter particles after using nail polish remover without damaging your natural nails. Use a fine-grit buffer in light, circular motions to eliminate stubborn glitter pieces that acetone couldn’t dissolve.
No force approach prevents nail damage by avoiding aggressive scraping or peeling of glitter polish. Patient soaking and gentle removal techniques protect your nail plate from thinning and weakness that harsh removal methods can cause.
Nail Health After Glitter Application
Moisturizing treatments restore nail and cuticle health after glitter removal by replenishing lost oils and preventing dryness. Apply a rich nail and cuticle cream or oil immediately after removal and continue daily treatments for at least a week.
Frequency limitations protect your nails from damage by spacing glitter manicures at least two weeks apart to allow recovery time. Constant glitter application and removal can weaken nail plates, so we recommend alternating with regular polish or nail treatments.
Strengthening routines rebuild nail integrity between glitter applications using protein-rich base coats or nail hardeners. These products fill microscopic gaps in the nail plate that frequent acetone exposure can create, restoring strength and flexibility.
Chemical avoidance maintains nail health by steering clear of harsh removers that strip natural oils and cause excessive dryness. Choose acetone-free removers for regular polish and reserve pure acetone only for stubborn glitter removal when necessary.
Conclusion
We’ve covered an extensive range of glitter nail possibilities that’ll transform your manicure game forever. From timeless silver elegance to bold gold statements and vibrant rainbow creations you now have the tools to express your unique style.
The seasonal designs we’ve shared ensure your nails stay fresh throughout the year while our minimalist approaches prove that less can be more impactful. Whether you’re preparing for a wedding day or planning the perfect party look these glitter techniques will make you shine.
Remember that proper application and maintenance are key to achieving salon-quality results at home. With the right base coat preparation removal techniques and aftercare your glitter manicures will look stunning and last longer.
It’s time to grab your favorite glitters and start experimenting. Your nails are waiting to become your next masterpiece!
Frequently Asked Questions
What occasions are glitter nails suitable for?
Glitter nails are versatile and appropriate for any occasion, not just special events. They can range from subtle, minimalist designs perfect for everyday wear to bold, statement looks ideal for parties, weddings, or holidays. The key is choosing the right glitter intensity and color palette to match your setting and personal style.
How do I apply glitter nail polish for even coverage?
For even glitter coverage, start with a clear base coat and apply multiple thin layers of glitter polish rather than one thick coat. Use the dunking method by dipping your nail into loose glitter, or apply with a brush for precision. Allow each layer to dry completely before adding the next.
What’s the best way to remove glitter nail polish?
The most effective method is the acetone soaking technique. Soak cotton balls in acetone, place them on each nail, wrap with foil, and let sit for 10-15 minutes. Gently push off the softened polish and follow with gentle buffing. Always moisturize your nails and cuticles afterward to prevent damage.
How can I make my glitter manicure last longer?
Apply a quality base coat before glitter application and seal with multiple thin layers of top coat. Focus on sealing the nail edges to prevent lifting. Regular top coat touch-ups every few days and using nail oil treatments will help maintain the manicure’s longevity and keep your cuticles healthy.
What are some trendy glitter nail design ideas?
Popular designs include silver glitter French tips, chunky gold overlays, rainbow ombre gradients, and holographic effects. Seasonal options like winter snowflake patterns or autumn leaf designs keep your look fresh. For subtlety, try minimalist accents like single glitter stripes or delicate cuticle lines.
Can I create glitter nail art at home?
Yes! With the right tools and techniques, you can achieve professional-looking glitter nails at home. Essential items include various glitter types, quality base and top coats, makeup sponges for gradients, and dotting tools for precision work. Practice different application methods to find what works best for you.
What glitter colors work best for different skin tones?
Silver and champagne glitters complement cooler skin tones, while gold and bronze enhance warmer complexions. Rainbow and holographic glitters are universally flattering. Consider your base color choice as well – nude bases work with most glitters, while bold colors can create dramatic contrasts or harmonious combinations.
How do I create a glitter gradient effect?
Use a makeup sponge to create smooth gradient transitions. Apply your base color first, then dab different glitter shades onto the sponge and gently press onto the nail, building intensity gradually. Work quickly while the base is slightly tacky, and seal with top coat for a professional finish.
