Christmas is just around the corner and we’re all looking for ways to add some festive sparkle to our holiday look. Your nails are the perfect canvas to showcase your Christmas spirit and creativity. From classic red and green combinations to elegant winter wonderland themes there’s a nail design that’ll perfectly complement your holiday style.
We’ve curated the most stunning Christmas nail art ideas that’ll make your fingertips the star of every holiday gathering. Whether you’re attending office parties family dinners or New Year’s celebrations these designs will help you express your festive mood with flair.
Ready to transform your nails into tiny masterpieces that capture the magic of the season? Let’s jump into these gorgeous Christmas nail designs that range from simple DIY options to more intricate patterns that’ll have everyone asking where you got your nails done.
Classic Red and Green Christmas Nail Designs
Classic red and green combinations never go out of style during the Christmas season. These timeless color pairings capture the essence of traditional holiday celebrations and work beautifully across all nail lengths and shapes.
Traditional Holly and Berry Patterns
Holly leaf designs transform your nails into miniature winter gardens with their distinctive jagged edges and vibrant green hues. We recommend starting with a deep forest green base coat on your accent nails, then using a thin nail art brush to create the characteristic three-pronged holly leaf shape. Small red dots placed strategically near each leaf represent the classic holly berries, completing this festive botanical look.
Berry cluster patterns offer another elegant approach to traditional Christmas nail art. Apply a rich burgundy or classic red base across all nails, then use dotting tools in varying sizes to create berry groupings on one or two accent nails. Green stems and small leaves painted with a detail brush connect the berry clusters, creating a cohesive design that screams holiday sophistication.
Metallic accents elevate traditional holly and berry patterns to glamorous new heights. Adding thin gold lines to outline holly leaves or placing tiny gold beads at berry centers creates dimension and catches light beautifully during holiday gatherings.
Candy Cane Striped Manicures
Diagonal stripes create the most recognizable candy cane pattern on your nails. Start with a bright white base coat on all nails, then use striping tape or nail art brushes to paint diagonal red stripes across each nail surface. The key to perfect candy cane stripes lies in maintaining consistent spacing between each red line.
Curved stripe techniques mimic the actual shape of candy canes for a more literal interpretation. Begin at one corner of your nail and paint gentle curved red lines that follow the natural arc of a candy cane. This technique works especially well on longer nail shapes like almond or coffin styles.
Accent nail variations allow you to incorporate candy cane stripes without overwhelming your entire manicure. Paint three nails in solid red, one in solid white, and create detailed candy cane stripes on your ring finger for a balanced yet festive look.
Emerald and Crimson Color Blocking
Geometric blocking creates bold, modern Christmas nail designs using emerald green and crimson red in distinct sections. Divide each nail into halves, thirds, or diagonal sections using nail tape, then fill each section with alternating colors for a contemporary holiday aesthetic.
Triangular patterns offer endless possibilities for emerald and crimson color combinations. Create Christmas tree silhouettes using emerald triangles on crimson bases, or arrange multiple small triangles in festive patterns across your nail surface.
Ombre transitions blend emerald and crimson seamlessly for a sophisticated color blocking effect. Start with one color at the base of your nail and gradually blend into the second color toward the tip using makeup sponges or gradient brushes. This technique creates depth while maintaining the classic Christmas color scheme.
Festive Winter Wonderland Nail Art
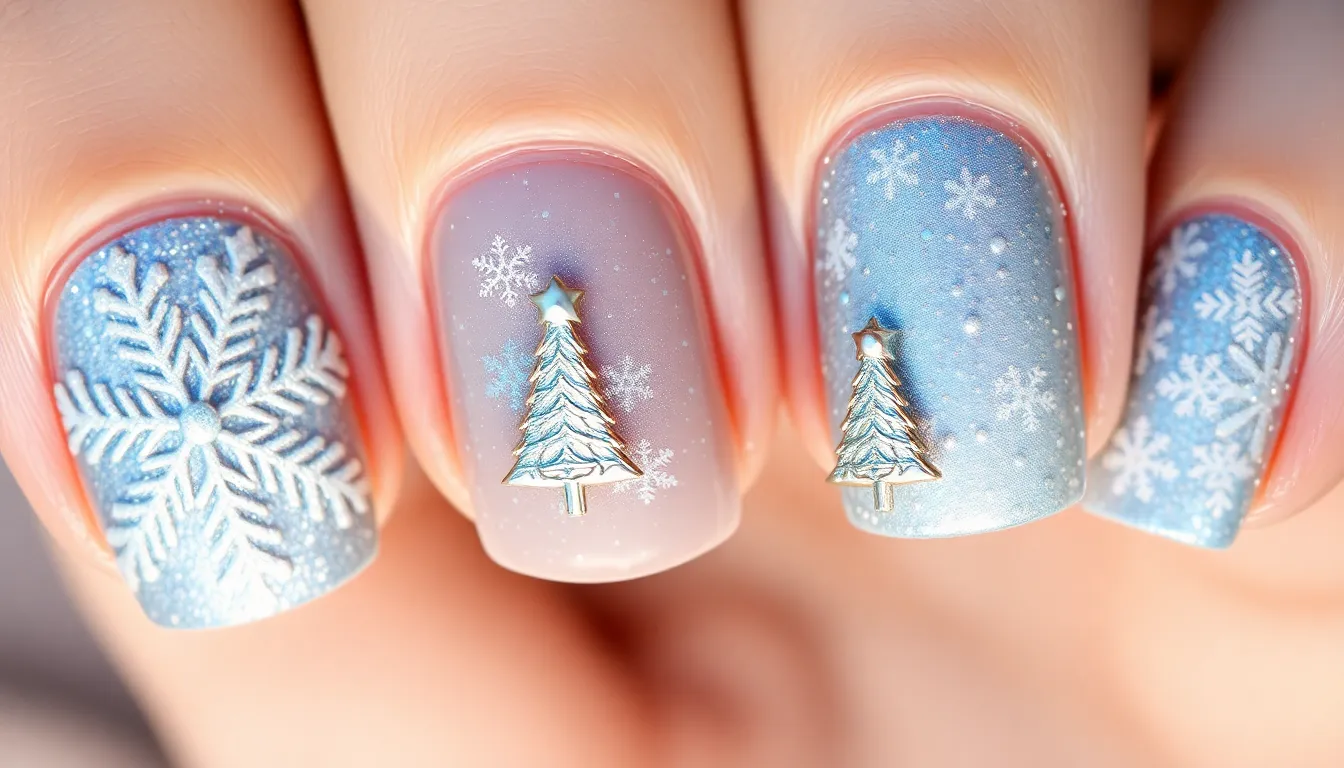
Winter wonderland themes bring ethereal beauty to Christmas nail designs, transforming our fingertips into snowy masterpieces. These designs capture the magic of frost and snow, creating elegant alternatives to traditional holiday colors.
Snowflake and Ice Crystal Designs
Delicate snowflakes create stunning focal points when applied over neutral, white, or soft blue base colors. We recommend using nail art brushes and fine tipped tools to create intricate snowflake patterns that showcase winter’s natural beauty. Glittering accents enhance the holiday shimmer, while crystal embellishments along the bottom rim add luxurious sparkle to each nail.
Different snowflake designs offer varying levels of complexity, from simple geometric patterns to elaborate crystalline structures. Fine white polish creates subtle snowflakes on darker bases, while silver and holographic polishes make patterns pop against lighter backgrounds. Multiple snowflakes scattered across each nail create a blizzard effect that’s both festive and sophisticated.
Frosty Blue and Silver Combinations
Frosty blue shades paired with metallic silver accents create stunning winter effects that shimmer like ice. Chrome and silver finishes complement pale blue tones, producing that coveted frozen appearance perfect for holiday gatherings. Clear glitter topcoats enhance the frosty look while adding dimensional sparkle that catches light beautifully.
Gradient techniques work exceptionally well with these color combinations, blending soft blues into silver tips for an ombre winter sky effect. Metallic foil accents create ice like reflections, while pearl finishes add subtle luminosity that mimics fresh snow. Different blue tones from powder blue to steel blue offer versatility in achieving the perfect winter wonderland aesthetic.
Winter Tree Silhouettes
Chrome mini Christmas trees create adorable focal points that bring winter forests to our fingertips. These tiny tree designs work beautifully as accent nails or repeated across multiple fingers for cohesive winter theming. Nail stickers provide easy application for those seeking professional looking results without advanced artistic skills.
Silhouette techniques using nail art brushes allow for custom tree shapes against winter sky backgrounds. Dark green or black trees stand out dramatically against light blue or white bases, while metallic tree designs add glamorous touches to winter scenes. Forest scenes with multiple tree heights create depth and visual interest, transforming each nail into a miniature winter industry.
Glamorous Gold and Silver Holiday Nails
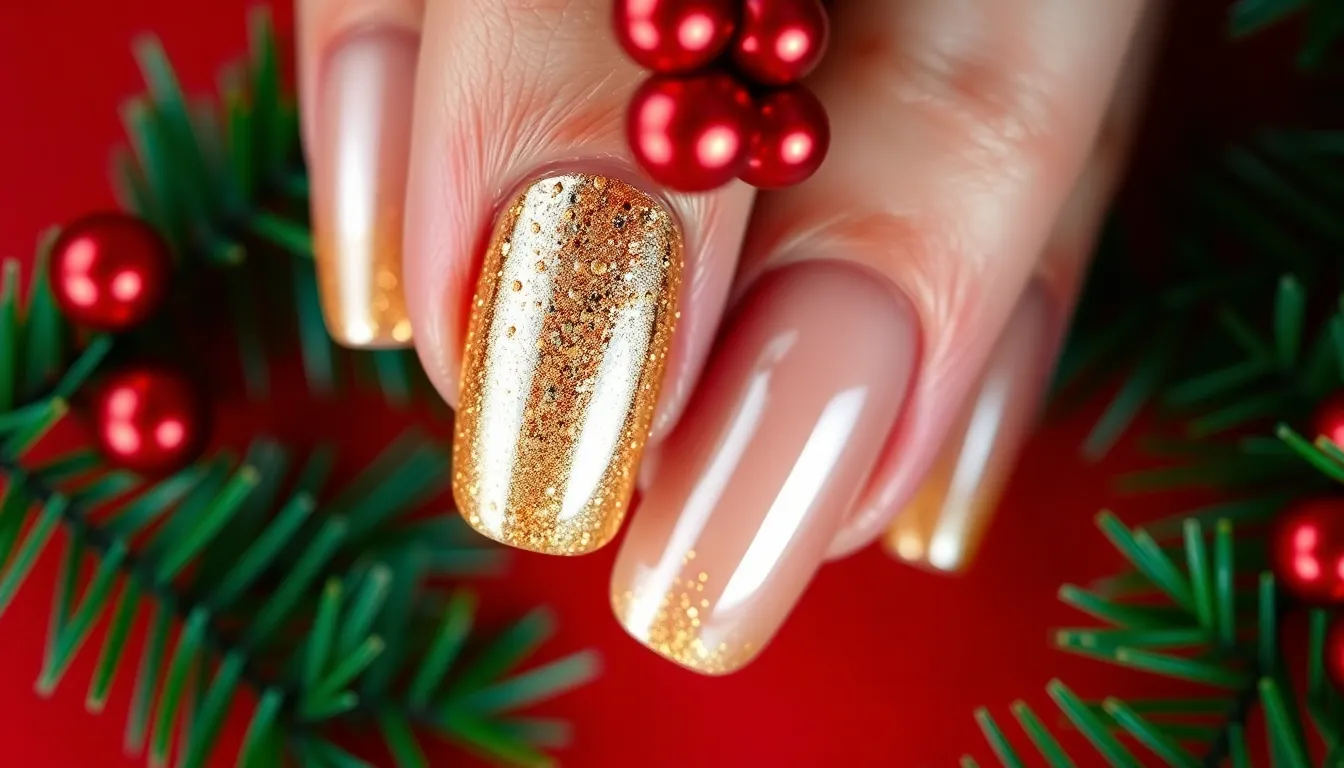
Building on our festive nail art journey, we’re now diving into the sophisticated industry of metallic holiday designs. Gold and silver combinations create an elevated Christmas manicure that perfectly complements any holiday gathering.
Metallic Gradient Effects
Gradient techniques transform your nails into stunning metallic masterpieces that catch light beautifully. We recommend starting with a gold to silver gradient by applying gold polish at the cuticle and gradually blending it toward silver at the nail tip using a makeup sponge. This seamless transition creates depth and movement on each nail.
Silver to gold ombré offers a dramatic reverse effect that’s equally captivating. Begin with silver polish at the base and work upward, blending into gold at the tips for a striking contrast. We’ve found that using a damp beauty sponge helps achieve the smoothest color transitions, while working quickly prevents the polish from drying during the blending process.
Multiple thin coats work better than one thick application when creating these gradient effects. Each layer builds intensity while maintaining the smooth metallic finish that makes these designs so elegant.
Glitter Accent Nail Techniques
Strategic glitter placement adds sparkle without overwhelming your entire manicure. We suggest creating a glitter accent nail by painting one nail per hand with gold glitter polish while keeping the remaining nails in complementary silver. This creates visual interest and prevents the look from becoming too busy.
Glitter tips offer a more subtle approach to incorporating sparkle into your holiday nails. Apply gold or silver glitter polish only to the nail tips, creating a reverse French manicure effect that’s perfect for those who prefer understated glamour. We recommend using striping tape to achieve clean, precise lines when applying glitter to just the tips.
Layering different sized glitter particles creates texture and dimension in your accent nails. Fine glitter provides base coverage while larger hexagonal pieces add eye-catching focal points.
Chrome Finish Applications
Chrome finishes deliver mirror-like effects that epitomize luxury in holiday nail art. Chrome gold finish creates an ultra-reflective surface that mimics precious metal, perfect for special holiday events. We apply chrome powder over a black base coat, then seal with gel top coat for maximum shine and durability.
Chrome silver finish offers a sleek, modern alternative that pairs beautifully with winter whites and cool-toned holiday outfits. The application process remains consistent, but the silver chrome creates a cooler, more contemporary aesthetic.
These chrome applications require exact techniques for best results. We buff the nail surface smooth before application, apply the chrome powder with an eyeshadow applicator, and seal immediately to prevent tarnishing. The result is a professional-quality finish that rivals salon work.
Christmas Character and Icon Nail Designs
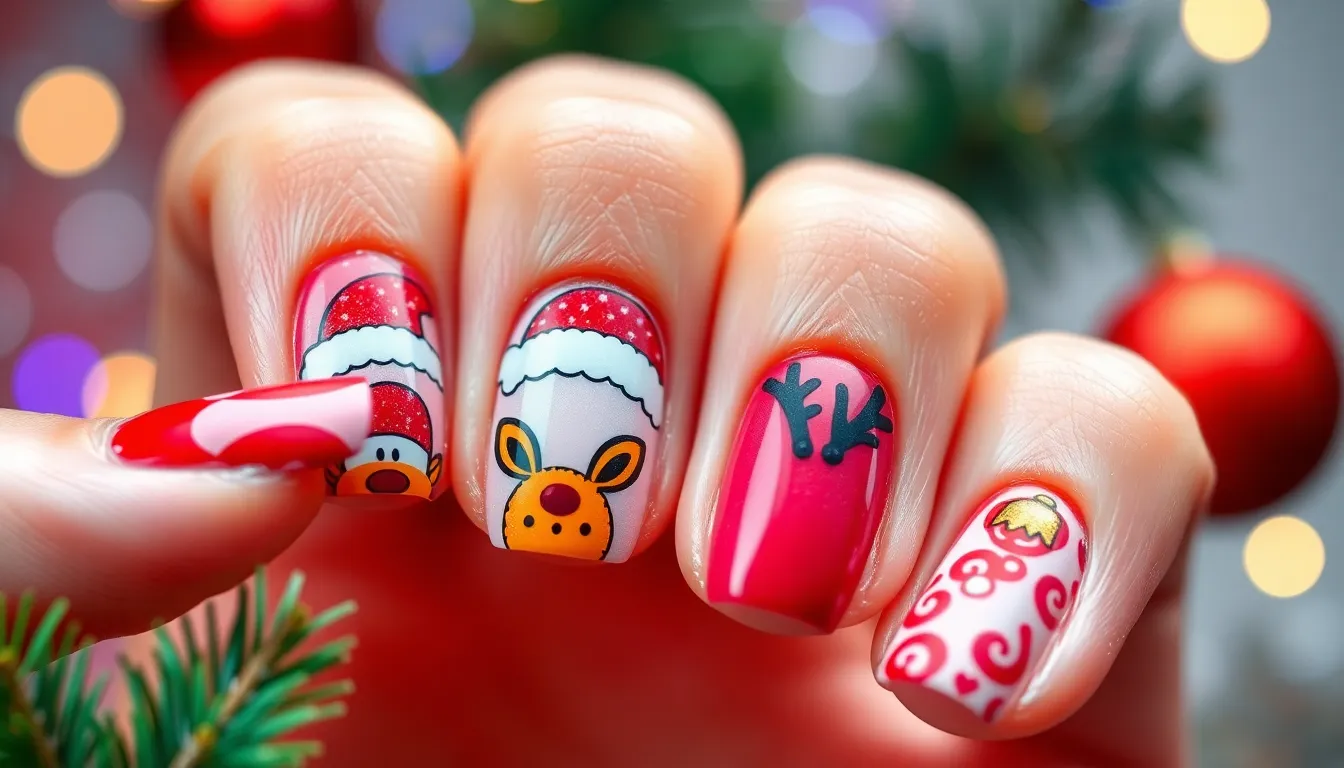
Moving beyond abstract holiday themes, we’re diving into whimsical nail art that brings beloved Christmas characters directly to your fingertips. These playful designs capture the magic of childhood Christmas memories while creating conversation-starting manicures.
Santa Hat and Beard Nail Art
Santa hat nail art transforms your nails into miniature holiday characters with surprising versatility. We recommend starting with a neutral base color like nude or soft pink, then painting a small red triangle near the tip of each nail to represent Santa’s iconic hat. Adding a tiny white pom pom at the triangle’s point completes the festive headwear effect.
Beard details elevate the Santa theme from simple to spectacular. Paint fluffy white clouds below the hat using a small dotting tool or fine brush, creating texture that mimics Santa’s signature facial hair. Combining both elements on accent nails while keeping other nails in complementary solid colors prevents the design from becoming overwhelming.
Variations include Santa face nail art where we paint rosy cheeks, a button nose, and twinkling eyes alongside the hat and beard elements. This comprehensive approach works particularly well on longer nail shapes like almond or coffin styles that provide adequate canvas space.
Reindeer and Christmas Tree Motifs
Reindeer nail art captures the enchantment of Santa’s magical helpers through carefully crafted miniature portraits. We suggest painting brown reindeer silhouettes on neutral backgrounds, adding distinctive antler branches using thin nail art brushes. Rudolph variations feature a bright red dot for his famous glowing nose, creating an instantly recognizable holiday character.
Christmas tree chrome nails offer a modern twist on traditional evergreen imagery. These designs use metallic chrome powders to create shimmering tree shapes that catch light beautifully. We apply the chrome over dark green base coats, then add tiny star toppers using gold nail art pens for authentic tree aesthetics.
Mini tree variations include geometric triangle designs stacked in decreasing sizes to form stylized evergreens. Decorating these triangular trees with colorful dots representing ornaments adds festive detail without requiring advanced artistic skills. Glitter accents around the tree bases simulate fallen snow or twinkling lights.
Ornament-Inspired Decorations
Ornament nail designs recreate the sparkle of hanging Christmas decorations in miniature form. We paint small circular shapes in various metallic shades like gold, silver, and rose gold, then add decorative caps at the top to mimic real ornament hangers. These circular designs work exceptionally well as accent nails paired with solid holiday colors.
Pattern variations within ornament shapes include stripes, polka dots, and swirl designs that mirror traditional glass ball decorations. Using nail art brushes, we create intricate patterns inside each circular ornament, making every nail unique while maintaining cohesive holiday theming. Glitter topcoats enhance the reflective quality that makes real ornaments so captivating.
Three dimensional ornament effects use nail gems and rhinestones to create actual texture rather than painted illusions. We strategically place small crystals to form ornament shapes, securing them with clear topcoat for durability. This technique produces manicures that truly sparkle under holiday lights during festive gatherings.
French Tip Christmas Variations
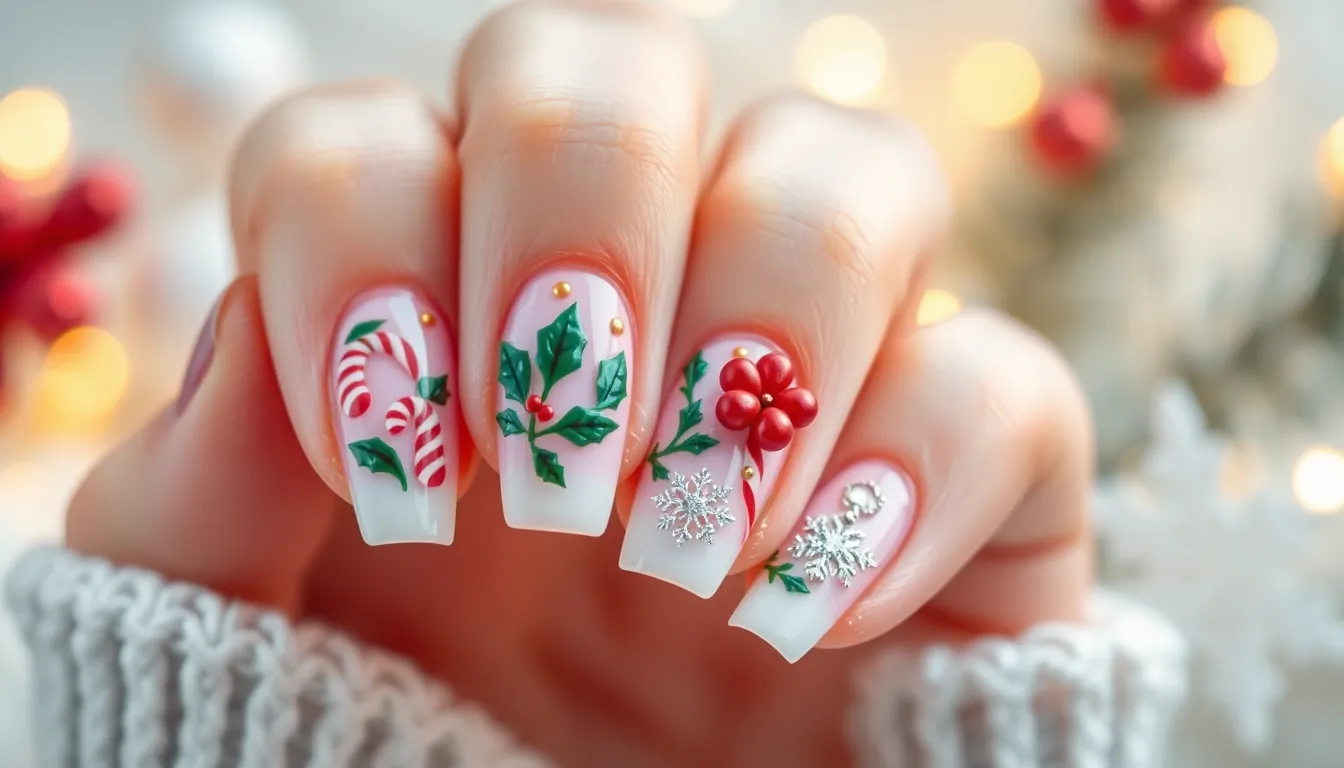
We’re transforming the timeless French manicure with festive holiday touches that capture Christmas magic perfectly. These variations offer sophisticated ways to incorporate seasonal elements while maintaining the elegant simplicity that makes French tips so beloved.
Holiday-Themed French Manicures
Incorporating seasonal elements like candy canes, holly, or snowflakes into the French tip design creates a unique festive look that stands out during holiday gatherings. We recommend starting with a classic nude or clear base and adding these charming details along the tip line for maximum impact. Candy cane stripes work beautifully as alternating red and white patterns across the tips, while delicate holly leaves with tiny red berries create an sophisticated botanical accent. Snowflake designs using white or silver nail art pens add winter wonderland charm that’s perfect for both casual and formal holiday events.
Reverse French with Festive Colors
Using festive colors like green, red, or gold on the base of the nail instead of the tip creates a reverse French manicure effect that feels fresh and modern. We love how this technique allows for bold color placement while keeping the overall look balanced and wearable. Deep emerald green at the base paired with nude tips creates an elegant foundation for holiday outfits, while rich burgundy bases offer warmth and sophistication. Metallic gold bases deliver luxury and glamour that pairs beautifully with both casual sweaters and formal holiday dresses.
Glittery French Tip Combinations
Adding glittering snowflakes to the French tip design creates a winter wonderland effect that catches light beautifully throughout the day. We suggest using fine glitter in silver or iridescent shades to create delicate snowflake patterns that feel magical without being overwhelming. Glittering candy cane tips using red and white glitter deliver a playful holiday look that’s perfect for festive parties and family gatherings. Metallic French tips in gold or silver polish provide sophisticated and festive appearance that works wonderfully for both daytime holiday events and evening celebrations.
DIY Christmas Nail Design Techniques

Creating stunning Christmas nail art at home becomes achievable with the right tools and techniques. We’ll guide you through everything needed to transform your nails into festive masterpieces.
Essential Tools and Supplies
Nail Polish Selection: We recommend gathering various colors including red, green, white, and gold as your foundation palette. Chrome nail polish works exceptionally well for creating those mini Christmas tree designs that catch the light beautifully.
Precision Application Tools: Nail art brushes become indispensable for detailed work like holly patterns and intricate snowflake designs. Dotting tools help create perfect snow dots and ornament details with consistent sizing.
Decorative Elements: Nail glitter adds that essential sparkle to winter wonderland themes and can be applied over base colors for dimensional effects. Nail stickers or decals offer quick answers for complex designs when time is limited.
Protective Finishes: Top coat serves as your design’s protective barrier, preventing chipping and extending wear time. Base coat creates the perfect foundation and protects your natural nails from staining.
Additional Accessories: Nail glue secures heavier decorative elements like gems or 3D stickers. Fine tip brushes allow for precise line work when creating candy cane stripes or tree branches.
Step-by-Step Application Methods
Preparation Phase: Clean and shape your nails to create the perfect canvas for your Christmas designs. Push back cuticles and buff nail surfaces to ensure smooth polish application.
Base Application: Apply a clear base coat to protect your natural nails and help polish adhere better. Allow each coat to dry completely before proceeding to prevent smudging.
Design Creation: Paint your chosen Christmas design using steady, controlled movements with nail art brushes. Work with thin layers to build up color intensity gradually rather than applying thick coats.
Accent Addition: Secure glitter or decorative stickers using a small amount of glue or fresh top coat as adhesive. Press elements gently but firmly to ensure proper bonding.
Sealing Process: Finish with a quality top coat to seal your design and prevent chipping during holiday activities. Apply thin, even strokes to avoid disturbing underlying artwork.
Beginner-Friendly Design Options
Classic Stripe Patterns: Simple red and white stripes create an instant candy cane effect that’s perfect for nail art beginners. Alternate colors in thin bands using tape as guides for clean lines.
Dot and Line Combinations: Dotting tools help create patterns resembling snow or Christmas ornaments without requiring advanced artistic skills. Combine different sized dots with simple lines for festive effects.
Ready-Made Answers: Pre-made stickers and decals provide professional-looking results with minimal effort and skill required. Choose designs featuring holly, snowflakes, or Christmas trees for instant holiday appeal.
Single Accent Approach: Focus your artistic efforts on one accent nail per hand while keeping others in solid festive colors. This technique reduces complexity while still achieving impressive holiday nail art results.
Long-Lasting Christmas Nail Care Tips
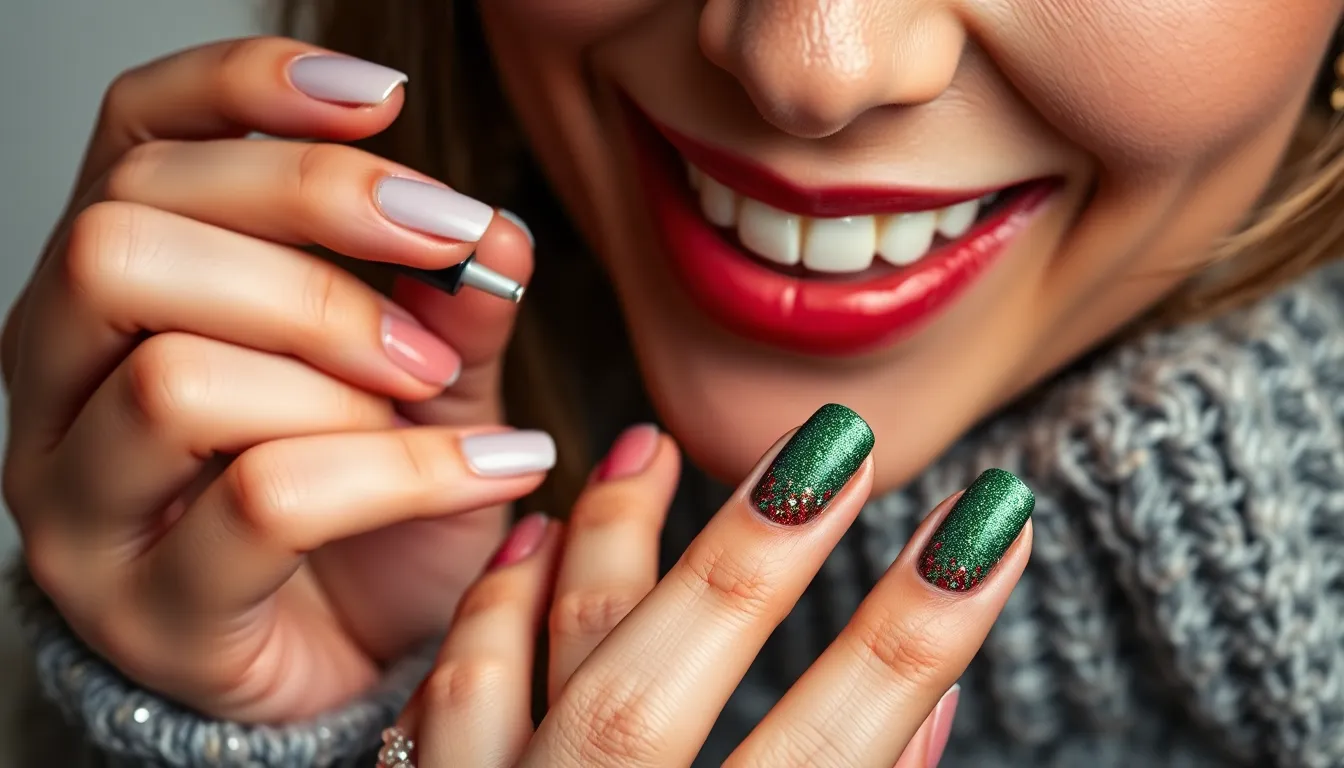
Creating stunning Christmas nail art is only half the battle – making your festive manicure last through all your holiday celebrations requires proper care and maintenance techniques.
Proper Base and Top Coat Application
Foundation layers determine the longevity of your Christmas nail designs. We recommend applying a high-quality base coat to protect your nails from staining and create a smooth surface for your festive colors. Quality base coats also help prevent chipping by creating a strong bond between your natural nail and the polish.
Sealing your holiday nail art with a top coat ensures lasting beauty. Apply a generous layer of top coat to lock in your Christmas designs and add glossy shine. We suggest reapplying top coat every 3-4 days to maintain that fresh-from-the-salon look throughout the holiday season.
Multiple thin layers work better than one thick application. Allow each coat to dry completely before adding the next layer to prevent bubbling and ensure smooth coverage. This technique is especially important when working with glitter polishes or metallic finishes common in Christmas nail art.
Maintenance Techniques for Holiday Events
Regular cuticle care keeps your Christmas manicure looking professional. Apply cuticle oil daily to maintain hydrated, healthy-looking nail beds that frame your festive designs perfectly. We recommend using oils containing vitamin E or jojoba for maximum nourishment.
Strategic touch-ups extend your manicure’s lifespan during busy holiday schedules. Keep a small brush and matching polish colors handy for quick fixes between parties and gatherings. Focus on repairing chips immediately to prevent further damage to your nail art.
Protective measures preserve your designs during holiday activities. Wear gloves when wrapping presents, cooking holiday meals, or cleaning to shield your nails from harsh chemicals and rough surfaces. We suggest keeping rubber gloves in your kitchen and fabric gloves for gift wrapping sessions.
Removal and Nail Health Considerations
Gentle removal techniques protect your natural nails after the holidays. Use acetone-free nail polish removers to prevent excessive drying and brittleness. Soak cotton pads with remover and press them onto each nail for 30 seconds before gently pushing off the polish.
Recovery periods between manicures maintain long-term nail health. We recommend taking breaks from nail polish to allow your nails to breathe and recover from heavy holiday wear. Apply nail strengthener during these rest periods to fortify weak or damaged nails.
Nourishing treatments restore nail health after festive celebrations. Choose nail polishes with nourishing ingredients like keratin or calcium to promote healthy growth. Regular application of cuticle cream and nail strengthening treatments helps repair any damage from frequent polish changes during the holiday season.
Conclusion
Christmas nail art offers endless possibilities to showcase your holiday spirit through creative and festive designs. We’ve explored everything from traditional red and green themes to sophisticated metallic finishes that’ll make your nails the perfect accessory for any holiday celebration.
Whether you’re drawn to whimsical character designs or prefer elegant winter wonderland styles your nails can become miniature works of art that capture the magic of the season. The key is choosing designs that match your personal style and skill level.
With proper preparation quality tools and the right care techniques your Christmas manicure can last throughout the entire holiday season. Don’t forget to give your nails some recovery time after all the festivities to keep them healthy and ready for your next creative adventure.
Frequently Asked Questions
What are the best color combinations for Christmas nail art?
Classic red and green combinations remain the most popular choice for Christmas nail art. Deep forest green paired with rich burgundy creates elegant holly and berry patterns. For a more sophisticated look, try emerald green with crimson red in geometric patterns, or opt for glamorous gold and silver combinations that add metallic elegance to your holiday manicure.
How can I create snowflake designs on my nails?
Use fine nail art brushes with white or silver polish on a neutral or soft blue base. Start with simple dot patterns, then add delicate lines radiating outward to form snowflake shapes. Enhance the design with glitter or crystal embellishments for extra sparkle. Practice on a nail wheel first to perfect your technique before applying to your actual nails.
What tools do I need for DIY Christmas nail art?
Essential tools include nail art brushes in various sizes, dotting tools, and a palette of festive colors (red, green, white, gold). You’ll also need quality base and top coats, nail files, and cuticle pushers. For beginners, consider nail art stickers, striping tape, and pre-made decorations to achieve professional-looking results without advanced techniques.
How can I make my Christmas manicure last longer?
Apply a high-quality base coat before your design and seal with a durable top coat. Perform regular cuticle care and do strategic touch-ups as needed. Protect your nails during holiday activities by wearing gloves when cleaning or cooking. Avoid using your nails as tools, and apply cuticle oil daily to maintain nail health throughout the festive season.
What are some beginner-friendly Christmas nail designs?
Start with classic stripe patterns using striping tape for clean lines. Simple dot and line combinations can create candy cane or holly berry effects. French manicures with festive colored tips are also beginner-friendly. Use pre-made Christmas nail stickers for instant professional results, or try single accent nails with glitter while keeping other nails in solid festive colors.
How do I create a winter wonderland effect on my nails?
Achieve this ethereal look by using frosty blue and silver gradient techniques. Apply multiple thin coats to create smooth color transitions from light blue to silver. Add delicate snowflake patterns with white polish and finish with glitter topcoat. Consider winter tree silhouettes against pale blue backgrounds, or use chrome powders over dark bases for an icy, mirror-like finish.
Can I incorporate Christmas characters into my nail art?
Yes! Santa hat designs work well with red triangles and white fluffy details on neutral bases. Create reindeer motifs using brown silhouettes with distinctive antlers, adding Rudolph’s red nose for fun. Christmas tree chrome nails using metallic powders offer a modern character twist. Use nail gems and three-dimensional decorations to recreate ornament-inspired designs with sparkle and texture.
How do I properly remove Christmas nail art without damaging my nails?
Use acetone-free nail polish remover when possible, and soak cotton pads rather than scrubbing aggressively. For stubborn glitter or chrome finishes, wrap each nail with remover-soaked cotton and foil for 10-15 minutes. Gently push off softened polish, then moisturize nails and cuticles. Allow recovery time between manicures and use nourishing treatments to restore nail health.


