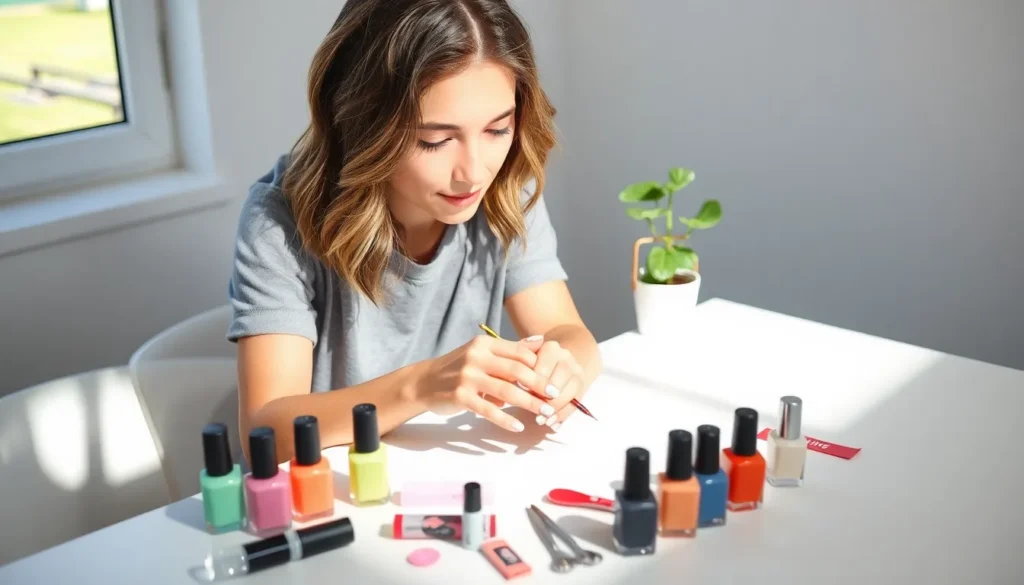
We’ve all been there – scrolling through Instagram and admiring those stunning nail art designs that look impossibly complex. But what if we told you that gorgeous nails don’t require hours at the salon or professional-level skills? Simple nail art can be just as eye-catching and trendy as elaborate designs.
The beauty of minimalist nail art lies in its versatility and accessibility. With just a few basic tools and techniques we’ll share, you can transform your everyday manicure into something special. From delicate dots and clean lines to subtle gradients and geometric patterns, simple doesn’t mean boring.
Whether you’re a complete beginner or someone who’s tried nail art before with mixed results, these easy ideas will boost your confidence and creativity. We’ll show you how to achieve salon-worthy looks using items you probably already have at home, proving that stunning nails are within everyone’s reach.
Simple Geometric Nail Art Designs
Geometric patterns offer the perfect entry point into nail art because they rely on basic shapes and clean lines that anyone can master.
Triangle and Diamond Patterns
Triangular designs create striking visual impact with minimal effort and basic tools. We recommend starting with tape to create crisp triangle edges on your base color. Position small pieces of painter’s tape or nail striping tape in triangular shapes across each nail then paint over with a contrasting shade. Remove the tape while the polish is still slightly wet to reveal sharp geometric lines.
Diamond patterns work beautifully as accent nails or full manicure statements. Create diamonds by painting two triangles that meet at their points or use a thin brush to outline diamond shapes. We’ve found that metallic polishes like gold or silver make diamond patterns pop against darker base colors like navy or burgundy.
Negative space triangles add modern sophistication to any manicure. Paint your base color then use tape to mask off triangular sections before applying a second coat. This technique creates geometric cutouts that show your natural nail underneath.
Minimalist Line Art
Single accent lines transform plain manicures into chic geometric statements. We suggest using nail striping brushes or thin nail art pens to draw clean vertical horizontal or diagonal lines across one or two nails per hand. Position lines at different angles on each accent nail for ever-changing visual interest.
Grid patterns create modern geometric appeal without complex techniques. Paint thin intersecting lines to form squares or rectangles across your nail surface. We recommend keeping grid lines sparse with 3 to 4 sections maximum to maintain the minimalist aesthetic.
Abstract line combinations let you experiment with geometric creativity. Mix straight lines with gentle curves or create intersecting patterns that don’t follow traditional rules. Start with two or three lines per nail then build complexity as your confidence grows.
Color Block Techniques
Two tone blocks deliver maximum impact with simple execution. We divide each nail into geometric sections using tape then fill each section with different colors. Popular combinations include pastels with neutrals or bold contrasts like black and white.
Asymmetrical blocking creates modern artistic flair through uneven geometric divisions. Paint irregular rectangles or triangles across your nail surface using different colors for each section. This technique works especially well with three coordinating shades from the same color family.
Gradient blocks combine color blocking with subtle transitions between shades. We apply each color block then blend the edges slightly while the polish is still wet. Use a small makeup sponge to dab along the color boundaries for smooth geometric transitions.
Easy Floral Nail Art Ideas
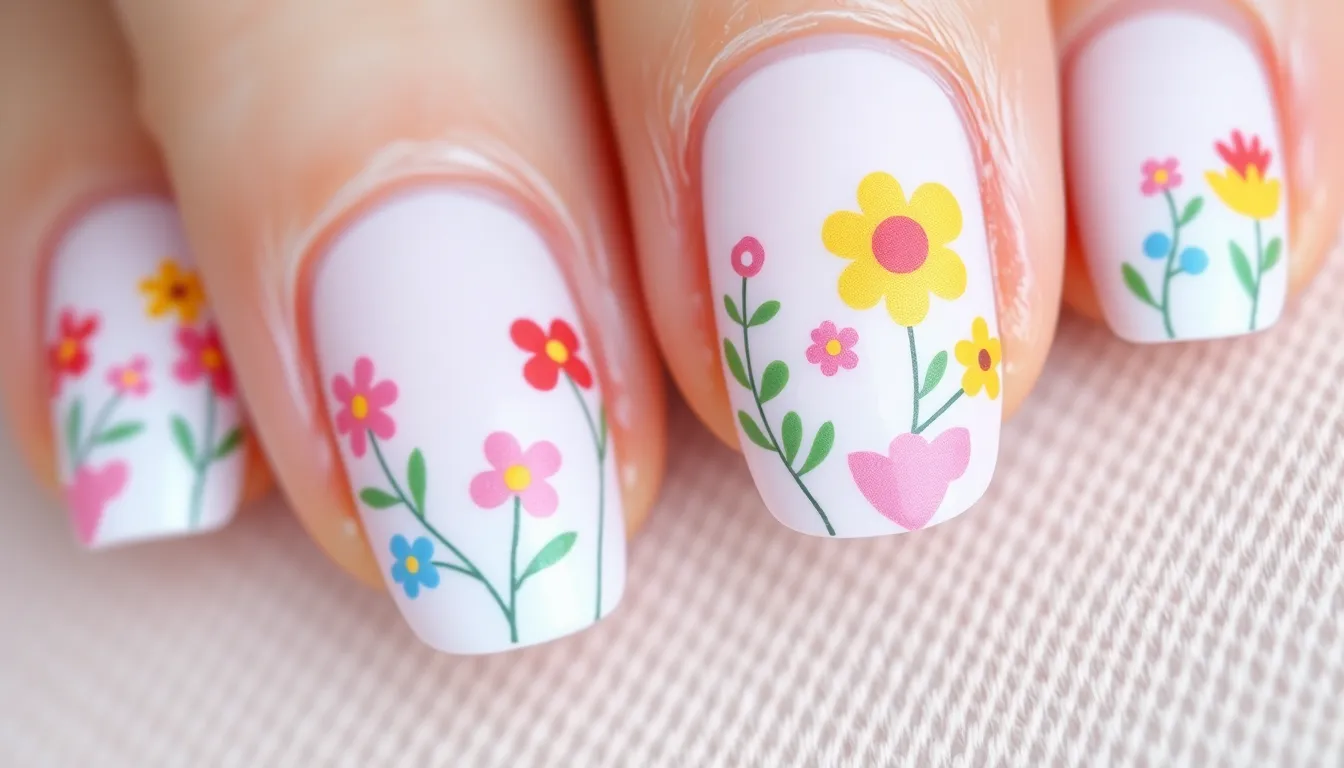
Floral nail art transforms ordinary manicures into garden-inspired masterpieces using simple techniques that require minimal tools. We’ll explore three beginner-friendly flower designs that create stunning results without professional expertise.
Basic Dot Flowers
Creating dot flowers starts with a simple dotting tool or the tip of a nail polish brush to form small, perfectly round circles. We arrange these dots in classic flower patterns, beginning with a center dot and adding surrounding petals in a circular formation. Five to seven dots create the most natural-looking flowers, while three dots work well for smaller nail beds.
Positioning matters when creating balanced dot flower arrangements across your nails. We recommend placing larger flowers on accent nails and smaller blooms on remaining fingers for visual harmony. Different colored dots add dimension, with lighter centers and darker petals creating depth and contrast.
Varying dot sizes within the same flower creates more realistic botanical effects. We use larger dots for the flower center and progressively smaller ones for outer petals. This technique mimics how real flowers appear in nature, with concentrated cores and delicate outer elements.
Simple Leaf Designs
Painting leaf shapes requires only a standard nail polish brush and steady hand movements. We create basic leaf outlines by making elongated oval shapes with pointed ends, starting from the base and pulling toward the tip. Single brush strokes work best for achieving smooth, natural-looking leaf silhouettes.
Adding veins transforms simple leaf shapes into detailed botanical elements. We use thinner brushes or nail art pens to draw a central line down each leaf, then add smaller branching lines on either side. These delicate details make leaves appear more realistic and professionally crafted.
Combining multiple leaf sizes and colors creates ever-changing foliage arrangements. We layer different shades of green, from deep forest tones to bright lime hues, building natural-looking plant compositions. Overlapping leaves at different angles adds depth and movement to the overall design.
Watercolor Bloom Effects
Achieving watercolor bloom effects begins with applying a base coat and layering different nail polish colors lightly across the surface. We work quickly while the polish remains wet, allowing colors to blend naturally into soft, flowing patterns. This technique creates dreamy, artistic backgrounds perfect for floral themes.
Blending colors with sponges or brushes produces the signature soft bloom appearance. We dab and blend different shades together, creating gradual color transitions that mimic real watercolor paintings. Purple and pink combinations work particularly well for romantic floral effects.
Building bloom effects requires patience and gentle application techniques. We apply thin layers of color, allowing each to partially dry before adding the next shade. This layering process creates natural-looking color variations and prevents muddy, over-mixed appearances that can ruin the delicate watercolor aesthetic.
Quick French Manicure Variations

French manicures don’t have to stick to the classic white tip formula. We can transform this timeless look with creative twists that add personality while maintaining the elegant simplicity you love.
Colored French Tips
Colored French tips breathe new life into the traditional manicure by swapping white polish for vibrant alternatives. We recommend starting with soft pastels like baby pink, lavender, or mint green for a subtle update that works for any occasion. Bold colors such as coral, navy blue, or even metallic gold create striking statement nails perfect for special events.
Apply your base coat first, then use nail guides or tape to achieve crisp tip lines. Paint the tips with your chosen color, ensuring smooth, even coverage. This variation allows us to match our nail art to exact outfits, seasons, or moods while keeping the classic French structure intact.
Reverse French Style
Reverse French style flips the traditional design by placing color at the nail’s base instead of the tip. We create this look by painting a curved line near the cuticle area, leaving the rest of the nail in a neutral shade or clear polish. This technique draws attention to the nail bed and creates an unexpected twist on familiar territory.
Start by applying your base color to the entire nail, then use a small brush to paint the curved accent at the bottom. Popular color combinations include nude nails with gold accents, clear polish with bright pink bases, or soft white with metallic silver curves. The reverse style elongates fingers and offers a modern take that feels fresh and contemporary.
Double French Lines
Double French lines add dimension by incorporating two parallel lines at the nail tip instead of one solid color block. We achieve this sophisticated look by painting the very edge of the nail in one color, then adding a second, thinner line just below it in a complementary shade. This creates visual depth and interest without overwhelming the design.
Use contrasting colors like black and white for dramatic impact, or choose tonal variations such as light pink with hot pink for subtle sophistication. Apply the outer line first, let it dry completely, then carefully add the inner accent line using a detail brush. This variation works exceptionally well on longer nails where we have more space to showcase both colors effectively.
Effortless Polka Dot Patterns
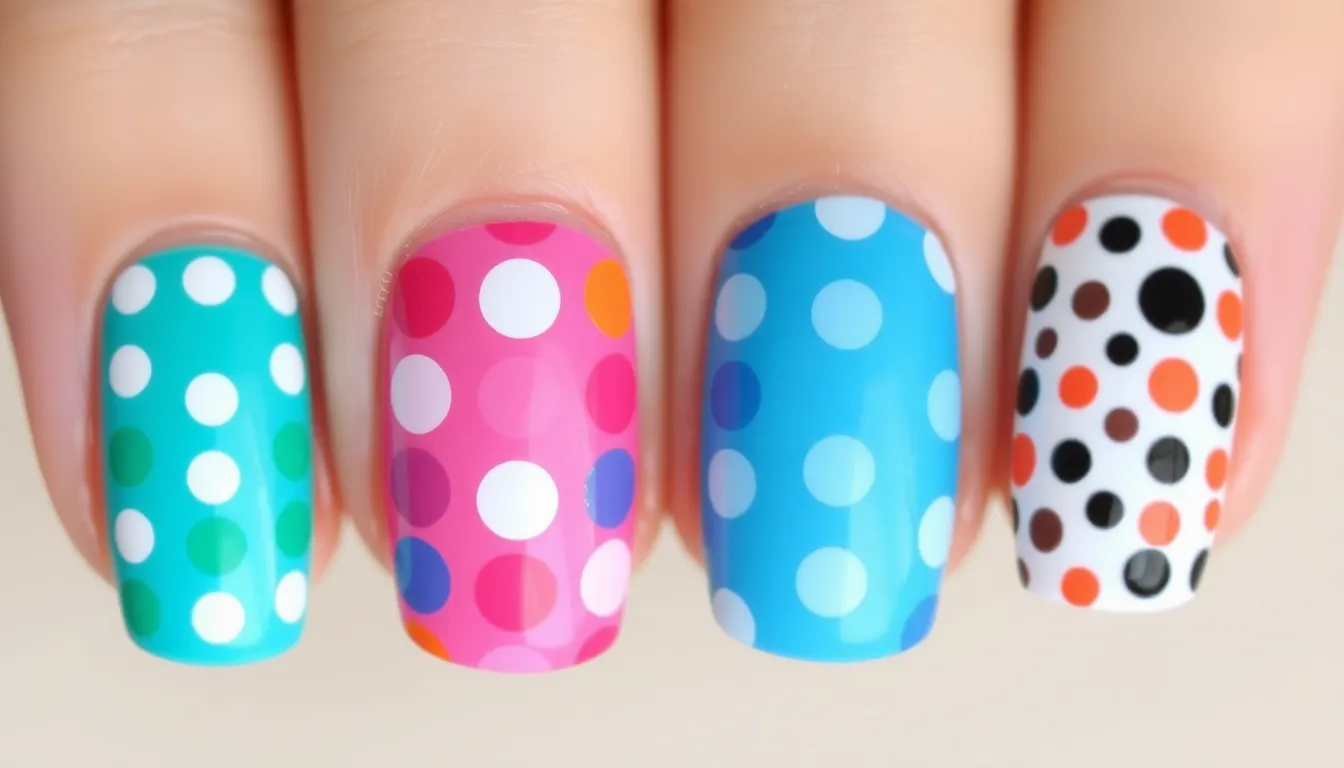
Polka dots bring instant charm to any manicure while requiring minimal skill and basic tools. We’ll explore three foolproof techniques that transform plain nails into playful masterpieces using simple dotting methods.
Classic Round Dots
Classic round dots create a timeless design that works with any color combination or nail length. We start by applying a base coat and letting it dry completely before adding our dotted pattern. Using a dotting tool or the tip of a nail polish bottle, we place evenly spaced dots across the nail surface.
Spacing consistency makes the biggest difference in achieving professional looking results. We recommend starting with larger dots and working toward smaller ones if you’re combining sizes. The key lies in maintaining equal distance between each dot for a balanced appearance.
Color contrast enhances the visual impact of classic polka dot designs. We suggest pairing light dots on dark backgrounds like white dots on navy blue, or creating monochromatic looks with varying shades of the same color family.
Gradient Dot Designs
Gradient dot designs create visual movement by transitioning dot sizes from large to small across the nail. We begin with the largest dots at one end of the nail and gradually decrease the size as we move toward the opposite end. This technique produces an elegant flowing effect that draws the eye naturally.
Color gradients within the dot pattern add sophisticated depth to the design. We can achieve this by using different shades of the same color, starting with the darkest tone for large dots and progressing to lighter shades for smaller ones. Alternatively, we might transition between completely different colors for a bold rainbow effect.
Tool selection affects the smoothness of your gradient transition. We use various sized dotting tools or create makeshift tools using bobby pins, pencil erasers, or cotton swabs to achieve different dot sizes within the same design.
Mixed Size Dot Combinations
Mixed size dot combinations create ever-changing visual interest by layering different sized dots on the same nail. We start by placing larger dots as anchor points, then fill in gaps with medium and small dots to create a balanced composition. This approach allows for creative freedom while maintaining visual harmony.
Strategic placement prevents overcrowding while maximizing visual appeal. We typically place three to five large dots first, then add smaller dots around them without overwhelming the nail surface. The negative space between dots becomes just as important as the dots themselves.
Contrasting colors enhance the playful nature of mixed dot designs. We might use bright colors against neutral backgrounds or create tone on tone effects with subtle color variations. Bold combinations like hot pink and lime green create statement nails, while soft pastels offer a more subtle approach.
Simple Striped Nail Designs
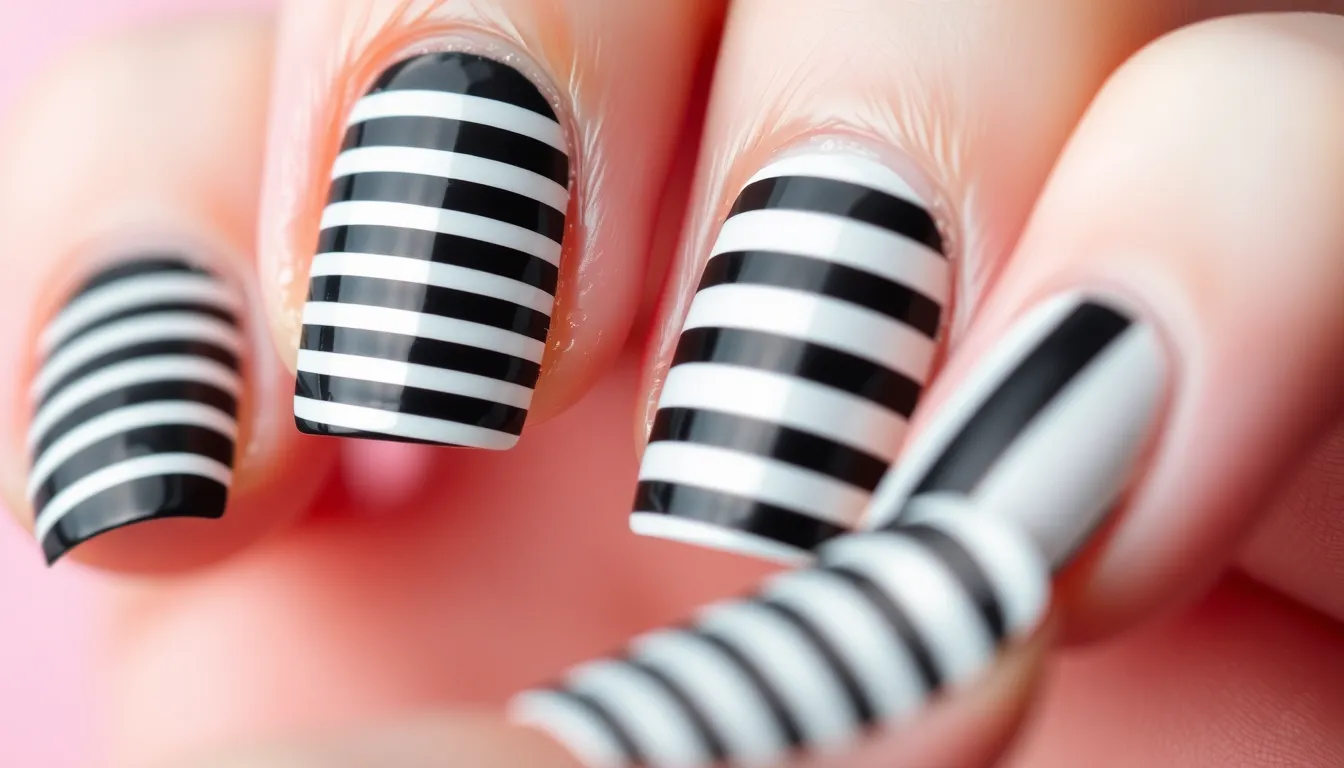
We love how striped nail designs offer endless versatility while remaining beginner friendly. These patterns create stunning visual impact using basic techniques that anyone can master.
Horizontal Stripe Patterns
Horizontal stripes instantly elongate your nails while creating a sophisticated look. We recommend starting with a striping brush at the cuticle end and working your way toward the tip for the cleanest lines. Experimenting with different stripe thicknesses adds visual interest to your design.
Color combinations make all the difference in horizontal patterns. Bold contrasts like black and white create dramatic impact, while soft pastels offer subtle elegance. We suggest alternating between thick and thin stripes to avoid monotony and create ever-changing movement across your nails.
Vertical Line Variations
Vertical stripes create a sleek modern appearance that flatters shorter nail shapes. Starting from the cuticle and moving toward the tip ensures smooth consistent lines throughout your design. We find that using a quality striping brush prevents wobbling and maintains precision.
Spacing becomes crucial with vertical line variations to avoid overwhelming the nail surface. Three to five evenly spaced lines typically provide the perfect balance without crowding. Metallic polishes work exceptionally well for vertical stripes, adding glamour while maintaining the clean minimalist aesthetic.
Diagonal Stripe Styles
Diagonal stripes bring ever-changing energy to your manicure through their angular appeal. We achieve the crispest lines by applying tape diagonally across the nail before painting with contrasting colors. Removing the tape while the polish remains slightly wet prevents peeling and ensures sharp edges.
Angle variations transform the entire look of diagonal stripe designs. Steep angles create bold dramatic statements, while gentle slopes offer subtle sophistication. We recommend practicing different tape placements on a nail wheel before committing to your final design to perfect your technique.
Basic Ombre and Gradient Effects
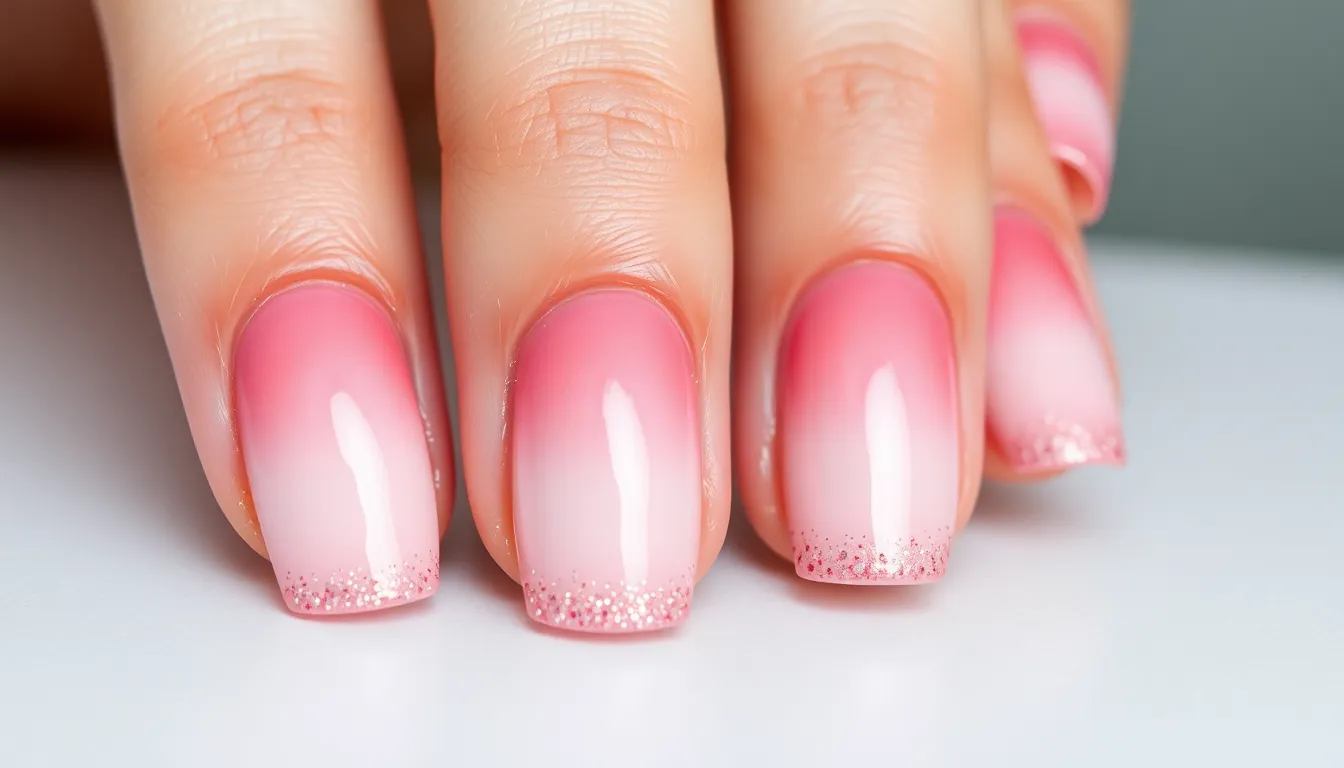
Ombre and gradient nail art creates stunning visual transitions that fade from one color to another. We’ll explore three essential techniques that transform simple manicures into eye-catching masterpieces.
Two-Color Gradient Technique
Two-color gradients blend different shades side by side for a seamless transition effect. We recommend starting with colors from the same family, like light pink to deep rose, for the most natural-looking results.
Apply your base coat first, then paint one color on half of your nail and the second color on the other half. Work quickly while the polish is still wet, using a clean brush to blend where the colors meet. Gentle back-and-forth motions create the smoothest gradient, while varying pressure helps control the blending intensity.
Choose complementary colors like blue to purple or yellow to orange for bold statement nails. Neutral combinations such as beige to brown offer versatile options that match any outfit. Practice on one nail first to perfect your blending technique before applying to all fingers.
Sponge Blending Method
Sponge blending uses a makeup sponge to dab polish colors together for professional-looking gradients. We prefer dense makeup sponges over kitchen sponges because they create smoother color transitions without streaking.
Start by applying your base coat and lightest color as the foundation. Paint both gradient colors side by side on a piece of paper or aluminum foil, then gently dab the sponge into both colors. Press the sponge onto your nail using a rolling motion, building up the gradient with multiple light layers.
Clean your sponge between applications to prevent muddy color mixing. Apply a quality top coat to seal the gradient and smooth any texture from the sponging process. This method works exceptionally well for sunset effects using orange, pink, and yellow combinations.
Glitter Fade Designs
Glitter fade designs layer sparkly polish over base colors for dramatic gradient effects. We achieve the best results by starting with light glitter application at the nail tip and gradually increasing concentration toward the cuticle.
Apply your chosen base color first, allowing it to dry completely before adding glitter. Use a fan brush or makeup sponge to distribute glitter polish unevenly, creating natural-looking fade patterns. Build up the glitter in thin layers rather than applying one thick coat for better control and smoother finishes.
Experiment with different glitter sizes and colors to create unique effects. Fine glitter creates subtle shimmer gradients, while chunky glitter adds bold texture and dimension. Silver glitter over navy blue creates elegant evening looks, while gold glitter over burgundy offers rich autumn vibes.
Easy Accent Nail Ideas
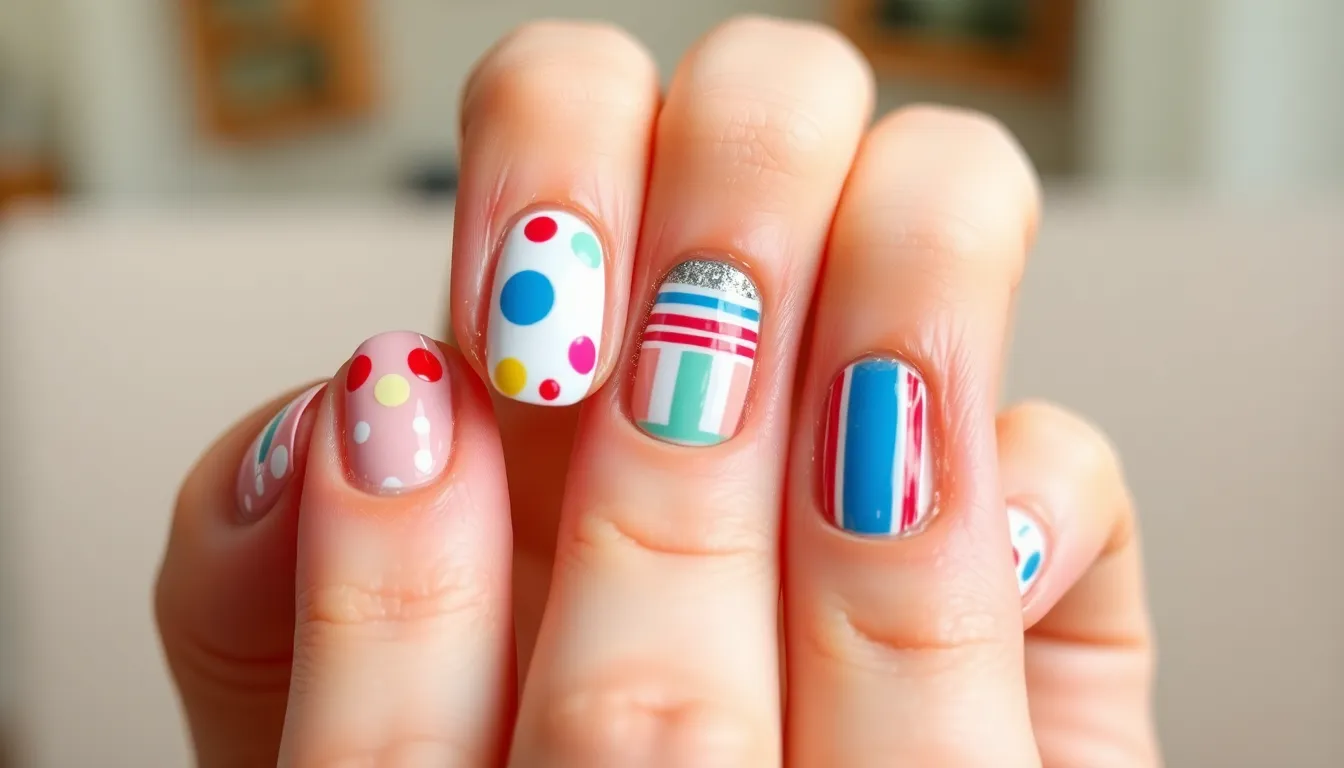
Creating stunning nail art doesn’t require decorating every finger. We’ll explore three simple accent techniques that add personality to your manicure while keeping the overall look manageable.
Single Statement Nails
Dots transform ordinary nails into playful masterpieces with minimal effort. Using a dotting tool or even a pen, we can create random dots on just one or two nails for instant visual interest. Position dots strategically across the nail surface, varying their sizes to create a natural, organic feel.
Stripes deliver bold impact when applied to a single accent nail. Apply tape to create clean lines, then paint over with your chosen color using a striping brush. Remove the tape while the polish is still wet to reveal crisp, professional looking stripes that pop against your base color.
Half moon designs offer a sophisticated twist on classic nail art. Paint a curved half moon shape at the cuticle using tape or nail stickers as guides. Choose contrasting colors to make the design stand out, or opt for subtle tone on tone variations for an elegant finish.
Glitter Accent Techniques
Glitter ombre creates a shimmering gradient effect that catches light beautifully. Start by applying glitter polish heavily at the nail tip, then gradually blend it toward the cuticle with decreasing intensity. Build up the sparkle in thin layers to achieve a smooth, professional looking fade.
Glitter accent nails provide instant glamour when applied to one focal nail per hand. Paint your chosen accent nail entirely with glitter polish, allowing it to serve as the statement piece while keeping other nails in coordinating solid colors. This technique works especially well on ring fingers or thumbs.
Metallic Detail Applications
Metallic stripes add sophisticated shine to any manicure base. Use metallic polish with a fine brush to create thin, precise lines across one or all nails. Space the stripes evenly for a uniform look, or vary the spacing for a more artistic approach that draws the eye.
Metallic dots deliver refined sparkle when strategically placed on accent nails. Apply metallic dots using a dotting tool, focusing on creating balanced patterns that complement your base color. Choose gold for warm tones or silver for cool palettes to enhance the overall color harmony of your design.
Simple Holiday and Seasonal Designs
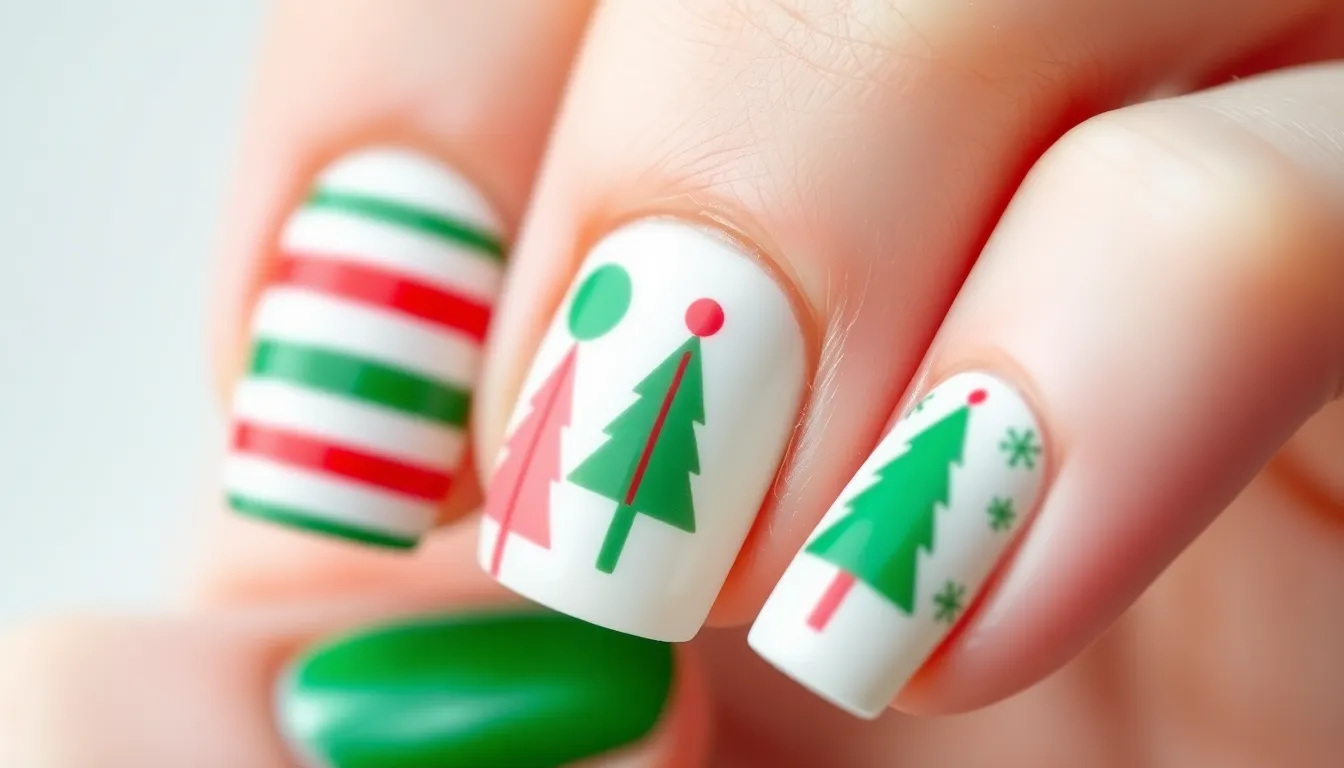
Seasonal nail art brings festive flair to your manicures while staying beginner friendly. We’ll explore three key seasonal approaches that use minimal tools and deliver maximum impact.
Quick Christmas Patterns
Christmas nail designs transform ordinary manicures into festive statements using simple techniques. We recommend starting with red and green stripes created by applying tape as a guide for clean lines. A single accent nail featuring a small gold star on neutral background provides subtle holiday charm without overwhelming the look.
Essential Christmas Elements:
| Pattern Type | Tools Needed | Difficulty Level |
|---|---|---|
| Candy cane stripes | Tape, red/white polish | Beginner |
| Minimalist trees | Small brush, green polish | Easy |
| Snowflake accents | Dotting tool, white polish | Intermediate |
Dotting tools help create perfect snowflakes by starting with a center dot and adding small lines radiating outward. Toothpicks work equally well as household alternatives for precise detail work. We’ve found that incorporating glitter through a sponge application adds sparkle without requiring traditional glitter tools.
Alternating red and white French tips offer a candy cane inspired twist on the classic manicure. Small brush techniques allow for minimalist Christmas trees on accent nails using simple triangular shapes. Holly leaf designs require just two brush strokes per leaf with tiny red dots for berries.
Easy Spring Motifs
Spring nail art celebrates renewal through floral designs and soft pastel colors. We focus on achievable patterns that capture the season’s essence without complex techniques. A single flower on each nail creates cohesive charm while remaining manageable for beginners.
Pastel polka dots bring playful spring energy using light pinks blues and yellows. Two toned nails feature a base color with small white daisies created through simple dot and petal techniques. Abstract lines in soft colors provide modern spring vibes through minimalist design approaches.
Popular Spring Color Combinations:
- Soft pink base with white flower accents
- Lavender background featuring yellow dot centers
- Mint green nails with coral floral details
- Peach base incorporating white daisy patterns
Minimal color blocking divides nails into sections using tape guides for crisp edges. We recommend practicing flower petals on paper first to develop steady hand control. Small white daisies require just five dots arranged in a circle with a contrasting center dot.
Trending abstract designs use flowing lines to mimic natural growth patterns. Floral accents work best when concentrated on one or two accent nails rather than every finger. Simple stem designs connect multiple flowers across the nail surface using thin brush strokes.
Basic Summer Themes
Summer nail ideas embrace bright cheerful colors and tropical motifs for vacation ready looks. We prioritize designs that capture sunny vibes through accessible techniques and common color combinations. Ombre effects using blue and white create instant beach atmosphere.
Yellow and orange gradients deliver sunset inspired nails through sponge blending methods. Single accent nails featuring palm trees use simple trunk and frond shapes painted with small brushes. Starfish designs require just five triangular points extending from a center circle.
Summer Design Elements:
| Theme | Primary Colors | Key Motifs |
|---|---|---|
| Beach | Blue, white, sandy beige | Waves, shells, anchors |
| Tropical | Green, yellow, coral | Palm trees, pineapples |
| Sunset | Orange, pink, purple | Gradients, silhouettes |
Glitter gradients achieve professional effects by dabbing sparkles onto wet polish using folded paper towels. Bright tropical colors work best when balanced with neutral accent shades. We suggest limiting bold patterns to one or two nails per hand for visual harmony.
Wave patterns use curved brushstrokes in alternating blue and white shades. Simple pineapple designs combine yellow ovals with green crosshatch tops for recognizable tropical symbols. Beach themes incorporate sandy textures through strategic glitter placement at nail tips.
Gradient techniques blend multiple summer colors for dramatic sky effects. Palm tree silhouettes against sunset backgrounds create vacation memories on your fingertips. Simple anchor shapes use basic curved and straight lines for nautical summer vibes.
Beginner-Friendly Tool Alternatives
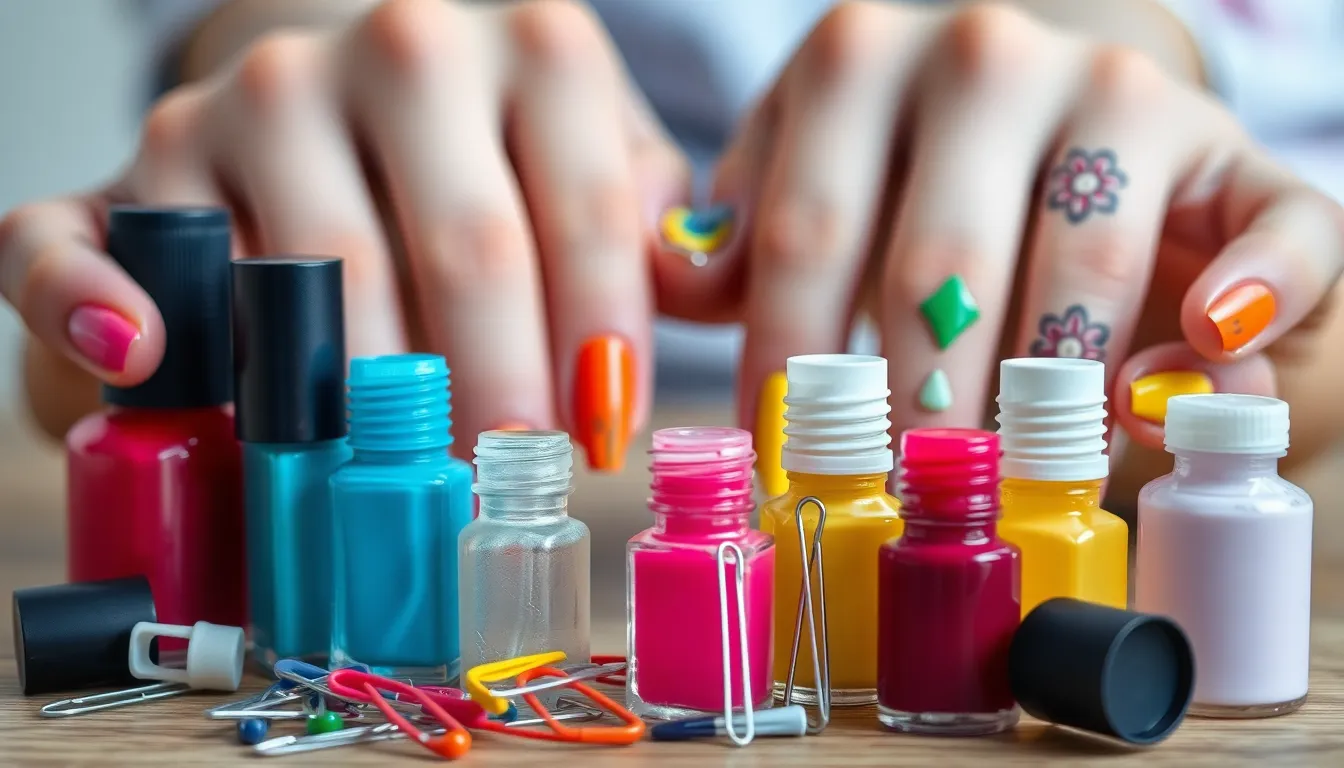
We don’t need expensive nail art tools to create stunning designs. Common household items can easily replace professional equipment and deliver impressive results.
Household Item Techniques
Toothpicks transform into precision dotting tools that create perfect small circles and intricate details. We can use the pointed end for tiny dots and the rounded end for slightly larger ones. Dipping the toothpick in nail polish allows us to control the size by adjusting how much polish we pick up.
Hairpins serve as excellent line drawing tools for creating geometric patterns and fine details. The curved end works perfectly for small curved lines while the straight portion helps us draw clean, straight edges. We simply dip the hairpin in polish and drag it across the nail surface.
Bobby pins excel at creating consistent parallel lines and grid patterns. Opening the bobby pin gives us two drawing points that maintain perfect spacing. We can create professional looking stripes by gently pressing both ends into the polish and drawing across the nail.
DIY Dotting Tools
Paper clips become versatile dotting instruments when we bend them into the right shape. Straightening one end and creating a small loop gives us different sized dotting options on each end. The metal surface picks up polish well and creates smooth, even circles.
Straight pins offer the finest dotting precision for delicate nail art details. We dip the pin head in polish to create tiny accent dots or use it for detailed work within larger designs. The sharp point also works perfectly for cleanup around the cuticle area.
Simple Brush Alternatives
Cotton swabs provide soft, rounded application perfect for blending colors and creating textured effects. We can use them for ombre techniques by dabbing different colors and blending them together. The cotton tip also works wonderfully for cleanup and removing excess polish from skin.
Nail polish brushes without handles give us more control over detailed work than full applicators. Removing the brush from an old polish bottle creates a precision tool perfect for small designs and touch up work. We can cut the bristles shorter for even more precise application control.
Essential Tips for Simple Nail Art Success
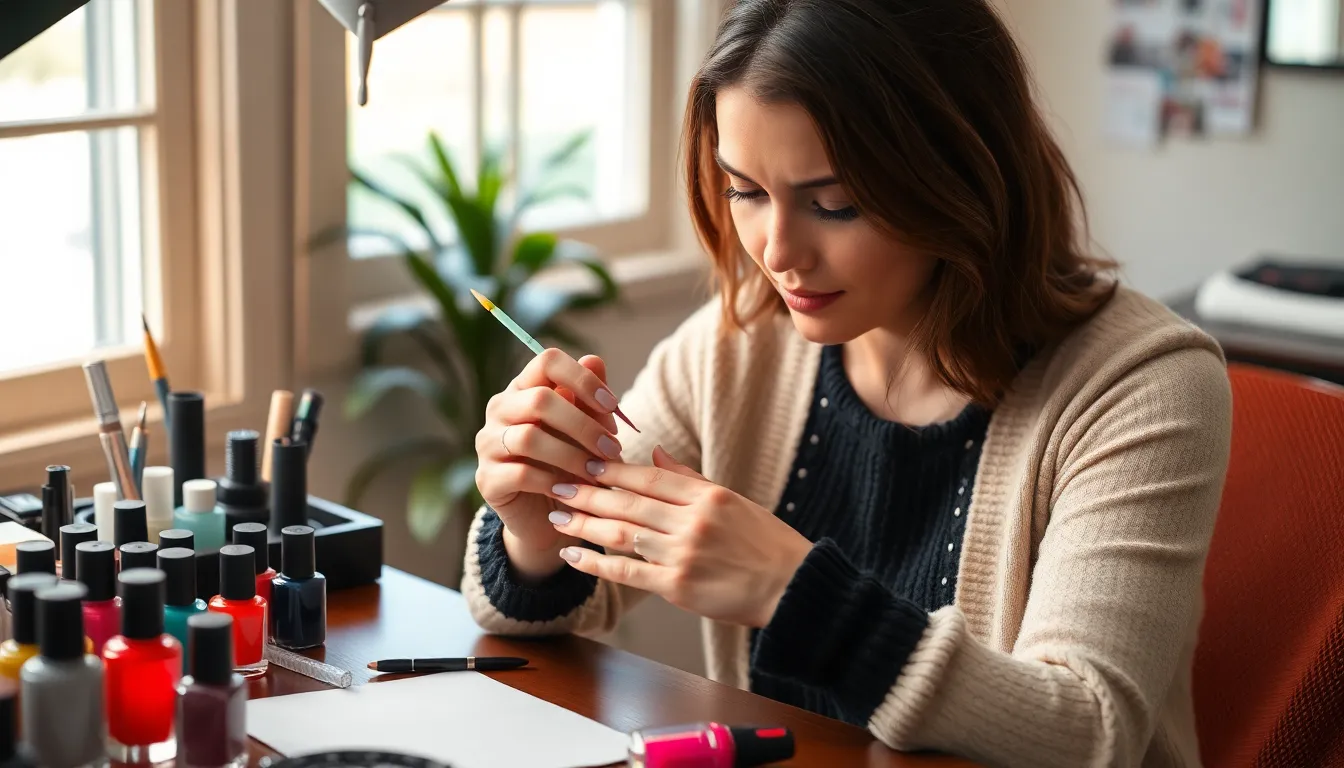
Mastering these fundamental techniques will transform your simple nail art from amateur to polished professional. We’ve compiled the most crucial steps that make the difference between designs that chip quickly and those that last beautifully.
Base and Top Coat Importance
Base coat application protects your natural nails while creating the perfect foundation for your artistic designs. We apply a thin layer of base coat to ensure our polish adheres smoothly and prevents staining of the nail bed. This essential step also helps extend the life of your manicure by creating a barrier between your nail and the colored polish.
Top coat sealing locks in your masterpiece and adds that coveted salon-quality shine to every design. We finish each nail art creation with a thin layer of top coat to seal the design and prevent chipping. This protective layer also enhances the vibrancy of colors and creates a smooth, professional finish that lasts for days.
Quick Drying Techniques
Fast drying top coat speeds up your entire nail art process and eliminates the frustration of smudged designs. We recommend investing in a quality fast-drying top coat that cuts waiting time in half while maintaining durability. This single product change can transform your nail art routine from a lengthy process to a quick beauty session.
Air drying requires patience but delivers flawless results when done correctly. We keep our hands completely still and away from any moisture sources to help polish dry faster naturally. Positioning your hands in a cool, dry area while avoiding touching surfaces ensures your simple nail art designs cure properly without imperfections.
Easy Cleanup Methods
Cotton swabs and remover create precise cleanup around your cuticles and nail edges. We use cotton swabs dipped in nail polish remover to clean up any excess polish that strays beyond the nail boundaries. This technique allows us to perfect our designs without starting over completely.
Acetone application with a small brush provides the most accurate cleanup for detailed work. We apply acetone using a small, precise brush to remove unwanted polish from exact areas without affecting the surrounding design. This method works especially well for intricate patterns where cotton swabs might be too large for detailed corrections.
Conclusion
We’ve shown you that creating beautiful nail art doesn’t require professional training or expensive equipment. With just a few basic techniques and common household items you can transform your nails into stunning works of art that reflect your personal style.
The key to mastering simple nail art lies in starting with basic designs and gradually building your confidence. Whether you’re drawn to geometric patterns polka dots or seasonal themes there’s a technique that matches your skill level and aesthetic preferences.
Remember that practice makes perfect and every nail artist started with their first simple design. Don’t be afraid to experiment with colors patterns and techniques – your creativity is the only limit to what you can achieve with these accessible nail art methods.
Frequently Asked Questions
What makes simple nail art appealing for beginners?
Simple nail art is perfect for beginners because it doesn’t require professional skills or expensive salon visits. These designs use basic techniques like dots, lines, and gradients that can be mastered quickly. You can create stunning looks using common household items, making it both accessible and budget-friendly while building confidence and creativity.
What are the easiest geometric nail art designs to start with?
Triangle and diamond patterns are excellent starting points for geometric nail art. Use tape to create crisp, clean edges for these shapes. Simple line art with accent lines and grid patterns also work well. Color blocking, where you divide nails into sections with different colors, is another beginner-friendly geometric technique.
How can I create simple floral nail art without advanced skills?
Start with basic dot flowers using a dotting tool or nail polish brush. Create clusters of dots in different sizes for a natural look. Add simple leaf shapes by painting elongated ovals and adding small lines for veins. For watercolor effects, layer thin coats of different colored polishes while they’re still slightly wet.
What are some modern French manicure variations I can try?
Try colored French tips using soft pastels or bold colors instead of traditional white. Reverse French involves applying color at the nail base rather than the tip. Double French lines create dimension by adding two parallel lines at the nail tip. These variations maintain elegance while adding personal flair.
How do I create professional-looking polka dot patterns?
Focus on consistent spacing and color contrast for classic round dots. Use a dotting tool or bobby pin for uniform sizes. For gradient dots, transition from large to small dots across the nail. Mix different dot sizes strategically, maintaining visual harmony through contrasting colors and thoughtful placement.
What striped nail designs work best for beginners?
Horizontal stripes are easiest and help elongate nails. Use tape for clean lines and experiment with different stripe thicknesses. Vertical lines create a sleek look and work well with metallic polishes. Diagonal stripes add dynamism – use tape at consistent angles and remove while polish is slightly tacky.
How can I achieve smooth ombre and gradient effects?
The two-color gradient technique involves blending adjacent shades while wet. Use a makeup sponge for the sponge blending method – apply colors to the sponge first, then dab onto nails. For glitter fades, layer sparkly polish from nail tip downward, building intensity gradually.
What are effective accent nail techniques?
Choose one or two nails per hand for accents to avoid overwhelming the look. Try single statement nails with dots or patterns, bold stripes using tape, or sophisticated half-moon designs. Glitter accents and metallic details like stripes or dots add instant glamour without complexity.
How can I create simple seasonal nail designs?
For Christmas, use red and green stripes or create minimalist trees with a thin brush. Spring designs feature easy florals and pastel dots. Summer embraces bright colors and simple tropical motifs like palm trees. Focus on capturing the season’s essence with 2-3 colors maximum.
What household items can replace professional nail art tools?
Toothpicks work perfectly for precision dotting and detail work. Hairpins create clean lines, while bobby pins make consistent parallel lines. Paper clips and straight pins serve as DIY dotting tools for various sized dots. Cotton swabs blend colors, and nail polish brush handles can be used for line work.
What are the essential steps for long-lasting nail art?
Always start with a base coat to protect your nails and help polish adhere better. Apply thin, even coats and allow proper drying time between layers. Finish with a quality top coat for shine and protection. Use fast-drying formulas when possible to prevent smudging.
How do I clean up mistakes in my nail art?
Keep cotton swabs and acetone or nail polish remover handy for quick corrections. Dip a cotton swab in remover and gently clean around the nail while the polish is still wet. For dried mistakes, use a small brush dipped in remover for precision cleanup.
