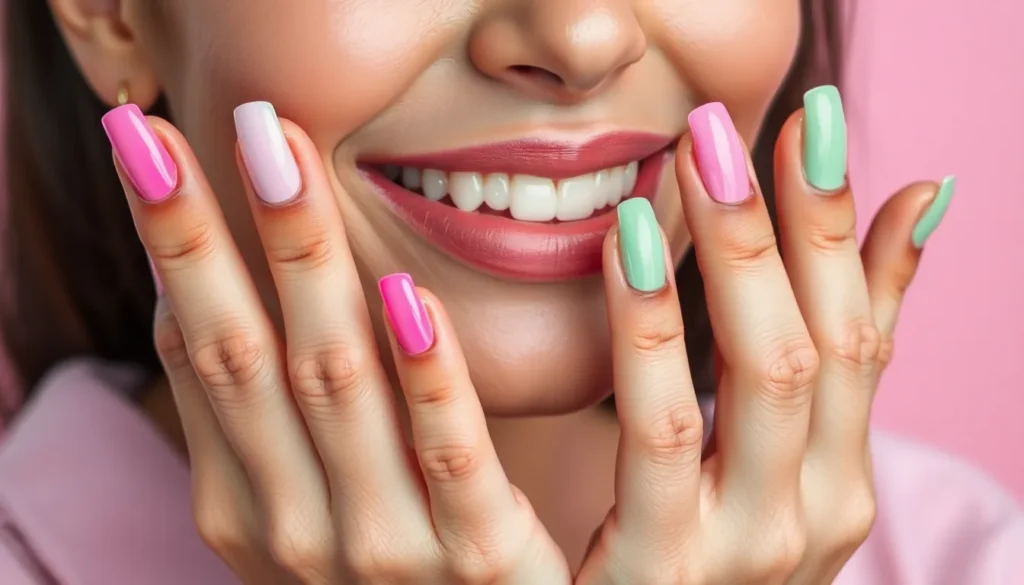
Jelly nails have taken the beauty industry by storm and we can’t get enough of their translucent gorgeous appeal. These stunning nail designs create a glass-like effect that’s both sophisticated and playful making them perfect for any occasion. Whether you’re headed to a summer party or want to add some sparkle to your everyday look jelly nails offer endless possibilities.
We’ve discovered that the secret to perfect jelly nails lies in their semi-transparent finish that mimics the look of colorful gelatin or stained glass. From subtle nude tones to bold rainbow hues these designs work beautifully on any nail length and shape. The best part? They’re surprisingly versatile and can be dressed up with glitter accents or kept minimal for a clean polished appearance.
Ready to jump into the industry of jelly nail art? We’ll show you the most stunning ideas trending right now plus pro tips to achieve that perfect translucent finish at home.
Classic Clear Jelly Nails With Minimalist Appeal
Clear jelly nails offer the perfect entry point into this trending nail art style while maintaining sophisticated elegance. We’ve found that these translucent designs work beautifully for both everyday wear and special occasions.
Simple Transparent Base With Nude Undertones
Choose a sheer nude base that complements your natural skin tone for the most flattering jelly nail effect. Apply two thin coats of translucent nude polish to achieve that signature glass-like finish without overwhelming opacity. Select undertones carefully by testing shades like peachy pink, warm beige, or cool taupe against your skin to find your perfect match.
Build the transparency gradually with each coat to maintain the jelly nail’s characteristic see-through quality. We recommend starting with one ultra-thin layer and allowing it to dry completely before adding the second coat. Keep cuticles clean and well-moisturized to enhance the overall polished appearance of your minimalist jelly nails.
Maintain the natural nail shape by filing into a gentle oval or square shape that follows your nail bed’s natural curve. This approach creates a seamless transition between your natural nail and the translucent polish. Apply a high-gloss top coat to seal the look and add that coveted glass-like shine that makes jelly nails so appealing.
Clear Jelly Nails With Subtle Shimmer Accents
Add micro-glitter particles to your clear base for a sophisticated sparkle that catches light beautifully without appearing overdone. Mix a small amount of ultra-fine shimmer polish with your clear jelly base to create a custom shade. Place shimmer strategically by concentrating it near the nail tips or creating a gradient effect from cuticle to tip.
Use iridescent toppers that shift color in different lighting to add dimension while maintaining the minimalist aesthetic. Apply these specialty polishes sparingly over your clear jelly base for maximum impact. Choose pearl or silver tones that complement the translucent quality rather than competing with it.
Create subtle accent nails by applying shimmer to just one or two fingers while keeping the rest completely clear. This technique draws attention without overwhelming the overall minimalist design. Blend the shimmer seamlessly by using a makeup sponge to dab and blend the glitter particles for a natural gradient effect.
Bold Neon Jelly Nail Designs for Summer Vibes
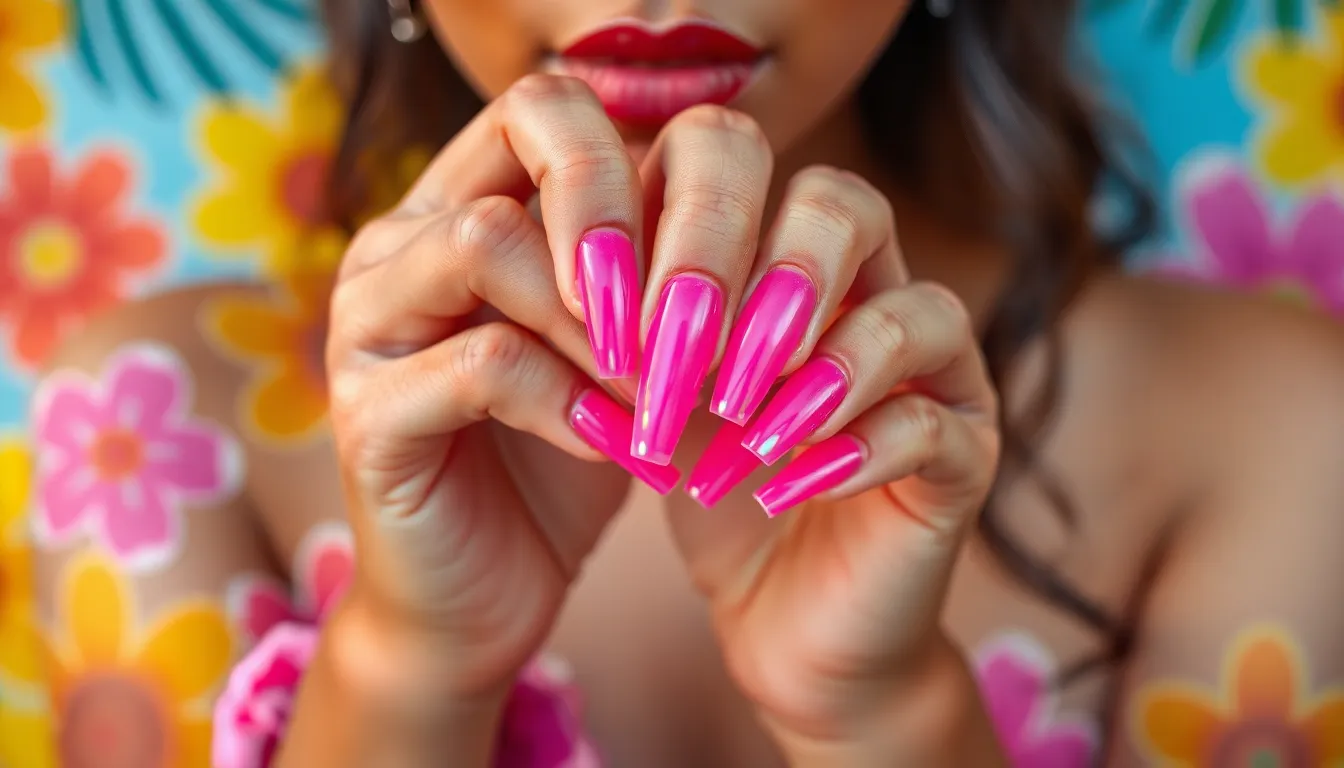
Summer 2025 calls for jelly nails that make a statement with electric colors and translucent finishes. These vibrant designs combine the glass-like clarity of jelly polish with neon intensities that capture attention and embody the season’s energetic spirit.
Electric Pink Jelly Nails With Holographic Details
Electric pink brings bold energy to your jelly manicure with its vivid translucent base that radiates confidence. We recommend applying this striking shade in two thin coats to maintain the characteristic see-through quality while achieving full color saturation. Holographic accents transform these already dazzling nails into light-reflecting masterpieces that sparkle from every angle.
Strategic placement of holographic elements works best when applied to one or two accent nails rather than the entire set. Fine holographic glitter can be dabbed onto the wet pink base using a small brush for precise control. This technique creates dimension without overwhelming the jelly’s natural transparency, resulting in a youthful and sophisticated look that’s perfect for summer festivities.
Bright Orange Jelly Manicure With Gradient Effects
Bright orange jelly polish captures summer warmth with its milky translucent finish that mimics sunset hues. Popular shades like OPI’s “Prideful Peach” from the Make ‘Em Jelly collection offer the perfect orange intensity for creating stunning gradient effects. We achieve these gradients by layering different concentrations of the same orange polish from cuticle to tip.
Starting with one thin coat at the base, we gradually build intensity by adding additional layers toward the nail tips. This sunset-inspired technique creates depth while maintaining the jelly’s signature transparency. The gradient effect adds sophistication to the playful orange base, making it suitable for both casual beach days and evening summer events.
Lime Green Jelly Nails With Glitter Placement
Lime green delivers fresh vibrancy that perfectly captures summer’s lively essence through its translucent finish. This energetic shade works exceptionally well with strategic glitter placement that enhances sparkle without compromising the jelly’s clarity. We focus on maintaining balance between the minimalist jelly base and glamorous glitter accents.
Positioning glitter elements near the cuticle area or as a thin line along the nail tips creates visual interest while preserving the lime green’s transparency. Fine holographic or silver glitter complements the fresh green tone beautifully. This approach ensures the design remains wearable for daily activities while providing enough sparkle for special occasions throughout the summer season.
Pastel Jelly Nail Ideas for Soft Feminine Looks
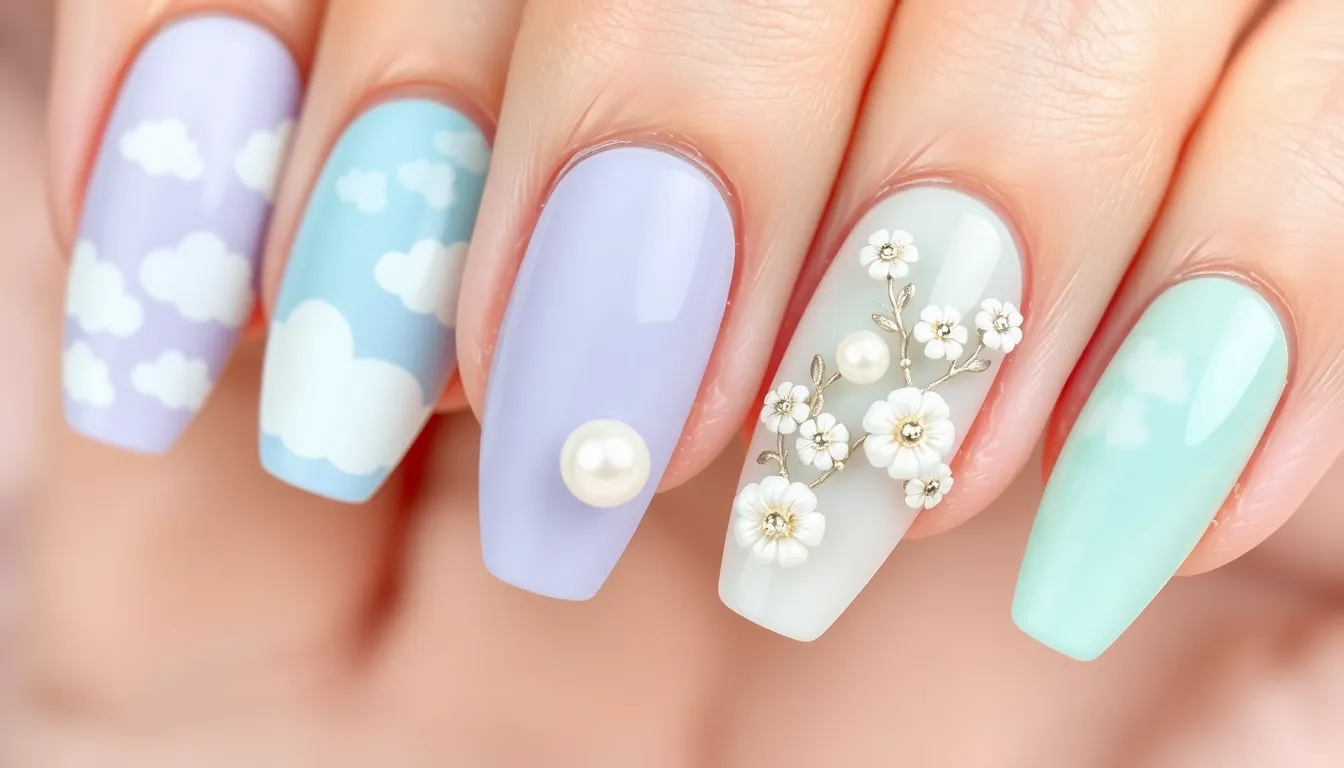
Gentle pastels transform jelly nail designs into dreamy, romantic statements that perfectly capture soft femininity. These delicate hues create an ethereal quality that’s both sophisticated and whimsical.
Baby Blue Jelly Nails With Cloud-Like Effects
Baby blue jelly polish creates the perfect canvas for dreamy cloud inspired nail art that feels like a summer sky. Apply your blue jelly gel polish in two thin coats to maintain that signature translucent finish we love about jelly nails.
Creating cloud effects requires layering white gel polish or paint using soft, wispy strokes across the nail surface. Use a small detail brush to blend the white polish gently, mimicking natural cloud formations that drift across blue skies.
Adding glitter or holographic topcoat brings extra depth to your blue jelly manicure while maintaining the soft, feminine aesthetic. We recommend applying the topcoat sparingly to preserve the delicate cloud effect you’ve created underneath.
Lavender Jelly Manicure With Pearl Embellishments
Lavender jelly gel polish delivers a soft, pastel base that embodies gentle sophistication in every stroke. This dreamy purple shade works beautifully as a foundation for elegant nail art that feels both modern and timeless.
Pearl beads and small rhinestones elevate your lavender jelly nails into luxurious statement pieces. Position these embellishments strategically near the cuticle area or create accent patterns on one or two nails per hand.
Securing pearl embellishments requires a strong topcoat to ensure your delicate decorations stay in place throughout wear. We suggest using nail glue for larger pearls and sealing everything with a quality gel topcoat for lasting results.
Mint Green Jelly Nails With Floral Accents
Mint green jelly polish serves as the perfect spring inspired base for delicate floral nail art designs. This refreshing shade captures the essence of new growth and natural beauty in its translucent finish.
Creating small floral patterns involves using nail art brushes with white or pink gel polish to paint tiny blossoms across your mint base. Start with simple five petal flowers and add small dots in contrasting colors for flower centers.
Detailing floral accents requires patience and steady hands, but the results transform your mint jelly nails into wearable garden art. We recommend practicing flower designs on nail wheels before applying them to your actual manicure for the best results.
Dark and Moody Jelly Nail Concepts
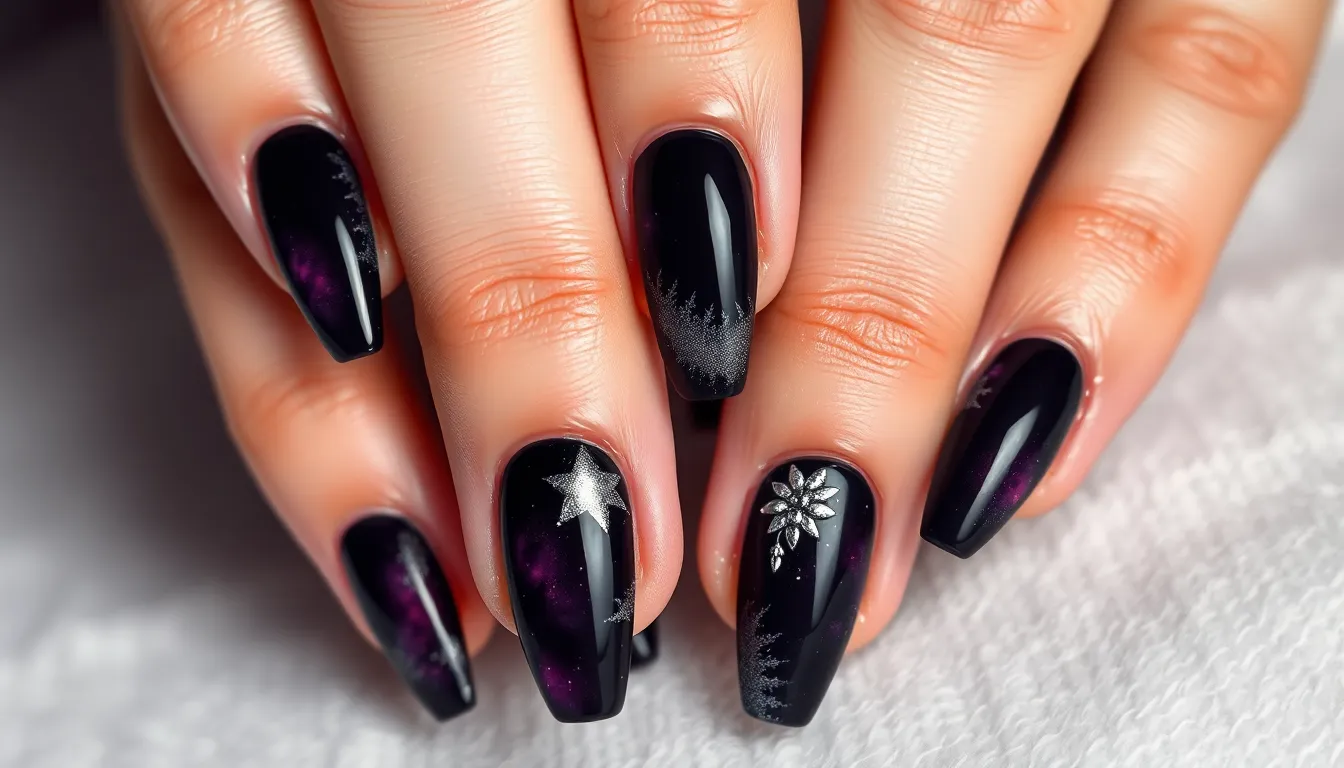
Transform your jelly nails into mysterious works of art with these dramatic and sophisticated designs. We’re moving away from soft pastels to explore the sultry side of translucent manicures.
Deep Purple Jelly Nails With Galaxy-Inspired Art
Create an otherworldly manicure by combining deep purple jelly polish with celestial nail art featuring swirling patterns reminiscent of stars and planets. Start with two thin coats of deep purple jelly polish to maintain that signature translucent quality while building rich color depth. Apply galaxy effects using nail art brushes and metallic paints in silver and gold tones to mimic cosmic dust and distant stars.
Technique Tips:
- Use a makeup sponge to dab on lighter purple shades for nebula effects
- Add tiny dots of white polish with a dotting tool for distant stars
- Finish with holographic topcoat to enhance the cosmic shimmer
Black Jelly Manicure With Silver Foil Details
Achieve maximum drama by pairing black jelly polish with striking silver foil accents that catch light beautifully. We recommend using NSFW Jelly from Cirque Colors as your base for the perfect balance of opacity and transparency. Apply the black jelly polish in two coats, allowing each layer to dry completely before adding your foil details.
Create geometric patterns or abstract designs using nail foil and a specialized nail art brush for precise placement. Press the foil firmly onto tacky topcoat areas to ensure proper adhesion and prevent lifting.
Burgundy Jelly Nails With Gothic Elements
Embrace dark romance with burgundy jelly polish enhanced by gothic inspired nail art such as crosses, bats, or intricate lace patterns. Build your burgundy base with two thin coats to achieve that perfect wine colored transparency that gothic aesthetics demand. Add your chosen gothic elements using nail stickers for beginners or hand painting techniques for more advanced nail artists.
Design Elements to Consider:
- Delicate cross silhouettes on accent nails
- Tiny bat shapes clustered near the cuticle area
- Victorian inspired lace patterns in metallic black
- Blood red gradient effects for added drama
These dark and moody concepts offer versatile options for anyone seeking sophisticated nail art that makes a statement while maintaining the elegant translucent quality that makes jelly nails so captivating.
Glitter-Infused Jelly Nail Designs for Maximum Sparkle
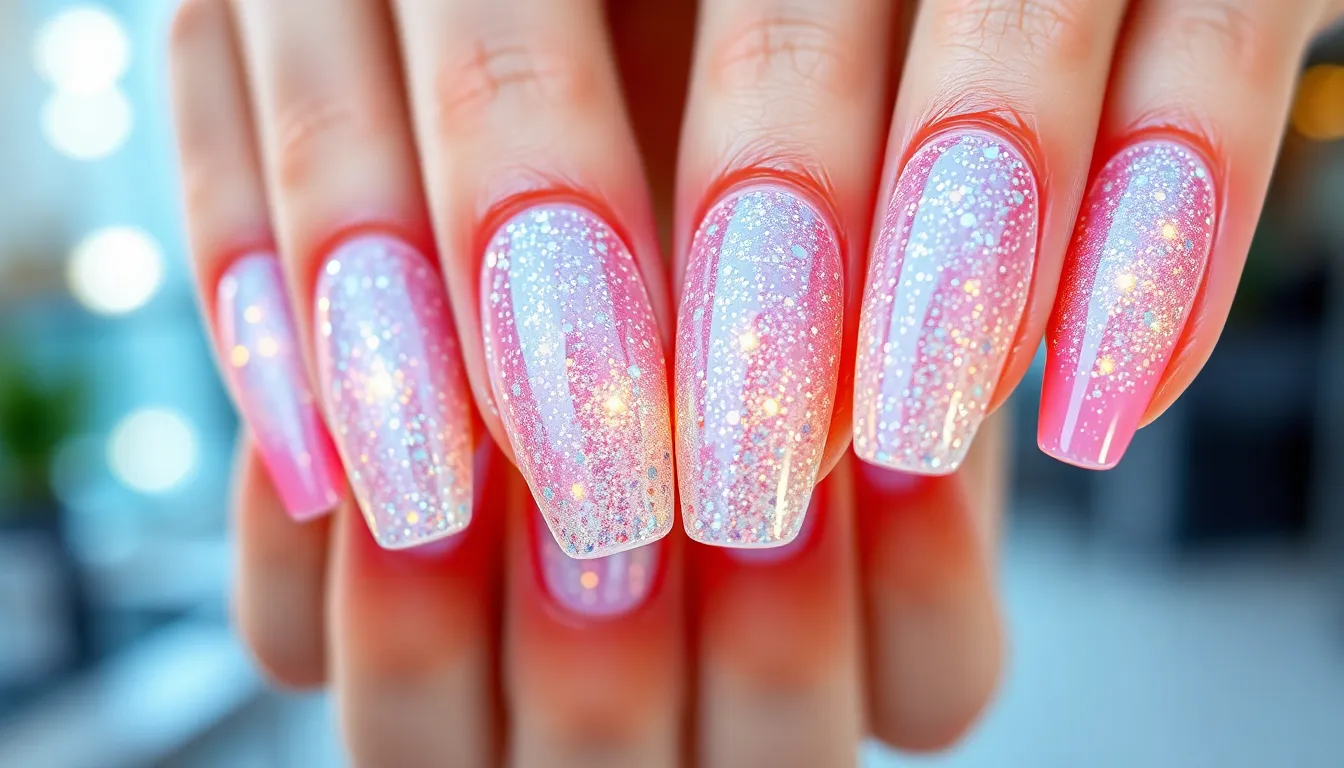
Sparkling elements transform ordinary jelly nails into show-stopping masterpieces that catch light from every angle. These designs leverage the translucent nature of jelly polish to create multilayered effects where glitter appears suspended within the nail rather than simply resting on the surface.
Holographic Glitter Suspended in Clear Jelly Base
Holographic particles create a multidimensional appearance that shifts colors depending on lighting and viewing angle. We recommend starting with a crystal-clear jelly base to preserve the reflective properties of holographic glitter particles. Multiple thin layers work better than one thick application to maintain the glass-like clarity that makes this technique so mesmerizing.
Application begins with a base coat followed by your first layer of clear jelly polish. Sprinkle holographic glitter while the polish remains tacky to ensure proper suspension within the translucent medium. Each subsequent layer should be cured separately to prevent cloudiness and maintain that floating-in-glass effect we’re after.
Professional nail artists suggest using fine holographic particles for subtle sparkle or mixing different sizes for added dimension. Temperature changes and movement create an ever-shifting rainbow display that makes these nails appear almost magical under various lighting conditions.
Chunky Glitter Jelly Nails With Color-Changing Effects
Chunky glitter pieces amplify visual impact when combined with thermochromic jelly polish that responds to temperature changes. These interactive designs shift hues based on body heat while irregular glitter placement enhances the three-dimensional appearance. We’ve found that mixing different glitter sizes creates the most ever-changing results.
Color-changing jelly polish serves as both the base and the magic element in this design. Apply your first coat and allow it to reach room temperature before adding chunky glitter pieces strategically across the nail surface. Subsequent layers of the thermochromic polish will encapsulate the glitter while maintaining the color-shifting properties.
Testing the temperature response ensures your design performs as expected. Cold environments reveal one shade while warm conditions trigger the color transformation, creating an interactive element that never fails to impress. Document your preferred glitter placement patterns for consistent results across all nails.
Fine Glitter Gradient in Translucent Jelly Polish
Fine glitter gradients create soft, diffused sparkle that appears to shimmer from within the nail structure itself. This technique involves blending glitter density from the cuticle area toward the nail tip using translucent jelly polish as the medium. We achieve the smoothest transitions by working in thin layers and building intensity gradually.
Starting at the cuticle with concentrated fine glitter, we gradually reduce density as we move toward the free edge. Each layer requires careful attention to ensure even distribution and seamless blending between sections. The translucent jelly base allows light to penetrate multiple layers, creating depth that flat glitter applications simply cannot match.
Precision application tools like fine brushes or makeup sponges help control glitter placement during the gradient process. Building the effect slowly prevents overwhelming the design while maintaining that ethereal, floating sparkle effect that makes jelly nails so captivating. Final topcoat application smooths any texture while preserving the dimensional sparkle beneath.
French Tip Jelly Nail Variations
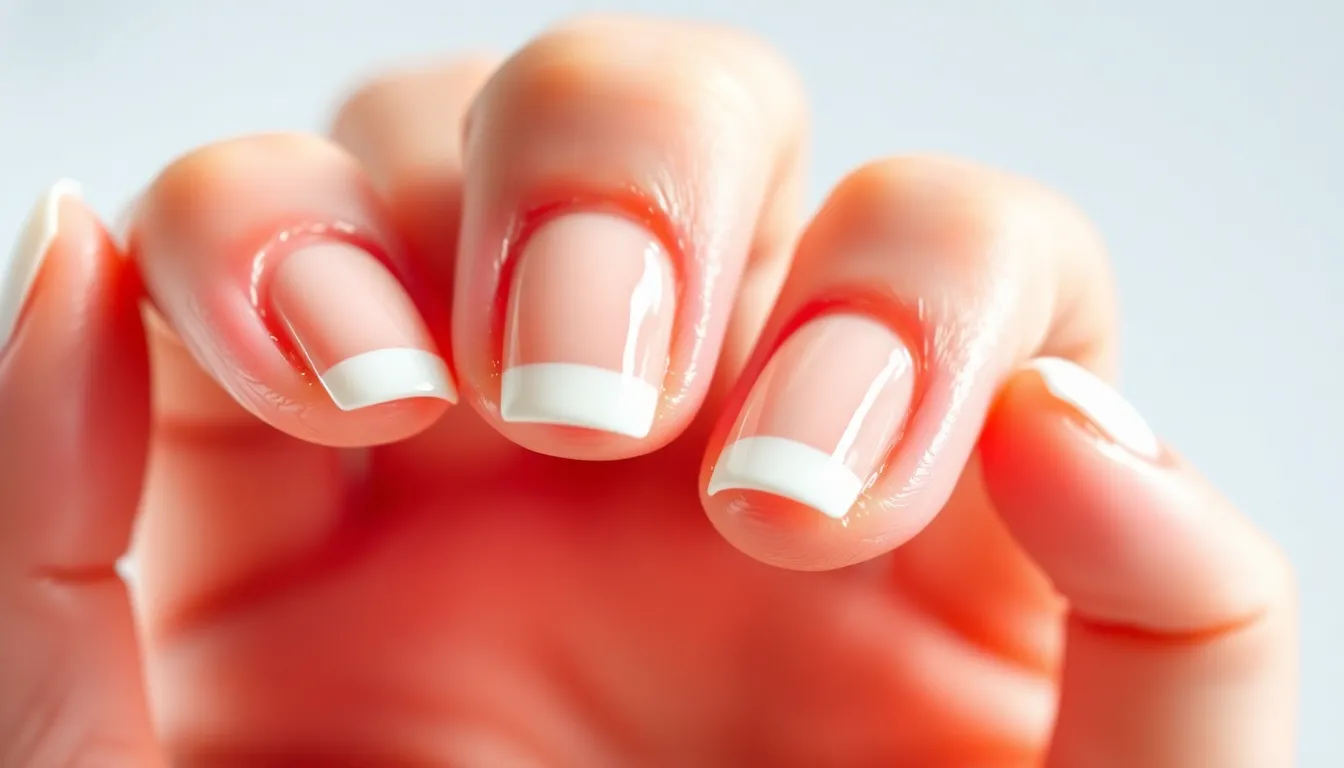
We’re combining the timeless elegance of French manicures with the modern appeal of jelly nails to create sophisticated looks that work for any occasion. These versatile designs maintain the translucent quality we love while adding crisp, polished finishing touches.
Classic White Tips on Clear Jelly Base
Classic white tips create the most recognizable French manicure when paired with a clear jelly foundation. We recommend applying two thin coats of clear jelly polish to achieve that signature translucent base that allows your natural nail to show through. The white tips provide a crisp contrast that makes this design perfect for professional settings or special events.
Precision becomes crucial when painting the white tips over your jelly base. We suggest using a steady hand or nail guides to create clean, even lines across all ten nails. The combination delivers an elegant finish that’s both modern and timeless.
Colored French Tips With Jelly Nail Foundation
Colored French tips transform the traditional white design into something more vibrant and personalized. We can use any gel polish color to create these eye-catching tips on our clear jelly base. Electric pink tips create a playful summer vibe, while deep burgundy tips offer sophisticated drama for evening wear.
Seasonal color matching works beautifully with this technique. We might choose coral tips for spring, bright blue for summer, or rich jewel tones for fall and winter. The clear jelly foundation allows the colored tips to appear more luminous and dimensional than they would on opaque base colors.
Reverse French Manicure Using Jelly Polish
Reverse French manicures flip the traditional design by placing the accent color at the cuticle area instead of the tip. We paint clear jelly polish over the nail tip while leaving the base area colored for this modern twist. This technique creates a unique gradient effect that’s particularly striking with bold base colors.
The reverse style offers more versatility in color combinations than traditional French tips. We can experiment with metallic bases, neon foundations, or even glitter-infused colors at the cuticle while maintaining that signature jelly transparency at the tips. This approach works especially well for those who want to try something different while keeping the elegant French manicure concept.
Abstract Art Jelly Nail Ideas for Creative Expression
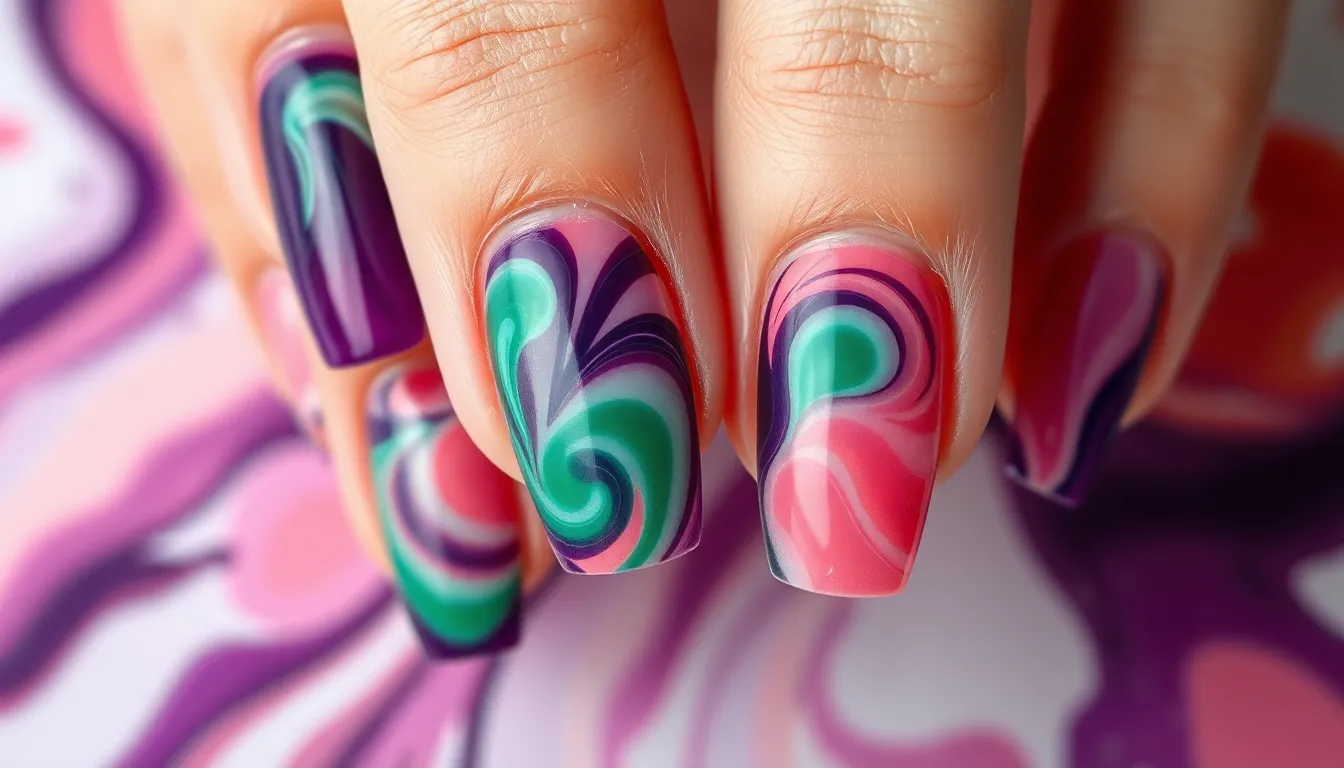
Abstract art transforms ordinary jelly nails into sophisticated masterpieces that showcase your artistic personality. Creative expression through nail art allows you to experiment with unconventional patterns and unique color combinations that reflect your individual style.
Marble Effect Jelly Nails With Swirled Patterns
Marble effect jelly nails create stunning dimensional looks by swirling different jelly gel colors together. We recommend starting with a clear or nude jelly base, then adding drops of contrasting colors like deep purple, emerald green, or coral pink. Swirl the colors gently with a fine brush or toothpick while the polish is still wet to achieve natural marble veining.
The translucent nature of jelly gel helps create depth that mimics real marble stone. Layer two thin coats of your base color first, then add the swirled pattern on the second coat for maximum transparency. Chrome powder can be lightly dusted over certain areas to enhance the marble effect with subtle metallic veining.
Temperature plays a crucial role in achieving perfect swirls. Work quickly while the jelly polish remains workable, typically within 30-45 seconds after application. Practice the swirling motion on a palette or nail wheel before attempting the design on your actual nails.
Geometric Shapes on Translucent Jelly Background
Geometric shapes offer a modern minimalist approach to jelly nail art that’s both stylish and sophisticated. We suggest using nail striping tape or stencils to create clean lines and precise shapes like triangles, squares, or hexagons over your jelly base. Clear or nude jelly backgrounds work best for showcasing bold geometric patterns.
Triangular designs can be created using metallic foils or contrasting jelly colors placed strategically across the nail surface. Square patterns work beautifully when alternated with negative space, allowing the translucent background to show through. Hexagonal shapes can be layered at different sizes to create honeycomb effects that appear to float within the jelly polish.
Color coordination is essential for geometric jelly designs. We recommend limiting your palette to 2-3 colors maximum to maintain the clean, modern aesthetic. Metallic accents like gold or silver can be added to outline shapes and create definition against the translucent background.
Watercolor-Inspired Jelly Nail Art Techniques
Watercolor inspired designs bring an ethereal, artistic quality to jelly nails through soft color blending and gentle gradients. We achieve this look by layering different jelly gel polishes in complementary shades, allowing colors to blend naturally at the edges. Start with the lightest color as your base, then add deeper tones in small sections.
Blending techniques work best when you apply colors while they’re still slightly wet. Use a clean, damp brush to soften harsh lines and create smooth color transitions. Popular color combinations include soft blues blending into purples, or warm corals melting into golden yellows for sunset effects.
The key to watercolor jelly nails lies in building up colors gradually through multiple thin layers. We recommend applying 3-4 coats total, allowing each layer to partially dry before adding the next. This technique creates the soft, diffused appearance characteristic of watercolor paintings while maintaining the jelly nail’s signature transparency.
Seasonal Jelly Nail Ideas Throughout the Year
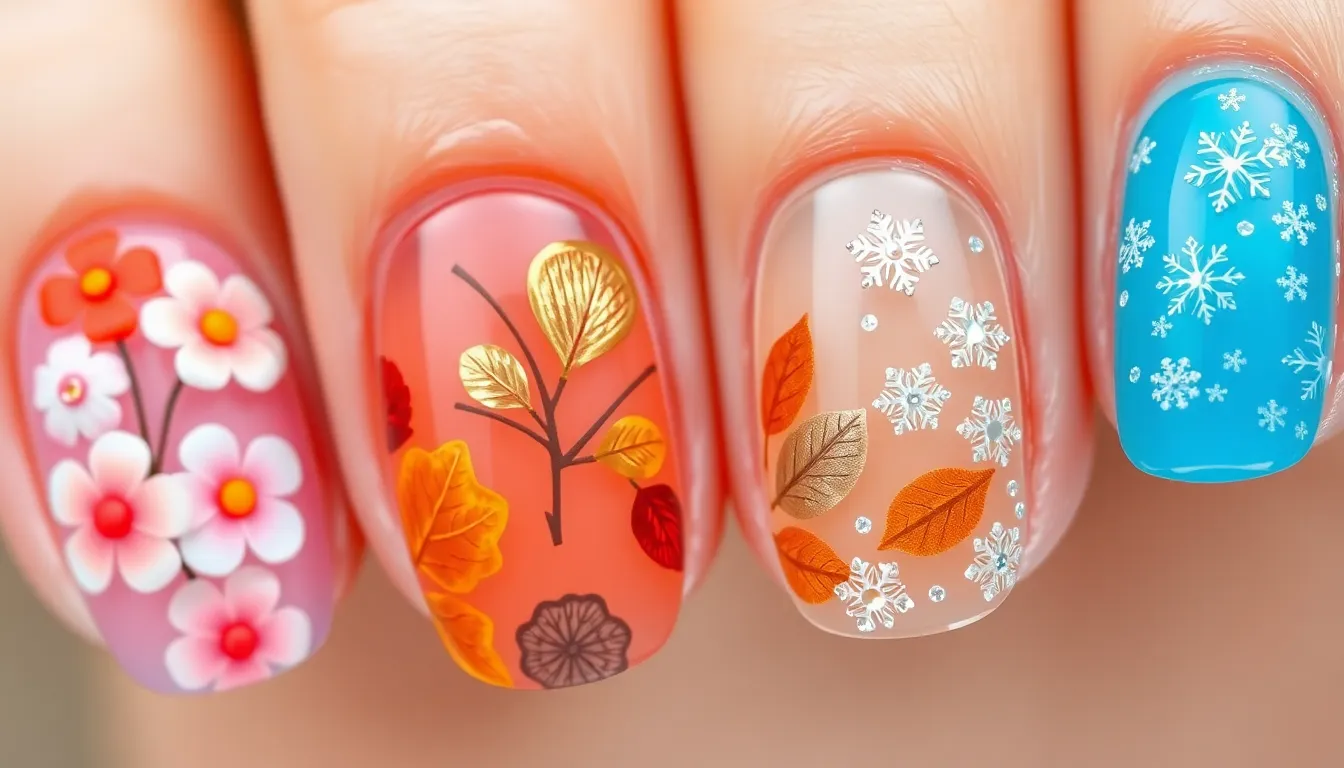
Seasonal inspiration transforms our jelly nail designs into timeless expressions that capture each period’s unique essence. Every season offers distinct opportunities to showcase translucent beauty through carefully curated colors and decorative elements.
Spring Floral Jelly Nails With Pressed Flowers
Spring floral jelly nails with pressed flowers create the perfect balance between delicate beauty and translucent sophistication. We recommend using pastel jelly polishes in soft pink, lavender, or mint green to establish a gentle base that complements the season’s fresh energy. Real pressed flowers or high-quality floral stickers add authentic botanical charm without overwhelming the design’s inherent transparency.
Application begins with two thin coats of your chosen pastel jelly polish, allowing each layer to dry completely before proceeding. Position pressed flowers like baby’s breath, violets, or small daisies strategically across select nails to create visual interest while maintaining the minimalist aesthetic. Seal everything with a clear top coat to preserve the flowers and enhance the jelly finish’s glossy appearance.
Summer Beach-Themed Jelly Manicure With Shell Details
Summer beach-themed jelly manicure with shell details captures the ocean’s vibrant energy through bold translucent colors and coastal accessories. Vibrant jelly polishes in turquoise, coral, or ocean blue provide the perfect foundation for beachy nail art that embodies summer’s carefree spirit. Shell-shaped stickers or tiny real shells create dimensional accents that transform ordinary jelly nails into vacation-ready masterpieces.
Start with two coats of your selected vibrant jelly polish, ensuring even coverage while maintaining the characteristic transparency. Apply shell decals or carefully place small shells using nail glue for secure attachment. Glitter or shimmer polish in gold or silver tones mimics ocean sparkle and adds the perfect finishing touch to complete your beach-inspired look.
Fall Autumn Leaf Jelly Nails With Warm Tones
Fall autumn leaf jelly nails with warm tones celebrate the season’s rich color palette through translucent amber, gold, and bronze shades. Warm jelly polishes in these earthy tones create a sophisticated base that captures autumn’s cozy atmosphere. Leaf designs using nail art brushes or detailed stamps add seasonal charm while maintaining the jelly nail’s signature transparency.
Begin with two thin coats of warm-toned jelly polish, allowing proper drying time between applications. Create leaf patterns using fine nail art brushes dipped in contrasting colors like deep burgundy or forest green. Brown or golden top coats add depth and richness that perfectly complement the autumn theme while preserving the translucent quality.
Winter Snowflake Jelly Nails With Crystal Accents
Winter snowflake jelly nails with crystal accents transform your manicure into a frosty winter wonderland. Icy blue or clear jelly polish creates the perfect frosty base that captures winter’s crisp beauty. Intricate snowflake designs using nail art tools and crystal accents add sparkling dimension that resembles natural frost patterns.
Apply two coats of icy blue or clear jelly polish as your foundation, ensuring smooth and even coverage. Use dotting tools or fine brushes to create detailed snowflake patterns in white or silver polish. Crystal or glitter accents strategically placed around the snowflakes enhance the frosty effect and add glamorous sparkle that catches light beautifully.
Conclusion
Jelly nails continue to captivate the beauty industry with their versatile appeal and endless creative possibilities. Whether you’re drawn to minimalist clear designs or bold neon statements these translucent masterpieces offer something for every style preference and occasion.
The beauty of jelly nails lies in their ability to adapt to your mood and the season. From subtle everyday elegance to dramatic artistic expressions you can transform your look while maintaining that signature glass-like finish that makes jelly nails so enchanting.
We encourage you to experiment with different techniques and color combinations to discover your perfect jelly nail style. With practice and the right products you’ll master this trending technique and create stunning manicures that showcase your personal aesthetic.
Frequently Asked Questions
What are jelly nails and why are they trending?
Jelly nails are a nail art trend featuring translucent, glass-like finishes that create a semi-transparent effect. They’re trending because of their versatility – they work for both casual and formal occasions, can be styled minimally or with embellishments, and complement all skin tones. The translucent quality gives nails an ethereal, sophisticated appearance that’s both modern and timeless.
How do I achieve the perfect jelly nail finish?
The key to perfect jelly nails is achieving the right level of transparency. Apply two thin coats of translucent polish rather than one thick coat to maintain the characteristic see-through effect. Keep cuticles clean and well-moisturized for a polished look. Choose sheer nude bases that complement your natural skin tone for the most flattering result.
What colors work best for jelly nails?
Jelly nails work beautifully in various color palettes. Classic clear and nude shades offer timeless elegance, while bold neons like electric pink, bright orange, and lime green create vibrant summer looks. Soft pastels like baby blue, lavender, and mint green provide feminine appeal, while dark shades like deep purple, black, and burgundy create dramatic, moody effects.
Can I add designs to jelly nails?
Absolutely! Jelly nails serve as perfect canvases for various designs. You can add subtle shimmer accents, holographic glitter, cloud effects, galaxy-inspired art, or floral patterns. French tips, geometric shapes, marble effects, and seasonal themes all work beautifully with the translucent base. The key is balancing embellishments with the nail’s natural transparency.
Are jelly nails suitable for all seasons?
Yes, jelly nails are incredibly versatile across seasons. Spring designs feature floral patterns with pressed flowers, summer showcases beach themes with vibrant colors, fall incorporates warm autumn tones, and winter creates frosty effects with snowflake patterns. The translucent quality adapts beautifully to seasonal color palettes and thematic elements year-round.
How long do jelly nails last?
Jelly nails typically last 7-10 days with proper application and care. Using a quality base coat, applying thin layers, and sealing with a good top coat extends longevity. Avoid thick application as it can cause chipping. Regular cuticle care and avoiding harsh chemicals help maintain the manicure’s appearance and durability.
Can I create jelly nails at home?
Yes, jelly nails are achievable at home with the right products and techniques. Use translucent or sheer polishes, apply thin coats, and allow proper drying time between layers. Practice gradient techniques, glitter placement, and design elements beforehand. With patience and the right tools, you can create professional-looking jelly nails without salon visits.

