We’ve all been there – staring down at our bare toenails wondering how to transform them into tiny canvases of creativity. Toe nail art isn’t just about painting your nails anymore; it’s become a powerful form of self-expression that lets your personality shine from head to toe.
Whether you’re preparing for sandal season or just want to add some fun flair to your pedicure routine, we’re here to inspire your next nail art adventure. From simple geometric patterns that beginners can master to intricate designs that’ll make you feel like a nail art pro, there’s something magical about creating beautiful art on such a small scale.
The best part? Your toes offer the perfect practice space for experimenting with new techniques without the pressure of having them on display all day. We’ll explore designs that work for every skill level and occasion – because your feet deserve just as much attention as your fingertips.
Classic French Pedicure With a Twist
We’re taking the timeless French pedicure and adding creative elements that transform this elegant classic into something uniquely yours. These modern variations maintain the sophisticated appeal while introducing playful elements that showcase your personal style.
Rainbow French Tips
Rainbow French tips bring vibrant color gradients to your traditional white-tipped pedicure design. We recommend starting with a clear or nude base coat to create the perfect canvas for your colorful tips. Paint each toenail tip with a different bright shade like coral pink, sunny yellow, electric blue, mint green, and lavender purple.
Ombre rainbow tips create a more subtle approach by blending colors seamlessly from one hue to another. We suggest using a makeup sponge to dab colors together while they’re still wet for the smoothest transition. This technique works beautifully with sunset colors like orange, pink, and yellow or ocean tones like blue, teal, and purple.
Glitter French Lines
Glitter French lines replace the traditional white tip with sparkling elements that catch light beautifully. We love using fine holographic glitter mixed with clear topcoat to create shimmering French tips that shift colors in different lighting. Silver and gold glitter remain classic choices that complement any outfit.
Chunky glitter creates bold statement lines that work perfectly for special occasions or when you want maximum sparkle. We recommend applying the glitter while your base polish is slightly tacky to ensure better adhesion. Rose gold glitter offers a warm metallic finish that pairs wonderfully with nude or blush pink base colors.
Colored French Base
Colored French bases flip the traditional design by using vibrant shades as the main color with contrasting tips. We suggest pairing deep jewel tones like emerald green or sapphire blue with crisp white tips for a striking contrast. Pastel bases like lavender, mint, or peach create softer looks when topped with deeper colored tips.
Black French bases create dramatic effects that work beautifully with metallic silver or gold tips. We’ve found that neon bases paired with white tips offer a fun summer vibe that’s perfect for beach vacations or pool parties. This reversed approach to French pedicures allows for endless color combinations while maintaining the classic structured look.
Floral Toe Nail Designs for Summer

Summer’s the perfect time to embrace nature-inspired nail art that captures the season’s vibrant energy. Floral toe nail designs offer endless creative possibilities for expressing your unique style while celebrating the colorful beauty of warm weather.
Tiny Daisy Patterns
Delicate daisy patterns transform your toes into charming canvases that perfectly complement casual summer footwear. We recommend starting with light base colors like pastel pink, mint green, or soft blue to create the ideal backdrop for these playful designs. Small white petals painted with thin brushes or dotting tools create the signature daisy look, while bright yellow centers add that essential pop of sunshine.
Creating these miniature masterpieces requires steady hands and patience, but the cheerful results make every careful brushstroke worthwhile. The fresh, whimsical appearance of tiny daisies makes them ideal for beach days, picnics, and any casual summer outing where you want your feet to shine.
Rose Petal Art
Sophisticated rose petal designs bring elegance to your summer pedicure with their layered, dimensional appearance. Artists achieve stunning depth by incorporating subtle shading techniques that create realistic 3D effects on each petal. Popular color choices include romantic pinks, passionate reds, and vibrant corals that can be finished with either matte or glossy topcoats depending on your preferred aesthetic.
Swirling petal patterns allow for both minimalistic and elaborate interpretations, making this style adaptable to your skill level and design preferences. The versatility of rose petal art means you can create anything from simple single-bloom accents to intricate multi-flower compositions across your toes.
Tropical Hibiscus Designs
Bold hibiscus flowers capture the exotic spirit of summer vacations and tropical getaways with their striking visual impact. These eye-catching designs feature vibrant shades like fuchsia, bright orange, and sunny yellow that instantly evoke images of paradise beaches and warm island breezes. Green leaf accents complement the blooms and add natural balance to the overall composition.
Tropical motifs work especially well for summer pedicures because they embody the season’s adventurous, carefree attitude. The large, dramatic petals of hibiscus flowers provide ample space for creative color blending and artistic expression, making them perfect for those who want their toe nail art to make a bold statement.
Geometric Patterns for Modern Looks
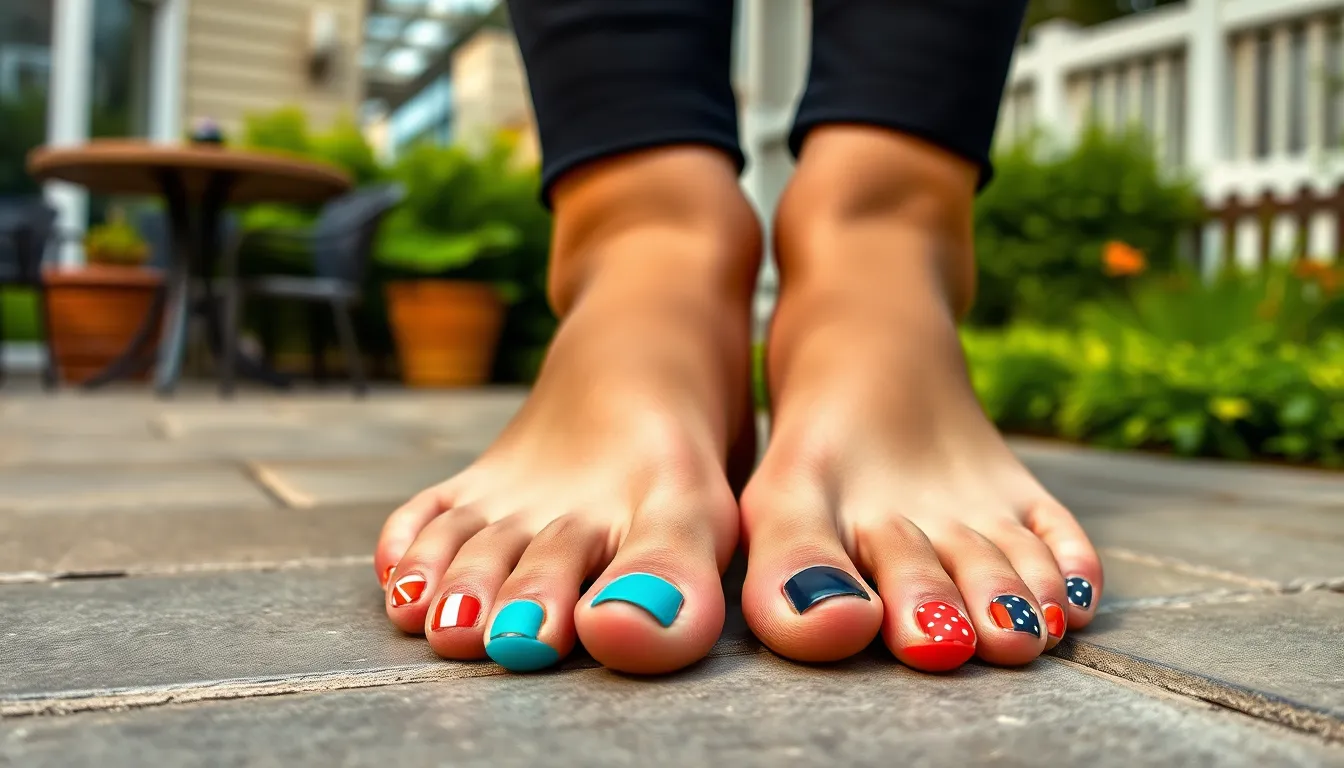
Geometric toe nail art brings contemporary sophistication to your pedicure with clean lines and structured designs. We’ll explore three striking geometric techniques that transform your toes into modern masterpieces.
Striped Accent Nails
Striped accent nails create visual interest by highlighting one or two toes with bold linear designs. We recommend choosing contrasting colors like black and white or navy and gold to make the stripes pop against your base color. Nail guides or tape help us achieve crisp, straight lines that look professionally done.
Creating these designs involves painting your base color first, then applying thin strips of tape in your desired pattern. Remove the tape while the polish is still slightly wet to prevent peeling. Alternating thick and thin stripes adds dimension to your design.
Triangle Color Blocking
Triangle color blocking divides each nail into geometric sections filled with complementary colors. We can create symmetrical triangles by placing tape diagonally across the nail or go asymmetrical for a more artistic approach. Bold color combinations like coral and turquoise or burgundy and cream work exceptionally well.
Start by painting your base color and letting it dry completely. Apply tape to create your triangle shapes, then fill each section with your chosen colors. This technique works particularly well on big toes where there’s more surface area to showcase the design.
Polka Dot Arrangements
Polka dot arrangements offer endless possibilities for playful geometric nail art. We can create uniform dots using nail dotting tools or vary the sizes for a more organic feel. Arranging dots in grid patterns, diagonal lines, or clustered groups each produces different visual effects.
Random placement creates a fun, scattered look while organized patterns appear more structured and formal. Different sized dots add visual texture to your design. We suggest using three colors maximum to maintain the clean geometric aesthetic while preventing the design from looking too busy.
Beach-Themed Nail Art Ideas
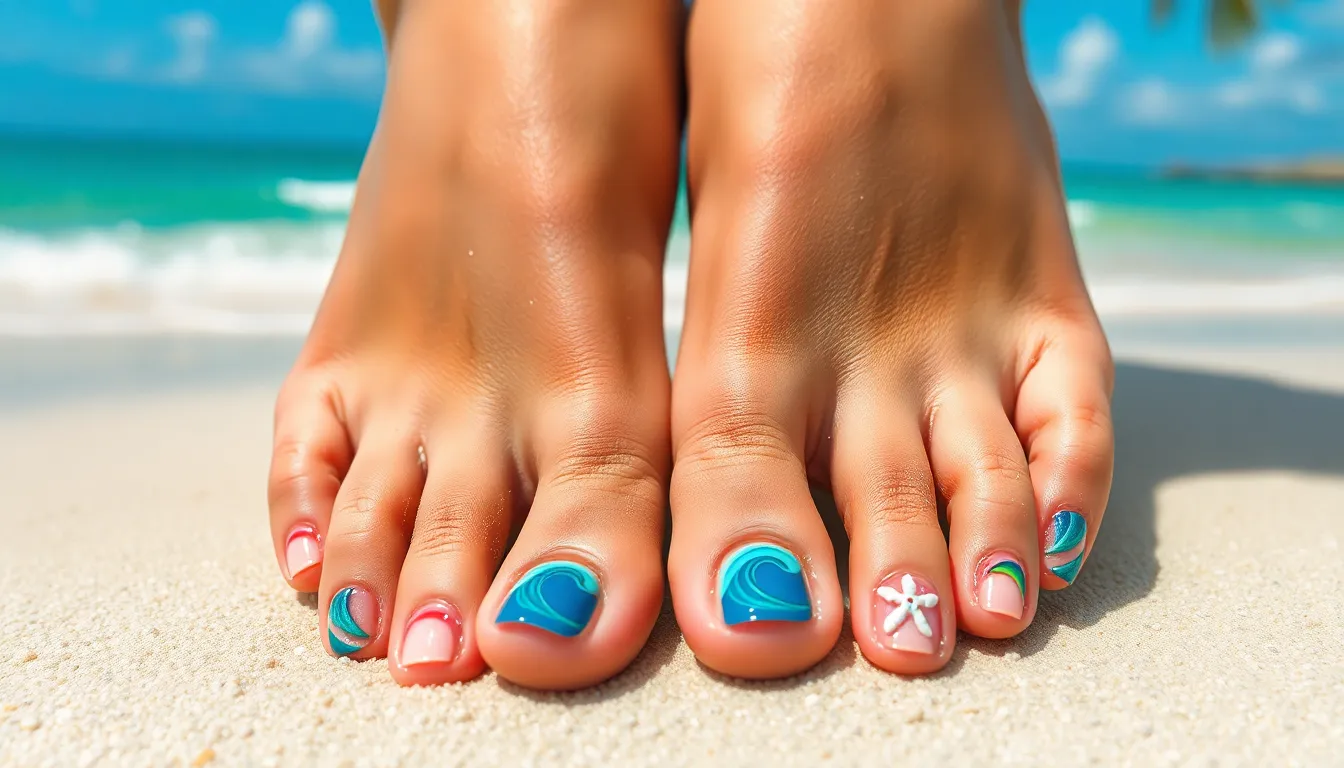
Beach inspired toe nail art transports us to paradise with designs that capture the essence of coastal beauty. These oceanic motifs bring vacation vibes to our everyday lives through creative artistry.
Ocean Wave Designs
Wavy patterns create the perfect foundation for ocean inspired toe nail art using various shades of blue and green to mimic natural water movement. We achieve stunning depth by layering different blue tones from light aqua to deep navy, creating realistic wave effects that seem to flow across our nails. Gradient waves work exceptionally well by transitioning from lighter shades at the cuticle to darker blues at the tip, mimicking how ocean water appears deeper as it moves away from shore.
Glitter and shimmer effects enhance our wave designs by adding ever-changing sparkle that catches light like real water. We can incorporate white foam details using thin brushes to paint delicate wave crests, making our ocean nail art appear more authentic and dimensional.
Seashell Accents
Seashell designs add elegant coastal charm to our toe nail art through detailed motifs that celebrate marine treasures. We create realistic shell appearances by using pearlescent finishes that mimic the natural iridescence found in actual seashells. Small seashell stickers provide an easy alternative for those who prefer ready made designs, while hand painted shells offer complete creative control.
Conch shells, scallops, and sand dollars work beautifully as accent pieces on one or two toes while keeping other nails in complementary solid colors. We enhance our seashell art by adding subtle shading with browns and grays to create depth, making the shells appear three dimensional against beach colored backgrounds.
Palm Tree Silhouettes
Palm tree silhouettes capture tropical paradise vibes through dramatic contrast designs that instantly evoke beach vacation memories. We paint these iconic trees against vibrant sunset backgrounds using colors like coral, pink, and orange to create stunning tropical scenes. The silhouette technique works particularly well because it allows the colorful background to shine while the dark tree shape provides striking visual impact.
These designs pair beautifully with bright summer colors and work especially well during vacation season when we want our toe nail art to match our tropical destinations. We can vary our palm tree designs by adding multiple trees at different heights or including small birds flying in the background for additional storytelling elements.
Minimalist Toe Nail Art Concepts
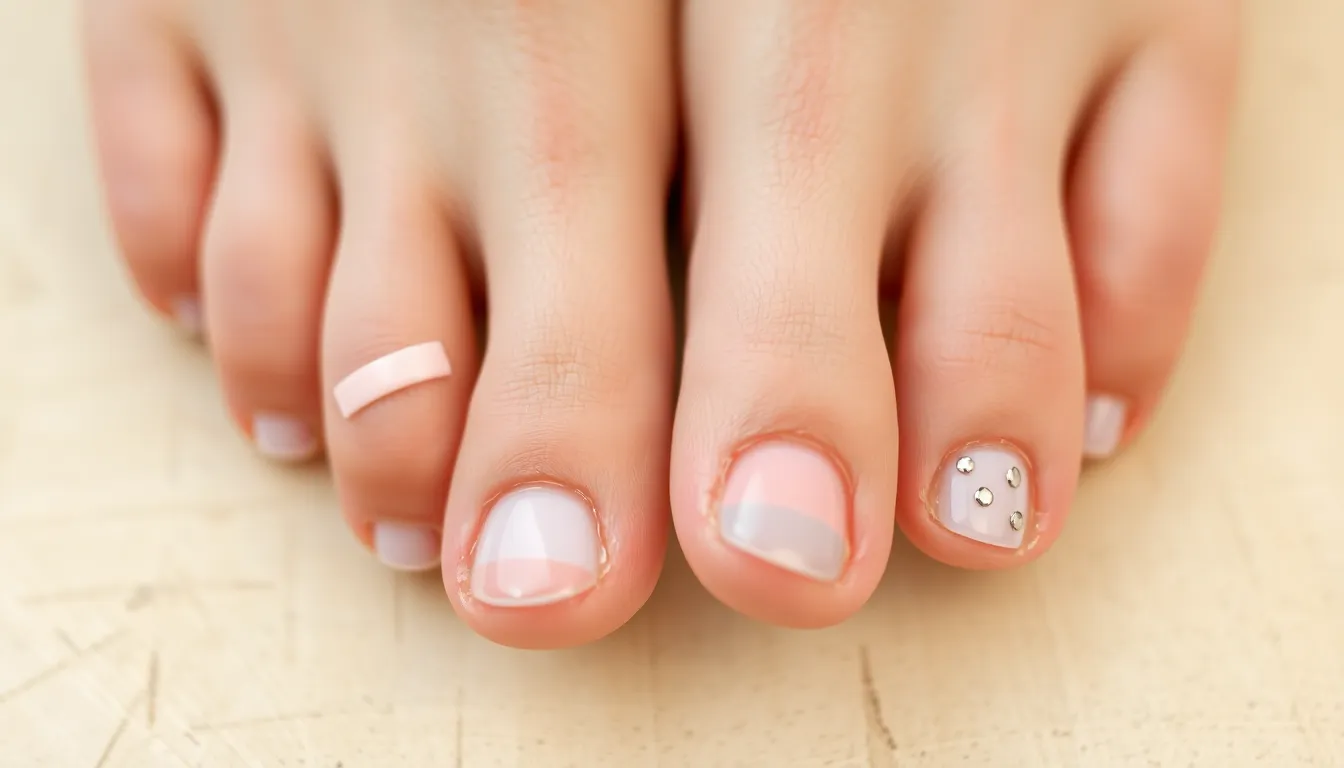
Shifting from bold summer designs to clean sophistication, minimalist toe nail art offers an elegant approach that emphasizes simplicity and refined details. These understated techniques prove that less truly can be more when creating stunning pedicure looks.
Single Accent Stripes
Single accent stripe designs feature one simple stripe on a chosen toe, creating visual interest through strategic contrast. We recommend applying these stripes in colors that complement your base polish while providing enough distinction to catch the eye. Position the stripe vertically down the center of your accent toe for a classic look, or experiment with diagonal placement for modern appeal. This technique works beautifully on the big toe as a focal point, allowing the remaining toes to maintain their solid color foundation.
Negative Space Designs
Negative space designs create art by intentionally leaving portions of the nail unpainted, resulting in clean geometric patterns that feel refreshingly modern. We achieve these looks by using tape or nail guides to section off areas before applying polish, then removing the barriers to reveal natural nail beneath. Try creating half-moon shapes at the base of each nail, leaving the tip area in your chosen color. Alternatively, design thin vertical strips that alternate between polish and natural nail for a sophisticated striped effect that requires no additional tools.
Metallic Dot Details
Metallic dot details transform simple solid colors into elegant statements through the strategic placement of small shimmering accents. We suggest using gold, silver, or rose gold polish applied with a dotting tool to create perfectly round embellishments. Place three small dots in a triangle formation on your big toe for balanced sophistication, or create a single centered dot on each nail for uniform elegance. These metallic touches catch light beautifully and add just enough glamour to elevate any base color without overwhelming the overall minimalist aesthetic.
Bold and Bright Color Combinations
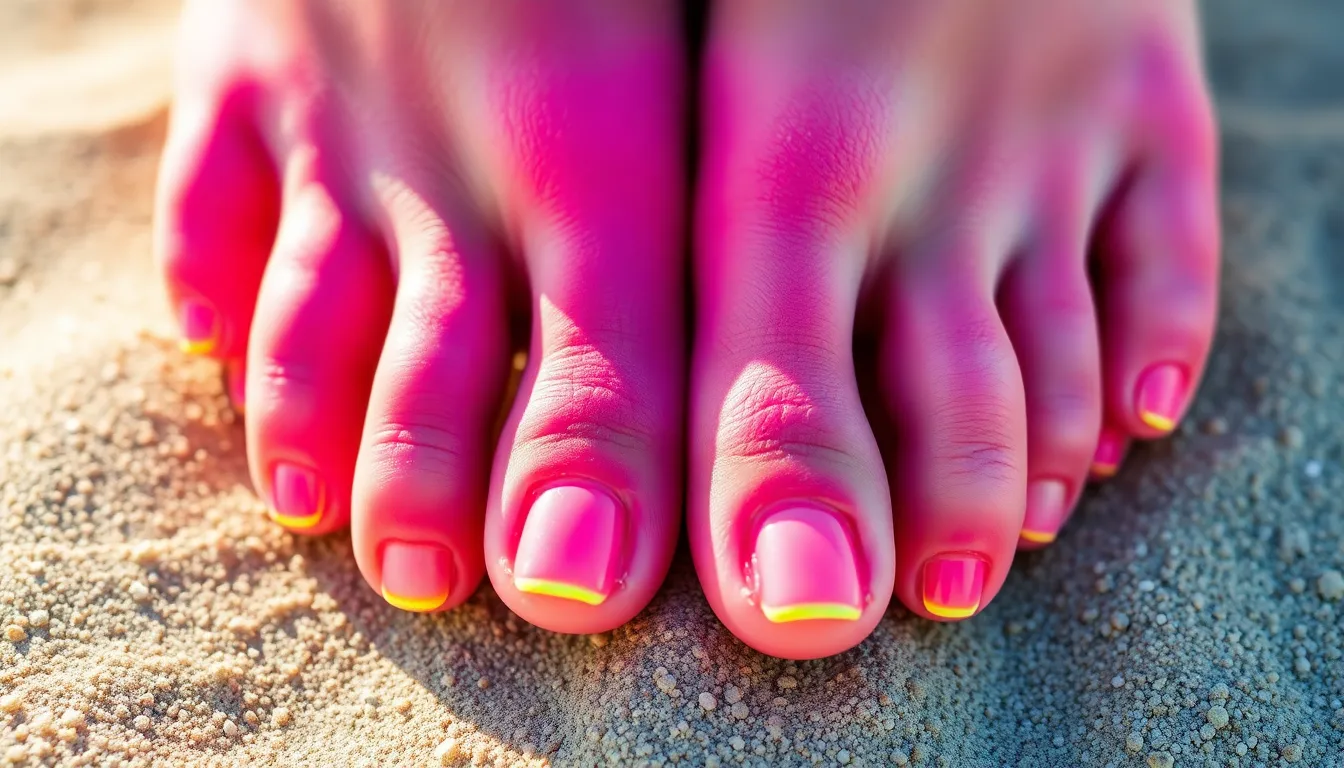
We’re diving into electrifying combinations that make your toes impossible to ignore. These vibrant techniques transform your pedicure into a statement piece that radiates confidence and creativity.
Neon Ombre Effects
Gradual neon fade creates stunning depth by starting with intense color at your nail tips and softening toward the cuticle. We recommend beginning with electric pink or lime green at the tip, then blending into white or a lighter shade as you work toward the base. Neon transition designs take this concept further by moving between two different fluorescent colors across the entire nail surface. You’ll achieve the smoothest results by applying each color while the previous layer remains slightly tacky, allowing natural blending at the meeting points.
Contrasting Color Blocks
Black and neon combinations deliver maximum visual impact by alternating between deep black and fluorescent shades on different toes. We suggest painting your big toe and ring toe in electric blue or hot pink, while keeping the remaining toes in classic black for balance. Pastel and neon pairings offer a softer approach that still commands attention through unexpected color relationships. Try combining baby pink with neon yellow, or lavender with electric green to create playful contrasts that feel both bold and wearable.
Sunset Gradient Designs
Warm sunset transitions capture nature’s most beautiful color combinations by blending orange into pink and finishing with golden yellow. We start with deep orange at the base, gradually introducing coral pink in the middle section, then adding bright yellow highlights near the tip. Golden hour effects focus on the magical moments before sunset using rich gold, burnt orange, and deep rose tones. These warm combinations work especially well when you add subtle shimmer to mimic the natural glow of evening light reflecting off your nails.
Holiday and Seasonal Toe Nail Themes
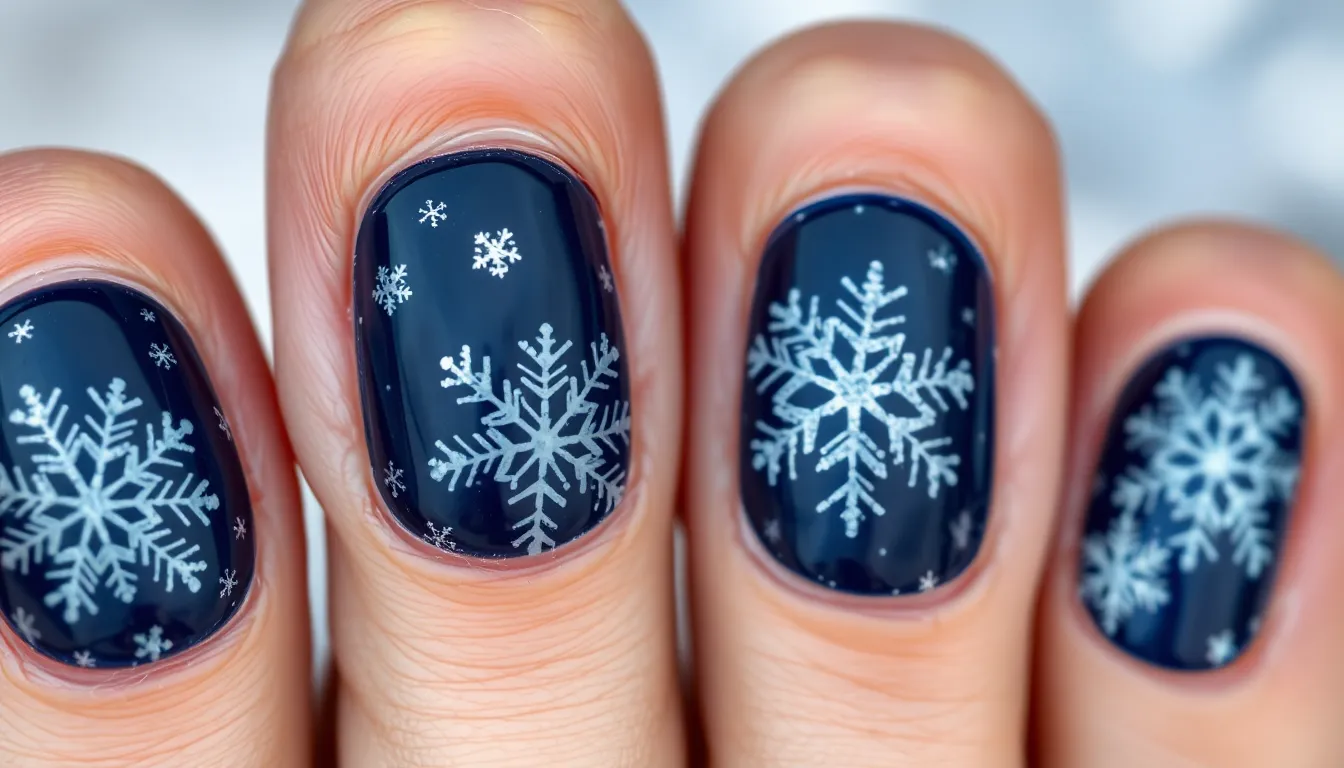
Celebrating special occasions and seasonal changes becomes even more exciting when we match our toe nail art to the time of year. These themed designs let us showcase our creativity while honoring the unique spirit of each season and holiday.
Winter Snowflake Patterns
Winter snowflake designs transform our toes into tiny winter wonderlands with delicate patterns that capture the season’s magic. We paint intricate snowflakes using white or silver polish on dark base colors like deep blue, dark purple, or black to create stunning contrast. Professional techniques include using stencils for precise patterns, stamping for consistent designs, or freehand painting with fine brushes for unique snowflake shapes.
Creating these winter masterpieces requires exact color combinations that mirror the season’s natural palette. Deep navy blue serves as the perfect backdrop for silver snowflakes, while black bases make white patterns pop dramatically. Dark purple creates a sophisticated foundation that pairs beautifully with both white and silver accents.
Halloween Spooky Designs
Halloween toe nail art embraces the spooky spirit with classic black and orange color combinations that instantly evoke the holiday’s excitement. We create frightening designs featuring spiderwebs stretched across our toes, ghostly figures floating on dark backgrounds, and carved pumpkin faces that bring Halloween magic to our feet. Playful bat silhouettes add extra drama when painted in black against bright orange bases.
Glow in the dark polish takes these Halloween designs to the next level, creating eerie effects that surprise and delight in low light conditions. Glitter adds sparkle to spider webs and makes ghostly designs shimmer with supernatural energy. Orange and black striped patterns create classic Halloween vibes, while adding small skull details or witch hat accents personalizes each spooky creation.
Spring Pastel Combinations
Spring toe nail art celebrates renewal and growth with soft pastel colors that reflect the season’s gentle beauty. We blend soft pink, lavender, mint green, pale yellow, and baby blue to create dreamy combinations that mirror blooming flowers and clear spring skies. These light colors serve as perfect bases for delicate floral patterns that capture spring’s natural awakening.
Polka dot arrangements in multiple pastel shades create cheerful designs that embody spring’s playful energy. Simple color gradients transition smoothly from one pastel to another, mimicking the gentle color changes we see in spring sunsets. Tiny flower motifs painted in complementary pastels add romantic touches that celebrate the season’s floral abundance.
Textured Nail Art Techniques
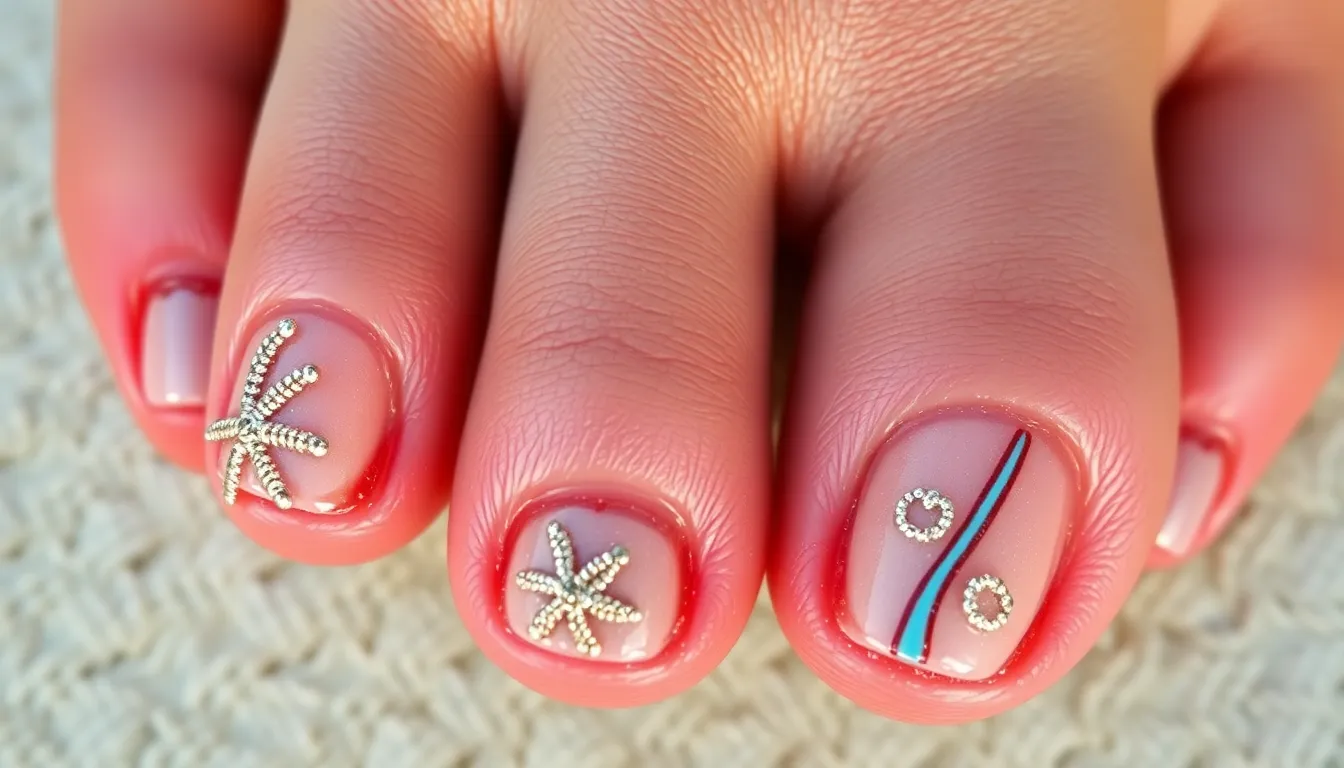
Moving beyond flat color applications, we can transform ordinary toe nail art into dimensional masterpieces through texture techniques. These methods create visual depth and tactile interest that elevates any pedicure design.
Matte and Glossy Contrasts
Combining matte and glossy finishes on the same nail creates stunning visual depth that catches light in unexpected ways. We achieve this effect by applying glossy gel over exact areas while leaving others with a matte finish. Strategic placement of contrasting textures highlights particular design elements like stripes, dots, or geometric shapes.
Selective application of matte top coats works exceptionally well for emphasizing certain nail art components. We can create sophisticated patterns by masking portions of glossy polish before applying the matte finish. This technique transforms simple designs into complex visual statements that appear different from various viewing angles.
Sand Texture Effects
Sand texture effects bring a subtle, organic feel to toe nail art through loose acrylic powder applications over uncured gel polish. We sprinkle the powder onto wet gel designs before curing under a lamp, creating surfaces that mimic natural sand or velvet materials. Brushing off excess powder after curing produces a smooth yet textured matte appearance.
This technique works beautifully with beach themed designs or minimalist color palettes. We enhance the sandy effect by choosing powder colors that complement the base shade. Clear acrylic powder over colored bases creates sophisticated neutral tones, while matching colored powders intensify the overall design impact.
Velvet Finish Applications
Velvet finishes create luxurious, soft textured surfaces using specialized powders or flocking agents over tacky gel bases. We apply these materials before the final cure to achieve authentic velvety textures on nail surfaces. This technique transforms ordinary polish into rich, dimensional art that begs to be touched.
Exact velvet powders produce more dramatic results than standard acrylic alternatives. We combine this finish with chrome accents or metallic details for added sophistication. The contrast between smooth metallic elements and soft velvet textures creates compelling visual interest that works beautifully for special occasions or elegant everyday looks.
Animal Print Toe Nail Designs
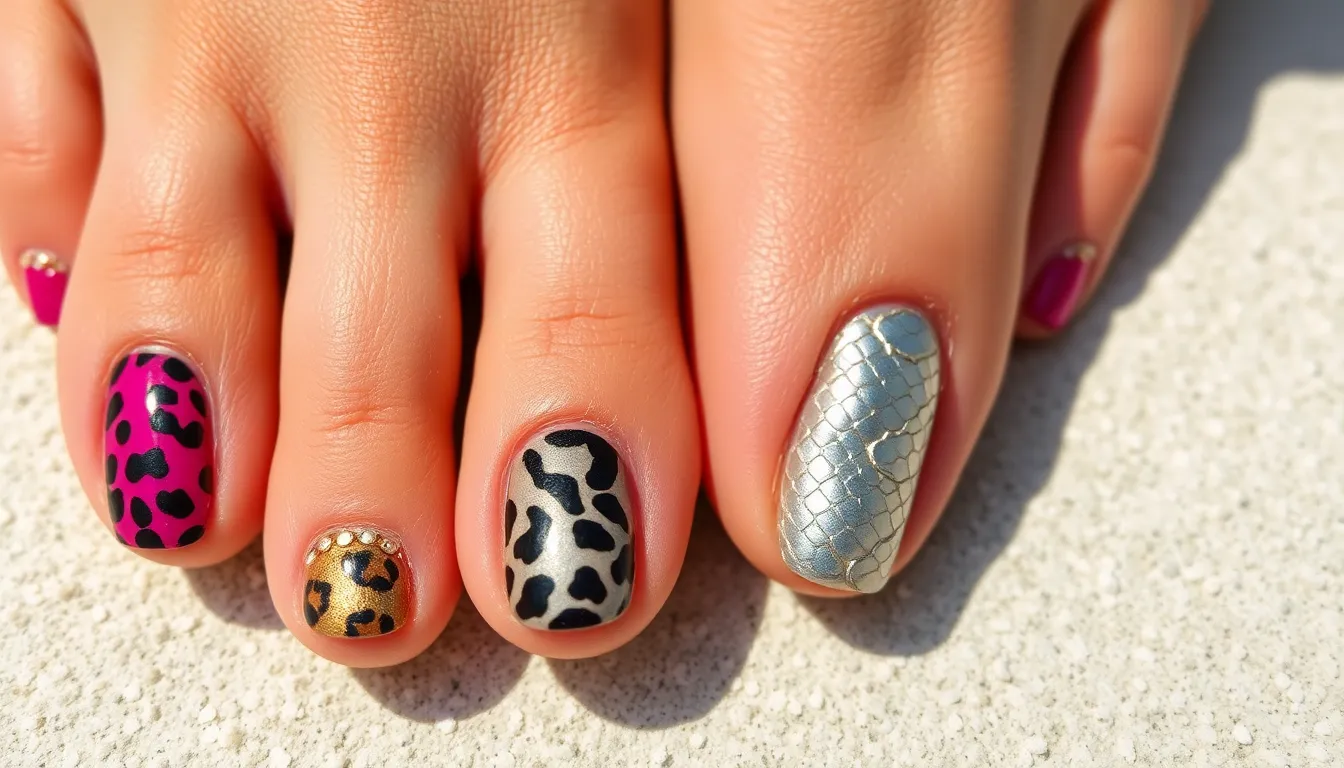
Animal print toe nail art brings wild sophistication to your pedicure routine. These bold patterns transform your toes into statement pieces that perfectly complement open-toe shoes and summer outfits.
Leopard Spot Patterns
Leopard spot patterns create the most beloved animal print design for toe nails. Classic spots feature brown, cream, and black shades that mimic natural leopard fur markings. We recommend starting with a neutral or white base polish to achieve the traditional look that works with any outfit.
Modern variations incorporate brighter colors like hot pink, electric blue, or emerald green for contemporary twists. Each spot should vary in size and shape to replicate authentic leopard patterns. Applying spots with a small dotting tool or toothpick gives you better control over placement and size.
The wild, edgy feel of leopard prints complements both casual and dressy occasions. Pairing leopard spots with gold accents or rhinestones adds luxury appeal to your pedicure.
Zebra Stripe Designs
Zebra stripe designs offer chic contrast through their characteristic black and white patterns. Clean lines create attention-grabbing pedicures that stand out in any crowd. We suggest using striping tape or nail art brushes to achieve perfectly straight lines across your toe nails.
Colored variations transform traditional zebra stripes into playful summer designs. Red and white stripes evoke nautical themes, while blue and silver combinations create modern metallic effects. Gradient zebra stripes blend colors seamlessly for softer interpretations of this bold pattern.
Diagonal stripe placement adds ever-changing movement to your toe nail design. Vertical stripes elongate shorter toe nails, while horizontal stripes create width on narrow nail beds.
Snake Skin Textures
Snake skin textures replicate the sophisticated scales and patterns found in nature. Fine detailing creates realistic scale appearances using small brush strokes or stamping techniques. We recommend metallic or glossy polish finishes that capture the sleek appearance of actual snake skin.
Gradient effects enhance snake skin patterns by transitioning from light to dark scales across each nail. Silver and gray combinations provide classic elegance, while gold and bronze tones add warmth to your pedicure. Iridescent topcoats create color-shifting effects that mimic real reptile skin.
Scale patterns work beautifully as accent designs on big toes while keeping other nails in solid coordinating colors. This approach maintains sophistication without overwhelming your overall pedicure look.
DIY Tools and Techniques for Home Application

Creating stunning toe nail art at home becomes achievable when you have the right tools and master essential techniques. We’ll explore the fundamental equipment and methods that transform ordinary pedicures into artistic masterpieces.
Essential Nail Art Brushes
Striping brushes create fine lines and intricate details that elevate your toe nail designs. These thin brushes excel at drawing delicate patterns like vines, geometric borders, or accent lines that frame your artwork. We recommend keeping multiple sizes to achieve varying line thickness throughout your design.
Flat brushes fill larger areas with smooth, even color coverage. They work perfectly for color blocking techniques, creating gradient effects, or applying base colors for complex designs. The wide surface area ensures consistent application without streaking or uneven coverage.
Detail brushes handle small, intricate work that requires precision. These tiny brushes paint miniature flowers, add highlights to designs, or create texture effects like scales or feathers. Their fine tips allow you to work in tight spaces around the cuticle area with complete control.
Dotting Tool Methods
Random dots create playful patterns using varying sizes and colors throughout your design. This technique works beautifully for abstract art, galaxy effects, or adding texture to existing patterns. We suggest starting with larger dots and filling in with smaller ones for visual balance.
Floral designs use strategic dot placement to form flowers and botanical patterns. Create petals by placing five dots in a circle formation, then add a center dot in a contrasting color. This method produces charming daisies, cherry blossoms, or abstract floral motifs without requiring advanced painting skills.
Geometric patterns employ dots to construct shapes like chevrons, zigzags, or mandala designs. Place dots in straight lines for chevron patterns, or arrange them in circular formations for mandala effects. The versatility of dotting tools allows you to create complex looking designs with simple motions.
Dotting tools come in different sizes, allowing artists to create various dot sizes throughout their design. For uniform dots, dip the tool in polish for each individual dot. For gradient effects, continue dotting until the polish exhausts completely.
Tape and Stencil Tricks
Chevron patterns use tape placement to create crisp, clean geometric designs. Apply tape in V shaped formations across your nail, paint over the exposed areas, then remove tape while polish remains wet. This technique guarantees sharp lines that look professionally executed.
Geometric shapes rely on stencils to paint precise triangles, squares, or hexagons. Position stencils firmly against your nail surface, apply polish with dabbing motions to prevent bleeding, then lift stencils carefully. We find this method perfect for creating modern, architectural inspired designs.
Striped nails achieve multi colored effects through strategic tape application. Place tape strips parallel across your nail, leaving exposed sections for different colors. This technique creates bold racing stripes, rainbow effects, or subtle gradient transitions between complementary shades.
Conclusion
We’ve explored an incredible range of toe nail art possibilities that prove your feet deserve just as much creative attention as your hands. From sophisticated French variations to bold animal prints and textured finishes there’s truly something for every style preference and skill level.
The beauty of toe nail art lies in its versatility and forgiving nature. Whether you’re drawn to minimalist designs or eye-catching seasonal themes you can experiment freely knowing that mistakes are easily corrected and creativity is always rewarded.
With the right tools and techniques at your disposal transforming your pedicure routine has never been easier. We encourage you to start with designs that speak to you and gradually build your confidence as you discover the joy of expressing your personality through your toes.
Frequently Asked Questions
What is toe nail art and why is it popular?
Toe nail art is a form of creative self-expression that involves decorating toenails with various designs, colors, and techniques. It’s gaining popularity because it offers a low-pressure environment to experiment with nail art, allows for personal creativity, and provides a fun way to showcase personality through intricate or simple designs that complement summer outfits and open-toe shoes.
What are some beginner-friendly toe nail art designs?
Beginners can start with simple geometric patterns like striped accent nails, polka dots, or single accent stripes. Minimalist designs featuring negative space, metallic dot details, and basic French pedicure variations are also perfect for newcomers. These designs require minimal tools and techniques while still creating visually appealing results.
How can I create modern French pedicure variations?
Modern French pedicures can be elevated with Rainbow French Tips using multiple colors, Ombre rainbow effects for gradient transitions, Glitter French Lines for sparkle, and Colored French Bases instead of traditional clear polish. These variations maintain the sophisticated appeal while adding personal flair and contemporary style to the classic design.
What are the best summer-themed toe nail designs?
Popular summer designs include floral patterns like tiny daisies, sophisticated rose petals, and bold tropical hibiscus flowers. Beach-themed options feature ocean wave designs with blue-green gradients, seashell motifs, and palm tree silhouettes against sunset backgrounds. These designs capture the vibrant energy and tropical spirit of summer.
How do I create textured nail art effects on toes?
Create textured effects by combining matte and glossy finishes for visual depth, using loose acrylic powder for sand texture effects, or applying velvet finishes for luxury appeal. These dimensional techniques transform ordinary designs into sophisticated masterpieces by adding tactile elements that enhance the overall pedicure experience.
What tools do I need for DIY toe nail art at home?
Essential tools include striping brushes for fine lines, flat brushes for even coverage, and detail brushes for intricate work. Dotting tools help create patterns and florals, while tape and stencils achieve crisp geometric shapes. These basic supplies make stunning toe nail art accessible for home application without professional equipment.
How can I incorporate seasonal themes into my toe nail art?
Match designs to seasons with winter snowflake patterns in white or silver, Halloween themes using black and orange with spooky motifs, and spring designs featuring soft pastels with floral patterns. Each season offers unique color palettes and motifs that reflect the time of year’s spirit and energy.
What are some bold color combinations for statement toe nails?
Try neon ombre effects fading from intense tips to lighter shades, contrasting color blocks pairing black with neon, or sunset gradients using orange, pink, and golden yellow. These vibrant combinations create eye-catching statement pieces that radiate confidence and showcase creative flair in toe nail art.
