Halloween’s creeping up fast and we’re here to help you nail the perfect spooky look – literally! Nothing completes a killer Halloween costume quite like wickedly designed nails that make everyone do a double-take. Whether you’re channeling classic horror vibes or going for cute-creepy charm your fingertips can become the ultimate accessory.
We’ve gathered the most hauntingly beautiful nail art ideas that’ll transform your manicure from ordinary to extraordinary. From blood-dripping designs that’ll make vampires jealous to adorable pumpkin patterns that scream autumn fun these looks work for every skill level and style preference.
Spooky Classic Halloween Nail Art Ideas
Classic Halloween motifs never go out of style when it comes to nail art. These timeless designs capture the essence of traditional Halloween imagery while remaining beginner-friendly and instantly recognizable.
Jack-o’-Lantern Pumpkin Designs
Orange bases serve as the perfect foundation for carved pumpkin faces on your nails. Start with two coats of bright orange polish, then use black nail art pens or thin brushes to draw triangular eyes and jagged smiles. We recommend adding small green stems using acrylic paint for extra detail.
Gradient pumpkin designs create depth and dimension across multiple nails. Paint each nail with varying shades of orange from light to dark, creating an ombre effect that mimics real pumpkins. Add vertical lines using darker orange or brown polish to simulate pumpkin ridges.
Mini pumpkin patches look adorable when scattered across shorter nails. Create tiny pumpkins using dotting tools and orange polish, then add small black dots for simple faces. This technique works especially well on accent nails paired with solid orange or black base colors.
Black Cat Silhouettes
Silhouette designs showcase the mysterious elegance of black cats against contrasting backgrounds. Paint your nails with deep purple, orange, or silver bases, then use black polish to create cat shapes sitting or arching their backs. We suggest practicing the silhouette shape on paper first.
Yellow eyes make cat silhouettes come alive with just tiny dots of bright polish. Add two small yellow spots where the cat’s eyes would be, creating an eerie glow effect. Green eyes work equally well for a more mystical appearance.
Multiple cats create storytelling opportunities across your nail set. Paint different cat poses on each nail, showing cats walking, sitting, or stretching. This technique transforms your nails into a miniature Halloween scene.
Ghost and Boo Patterns
White ghost shapes require steady hands but deliver maximum spooky impact. Use white polish over black or dark purple bases to paint simple ghost outlines with wavy bottoms. Add two black dots for eyes and a small oval for the mouth using dotting tools.
Glow in the dark polish enhances ghost designs with supernatural effects. Apply glow polish over your white ghost shapes, then charge them under bright light. Your ghostly nails will emit an eerie glow in dark settings throughout Halloween night.
“Boo” lettering adds playful text elements to ghost themed nails. Write “BOO” in spooky fonts across accent nails using black polish over white bases. We recommend using nail art stencils or stickers for clean lettering if freehand writing proves challenging.
Gothic Glam Halloween Nail Art Ideas

Gothic glam nail art transforms classic Halloween motifs into sophisticated designs that blend dark elegance with luxurious touches. We’ll explore three striking techniques that create dramatic yet refined looks perfect for Halloween festivities.
Blood Drip and Splatter Effects
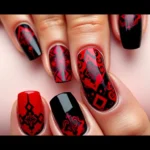
Blood drip effects create dramatic visual impact using red polish against black backgrounds for maximum contrast. Acrylic paint provides more realistic splatter patterns than traditional nail polish while offering better control over texture and opacity. 3D blood drops elevate the design by adding dimensional elements that catch light and create authentic-looking effects.
We recommend starting with a black base coat and allowing it to dry completely before applying red polish in dripping motions from the cuticle downward. Varying the thickness of each drip creates natural-looking blood patterns that appear more realistic. Small splatters around the nail bed enhance the overall effect while maintaining the gothic aesthetic.
Spider Web Designs
Spider web patterns offer versatile design options that work beautifully as French tip alternatives or full nail coverage. Gel polish creates precise, intricate web details that maintain their shape throughout wear while acrylic applications provide more dimensional texture. Color variations beyond traditional black include metallic silver, deep purple, or even holographic finishes for modern interpretations.
We suggest using thin nail art brushes or dotting tools to create delicate web patterns that start from one corner and radiate outward. French tip spider webs provide sophisticated Halloween flair while maintaining workplace appropriateness. Adding small rhinestone “dewdrops” or glitter accents transforms simple webs into glamorous gothic statements.
Dark Ombre and Gradient Looks
Dark ombre techniques transition between complementary Halloween colors to create mysterious, sophisticated effects. Black to purple gradients evoke twilight atmospheres while orange to red transitions capture autumn’s fiery essence. Glossy topcoats intensify the gradient effect and create smooth color blending that appears professional.
We achieve seamless gradients by applying lightest colors first, then blending darker shades while polish remains workable. Makeup sponges create smooth transitions between colors when dabbed gently across the nail surface. Multiple thin coats produce better results than single thick applications, allowing each layer to enhance the overall depth and richness of the gothic glam effect.
Cute and Whimsical Halloween Nail Art Ideas

While gothic glamour creates dramatic effects, we can embrace the sweeter side of Halloween with playful designs that capture the season’s charm without overwhelming spookiness.
Candy Corn Inspired Nails
Candy corn colors transform our nails into festive treats that celebrate Halloween’s sweetest tradition. We achieve this iconic look by layering yellow, orange, and white nail polish in horizontal bands across each nail. Starting with a white base coat creates the perfect foundation for our candy corn gradient effect.
Geometric patterns elevate this design beyond simple stripes. We incorporate triangular shapes and color blocking techniques to mimic candy corn’s distinctive layered appearance. Alternating the direction of these geometric elements across different nails creates visual interest while maintaining the cohesive candy corn theme.
Friendly Monster Faces
Smiling ghosts bring warmth to our Halloween nail art without sacrificing seasonal spirit. We paint these cheerful specters using white polish as our base, then add simple curved lines for eyes and mouths using black nail art pens. Each nail becomes a canvas for a different ghost expression, from winking to broadly grinning.
Happy pumpkins add vibrant personality to our monster collection. We use bright orange polish as our foundation, then create jack o’lantern faces with varying expressions using black detailing. These playful pumpkins can feature everything from surprised looks to mischievous grins, making each nail a unique character.
Halloween Cookie Designs
Sugar cookie nails recreate the beloved treat right on our fingertips. We start with a warm beige or tan base coat to simulate cookie dough, then add colorful “frosting” details using pastel polishes. Small dots and lines mimic sprinkles, while we can use nail stickers for more intricate decorative elements.
Jack o’lantern cookies combine two Halloween favorites into one adorable design. We paint orange circular shapes to represent cookie bases, then add classic pumpkin faces using black polish for features. These cookie inspired nails capture the cozy feeling of Halloween baking while maintaining our festive nail art theme.
Movie-Inspired Halloween Nail Art Ideas

Cinema brings our favorite spooky characters to life, and we can recreate these iconic looks right on our fingertips. These movie-inspired designs let us channel beloved Halloween films while showcasing our nail art skills.
Tim Burton Character Themes
Jack Skellington nails capture the Pumpkin King’s iconic look using simple black and white polish combinations. We paint Jack’s distinctive face silhouette on accent nails, featuring his signature stitched smile and hollow eye sockets. The remaining nails work beautifully with alternating black and white bases or subtle bone patterns.
Edward Scissorhands designs showcase the character’s metallic scissor hands using silver or gunmetal polish. We create delicate scissor silhouettes on each nail, sometimes adding tiny cut marks or torn fabric effects. Black bases make the silver scissors pop dramatically against the dark backdrop.
Corpse Bride nail art brings Emily’s romantic gothic aesthetic to our manicures through wedding-inspired elements. We paint delicate bridal veils, wilted flowers, and “till death do us part” script across our nails. Blue and silver polish combinations perfectly capture the movie’s ethereal color palette.
Classic Horror Movie References
Jason Voorhees nails feature the Friday the 13th killer’s signature hockey mask and machete imagery. We alternate between painting the iconic white mask with red triangle markings and silver machete silhouettes. Dark backgrounds enhance the menacing effect of these classic slasher elements.
Michael Myers designs recreate the Halloween franchise’s masked killer using stark white and black polish. We paint the emotionless mask on accent nails while incorporating knife silhouettes and shadow effects. The minimalist color scheme makes these designs instantly recognizable.
Freddy Krueger nail art showcases the Nightmare on Elm Street villain’s razor glove using red and metallic silver combinations. We paint individual finger blades across our nails, sometimes adding burn textures or striped sweater patterns. The red and black color scheme perfectly captures Freddy’s menacing appearance.
Disney Halloween Villain Nails
Maleficent nails embody the Sleeping Beauty villain’s dark elegance through purple and black gothic designs. We paint her distinctive horned silhouette, flowing cape details, and magical staff imagery. Deep purple bases with black accent details create the perfect villainous sophistication.
Ursula designs bring the Little Mermaid’s sea witch to life with tentacle patterns and oceanic elements. We use purple polish as our base, adding black tentacle swirls and golden crown details. Shimmer topcoats create the perfect underwater effect for these aquatic villain nails.
Jafar nail art captures the Aladdin antagonist’s scheming nature through golden staff designs and snake motifs. We paint his hypnotic snake staff, cobra transformations, and Arabian-inspired geometric patterns. Black bases with gold accents perfectly represent his dark magical powers.
Advanced Halloween Nail Art Ideas

We’re taking Halloween nail art to the next level with sophisticated techniques that transform your nails into miniature works of art. These advanced methods require more skill and patience but deliver stunning results that’ll make your manicure the centerpiece of any Halloween look.
3D Sculpted Elements
Three-dimensional decorations elevate your Halloween nails from flat designs to tactile masterpieces that demand attention. Nail artists use gel, acrylic, or resin to build textures directly onto the nail surface, creating tiny pumpkins, intricate cobwebs, detailed bat wings, and ghostly figures that you can actually feel.
Building techniques involve layering materials to achieve realistic depth and dimension. We start with a base design, then add sculpted elements using specialized tools like dotting pens, fine brushes, and sculpting implements. Popular 3D elements include:
- Miniature pumpkins with raised ridges and curled stems
- Layered cobwebs that catch light from multiple angles
- Bat silhouettes with textured wing details
- Ghost figures with flowing, raised edges
Application methods require curing each layer under UV or LED lights to ensure durability. The sculpted elements create visually striking manicures that stand out dramatically from traditional flat nail art designs.
Glow-in-the-Dark Accents
Special glow-in-the-dark polish transforms ordinary Halloween designs into luminous spectacles that come alive in darkness. These phosphorescent materials absorb UV light during the day and emit an eerie glow when the lights go out, making your nails perfect for evening Halloween events.
Application techniques involve layering glow-in-the-dark powders or polishes over standard base colors. We apply the glow element as topcoats, accent details, or mixed directly into designs. The most dramatic effects come from:
- Skeleton hand bones that illuminate against black backgrounds
- Ghostly figures that appear to float in darkness
- Spiderweb patterns that glow with ethereal light
- Mystical symbols that reveal hidden messages
Charging methods require exposing the nails to natural sunlight or UV lamps before events. The glow effect typically lasts 4-6 hours, creating stunning visual impact that surprises and delights throughout Halloween night.
Intricate Hand-Painted Scenes
Detailed Halloween motifs painted directly onto nails showcase artistic skill through miniature industry scenes. Skilled nail artists use fine brushes to create haunted houses, full moons, black cats, and eerie forests that tell complete stories across your fingertips.
Painting techniques combine multiple methods including dotting, stamping, and layering to achieve professional results. We use specialized nail art brushes ranging from size 000 to 3, along with dotting tools and detail brushes. Common scene elements include:
- Haunted houses with glowing windows and twisted trees
- Moonlit graveyards with detailed tombstones
- Black cats silhouetted against orange harvest moons
- Mystical forests with bare branches and floating spirits
Color combinations typically feature deep purples, midnight blacks, burnt oranges, and silver accents to create atmospheric depth. These hand-painted scenes often span multiple nails, creating cohesive artwork that transforms your entire manicure into a Halloween masterpiece.
Quick and Easy Halloween Nail Art Ideas

Perfect for beginners or anyone short on time, these techniques deliver stunning Halloween nails without requiring advanced skills or expensive tools.
Simple Stamping Techniques
Stamping plates make creating intricate Halloween designs incredibly straightforward. We recommend using nail stamping plates with Halloween themed images like bats, spiders, or jack o lanterns to achieve professional looking results in minutes.
Start by applying your base color and letting it dry completely. Press the stamping plate firmly onto your nail and lift straight up to transfer the design. This method works especially well for repeating patterns like spider webs or tiny pumpkins across multiple nails.
Choose metallic stamping polishes in silver or gold to make your Halloween motifs pop against darker base colors. The contrast creates visual interest while maintaining that spooky aesthetic we’re going for.
Nail Sticker Applications
Nail stickers offer the quickest path to Halloween nail art success. These pre made designs come in various Halloween patterns including ghosts, cobwebs, skulls, and miniature jack o lanterns that instantly transform plain nails.
Apply them directly onto a dried base coat for best adhesion. We’ve found that pressing from the center outward eliminates air bubbles and ensures smooth application. Popular sticker designs include tiny bats scattered across the nail or single statement pieces like a large spider web.
Seal everything with a quality top coat to prevent lifting and extend wear time. This final step keeps your Halloween stickers looking fresh throughout the entire spooky season.
Basic Color Blocking Methods
Color blocking creates bold Halloween looks using simple geometric shapes and strategic color placement. The classic black and orange combination remains the most recognizable approach, using black as your base and orange for striking accents.
Pink Cobweb Renaissance: Paint a nude base coat first, then use pink polish to create cobweb designs on the tips. This technique mimics a French tip effect while adding that Halloween twist we love.
Two Tone Splitting: Divide each nail horizontally or vertically using tape, then paint each section a different Halloween color. Popular combinations include purple and green, black and silver, or orange and burgundy for a more sophisticated autumn vibe.
These color blocking methods work particularly well on shorter nails where detailed artwork might look cramped. The clean lines and bold contrasts make your Halloween manicure visible from any distance.
Color Palette Halloween Nail Art Ideas

Building on our previous designs, we’ll explore how strategic color choices can transform your Halloween manicure into a cohesive masterpiece. These carefully curated color combinations serve as the foundation for creating stunning Halloween nail art that perfectly captures the season’s essence.
Orange and Black Combinations
Orange and black combinations remain the quintessential Halloween color duo that instantly evokes spooky season vibes. We love using bright orange as a base color while incorporating black details like pumpkin stems, bat silhouettes, or spider outlines for maximum contrast. These classic colors work beautifully for gradient effects where orange fades into deep black at the tips.
Creating pumpkin patch designs becomes effortless with this timeless combination. Start with an orange base coat then add black vertical lines to mimic pumpkin ridges. Finish with small black stems and curly vines for authentic jack o’lantern appeal. We recommend alternating orange and black base colors across different nails for ever-changing visual interest.
Purple and Green Schemes
Purple and green schemes create an enchanting witchy atmosphere that’s perfect for those seeking mysterious Halloween vibes. Deep purple serves as an excellent base for celestial designs featuring silver stars and crescent moons. Emerald green works wonderfully for creating spooky forest scenes or witch themed nail art.
These colors pair beautifully together for ombre transitions that mimic twilight skies or magical potions. We suggest using purple as your dominant color while adding green accent details like poison bottle designs or mystical swirls. Adding black to this combination creates dramatic depth that enhances the supernatural aesthetic.
Metallic and Glitter Accents
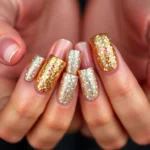
Metallic and glitter accents elevate any Halloween design from ordinary to extraordinary with their luxurious finish. Silver metallics work perfectly for spider web details, ghost outlines, or moonlight effects that catch light beautifully. Gold accents add warmth to autumn themed designs featuring leaves, harvest moons, or vintage Halloween motifs.
| Metallic Shade | Best Uses | Effect Created |
|---|---|---|
| Silver | Spider webs, ghosts, stars | Cool, ethereal glow |
| Gold | Autumn leaves, harvest themes | Warm, vintage appeal |
| Copper | Pumpkin details, witch elements | Rich, earthy depth |
| Chrome | Futuristic horror, sci-fi themes | Mirror-like intensity |
Glitter overlays in orange and purple tones create mesmerizing depth when applied over solid base colors. Chrome finishes work exceptionally well for modern gothic looks or futuristic horror themes. We recommend using metallic foil accents sparingly to highlight exact design elements without overwhelming the overall composition.
Conclusion
We’ve explored a industry of Halloween nail art possibilities that’ll transform your manicure into the perfect spooky accessory. From beginner-friendly pumpkins to advanced 3D sculptures these designs offer something for every skill level and style preference.
Whether you’re channeling classic horror vibes or embracing cute Halloween charm your nails can become miniature masterpieces that complete your seasonal look. The techniques we’ve shared—from simple stamping to intricate hand-painted scenes—ensure you’ll find the perfect approach for your Halloween celebration.
Remember that Halloween nail art is all about creativity and fun. Don’t be afraid to mix techniques combine color schemes or add your own personal twist to these ideas. Your nails are the perfect canvas to showcase your Halloween spirit and make a memorable impression at every spooky gathering.
Frequently Asked Questions
What are the easiest Halloween nail art designs for beginners?
Simple pumpkin patterns, basic ghost shapes, and candy corn stripes are perfect for beginners. These designs use basic colors like orange, black, white, and yellow. You can also try nail stickers or stamping plates for professional-looking results without advanced painting skills.
How can I make my Halloween nails glow in the dark?
Apply glow-in-the-dark nail polish as a base coat or accent over regular polish. Charge the nails under bright light for several minutes before going into darkness. This technique works especially well with ghost designs, spider webs, and spooky silhouettes.
What colors work best for Halloween nail art?
Classic combinations include orange and black for traditional spooky vibes, purple and green for witchy themes, and deep reds for gothic looks. Metallic accents in gold, silver, or copper can elevate any Halloween design and add sophisticated sparkle.
How long does Halloween nail art typically last?
With proper base and top coats, Halloween nail art can last 7-10 days. 3D elements and intricate designs may chip sooner. Use cuticle oil daily and wear gloves when cleaning to extend wear time. Touch up small chips with matching polish.
Can I create movie-inspired Halloween nails without artistic skills?
Yes! Use nail stickers featuring popular characters like Jack Skellington or Disney villains. Stamping plates offer detailed movie-themed designs. For simple character looks, try basic color blocking – like black and white stripes for Beetlejuice or red and green for Freddy Krueger.
What tools do I need for advanced Halloween nail art?
Essential tools include fine detail brushes, dotting tools, nail art pens, and small sponges for gradients. For 3D effects, you’ll need sculpting gel or acrylic powder. Stamping plates, stencils, and nail stickers can help achieve complex looks more easily.
How do I create realistic blood drip effects on nails?
Start with a dark base color, then use deep red polish on a thin brush. Begin at the cuticle and drag downward in irregular patterns, varying thickness and length. Layer different red shades for depth, and finish with glossy top coat for wet-looking blood.
Are there Halloween nail designs suitable for short nails?
Absolutely! Try simple accent nails with tiny pumpkins, single Halloween stickers, or color blocking geometric patterns. Ombre effects, small dots creating spider patterns, and mini French tips with Halloween colors all work beautifully on shorter nail lengths.
