We’re about to transform your manicure game with nail art that literally lights up the night. Glow-in-the-dark nails aren’t just a trend – they’re a statement that turns your fingertips into miniature beacons of creativity and fun.
Whether you’re planning a night out with friends or simply want to add some magic to your everyday look, luminescent nail designs offer endless possibilities. From subtle glowing accents to full-coverage phosphorescent masterpieces, these eye-catching manicures are surprisingly easy to achieve at home.
The best part? You don’t need expensive salon treatments or professional skills to create stunning glow-in-the-dark nail art. With the right products and techniques, we’ll show you how to make your nails the center of attention in any dimly lit room. Get ready to discover creative designs that’ll have everyone asking where you got your amazing glowing manicure.
Classic Glow in the Dark Nail Polish Designs
Traditional glow in the dark polish techniques offer the perfect starting point for anyone wanting to experiment with luminescent nails. These time-tested approaches deliver reliable results and work beautifully for both beginners and experienced nail artists.
Solid Neon Colors That Charge Under Light
Solid applications create the most intense glow effects we can achieve with standard nail polish. Neon green delivers the brightest luminescence, followed closely by electric blue and vibrant yellow shades. We recommend applying three thin coats rather than one thick layer to maximize light absorption and prevent streaking.
Popular solid colors include lime green, electric blue, hot pink, and bright orange that charge quickly under natural or artificial light. Electric green shades typically glow for 2-3 hours after a 10-minute light exposure, while blue tones maintain their luminescence for approximately 1-2 hours. Pink and orange varieties offer softer glows that last around 45-60 minutes in complete darkness.
French Tips With Glowing Edges
French manicures gain dramatic appeal when we add glowing tips to classic nude or clear bases. Start with your preferred neutral base color and apply two coats for even coverage. Edge definition becomes crucial for this technique, so we suggest using nail guides or tape to create crisp lines.
Apply the glow polish only to the tip area, extending about 3-4mm from the nail edge for optimal visual impact. Green glow tips paired with pale pink bases create elegant contrast, while blue luminescent edges complement beige or champagne base colors beautifully. This design works exceptionally well for evening events where you want subtle sophistication with unexpected flair.
Gradient Fade Effects From Dark to Bright
Gradient techniques blend regular polish with glow formulas to create stunning ombre effects that reveal themselves in darkness. We start with a dark base color like deep purple or black, then sponge the glow polish from the tip toward the cuticle area. This creates a natural fade that appears subtle in normal light but transforms dramatically when the lights dim.
Successful gradients require patience and the right tools, including makeup sponges cut into small triangular pieces for precise application. Work the glow polish in light dabbing motions, building up intensity gradually rather than applying heavy amounts at once. Purple to green gradients offer the most striking results, while black to blue combinations provide sophisticated elegance for professional settings.
Galaxy and Space-Themed Glow Nail Art

Taking your luminescent manicure to cosmic heights, galaxy and space-themed designs offer endless possibilities for creating otherworldly nail art that’ll have everyone stargazing at your fingertips.
Starry Night Sky Patterns
Glitter Application Techniques create the most authentic starry night effects when you layer glow-in-the-dark glitter polishes over dark base colors. We recommend starting with a deep navy or black base coat, then applying light coats of glow-in-the-dark polish to mimic twinkling stars across your nail canvas.
Layering Methods work best when you build up the starry effect gradually, allowing each coat to charge under light before applying the next. Mix different sizes of glow-in-the-dark glitter particles to create depth and dimension in your night sky design.
Color Combinations that work exceptionally well include silver glitter over midnight blue, white sparkles on black backgrounds, and iridescent particles mixed with traditional glow formulas for maximum impact.
Planet and Moon Phase Designs
Moon Phase Sequences make stunning accent nails when you dedicate each finger to a different lunar stage using glow-in-the-dark materials. Start with a new moon using dark polish, then gradually add more glowing area for waxing phases, culminating in a full moon design using complete glow coverage.
Planetary Ring Effects showcase Saturn-inspired designs where you apply thin lines of glow-in-the-dark polish around a central planetary circle. These ring patterns become especially dramatic in low light conditions, creating an authentic celestial appearance.
Mars-Inspired Designs use red-tinted glow formulas to recreate the red planet’s distinctive appearance, while Jupiter designs can incorporate swirling patterns using multiple glow colors to represent the gas giant’s atmospheric bands.
Constellation Nail Art With Glowing Stars
Constellation Mapping requires careful placement of glow-in-the-dark dots to recreate famous star patterns like the Big Dipper or Orion across your nail set. We suggest using a fine brush or dotting tool to apply small points of glow polish at precise locations.
Star Point Techniques involve creating varying sizes of glowing dots to represent different star magnitudes within each constellation pattern. Larger dots represent brighter stars, while smaller applications show dimmer celestial bodies.
Connected Patterns can be enhanced by using thin lines of glow polish to connect star points, making constellation shapes more visible in both regular and low light conditions. This technique helps create a cohesive celestial story across all your nails.
Halloween-Inspired Glow in the Dark Nails

Halloween transforms glow nail art into spine-tingling masterpieces. We’ll explore how to create haunting designs that literally light up the night.
Spooky Ghost and Skeleton Motifs
Ghost designs offer endless creative possibilities with their ethereal glow effects. We recommend starting with a black jelly base polish to enhance the luminescent properties of your ghost shapes. Simple ghost silhouettes can be painted using white glow polish, while more detailed spirits require layering techniques for dimension. Skeleton patterns work beautifully when we use thin brushes to create bone structures that appear to float on dark backgrounds.
Dotting tools become essential for adding ghost eyes and facial features that maintain visibility in both light and dark conditions. We’ve found that applying three thin coats of glow polish creates the most dramatic effect for skeletal designs. Ribcage patterns particularly shine when we alternate between regular white and glow polish to create depth.
Glowing Jack-o’-Lantern Faces
Jack-o’-lantern nails capture Halloween’s iconic spirit through strategic glow placement. We suggest using orange as your base color and adding glow polish specifically to the carved features like triangular eyes and jagged smiles. Traditional pumpkin faces work best when we outline the glowing elements with black polish to create contrast.
Festive variations include adding green glow stems or creating multiple pumpkin sizes across different nails. We recommend letting each layer dry completely before adding glow details to prevent smudging. Creative jack-o’-lantern expressions from happy to menacing can be achieved by varying the shape and size of the glowing facial features.
Eerie Spider Web Patterns
Spider web designs create intricate patterns that seem to pulse with otherworldly energy in darkness. We start by creating the web structure using thin lines of glow polish, working from corner to corner to establish the basic framework. Concentric curves connecting the main lines complete the web effect while maintaining structural accuracy.
Blue chrome powder adds unique dimensional effects when applied over glow polish bases before the final cure. We’ve discovered that pairing spider webs with small glow dots creates the illusion of trapped dewdrops. Adding tiny spider silhouettes using regular black polish provides contrast while maintaining the spooky theme throughout your Halloween manicure.
Geometric Patterns With Glow Elements

Geometric designs transform into mesmerizing focal points when paired with luminescent polish. These structured patterns create striking contrasts that showcase glow effects while maintaining clean, modern aesthetics.
Glowing Triangle and Diamond Shapes
Triangle formations create bold statements when filled with glow polish on contrasting base colors. We recommend starting with a black or deep purple base to maximize the luminescent impact of your geometric shapes. Diamond patterns work exceptionally well when alternated across nails, creating a cohesive look that catches light beautifully.
Layering techniques enhance these angular designs by using different glow colors within each shape. Electric blue triangles paired with neon green diamonds produce stunning visual effects that shift between day and night appearances. Practice creates precision, so we suggest using nail tape or stencils to achieve crisp, clean edges.
Color combinations amplify the geometric glow effect when you contrast warm and cool tones within the same design. Yellow triangles against purple backgrounds create vibrant energy, while white diamond shapes on black bases offer classic elegance with modern glow technology.
Neon Grid and Line Designs
Grid patterns maximize glow visibility by creating structured frameworks that illuminate your entire nail surface. We achieve the most dramatic effects by painting thin lines with luminescent polish over dark backgrounds like midnight blue or charcoal gray. This technique amplifies the neon appearance and creates a futuristic aesthetic.
Intersecting lines form complex patterns that pulse with energy in low light conditions. Vertical and horizontal strokes using glow polish create window pane effects, while diagonal crosshatching produces ever-changing geometric textures. Steady hands and quality brushes ensure professional looking results.
Spacing considerations determine the overall impact of your grid design. We recommend keeping lines approximately 2-3mm apart for optimal glow distribution without overwhelming the nail surface. Thicker lines provide more intense luminescence, while thinner strokes create delicate, intricate patterns.
Abstract Geometric Combinations
Mixed shape designs combine triangles, diamonds, and hexagons to create mesmerizing abstract compositions. We layer these various geometric elements using different glow colors to build depth and visual interest. This technique produces unique patterns that appear completely different under normal light versus darkness.
Overlay methods enhance existing geometric patterns by adding glow accents strategically throughout the design. Paint base geometric shapes with regular polish, then highlight exact areas with luminescent colors to create selective glow effects. This approach offers subtle sophistication while maintaining geometric structure.
Freehand techniques allow creative freedom when combining multiple geometric elements into cohesive designs. We suggest sketching your pattern first, then building layers gradually to achieve the desired glow intensity. Random placement of shapes often produces more ever-changing results than perfectly symmetrical arrangements.
Nature-Inspired Glowing Nail Designs

We’re bringing the beauty of the natural industry to your fingertips with these enchanting glow designs that capture nature’s most captivating elements. These organic motifs transform your nails into miniature landscapes that come alive in darkness.
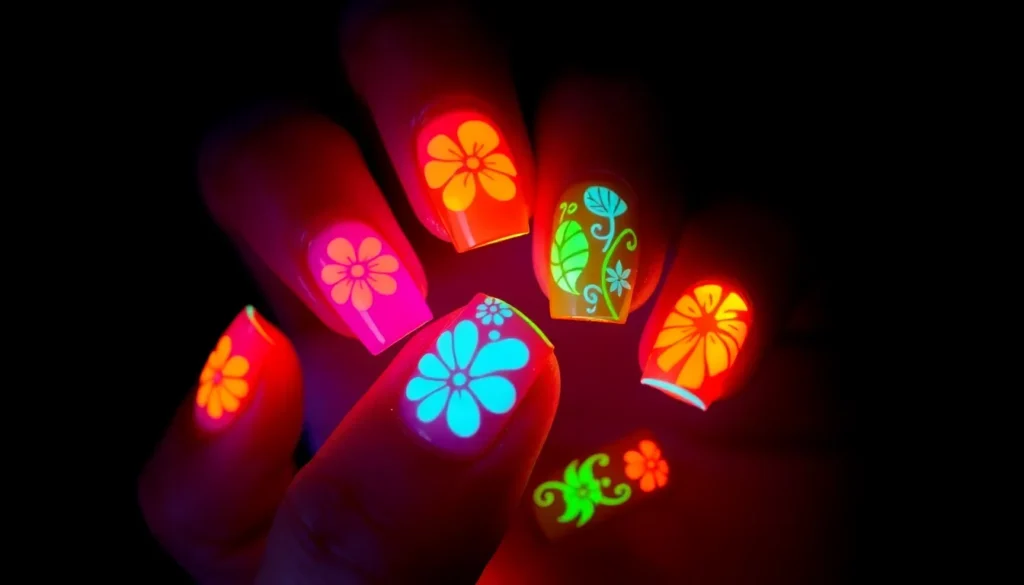
Luminescent Flower and Leaf Patterns
Delicate florals take on magical qualities when painted with glow formulas that illuminate petals and stems in low light conditions. We recommend starting with pastel blues and pinks as your base colors to create soft botanical designs that appear ethereal after dark. Paint intricate flower motifs using thin brushes to achieve detailed petal work that glows with gentle luminescence.
Luminescent dip powder offers superior longevity for these detailed designs compared to traditional polish applications. We suggest creating layered leaf patterns that overlap naturally, using different glow intensities to add depth and dimension. Combine regular polish for shadows with glow formulas for highlights to make your floral artwork pop dramatically when lights dim.
Accent nails featuring single statement blooms work beautifully when you want subtle nature themes without overwhelming your entire manicure. We find that cherry blossoms, roses, and simple daisy chains translate perfectly into glowing nail art that maintains elegance while offering nighttime drama.
Glowing Ocean Wave Effects
Flowing wave patterns capture the ocean’s movement through strategic color blending that mimics water’s natural rhythm across your nail surface. We create these effects by applying dark base coats in navy or deep teal, then layering glow formulas in green or blue shades to represent cresting waves. The contrast between dark depths and luminous peaks creates stunning visual impact.
Gradient techniques work exceptionally well for achieving realistic water movement that appears to flow from cuticle to tip. We recommend using makeup sponges to blend colors seamlessly, creating that perfect ocean ombre effect that glows intensely after light exposure. Build your waves gradually with multiple thin layers rather than attempting thick single applications.
Metallic accents enhance the aquatic theme when strategically placed to represent foam caps or moonlight reflections on water. We suggest adding silver or pearl highlights sparingly to maintain the organic feel while boosting the overall glow effect in darkness.
Mystical Forest and Tree Silhouettes
Dark woodland scenes provide dramatic backdrops for glow elements that peek through like moonlight filtering between branches. We start these designs with black or deep forest green bases to maximize the contrast when luminescent details emerge in low light conditions. Paint tree silhouettes using glow formulas to create haunting forest landscapes that transform completely after dark.
Layered tree designs add incredible depth to your forest themed manicures through strategic placement of foreground and background elements. We create multiple tree lines at different scales, using varying glow intensities to suggest distance and create that mysterious woodland atmosphere. Thin branches reaching across nails connect the design while maintaining natural organic flow.
Mystical elements like glowing mushrooms or fireflies elevate basic tree silhouettes into enchanted forest scenes that tell complete stories on your nails. We dot tiny luminescent spots throughout the design to represent magical forest lights, creating an otherworldly effect that captivates viewers when your nails glow in darkness.
Party and Festival Glow Nail Ideas

Party settings demand nail art that transforms ordinary manicures into conversation starters that pulse with energy under different lighting conditions.
Rave and Club-Ready Neon Designs
Glowing lightning bolt effects create dramatic impact when we apply matte black base coats and paint green glow polish stripes down each nail’s center. Neon ombré techniques involve gradually blending electric colors that intensify under club lighting, creating smooth transitions from dark bases to luminescent tips. Glow tips offer a modern twist on French manicures by applying luminescent polish only to nail edges, producing subtle yet striking results that shine brightest in darkened venues.
Vibrant stripe patterns work exceptionally well when we paint alternating bands of pink, blue, and green neon colors across each nail surface. Electric accent walls can be created by designating one nail per hand as a focal point with bold glow designs while keeping remaining nails in complementary matte shades.
Electric Music Festival Themes
Glowing geometric patterns capture festival energy when we create abstract shapes and triangular designs that react dramatically under UV lighting conditions. UV reactive colors transform nail art into ever-changing displays that shift appearance between natural and blacklight environments, making them perfect for outdoor music events.
Abstract artistic designs allow creative freedom to combine multiple glow shades into swirling patterns that represent sound waves and musical energy. Bold color combinations work best when we pair electric blues with neon greens or vibrant purples with glowing yellows to create maximum visual contrast.
Festival inspired motifs can include musical notes, sound bars, and wave patterns painted with glow polish to celebrate the electronic music atmosphere. Layered effects build dimension when we apply base colors first, then add glow accents that become visible only when lighting changes throughout festival environments.
Blacklight Reactive Party Patterns
Fluorescent floral designs bloom under blacklight when we paint detailed flower patterns using UV reactive colors that appear subtle in daylight but explode with color under party lighting. Glowing geometric shapes create mesmerizing effects through carefully planned triangles, diamonds, and hexagons that pulse with energy in darkened party spaces.
Reactive color combinations work most effectively when we choose pigments specifically formulated to respond to UV wavelengths, ensuring maximum brightness under blacklight conditions. Pattern layering techniques involve applying base designs with regular polish, then adding glow accents that reveal hidden details only when party lights activate them.
Stained glass effects emerge when we combine yellow, purple, green, and blue glow polishes in segmented patterns that mimic cathedral windows under blacklight exposure. Interactive nail art responds to party environments by changing appearance as guests move between different lighting zones throughout event spaces.
DIY Tips for Creating Glow in the Dark Nails

Creating luminescent nails at home doesn’t require professional expertise or expensive salon treatments. We’ll guide you through the essential supplies and proven techniques to achieve stunning glowing effects.
Essential Supplies and Tools Needed
Glow in the dark pigment serves as the foundation for luminescent nail art, available at create stores and online retailers. Quality matters significantly when selecting these pigments, as they determine both brightness and duration of your glow effects.
Clear nail polish provides the perfect base for mixing with glow powder since it allows maximum light transmission. We recommend using a fresh bottle to ensure proper consistency and adhesion.
Empty polish bottles make mixing and storing your custom glow formulas much easier. Funnel tools prevent spills and waste when transferring your mixtures between containers.
Nail art brushes offer precision for detailed designs and patterns. Toothpicks work excellently as mixing tools to blend pigments evenly throughout your polish base.
Step-by-Step Application Techniques
Prepare your custom polish by mixing approximately 25% glow powder with clear polish using a 1:4 ratio for optimal results. This concentration provides the perfect balance between coverage and luminescence without creating a thick, clumpy texture.
Apply thin base coats first to create an even foundation for your glow effects. Multiple thin layers produce brighter results than single thick applications, allowing each coat to dry completely before adding the next.
Build your glow intensity by layering additional coats until you achieve your desired brightness level. We’ve found that three coats typically deliver the most vibrant luminescent effects.
Seal with clear topcoat to protect your glow polish and extend wear time. This final step prevents chipping and maintains the smooth surface needed for optimal light charging.
Charging and Maintenance Tips
Expose nails to bright light for several minutes to activate the photoluminescent properties of your glow powder. Natural sunlight or LED lamps work most effectively for charging your luminescent manicure.
Recharge periodically throughout the day to maintain consistent glow intensity, especially before evening events or low light situations. The charging process takes just a few minutes but dramatically improves visibility.
Store glow polish properly in cool, dark places to preserve the pigment’s effectiveness over time. Temperature fluctuations can affect the consistency and performance of your custom glow formulas.
Maintain nail health by using cuticle oil and moisturizer regularly, as glow polishes can be slightly more drying than traditional formulas due to their mineral content.
Professional Glow Nail Art Techniques

Taking your glow nail art to the next level requires mastering professional techniques that enhance luminosity and durability. We’ll explore advanced methods that nail artists use to create show-stopping designs that glow brighter and last longer than basic applications.
Advanced Layering Methods
Layering glow-in-the-dark acrylics or polishes over regular nail polish creates enhanced glow effects that outperform single-coat applications. We recommend starting with your base color and allowing it to dry completely before applying the first thin layer of glow material. Each subsequent layer must cure or dry thoroughly before adding the next to prevent smudging and ensure optimal adherence.
Building multiple thin layers produces superior results compared to one thick application. We’ve found that three to four ultra-thin coats create the most intense luminescent effects while maintaining a smooth finish. Strategic layering also allows you to control the opacity and brightness of your glow elements, creating depth variations that make designs appear more dimensional in darkness.
Mixing Glow Powders With Regular Polish
Creating custom glow polish at home requires exact materials and precise techniques for consistent results. We gather glow-in-the-dark pigment, clear nail polish, a small mixing bowl, and a funnel to prevent waste during the mixing process. Art ‘N Glow Pigment Powders work exceptionally well for this application due to their fine particle size and intense luminosity.
Mixing requires careful attention to ratios for optimal glow performance. We use a funnel to add pigment gradually into clear polish while stirring continuously to achieve even distribution. Starting with small amounts allows you to control the opacity and brightness level according to your design needs. The mixture should flow smoothly while maintaining enough pigment concentration to produce visible glow effects.
Creating Long-Lasting Luminescent Effects
Achieving durable glow effects that maintain their brightness over time depends on using high-quality glow pigments and proper application techniques. We recommend investing in premium glow materials that charge quickly and maintain luminosity for extended periods. Multiple thin layers applied with adequate drying time between coats creates the foundation for lasting glow performance.
Proper curing enhances both adhesion and glow longevity in your nail art designs. We ensure each layer receives adequate light exposure during the drying process to activate the photoluminescent properties effectively. Regular charging under bright light sources keeps the glow effects vibrant throughout wear time. Storage practices also matter – keeping unused glow polish in cool, dark locations preserves the pigment’s effectiveness for future applications.
Seasonal Glow in the Dark Nail Themes

Changing seasons offer perfect opportunities to refresh your glow in the dark nail art with themed designs that capture each time of year’s unique beauty.
Summer Beach and Tropical Designs
Beachy vibes come alive with glow in the dark blues and greens that mimic ocean waves or stunning sunsets. We recommend layering electric blue over a navy base to create realistic wave patterns that pulse with oceanic energy when the lights go down. Metallic silver accents enhance these designs by adding shimmer that mimics sunlight dancing on water.
Tropical flowers transform nails into miniature paradise scenes using neon pink, orange, and yellow glow polish. Paint hibiscus petals with vibrant orange glow formula over a coral base, then add yellow centers that burst with luminescent color. Plumeria designs work beautifully when created with white glow polish accented by soft pink edges.
Glowing shells create elegant beachy effects using combinations of glow in the dark white and pastel colors. We suggest painting conch shell spirals with pearl white glow polish over a nude base, then adding subtle coral or seafoam green accents. Scallop shell patterns work particularly well as accent nails, providing perfect focal points for summer manicures.
Winter Wonderland Glowing Effects
Snowflakes become magical when painted with glow in the dark white polish to create intricate crystalline patterns. We recommend using thin nail art brushes to create delicate six pointed designs that radiate from central points, making each nail look like a captured snowflake. Layering translucent white glow over sheer blue bases creates depth that mimics real snow crystals.
Aurora Borealis effects use shades of blue and green glow in the dark polish to mimic the Northern Lights dancing across your nails. Paint sweeping curved lines with electric blue glow formula, then blend in emerald green accents to create those characteristic sky ribbons. Purple glow additions enhance the ethereal quality of these celestial designs.
Glowing snow effects start with white base coats enhanced by glow in the dark accents for realistic wintry appearances. We suggest applying white polish as your foundation, then dotting various sized spots of white glow formula to create snowfall patterns. Silver glitter additions make these designs sparkle like fresh powder catching moonlight.
Spring Garden Party Inspirations
Glowing blooms bring gardens to life using glow in the dark pastel shades like pink and purple for ethereal floral patterns. Cherry blossom designs work beautifully with soft pink glow polish applied over nude bases, creating delicate petals that seem to float in darkness. Lavender flowers painted with purple glow formula over gray bases capture spring’s gentle awakening.
Glowing leaves add natural beauty using glow in the dark green polish to create botanical designs that pulse with life. We recommend painting fern fronds with lime green glow over forest green bases for dimensional effects. Maple leaf silhouettes created with yellow green glow formula provide stunning accent nails for spring celebrations.
Glowing honeybees bring playful energy using yellow glow in the dark polish to draw cheerful insects on floral backgrounds. Paint bee bodies with golden yellow glow formula, then add black stripes for contrast and tiny wing details with clear glow polish. These buzzing accents work perfectly scattered across garden themed nail art designs.
Conclusion
We’ve explored an exciting industry of luminescent nail art that transforms ordinary manicures into captivating masterpieces. From classic solid neons to intricate constellation patterns these glowing designs offer endless possibilities for self-expression and creativity.
Whether you’re preparing for a festival crafting spooky Halloween looks or simply wanting to add some magic to your everyday style these techniques empower you to create stunning results at home. The key lies in proper preparation quality materials and patience with layering techniques.
Your nails can now become conversation starters that literally light up any room you enter. Experiment with different seasonal themes mix various techniques and don’t be afraid to push creative boundaries as you develop your own signature glow-in-the-dark nail art style.
Frequently Asked Questions
What are glow-in-the-dark nails and how do they work?
Glow-in-the-dark nails are nail art designs that use luminescent polish or pigments to create a glowing effect in low-light conditions. They work by absorbing light energy and slowly releasing it as a visible glow. The nails need to be “charged” under bright light before they’ll glow in the dark.
Can I create glow-in-the-dark nails at home?
Yes, you can easily create glow-in-the-dark nails at home without professional skills or expensive salon treatments. You’ll need glow-in-the-dark pigment, clear nail polish, nail art brushes, and basic manicure supplies. The process involves mixing glow powder with polish and applying thin layers for optimal brightness.
How long do glow-in-the-dark nails glow?
The glow duration varies depending on the quality of the glow powder and how well the nails were charged. Most glow-in-the-dark nails will glow brightly for 30 minutes to 2 hours after being exposed to light, with some premium formulations lasting longer.
What colors work best for glow-in-the-dark nail art?
Neon green, electric blue, and vibrant yellow provide the most intense glow effects. For maximum impact, use dark base colors like black or deep navy to make the glow more visible. Different colors have varying glow intensities and durations.
How do I charge my glow-in-the-dark nails?
Expose your nails to bright light sources like sunlight, LED lights, or fluorescent bulbs for 10-15 minutes. The brighter and longer the exposure, the stronger and longer-lasting the glow will be. UV lights work particularly well for charging glow effects.
What nail art designs work well with glow-in-the-dark polish?
Popular designs include galaxy and space themes, Halloween motifs like ghosts and jack-o’-lanterns, geometric patterns, nature-inspired designs like flowers and ocean waves, and party-ready patterns. French tips with glowing edges and gradient fades also create stunning effects.
How do I maintain glow-in-the-dark nails?
Store glow polish in a cool, dark place to preserve its luminescent properties. Apply a quality top coat to protect the glow layer and extend wear time. Regularly charge your nails under bright light to maintain optimal glow effects.
Are glow-in-the-dark nail products safe to use?
Yes, most commercial glow-in-the-dark nail products are safe when used as directed. Look for products that are specifically formulated for nails and avoid ingesting or getting the product in your eyes. Always read product labels and follow safety instructions.


