Disney magic doesn’t have to end when you leave the theme park. We’ve discovered that bringing that enchanting sparkle to your fingertips creates pure joy every single day. Whether you’re planning your next Disney vacation or simply want to add some whimsical charm to your everyday look, Disney nail art transforms ordinary manicures into extraordinary masterpieces.
From classic Mickey Mouse silhouettes to intricate princess-inspired designs, we’ll show you how to recreate the wonder of Disney right at home. These aren’t just nail designs – they’re tiny canvases that tell your favorite Disney stories. You’ll learn techniques that work for beginners and seasoned nail artists alike.
Ready to turn your nails into a magical adventure? We’ve curated the most stunning Disney nail ideas that’ll have everyone asking where you got your manicure done. Let’s jump into a industry where creativity meets Disney magic, one nail at a time.
Classic Disney Princess Nail Designs
Transform your nails into royal masterpieces with these timeless princess-inspired designs that capture the essence of Disney’s most beloved characters.
Snow White Apple Red and Royal Blue
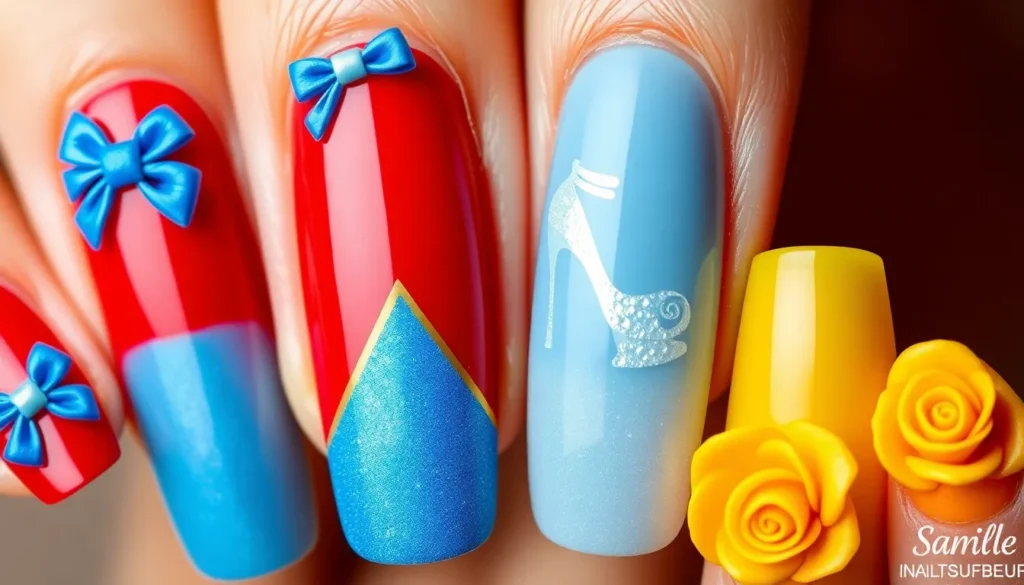
Snow White nail designs combine the perfect balance of innocence and elegance through her signature color palette. We recommend starting with a deep apple red base on your accent nails, then adding royal blue tips or geometric patterns on the remaining fingers. Create tiny white bows using nail art brushes or small dotting tools to represent her iconic hair ribbon.
Add golden yellow accents through thin striping tape or hand-painted details to complete the Snow White aesthetic. Consider incorporating small rhinestones or glitter in strategic spots to mimic the sparkle of her dress. Paint delicate apple shapes on one or two nails using red polish with green stems for an extra touch of whimsy.
Cinderella Glass Slipper Sparkle
Cinderella’s ethereal beauty translates beautifully into shimmering nail art that captures her transformation magic. Start with a soft powder blue base coat across all nails, then layer silver or clear glitter polish to create that glass slipper effect. Use iridescent topcoat to enhance the magical shimmer that changes in different lighting.
Create elegant swirl patterns using white nail art pens or thin brushes to represent her flowing ballgown. Add tiny silver stars or moon shapes using nail stamps or hand-painting techniques. Consider using chrome powder on one accent nail to achieve that perfect glass-like finish that mirrors her famous slipper.
Belle’s Enchanted Rose Petals
Belle’s sophisticated style calls for warm golden yellows paired with romantic rose accents that reflect her love of beauty and literature. Paint your base nails in a rich buttercup yellow, then use burgundy or deep red polish to create rose petal designs on accent nails. Layer different shades of red and pink to achieve realistic petal depth and dimension.
Incorporate tiny green leaves using nail art brushes or small dotting tools around your rose designs. Add gold foil accents or metallic striping tape to represent the enchanted elements of her story. Consider painting small book silhouettes or musical notes on one nail to honor her intellectual and musical nature.
Disney Villain Nail Art Inspirations
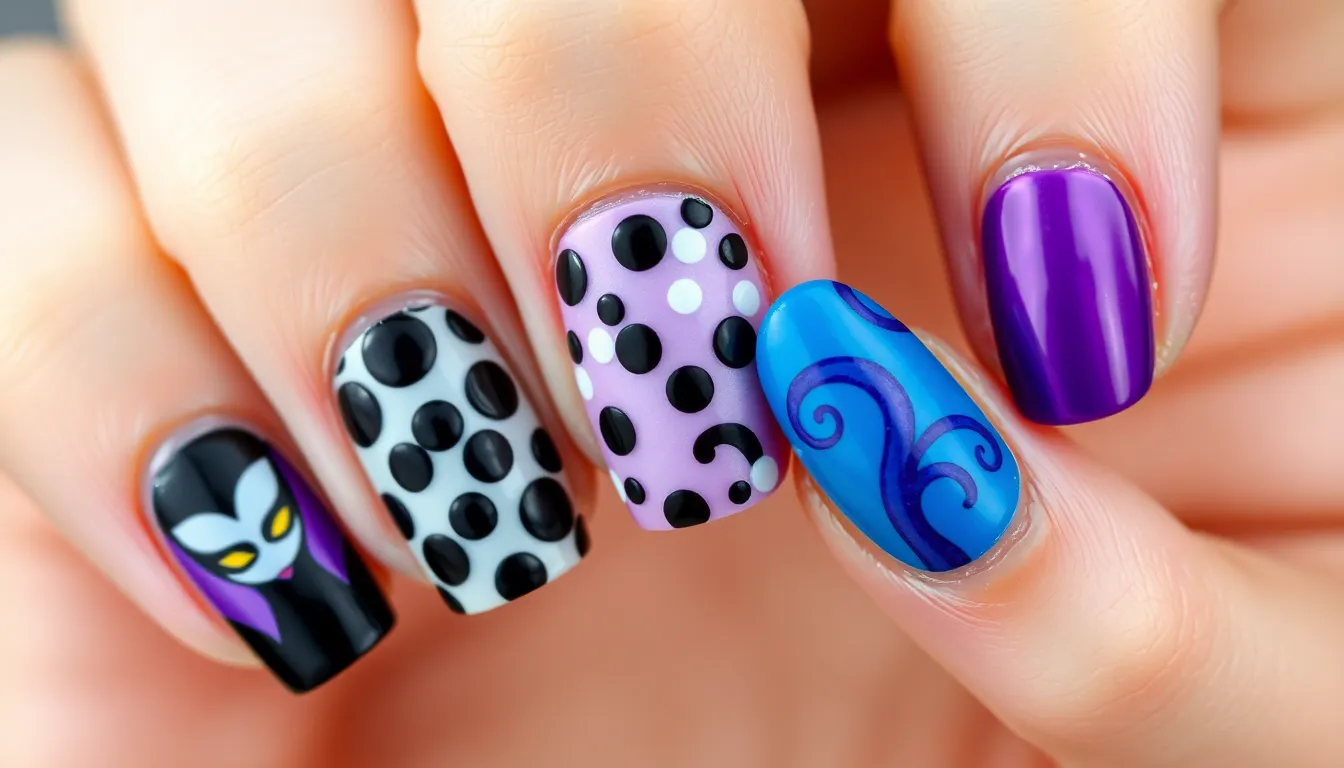
While princess nails capture hearts with their sweet elegance, villain inspired designs let us embrace our darker, more dramatic side with bold colors and striking patterns.
Maleficent’s Dark Magic Purple
Maleficent’s mysterious persona from “Sleeping Beauty” translates beautifully into nail art through deep purples, blacks, and dark reds that evoke her magical power. We love creating gradient effects that transition from rich dark purple to midnight black, capturing the essence of her spellbinding abilities.
Sharp, pointed nail tips mimic Maleficent’s iconic horns perfectly, while glitter and rhinestones add the dramatic flair she’s famous for. Dark red accents can represent her fiery magic, and we often incorporate metallic elements to reflect her regal yet sinister nature.
Cruella De Vil Black and White Spots
Cruella De Vil’s obsession with dalmatians from “101 Dalmatians” creates one of the most recognizable nail patterns in Disney villain art. Black and white spotted designs work across all nails, with each finger featuring different sized spots for authentic variation.
Dalmatian print nail wraps offer the easiest application method, though hand painted spots give you complete creative control. We recommend adding a single red accent nail or red tips to channel Cruella’s signature style and fierce personality.
Ursula’s Tentacle Ombre Effect
Ursula’s underwater domain from “The Little Mermaid” inspires stunning ocean depth effects through deep blue to purple ombre transitions. These color gradients simulate the mysterious depths where the sea witch dwells, creating an enchanting aquatic atmosphere.
Tentacle like swirls painted in darker shades or applied through nail stickers add Ursula’s signature element to the design. Iridescent polish and glitter create that magical underwater shimmer effect, while purple undertones reflect her powerful and mystical nature.
Mickey and Minnie Mouse Themed Nails
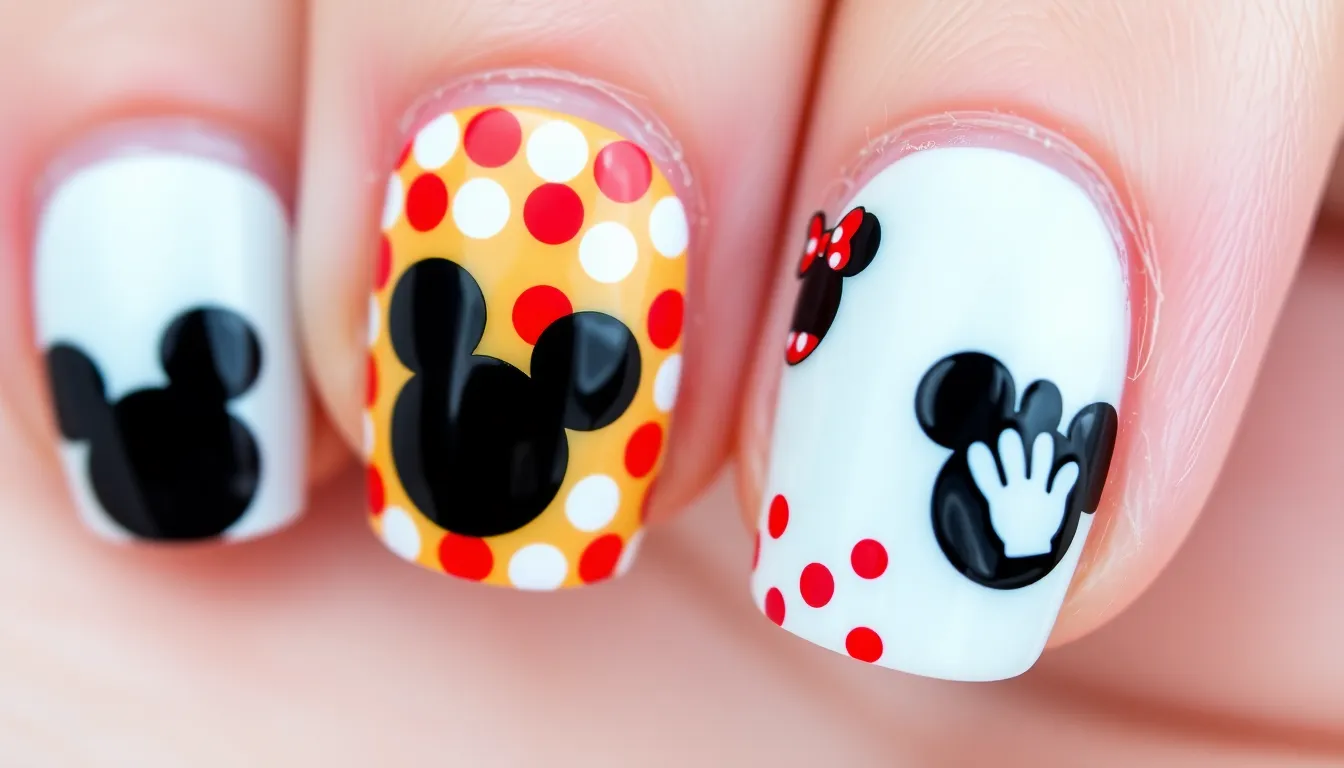
We’re diving into the most beloved Disney duo’s nail art possibilities. These timeless characters offer endless inspiration for creating magical manicures that capture the essence of Disney’s most iconic pair.
Traditional Mickey Head Silhouettes
Classic Mickey Mouse silhouettes create the perfect foundation for Disney nail art enthusiasts. We recommend starting with a black or white base color to make the iconic three-circle design pop against your nails. Red and yellow accents work beautifully to honor Mickey’s traditional color scheme, while experimenting with different background shades adds personal flair to your design.
Creating these silhouettes requires steady hands and small dotting tools to achieve the perfect circular shapes. We suggest practicing the proportions first, ensuring the main circle is larger than the two ear circles positioned at the top. Black polish works exceptionally well for creating bold, recognizable Mickey heads against lighter backgrounds.
Minnie’s Polka Dot Bow Designs
Minnie Mouse’s signature style translates beautifully into feminine nail art featuring polka dots and bows. We love incorporating red and white polka dot patterns that mirror Minnie’s classic dress design. These playful patterns work best when applied over a solid base color, creating contrast that makes each dot stand out.
Bow accents add the perfect finishing touch to Minnie-inspired nails, typically placed on the ring finger or thumb for maximum impact. We recommend using a small nail art brush to create tiny bow shapes, or applying pre-made bow decorations for a more three-dimensional effect. Red bows against white polka dots create the most authentic Minnie Mouse aesthetic.
Mickey Glove Hand Accents
Mickey’s iconic white gloves offer a unique design element that stands out among Disney nail art options. We typically feature this design as an accent nail, placing it on the ring finger or thumb to create a focal point within the overall manicure. White polish forms the base of the glove design, with black outlines defining the fingers and cuff details.
These glove designs work particularly well when combined with other Mickey Mouse elements like his signature colors or silhouettes. We suggest using a fine-tip nail art brush to create clean lines and proper proportions that capture the essence of Mickey’s beloved gloves. Adding small button details or dimensional accents enhances the overall authenticity of this charming design.
Pixar Character Nail Creations
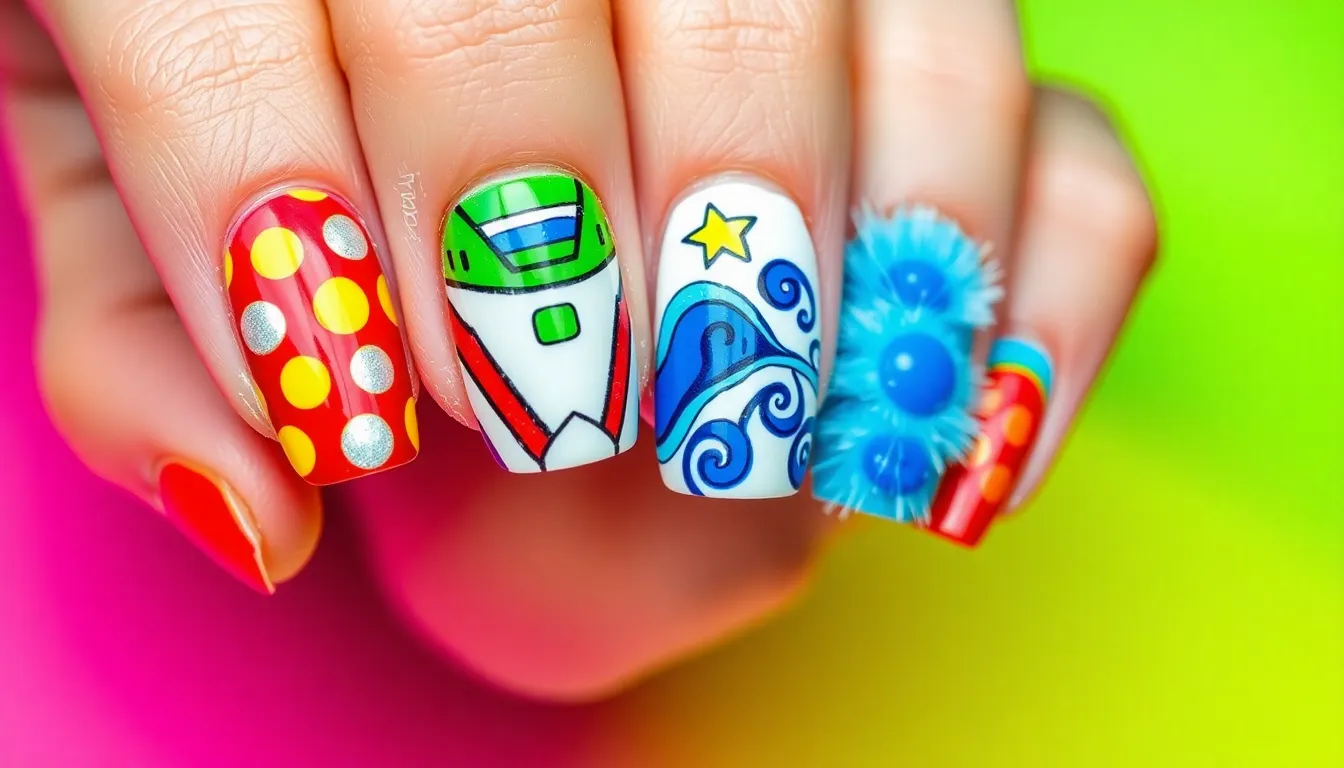
We’re expanding our Disney nail art journey beyond the classic characters to embrace the vibrant industry of Pixar animation. These beloved animated films offer endless inspiration for creative nail designs that capture the heart and imagination of every Disney fan.
Toy Story Woody and Buzz Patterns
Woody’s iconic cowboy aesthetic translates beautifully into western themed nail art using red, yellow, and blue color schemes. We recommend starting with a bright yellow base to represent his vest, then adding red and white checkered patterns or cow print designs using nail art brushes or stamping plates. Blue denim inspired textures work perfectly for accent nails, while tiny sheriff star decals complete the cowboy look.
Buzz Lightyear’s space ranger suit offers metallic silver and white color combinations that create stunning futuristic designs. We suggest using chrome nail polish for that authentic space suit finish, adding purple and green accent details to match his signature colors. Geometric patterns and angular lines help recreate his high tech appearance, while star and planet nail stickers enhance the outer space theme.
Finding Nemo Ocean Wave Designs
Ocean wave patterns capture the underwater magic of this beloved film using various shades of blue from navy to turquoise. We create these designs by blending different blue tones with a makeup sponge, starting darker at the base and lightening toward the tips. White polish dabbed over the blue creates realistic foam effects, while adding tiny silver glitter mimics sunlight dancing on water.
Nemo’s distinctive clownfish stripes translate into bold orange and white accent nails that perfectly complement the ocean wave base. We achieve these stripes using nail art tape for clean lines, alternating bright orange with crisp white bands. Black outlining adds definition to the stripes, while small rhinestones or pearls scattered across select nails represent bubbles rising through the water.
Monster’s Inc. Colorful Fur Textures
Sulley’s signature blue fur creates striking textured nail art using specialized fuzzy or velvet nail polish finishes. We build these designs with a base coat of bright blue, then apply textured topcoat using dabbing motions to create that fluffy fur appearance. Purple undertones and darker blue shading add depth and dimension, making the nails appear three dimensional.
Mike Wazowski’s vibrant green coloring offers opportunities for bold lime and emerald nail combinations. We recommend using bright neon green as the primary color, adding a single large white circle on the ring finger to represent his iconic eye. Black detailing creates the pupil and adds personality, while keeping other nails in complementary green shades maintains the monster theme without overwhelming the design.
Disney Castle and Magical Elements
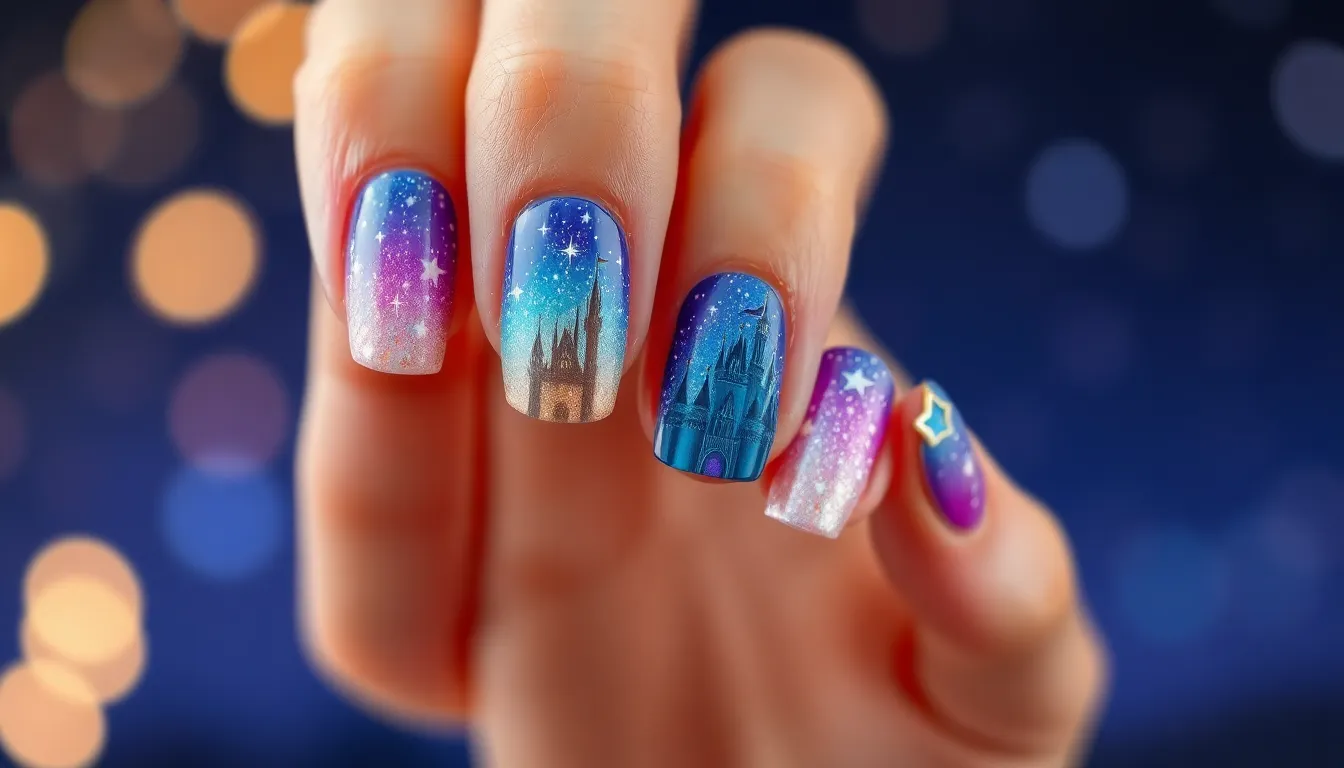
Transform your nails into a magical fairytale with enchanting castle designs and whimsical elements that capture Disney’s most iconic imagery. These sophisticated nail art techniques bring the wonder of Disney parks directly to your fingertips.
Cinderella Castle Silhouette Art
Create stunning castle silhouettes using deep blue or purple backgrounds that perfectly frame the majestic outline of Cinderella Castle. We recommend applying a silver or gold polish to paint the castle’s distinctive towers, flags, and iconic walkthrough arches using fine nail art brushes or precision stickers.
Add a subtle glitter finish over the background to mimic a starlit nighttime sky, making your castle design truly sparkle. Detail work becomes easier when you use nail art brushes to incorporate exact architectural elements like the castle’s multiple spires and decorative banners.
Consider using nail stickers for more intricate castle details if you’re just starting your Disney nail art journey. Professional results come from layering a glossy topcoat over your completed silhouette to protect the design and enhance the overall shine.
Fairy Dust Glitter Gradients
Blend pastel shades of pink, blue, and purple to create dreamy gradient effects that capture the essence of fairy magic. Start with the lightest shade at your cuticle and gradually transition to deeper tones toward the nail tip using a cosmetic sponge for seamless blending.
Layer fine glitter polish over your completed gradient to achieve that authentic fairy dust sparkle. We suggest using a dabbing motion rather than brushing to apply the glitter, ensuring even coverage without disturbing your base colors.
Finish with glitter tips by concentrating extra sparkle at the nail edges using either glitter polish or a specialized glitter topcoat. This technique creates a magical ombre effect that catches light beautifully and adds dimension to your fairy inspired design.
Magic Wand Star Accents
Paint delicate magic wands on accent nails using white or silver polish, creating thin lines that represent the wand’s handle and shaft. Add sparkly tips to your wands using glitter polish, making sure to create a small star or burst pattern at the wand’s end.
Create star accents throughout your design using star shaped nail stickers for consistency, or paint them freehand with nail art brushes for a more personalized touch. We recommend placing these stars strategically around your other Disney elements to enhance the overall magical theme.
Combine multiple star sizes across your nails to create depth and visual interest, using different metallic shades like gold, silver, and iridescent white. This layering technique ensures your magic wand and star accents complement rather than compete with your other Disney nail art elements.
Seasonal Disney Holiday Nail Ideas

We can transform our Disney nail art into festive celebrations throughout the year with holiday themed designs. These seasonal manicures combine the magic of Disney with the joy of special occasions.
Halloween Disney Villain Themes
Halloween Disney villain nail designs let us embrace our darker side with dramatic colors and bold patterns. Maleficent’s iconic look translates beautifully into deep purple and black gradients, while pointed nail tips mirror her menacing horns perfectly. Ursula inspired nails feature tentacle swirls in dark blues and purples, enhanced with iridescent polish to capture her underwater mystique.
Jafar themed designs incorporate rich burgundy and gold accents with serpentine patterns that spiral around each nail. We achieve these villain looks by layering dark base colors and adding metallic details with thin brushes or nail art pens. Bold geometric shapes and sharp lines enhance the dramatic effect these villain characters bring to our Halloween celebrations.
Christmas Mickey Ornament Designs
Christmas Mickey ornament nail art transforms our fingertips into festive holiday decorations using traditional red, green, and gold polish combinations. Mickey Mouse silhouettes become ornament shapes when we add decorative caps and hanging strings in metallic gold. Each nail can feature different Disney character ornaments, creating a miniature Christmas tree effect across our hands.
Festive Mickey heads get adorned with holly leaves and berries, while Minnie Mouse ornaments showcase tiny red bows and polka dot patterns. We create depth by using a deep red or forest green base with gold foil accents that catch the light like real ornaments. Santa Mickey designs incorporate his classic red hat with white trim, bringing holiday cheer to our Disney nail collection.
Easter Bunny Disney Character Mix
Easter Disney nail designs blend springtime pastels with beloved character elements for whimsical seasonal looks. Mickey Mouse ears transform into bunny ears using soft pink and white polish, while Easter eggs feature Disney character faces in cheerful colors. Thumper inspired nails showcase fluffy white bases with pink inner ears and tiny black whiskers drawn with precision brushes.
Bambi themed Easter designs incorporate soft browns and gentle florals that represent spring awakening in the forest. We create Easter egg hunt scenes across multiple nails using different Disney characters peeking out from colorful egg shapes. Pastel purple, yellow, and mint green serve as perfect base colors for these springtime Disney celebrations, finished with tiny flower decals or hand painted daisies.
Disney Movie Quote Nail Typography
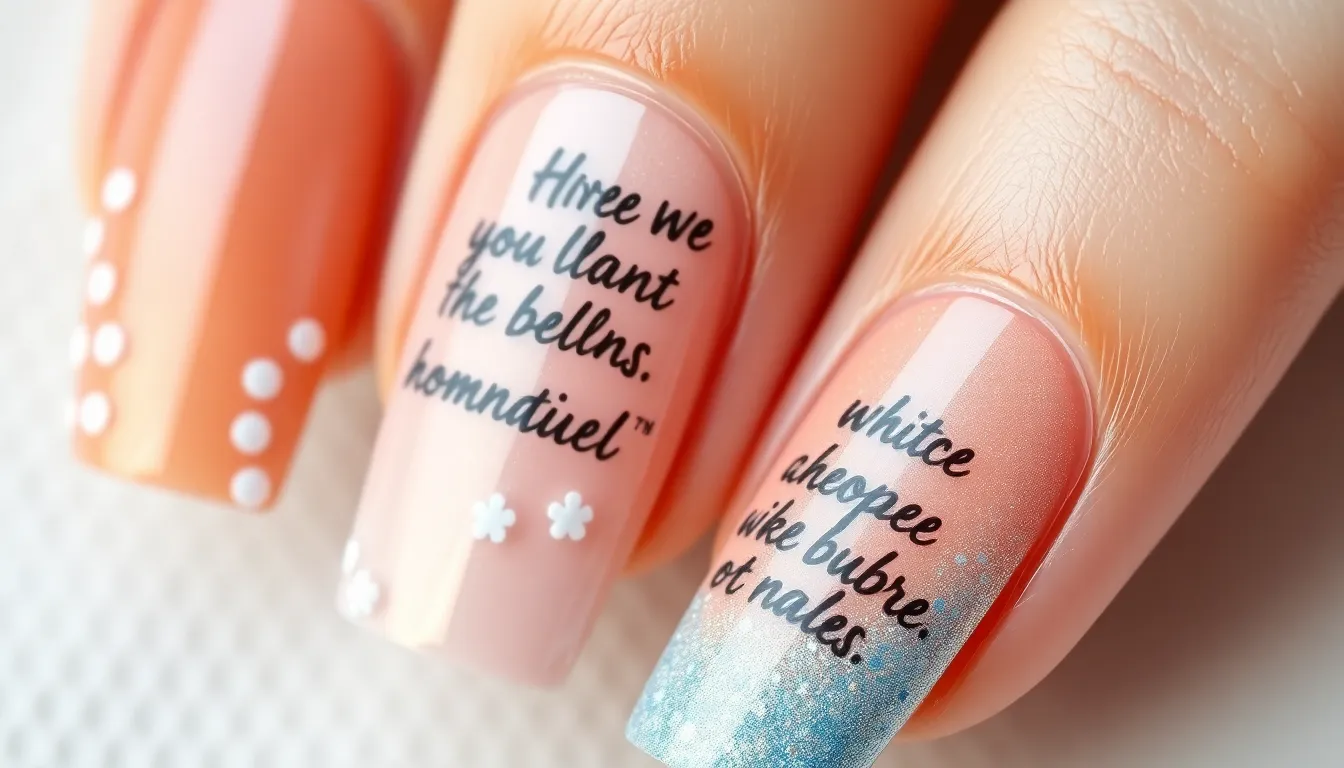
Typography nail art brings our favorite Disney movie quotes directly to our fingertips, creating inspiring manicures that celebrate the wisdom and magic found in beloved Disney films. We can transform simple nail designs into meaningful statements using elegant fonts, playful lettering, and creative text placement techniques.
“Hakuna Matata” Script Designs
Hakuna Matata script designs capture the carefree spirit of Timon and Pumbaa’s iconic motto from The Lion King. We achieve this look by painting the Swahili phrase in flowing, calligraphic fonts that evoke the joyful energy of this beloved Disney philosophy.
Creating the perfect Hakuna Matata design starts with selecting warm earth tones like golden yellows and sunset oranges as our base colors. Adding jungle-inspired accents such as tiny paw prints, leafy vines, or safari silhouettes enhances the African savanna theme beautifully.
Brushwork techniques using thin nail art brushes allow us to write the script in elegant cursive lettering across accent nails. Positioning the quote diagonally or curved along the nail shape creates visual interest while maintaining readability.
“Let It Go” Frozen Lettering
“Let It Go” Frozen Lettering transforms our nails into icy masterpieces that celebrate Elsa’s empowering anthem. We paint this uplifting phrase using shimmering whites, crystal blues, and frosty silver tones that mirror the magical ice queen’s powers.
Font choices for this design favor modern cursive or flowing script styles that capture the song’s soaring melody. Background elements like delicate snowflakes, frost patterns, or gradient ombre effects complement the lettering beautifully.
Glitter application over the text creates the sparkling ice effect that makes these nails truly magical. Stamping plates designed specifically for script lettering help achieve professional-looking results when freehand writing feels challenging.
“Just Keep Swimming” Motivational Text
“Just Keep Swimming” Motivational Text brings Dory’s optimistic message from Finding Nemo to life through playful aquatic nail designs. We pair this encouraging phrase with ocean-inspired backgrounds in brilliant blues, coral oranges, and sea foam greens.
Typography for this design uses bold, cheerful fonts that reflect Dory’s upbeat personality and determination. Decorative elements like tiny bubbles, clownfish stripes, or wave patterns create the perfect underwater setting for our motivational message.
Accent nails featuring the complete phrase work beautifully alongside coordinating designs that showcase ocean themes. Dotting tools and fine brushes make it easy to add small decorative bubbles and sea life details that enhance the overall aquatic aesthetic.
Advanced Disney 3D Nail Art Techniques
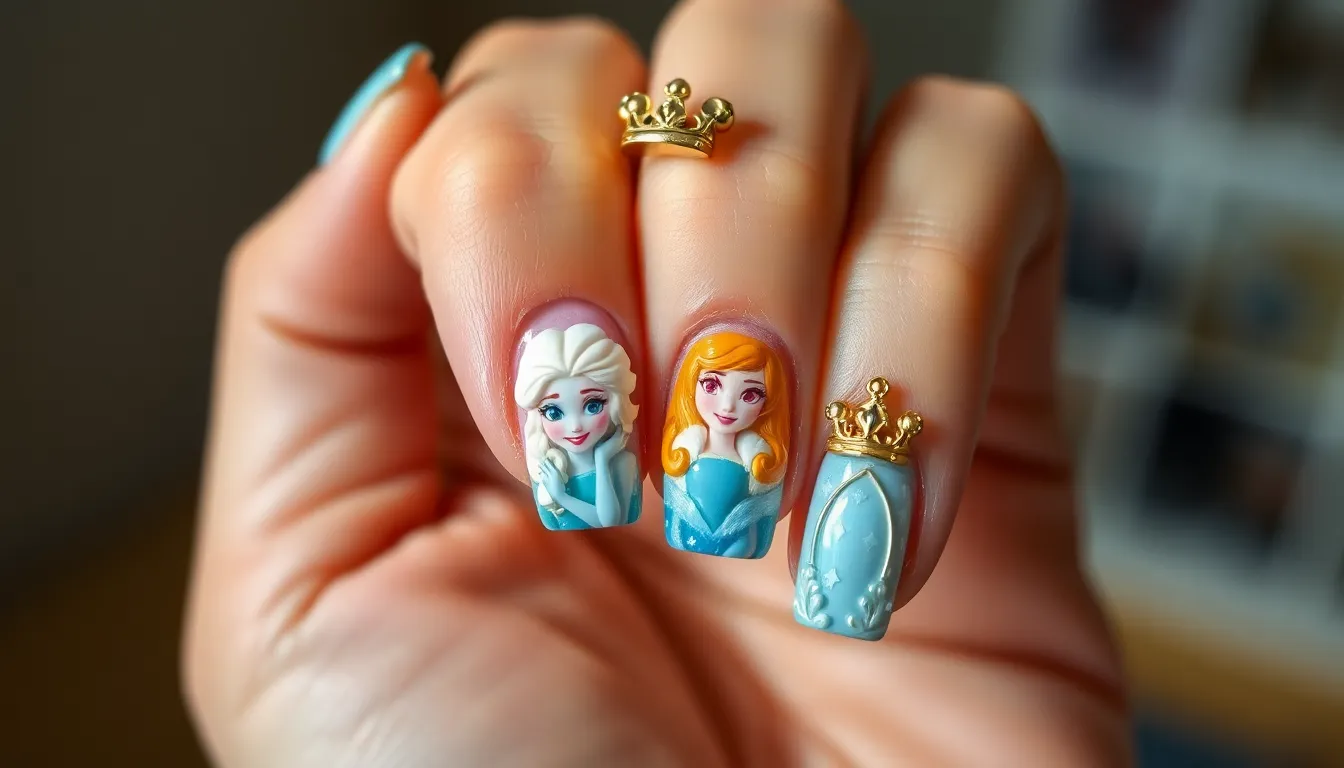
Elevating our Disney nail art game requires mastering three dimensional techniques that bring characters to life on our fingertips. These advanced methods transform flat designs into stunning sculptural masterpieces.
Character Face Portrait Details
Precision painting becomes essential when we’re creating detailed character faces like Elsa’s regal expression or Belle’s gentle smile. Fine brushes allow us to capture intricate facial features with remarkable accuracy, bringing beloved Disney personalities to our nails with stunning realism.
Layering colors helps us achieve authentic skin tones that match each character perfectly. We start with base flesh tones and gradually build depth using multiple polish shades, creating dimensional faces that truly capture each character’s unique appearance. Professional nail artists recommend using at least three different skin tone shades for realistic results.
Feature definition requires steady hands and quality tools to paint delicate details like eyelashes, eyebrows, and lip lines. We use ultra fine brushes to add character exact elements such as Ariel’s flowing red hair or Rapunzel’s distinctive purple eyes.
Miniature Disney Accessory Charms
Charm placement transforms ordinary nails into miniature Disney wonderlands using tiny accessories like Mickey Mouse heads, princess crowns, or character exact items. We strategically position these charms to complement our nail designs without overwhelming the overall aesthetic.
Adhesive techniques ensure our Disney charms stay securely attached throughout daily activities. Nail glue provides the strongest hold, while specialized charm adhesives offer gentler removal options that won’t damage our natural nails. Professional quality adhesives maintain charm security for up to two weeks.
Size coordination helps us select appropriately sized charms that enhance rather than dominate our nail art. Smaller charms work best on shorter nails, while longer nails can accommodate slightly larger Disney accessories without appearing disproportionate.
Layered Storytelling Nail Scenes
Scene building allows us to create complete Disney narratives across our fingertips using layered elements from movies like The Little Mermaid or Frozen. We start with background elements and gradually add foreground details, creating depth and visual interest that tells a complete story.
Background techniques form the foundation of our storytelling scenes using ombre or gradient methods. Underwater scenes benefit from blue to teal gradients, while forest settings use green to brown transitions that create immersive environments for our Disney characters.
Character integration brings our favorite Disney personalities into these layered scenes through careful positioning and scale consideration. We place characters strategically within the background environments, ensuring they appear naturally integrated rather than simply placed on top of existing designs.
Conclusion
Disney nail art opens up endless possibilities for expressing our love of these timeless characters and stories. Whether we’re creating simple Mickey Mouse silhouettes or mastering advanced 3D techniques with miniature charms we’ve discovered that there’s a Disney design perfect for every skill level and occasion.
These magical manicures let us carry a piece of Disney magic wherever we go. From princess-inspired elegance to villain drama and seasonal celebrations our nails become tiny canvases that showcase our favorite Disney memories and characters.
We encourage you to experiment with different techniques and find your unique Disney nail art style. Remember that practice makes perfect and every design is an opportunity to spread a little Disney magic through your fingertips.
Frequently Asked Questions
What are Disney nail art designs?
Disney nail art designs are creative manicures inspired by beloved Disney characters, movies, and stories. These designs transform ordinary nails into magical canvases featuring elements from classic princesses like Cinderella and Snow White, villains like Maleficent, Pixar characters, and iconic Disney quotes. They range from simple beginner-friendly designs to advanced 3D techniques.
How do I create Snow White inspired nails?
For Snow White nails, start with a deep apple red base color. Add royal blue tips to represent her dress, then paint tiny white bows as accents. You can also incorporate yellow elements to represent her bodice. This classic combination captures the essence of Snow White’s iconic look perfectly.
What colors work best for Maleficent nail art?
Maleficent nail designs work best with deep, dramatic colors including rich purples, blacks, and dark reds. Create gradient effects blending these colors and consider pointed nail tips to mimic her iconic horns. Add metallic accents or dark glitter for extra drama that captures her villainous elegance.
Can beginners create Disney nail art?
Yes! Disney nail art offers techniques suitable for all skill levels. Beginners can start with simple designs like Mickey Mouse silhouettes, solid princess-inspired colors, or basic polka dots. As skills develop, you can progress to more detailed character faces, 3D elements, and complex storytelling scenes.
How do I make Cinderella themed nails?
Create Cinderella nails using a soft powder blue base color representing her ball gown. Add shimmering glitter to mimic her glass slipper’s sparkle. Consider incorporating silver accents, tiny crown details, or castle silhouettes. The key is using elegant, dreamy colors that capture her fairy tale transformation.
What are the best tools for Disney nail art?
Essential tools include ultra-fine brushes for detailed work, dotting tools for perfect circles, nail art pens for precision lines, and quality base and top coats. For advanced techniques, consider nail charms, 3D accessories, various glitters, and foil transfers to create professional-looking Disney designs.
How do I incorporate Disney quotes into nail art?
Disney quote nails involve elegant typography paired with thematic backgrounds. Use nail art pens or thin brushes to write quotes like “Hakuna Matata” or “Let It Go.” Match colors to the movie theme – earth tones for Lion King, icy blues for Frozen. Practice lettering on paper first.
What are 3D Disney nail techniques?
Advanced 3D Disney nail art includes sculpting character faces with gel or acrylic, adding miniature charms and accessories, and creating layered storytelling scenes. These techniques require precision painting, proper layering, and secure adhesive application. Start with simple 3D elements before attempting complex character sculptures.
How do I create seasonal Disney nail designs?
Seasonal Disney nails blend holiday themes with character elements. Halloween features villain-inspired dark colors and dramatic patterns. Christmas incorporates Mickey ornament designs with festive reds and greens. Easter combines springtime pastels with bunny-eared Mickey or floral princess themes for whimsical seasonal celebrations.
How long do Disney nail art designs last?
With proper application including base coat, quality polish, and top coat, Disney nail art typically lasts 7-14 days. 3D elements and charms may require extra care and frequent touch-ups. Gel polish extends wear time significantly, while regular polish needs more frequent maintenance for optimal appearance.
