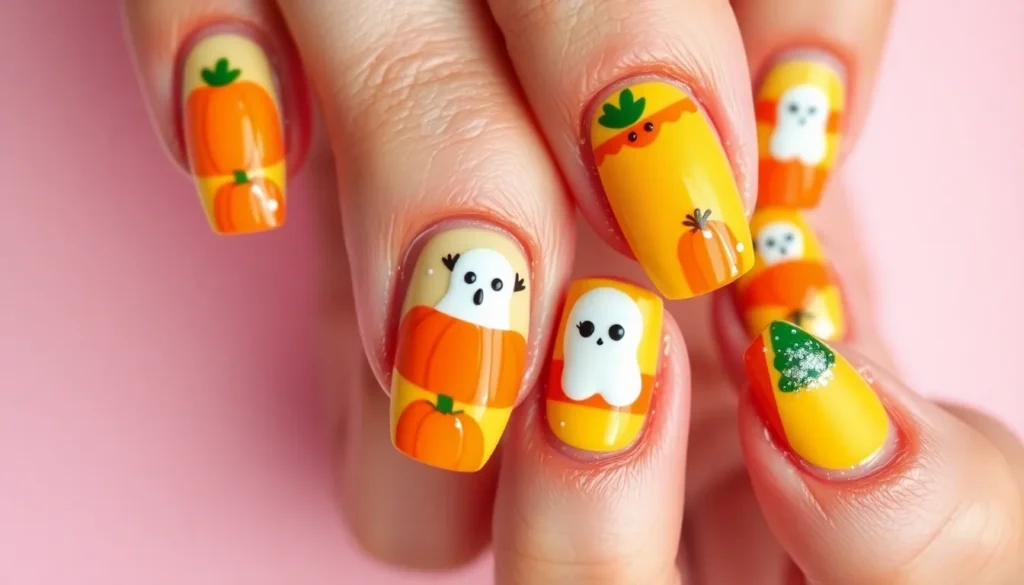
Halloween’s just around the corner and we’re absolutely obsessed with the cutest nail trends that’ll make your manicure the talk of every spooky gathering. From adorable pumpkin designs to charming ghost patterns, this season’s nail art combines festive spirit with irresistible cuteness that’s perfect for anyone who wants to celebrate without going full gothic.
We’ve discovered that cute Halloween nails are taking over social media feeds everywhere, and it’s easy to see why. These designs let you embrace the holiday’s playful side while keeping your look approachable and fun. Whether you’re heading to a pumpkin patch, costume party, or just want to add some seasonal flair to your everyday style, the right nail art can transform your entire look.
Ready to transform your fingertips into the perfect Halloween accessory? We’ll show you the most enchanting designs that balance spooky and sweet perfectly.
Adorable Pumpkin Patch Nail Designs
Pumpkin-themed nail art captures the essence of autumn with warm orange hues and charming seasonal motifs. These delightful designs bring the cozy feeling of pumpkin patches right to your fingertips.
Classic Orange Pumpkin Art
Classic orange pumpkin nails feature bold pumpkin silhouettes painted across your nail bed using traditional orange polish. We recommend creating these iconic designs by painting a rounded orange base and adding vertical lines with a thin nail art brush to mimic pumpkin ridges. Dark green stems complete the look when painted at the cuticle area using forest or hunter green polish.
Matte finish transforms regular orange pumpkins into realistic autumn gourds that look freshly picked from the patch. Professional nail artists suggest using a small dotting tool to create tiny highlight spots on each pumpkin for added dimension. These timeless designs work beautifully on medium to long nail lengths where there’s enough space for detailed pumpkin shapes.
Mini Pumpkin Accent Nails
Mini pumpkin accent nails showcase tiny pumpkin designs on one or two fingers while keeping other nails in coordinating solid colors. We love placing these miniature pumpkins on ring fingers or thumbs using bright orange, burnt orange, or even white polish for ghost pumpkins. Small pumpkin decals offer an easy alternative for those who prefer not to hand-paint intricate details.
Clustering multiple mini pumpkins creates a pumpkin patch effect across a single nail surface. Nail technicians often use striping tape to create clean pumpkin lines and remove it while the polish is still slightly wet. These adorable accents pair perfectly with nude, cream, or deep burgundy base colors that complement the autumn theme.
Pumpkin Spice Gradient Effects
Pumpkin spice gradient nails blend warm autumn colors from deep orange to golden yellow, creating a sunset-inspired ombre effect. We achieve this look by applying orange polish at the cuticle and gradually blending it into yellow or peach tones toward the nail tip using a makeup sponge. Copper glitter adds sparkle that mimics the warm glow of autumn sunlight.
Vertical gradients work exceptionally well for pumpkin spice effects, transitioning from burnt orange to cream or vanilla shades. Adding small pumpkin silhouettes over the gradient creates depth and visual interest. These sophisticated designs capture the cozy warmth of pumpkin spice lattes while maintaining an elegant autumn aesthetic perfect for both casual and formal Halloween celebrations.
Charming Ghost and Spirit Nail Art
 1")
We’ll now explore the enchanting industry of ghostly nail designs that perfectly balance cute and spooky aesthetics. These ethereal designs bring a playful spirit to your Halloween manicure without being too frightening.
Friendly Ghost Characters
Classic white ghost faces transform your nails into adorable canvases featuring simple black dots for eyes and small oval shapes for mouths. Creating these designs requires white gel polish as your base color and precise black detailing using a fine brush or dotting tool. We recommend starting with your ring finger as an accent nail before expanding the design across multiple fingers.
Casper inspired artwork brings nostalgic charm to your Halloween nails using the beloved friendly ghost character as inspiration. Begin with a crisp white base and add characteristic black features like round eyes and a sweet smile. Personalizing these designs with tiny accessories like miniature hats or bow ties adds extra character to each ghostly figure.
Simple ghost silhouettes work beautifully on round or almond shaped nails using white and nude polish combinations for an elegant foundation. These designs maintain sophistication while embracing the Halloween theme through subtle ghostly details. Adding small expressions or varying the ghost sizes across different fingers creates visual interest without overwhelming the overall look.
Glow in the Dark Ghost Details
Phosphorescent polish applications create mesmerizing effects that reveal themselves in low light conditions. We apply glow in the dark topcoat over white ghost designs to achieve an otherworldly appearance that surprises and delights. These special polishes charge under regular light and emit a soft green or blue glow for several hours.
Luminescent accent features enhance traditional ghost nail art with strategic placement of glowing elements. Focus the glow in the dark details on ghost eyes or outline the entire figure for maximum impact. Combining regular white polish with glow in the dark stickers offers an easier application method for beginners.
Nighttime visibility effects make your ghost nail art the center of attention at evening Halloween events. Charging your nails under a lamp before heading out ensures optimal glow performance throughout the night. We suggest testing the glow intensity beforehand to achieve your desired luminescence level.
Cute Casper Inspired Designs
Beloved character interpretations capture the essence of everyone’s favorite friendly ghost through carefully crafted nail art. Start with a pure white base coat and use black gel polish to create Casper’s distinctive round eyes and gentle smile. Adding small details like rosy cheeks using pink polish brings warmth to the ghostly character.
Themed combination designs pair Casper inspired ghosts with complementary Halloween elements like tiny pumpkins or autumn leaves. These mixed motif manicures tell a complete seasonal story across your fingertips. We recommend using acrylic paint for fine details and sealing everything with a quality topcoat for longevity.
Personalized ghost expressions allow you to create unique versions of the classic Casper look by varying facial features and accessories. Experiment with different eye shapes, mouth positions, or small decorative elements like stars or hearts. Each nail can feature a slightly different ghost personality while maintaining the overall Casper aesthetic.
Sweet Candy Corn Nail Creations
 2")
Candy corn inspired designs bring the iconic Halloween treat straight to your fingertips with vibrant yellow, orange, and white color combinations.
Traditional Tri-Color Stripes
Traditional candy corn nails showcase the classic tri-color stripes that mirror the beloved Halloween candy perfectly. We start with a base coat and apply yellow at the nail base, followed by orange in the middle section, and finish with white at the tips. This layered approach creates the authentic candy corn appearance that’s instantly recognizable.
Applying each color in descending order ensures clean lines and proper color separation. The key is letting each layer dry completely before adding the next stripe to prevent bleeding between colors. Professional nail artists recommend using tape or nail guides to achieve razor sharp lines between each section.
Modern Candy Corn Variations
Modern candy corn variations incorporate contemporary nail art elements like glitter accents, rhinestones, and three dimensional candy corn shapes. We’ve seen artists add holographic glitter over the traditional stripes for extra sparkle that catches Halloween party lights beautifully.
Mixed media elements transform basic candy corn designs into statement pieces worthy of social media attention. Nail art brushes allow us to paint actual candy corn shapes on accent nails while keeping other fingers in complementary solid colors. Some artists even apply tiny rhinestones along the color transitions to create luxury versions of this playful theme.
Ombre Candy Corn Effects
Ombre candy corn effects blend the traditional yellow, orange, and white colors into smooth gradients that create sophisticated Halloween nail art. We achieve this look by applying the three colors while they’re still wet and using a makeup sponge to blend the transitions seamlessly.
The gradient technique produces a sunset like effect that’s more subtle than harsh stripe lines but maintains the candy corn color story. This approach works especially well on longer nail shapes where there’s more space to showcase the beautiful color transitions. Adding a glossy top coat enhances the ombre effect and makes the colors appear to flow into each other naturally.
Playful Black Cat Nail Designs
 3")
Black cats bring mystical charm to cute Halloween nails with their whimsical appeal. We’ll explore enchanting feline designs that capture the playful spirit of these beloved Halloween companions.
Silhouette Cat Profiles
Elegant black cat silhouettes create striking contrast against light base colors like nude, white, or soft pink. We recommend painting sleek cat profiles on accent nails while keeping other fingers in complementary solid shades. Long nail shapes showcase these silhouettes beautifully, allowing space for detailed arched backs and curved tails that define classic cat poses.
Minimalist approaches work exceptionally well with single cat silhouettes placed strategically on ring fingers or thumbs. Adding tiny yellow dots for eyes brings these shadow figures to life without overwhelming the design’s simplicity. Multiple silhouettes across different nails can tell a story, featuring cats in various positions like sitting, stretching, or prowling.
Cat Eye Accent Details
Cat eye accent nails incorporate feline elements without covering entire nail surfaces. We suggest painting small cat ears at nail tips or adding whisker details to French manicure designs. These subtle touches maintain elegance while embracing Halloween’s playful side through recognizable cat features.
Yellow or green cat eyes painted as small ovals create focal points on otherwise simple manicures. Positioning these eyes near cuticle areas or nail centers draws attention without overwhelming the overall design. Combining cat eye accents with other Halloween elements like tiny bats or stars creates cohesive seasonal themes across multiple fingers.
Cute Cat Face Illustrations
Full cat face illustrations transform nails into miniature canvases for adorable feline expressions. We paint round cat faces using black base colors, then add pink noses, white whiskers, and expressive eyes in yellow or green hues. These detailed designs work best on shorter nail lengths where proportions remain balanced and features stay clearly defined.
Cartoon style cat faces offer endless personality options through varied expressions like winking, sleeping, or surprised looks. Adding small accessories such as witch hats, bow ties, or collars personalizes each cat character while maintaining the Halloween theme. Different cat faces on each nail create a playful collection of feline friends that capture attention and spark conversations at Halloween gatherings.
Whimsical Witch-Themed Nail Art
 4")
Witch inspired nail designs bring magical charm to your Halloween manicure with playful elements that enchant rather than frighten. These spellbinding styles incorporate miniature witch accessories, mystical brewing motifs, and sparkling potion effects to create the perfect balance of cute and spooky.
Tiny Witch Hat Accents
Miniature witch hats transform ordinary nails into magical masterpieces when applied as delicate accent pieces. We love creating these charming details using nail art brushes to paint tiny triangular hats, or applying ready made stickers and 3D charms for instant witchy vibes. Position these adorable accessories on one or two accent nails to complement your overall design without overwhelming the look.
Enhance your witch hat accents with glitter, rhinestones, or contrasting colors for that whimsical touch we’re after. Black hats pop beautifully against orange, purple, or green base colors, especially when paired with polka dots or thin striping. Consider adding tiny buckles or bands to your painted hats using metallic polish for extra detail work.
Magical Cauldron Designs
Cauldron motifs bring the brewing magic directly to your fingertips through hand painted designs or carefully applied decals. These mystical vessels work best when painted in simple cartoon style outlines that maintain the cute aesthetic we want for Halloween. Place cauldrons on contrasting nail colors to make them stand out as focal points in your witch themed manicure.
Create bubbling effects around your cauldrons using small dots of glitter or metallic polish to simulate magical brew activity. We recommend layering clear glitter polish over colored bases to achieve that mystical potion depth. Simple black outlines filled with silver or gold create striking cauldron silhouettes that catch light beautifully.
Sparkly Witch Brew Effects
Glitter gradients and metallic dots recreate the magical shimmer of witch potions brewing in cauldrons. Layer different glitter sizes and colors to build depth that mimics the swirling magic inside enchanted brews. We achieve the most stunning effects by combining fine glitter with larger hexagonal pieces for texture variation.
Enhance your brew effects with miniature stars, moons, and rhinestones that reinforce the mystical atmosphere. Apply these celestial accents strategically around glitter areas to create cohesive magical themes. Clear or lightly tinted glitter polishes work best as topcoats, allowing the underlying colors to show through while adding that essential sparkly witch brew shimmer.
Delightful Halloween Character Nails
 5")
Moving beyond traditional Halloween motifs, we can create adorable character nails that bring beloved spooky friends to life. These charming designs transform your nails into tiny canvases for the cutest Halloween personalities.
Cute Monster Faces
Cute monster faces offer the perfect balance between Halloween spirit and playful charm. We love creating cartoonish versions of classic monsters like ghosts, bats, and spiders that smile instead of scare. Simple dot work and basic lines can transform any nail into an adorable monster friend.
Nail polish becomes your primary tool for painting these delightful creatures directly onto your nails. Bright colors like purple, green, and orange work beautifully for monster skin tones, while white dots create friendly eyes and black lines add expressive features. Stickers provide an easier alternative for those who prefer ready made designs.
Playful expressions make these monsters irresistibly cute rather than frightening. Wide eyes, rosy cheeks, and cheerful smiles turn even the spookiest creatures into loveable characters. We recommend starting with simple two color combinations before advancing to more detailed designs.
Friendly Vampire Designs
Friendly vampire designs bring gothic elegance to your Halloween nails without the intimidation factor. Blood red polish serves as the perfect base color, creating that classic vampire aesthetic while maintaining a sophisticated look. Heart motifs scattered across the design add romantic touches that soften the traditional vampire theme.
Fang designs become adorable when painted as tiny white triangles with subtle shading. We suggest placing them strategically on accent nails rather than every finger for the most impactful look. Nail guides help achieve perfectly symmetrical fangs that look professionally done.
Stickers offer convenient alternatives for creating detailed vampire elements like bat wings or tiny coffins. These pre made designs ensure consistency across all your nails while saving time on intricate hand painting. We find that combining stickers with hand painted elements creates the most ever-changing vampire nail art.
Adorable Skeleton Art
Adorable skeleton art transforms spooky bones into charming characters through creative color choices and playful styling. Pastel colors like soft pink, lavender, and mint green replace traditional white, creating skeleton designs that feel more cute than creepy. Cartoonish styles with rounded edges and friendly expressions complete the adorable transformation.
Smiling faces turn skeleton heads into delightful characters that celebrate rather than frighten. We love adding tiny floral crowns or bow ties to give each skeleton personality and charm. These small details make each nail unique while maintaining the overall theme.
Nail stickers and stamps provide excellent options for those who want detailed skeleton designs without extensive nail art skills. Professional looking results become achievable for beginners when using these tools. We recommend combining different skeleton poses across your nails to create a complete cast of bony characters.
Festive Fall Foliage Nail Looks
 6")
Transform your manicure into autumn’s masterpiece with these enchanting foliage designs that capture the season’s natural beauty. These festive looks perfectly complement your cute Halloween nails while celebrating fall’s stunning transformation.
Autumn Leaf Patterns
Vibrant autumn leaf patterns bring nature’s artistry directly to your fingertips with stunning orange, red, and yellow color combinations. Create realistic maple leaf silhouettes using fine nail art brushes and layering techniques that mimic the natural color variations found in fall foliage. Paint delicate oak leaves with golden brown bases and amber highlights to achieve that perfect seasonal glow. Add tiny leaf details as accent nails while keeping the remaining nails in solid autumn tones like burnt orange or deep burgundy.
Gradient leaf effects blend multiple fall colors seamlessly across each nail, creating the illusion of leaves transitioning through their seasonal changes. Use sponge dabbing techniques to merge warm yellows into rich oranges and deep reds for that natural ombre appearance. Apply small leaf stamps or hand painted details over the gradient base to enhance the autumn forest aesthetic. Finish with a matte top coat to capture the authentic texture of fallen leaves.
Harvest Moon Designs
Full moon nail art creates a mystical centerpiece that perfectly captures autumn’s enchanting nights with glowing lunar details. Paint a large cream or pale yellow circle on a deep navy or black base to represent the harvest moon rising over the horizon. Add subtle shimmer or pearl polish to the moon area for that authentic celestial glow. Surround the moon with tiny painted stars or use star shaped rhinestones for added sparkle.
Autumn silhouette designs frame the harvest moon with seasonal elements like bare tree branches, flying bats, or pumpkin patches. Create these silhouettes using black polish over the moon backdrop for dramatic contrast. Paint thin tree branches reaching across the nail surface while leaving the moon as the focal point. Add small autumn leaves falling around the moon scene to complete the seasonal story.
Cozy Plaid Nail Art
Traditional plaid patterns evoke that cozy fall feeling with warm color combinations like red, orange, and yellow arranged in classic crisscross designs. Start with a base color and use thin nail art brushes to create perpendicular lines in alternating colors. Layer the lines to achieve the authentic plaid weave appearance that’s perfect for autumn celebrations. Focus on one or two accent nails with full plaid designs while keeping others in coordinating solid colors.
Modern plaid variations update the classic pattern with contemporary twists like metallic accents or gradient effects within each plaid square. Use nail tape to create perfectly straight lines and clean geometric patterns that look professionally executed. Incorporate seasonal colors like burnt orange, deep burgundy, and golden yellow to maintain that autumn atmosphere. Add tiny rhinestones at plaid intersections for extra sparkle that catches the light beautifully.
Creative Halloween French Tip Variations
 7")
French tips get a spooky makeover with these creative Halloween variations that blend classic elegance with festive charm. We’ll show you how to transform traditional French manicures into seasonal masterpieces.
Spooky French Tip Updates
Elegant Black French Manicure creates sophisticated Halloween nails with deep black tips and a glossy finish that adds mystery to any outfit. We recommend using a high-quality black polish for maximum opacity and professional results.
Chic Pink Cobweb Nail Art transforms your manicure with delicate web designs painted over pink and white French tips on a glossy nude base coat. These intricate patterns catch light beautifully and create conversation-worthy nail art.
Ghostly Accents add playful spooky touches to traditional French tips by incorporating tiny ghost figures along the white tip line. We suggest using a fine nail art brush or dotting tool to create these adorable supernatural friends.
Simple Pumpkin French Tip Nails feature double French tips adorned with miniature pumpkin designs that perfectly capture autumn’s essence. Orange and green details bring these seasonal motifs to life without overwhelming the classic French structure.
Colorful Halloween Tips
Pumpkin-Carved Mani showcases vibrant orange nails decorated with adorable pumpkin faces that smile back at you throughout the day. We love how these charming expressions add personality to each fingertip.
Multi-Colored Tips incorporate a festive palette of orange, black, and purple across different nails to create ever-changing Halloween nail art. Each finger tells part of your spooky story while maintaining overall design cohesion.
Autumn Gradient Tips blend warm seasonal colors from orange to deep burgundy for a sophisticated take on Halloween French manicures. These smooth color transitions mimic fall sunsets and complement any autumn wardrobe.
Candy Corn Inspired Tips recreate the iconic Halloween treat with yellow, orange, and white striped French tips that celebrate classic holiday confections. We recommend using striping tape for clean, professional-looking lines.
Glitter Halloween Accents
Glitter Web Nails incorporate shimmering web designs that catch light from every angle and add magical sparkle to your Halloween manicure. Fine glitter particles create realistic web textures over your base color.
Glittery Ghosts and Stars combine celestial elements with supernatural themes using sparkly accents that twinkle like Halloween night sky. We suggest layering different glitter sizes for dimensional effects.
Holographic Halloween Tips feature color-changing glitters that shift between purple, green, and orange depending on lighting conditions. These mesmerizing effects create ever-changing nail art that evolves throughout your Halloween celebrations.
Metallic Accent Nails use copper and gold glitters to highlight exact design elements like pumpkin stems or ghost outlines. These sophisticated touches elevate simple Halloween motifs into premium nail art experiences.
Easy DIY Cute Halloween Nail Tutorials
 8")
Creating adorable Halloween nail art doesn’t require professional salon skills or expensive equipment. We’ll walk you through simple techniques that deliver stunning results with minimal effort.
Beginner-Friendly Designs
Ghost nails transform any manicure into a spooky masterpiece with just white and black polish. Paint your nails completely white as the base coat. Use black polish to draw two small dots for eyes and a small oval or wavy line for the mouth. Start with simple facial expressions before attempting more detailed ghost characters.
Pumpkin nails capture autumn’s essence using basic orange polish and a thin brush. Apply orange polish as your base color and let it dry completely. Draw on simple facial features like triangular eyes and a curved mouth using black polish. Add a small green stem at the base of your nail for extra detail.
Mummy nails create an instantly recognizable Halloween look with white or beige polish. Wrap thin strips of tape or use nail tape to create irregular bandage patterns across your nail. Paint over the exposed areas with white polish, then remove the tape to reveal clean mummy bandage lines. Add small black dots for eyes peeking through the bandages.
Candy corn nails replicate the iconic Halloween treat using three simple colors. Start with white polish at the tip of your nail. Apply yellow polish in the middle section. Finish with orange polish at the base. Use nail tape between each section to achieve crisp, clean lines that mimic real candy corn stripes.
Quick Halloween Nail Hacks
Nail stickers provide instant Halloween designs without any painting skills required. Apply pre-made stickers featuring bats, jack-o-lanterns, or spider webs directly onto dried base polish. Press firmly and seal with a top coat for long-lasting wear. Choose stickers that complement your base color for the most striking effect.
Nail tape creates perfect lines and geometric patterns effortlessly. Use the tape to section off areas for clean color blocking or striped designs. Apply your polish over the tape while it’s still in place, then remove immediately while the polish is wet. This technique works perfectly for candy corn stripes or creating spider web patterns.
Stampers reproduce intricate Halloween designs with professional precision. Load your stamper with polish and press onto pre-designed plates featuring skulls, spider webs, or pumpkin patterns. Transfer the design directly onto your nail for detailed artwork that would otherwise require advanced painting skills. Practice the stamping motion on paper first to perfect your technique.
Simple Tools and Techniques
Dotting tools create perfect circles and small details every time. Use different sized dotting tools to make spider bodies, ghost eyes, or decorative accents on your Halloween designs. Dip the tool in polish and gently press onto your nail surface. Clean the tool between colors to prevent muddy mixing.
Thin brushes allow precise control for drawing facial features and fine details. Choose brushes with synthetic bristles that won’t fray or shed during application. Load the brush with a small amount of polish and practice steady hand movements on paper before working on your nails. Keep a steady hand by resting your elbow on a table while painting.
Nail polish cleanup brushes fix mistakes and create sharp, professional edges around your cuticles. Dip the brush in nail polish remover and gently clean away any polish that strayed from your nail bed. Use these brushes to perfect your Halloween designs and ensure each nail looks salon quality. Keep several brushes on hand since they work best when clean and properly maintained.
Conclusion
These enchanting Halloween nail designs prove that spooky doesn’t have to mean scary. We’ve shared countless ways to celebrate the season through adorable nail art that captures both the magic and whimsy of Halloween.
From beginner-friendly DIY tutorials to sophisticated French tip variations we’ve covered options for every skill level and style preference. Whether you’re drawn to playful pumpkins charming ghosts or elegant autumn leaves there’s a perfect design waiting for your fingertips.
The beauty of Halloween nail art lies in its versatility and creative freedom. We encourage you to experiment with different techniques mix and match elements from various designs and most importantly have fun bringing your festive vision to life.
This Halloween let your nails tell a delightful story that’s uniquely yours. After all the best nail art comes from embracing your creativity and celebrating the season with confidence and joy.
Frequently Asked Questions
What are the most popular cute Halloween nail trends for 2025?
The most popular cute Halloween nail trends include adorable pumpkin designs with warm orange hues, friendly ghost characters, sweet candy corn creations, playful black cat silhouettes, and whimsical witch-themed art. These designs blend spooky and sweet aesthetics, featuring charming elements like mini pumpkins, Casper-inspired ghosts, and magical cauldron motifs that are perfect for social media sharing and Halloween celebrations.
How can beginners create professional-looking Halloween nail art at home?
Beginners can achieve professional results using simple tools like dotting tools, thin brushes, and nail stickers. Start with easy designs like basic ghost faces or pumpkin silhouettes. Use tape for clean lines, nail stamps for detailed patterns, and consider glow-in-the-dark polish for added effect. Practice simple techniques first, then gradually add glitter accents and rhinestones for more sophisticated looks.
What colors work best for cute Halloween nail designs?
The best colors for cute Halloween nails include classic orange and black combinations, warm autumn shades like burnt orange and gold, creamy whites for ghosts, and vibrant yellows for candy corn designs. Pastel versions of traditional Halloween colors create a softer, cuter aesthetic. Metallic accents in copper and silver add sophistication, while glow-in-the-dark elements enhance the spooky factor.
How do you create candy corn nail art with clean lines?
To create clean candy corn stripes, start with a white base coat and let it dry completely. Use striping tape or regular tape to section off each color band. Apply yellow polish first, then orange, ensuring each layer dries before adding the next. Remove tape while polish is slightly wet for crisp lines. Finish with a top coat for durability and shine.
What are some creative alternatives to traditional Halloween nail designs?
Creative alternatives include fall foliage patterns with autumn leaves, harvest moon designs, cozy plaid nail art, and Halloween French tip variations. You can also try cute monster faces in bright colors, friendly vampire designs with gothic elegance, adorable skeleton art in pastels, or witch brew effects with layered glitters. These options maintain festive spirit while offering unique twists.
How long do Halloween nail designs typically last?
Halloween nail designs typically last 7-14 days with proper application and care. Use a quality base coat, apply thin layers of polish, and seal with a top coat. Avoid harsh chemicals, wear gloves when cleaning, and apply cuticle oil daily. Designs with stickers or 3D elements may have shorter wear time, while simple painted designs tend to last longer.
Can Halloween nail art work for professional settings?
Yes, Halloween nail art can work professionally by choosing subtle designs and muted colors. Opt for minimalist approaches like single ghost silhouettes, elegant black French tips, or simple autumn leaf accents. Use sophisticated color combinations like burgundy and gold instead of bright orange, and keep designs small and refined rather than bold and dramatic.
What tools are essential for creating detailed Halloween nail designs?
Essential tools include thin detail brushes for precise lines, dotting tools for perfect circles and dots, nail art pens for fine details, and striping tape for clean edges. Nail stamps and stencils help create consistent patterns, while small scissors and tweezers assist with applying stickers and rhinestones. A good top coat is crucial for sealing and protecting detailed artwork.


