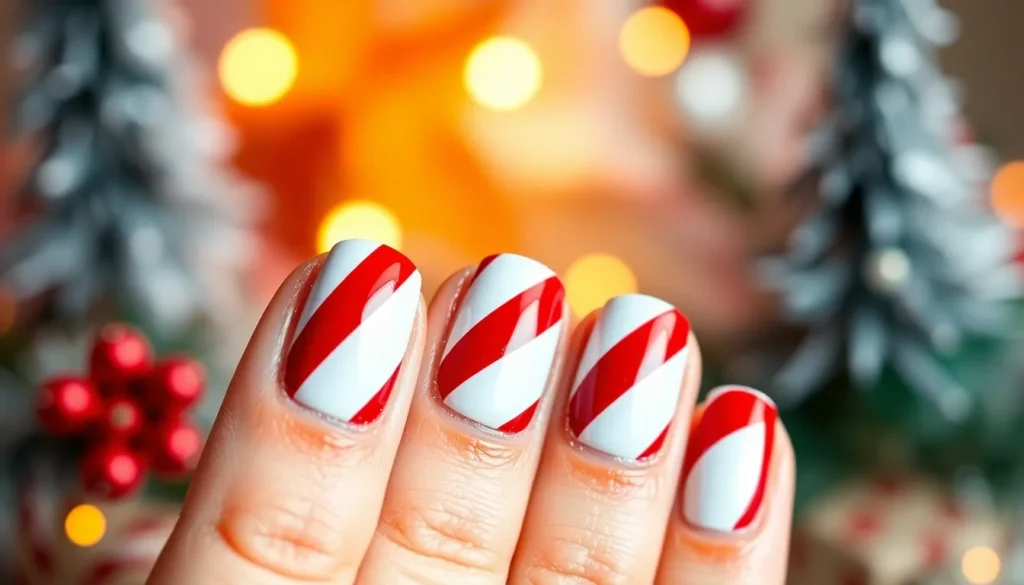
Nothing captures the festive spirit quite like candy cane nails – the perfect holiday manicure that’ll make your fingertips look good enough to eat. We’ve all seen those gorgeous red and white striped designs flooding our social media feeds every December and wondered how to recreate that picture-perfect look at home.
The beauty of candy cane nail art lies in its versatility and timeless appeal. Whether you’re attending holiday parties or simply want to spread some seasonal cheer we’ll show you how to achieve this classic Christmas design without very costly or spending hours at the salon.
From simple DIY techniques using household items to professional-level designs that’ll impress everyone at your next gathering we’ve got you covered. These eye-catching nails aren’t just for the holidays either – they’re perfect for any time you want to add a playful pop of pattern to your look.
Classic Red and White Striped Candy Cane Nails
Classic red and white stripes form the foundation of every stunning candy cane nail design we create. This timeless combination captures the essence of holiday magic while remaining surprisingly versatile for any skill level.
Traditional Diagonal Stripe Pattern
Diagonal stripes create the most authentic candy cane appearance on our nails by mimicking the actual candy’s spiral pattern. We start with a white base coat and allow it to dry completely before applying red striping tape at 45-degree angles across each nail. The key lies in spacing our stripes evenly, typically leaving 2-3mm between each red line for optimal visual impact.
Precision becomes crucial when we remove the tape while the polish remains slightly tacky. This technique prevents the red polish from peeling away with the tape, ensuring clean and sharp stripe edges. We recommend using a high-quality nail art brush to touch up any imperfections before sealing with a clear top coat.
Professional results emerge when we alternate the diagonal direction on each nail, creating a ever-changing candy cane pattern across our entire manicure. This variation adds visual interest while maintaining the classic holiday aesthetic we’re aiming to achieve.
Vertical Stripe Candy Cane Design
Vertical stripes offer a modern twist on traditional candy cane nails while remaining incredibly beginner-friendly. We apply thin red stripes running from cuticle to tip using either striping tape or a fine nail art brush, creating clean parallel lines against our white base.
Spacing consistency determines the overall success of this vertical candy cane design. We typically create 3-4 red stripes per nail, ensuring equal white space between each line for a balanced and polished appearance.
Accent nails work beautifully with this vertical stripe technique by alternating the pattern direction or adding glitter to select nails. This approach prevents the design from becoming overwhelming while maintaining our festive candy cane theme throughout the manicure.
Curved Stripe Technique
Curved stripes require steady hands but deliver the most authentic candy cane swirl pattern we can achieve at home. We use a small nail art brush to paint gentle S-shaped curves in red polish over our white base, following the natural curve of each nail.
Practice makes perfect with this advanced candy cane technique, so we recommend starting with subtle curves before attempting more dramatic swirls. The key involves maintaining consistent curve depth and spacing across all ten nails for a cohesive final result.
Layering thin coats of red polish builds up our curved stripes gradually, preventing messy application and ensuring smooth, even coverage. We complete each curved candy cane nail with two coats of clear top coat to protect our intricate design work.
French Tip Candy Cane Nails

French tip candy cane nails elevate the classic manicure with festive holiday flair. We’ll explore sophisticated variations that combine traditional elegance with seasonal charm.
Red and White French Manicure Style
Creating this sophisticated look starts with painting your nail tips white, maintaining the timeless French manicure foundation. Apply red accents strategically along the white tips to mimic authentic candy cane stripes. Position thin red lines diagonally across the white tips for maximum visual impact. Maintain consistent spacing between stripes to achieve professional results.
Polish selection plays a crucial role in this design’s success. Choose high-quality red and white polishes that provide full coverage in a single coat. Allow each color to dry completely before adding the next layer. Seal your finished design with a glossy top coat to enhance durability and shine.
Reverse French with Candy Cane Tips
Transform traditional French tips by applying candy cane patterns exclusively to the nail tips while keeping the base solid. Paint your entire nail with a festive base color like deep red, forest green, or classic nude. Focus the candy cane stripes only on the tip area, creating a striking contrast with the solid base.
Execute this design by taping off the tip section before applying your striped pattern. Remove tape carefully while the polish remains slightly wet to prevent peeling. Blend the candy cane tips seamlessly with your chosen base color for a polished finish.
Double French Tip Design
Layer two distinct French tips to create this playful twist on traditional candy cane nails. Start with a white French tip as your foundation, then add a second tip featuring red and white candy cane stripes. Space the two tips appropriately to showcase both design elements effectively.
Achieve this advanced technique by applying the first white tip, allowing it to cure completely, then adding the striped tip above it. Vary the width of each tip to create visual interest and prevent overwhelming the nail. Practice this design on practice nails first to master the layering technique before applying to your natural nails.
Glitter Candy Cane Nails
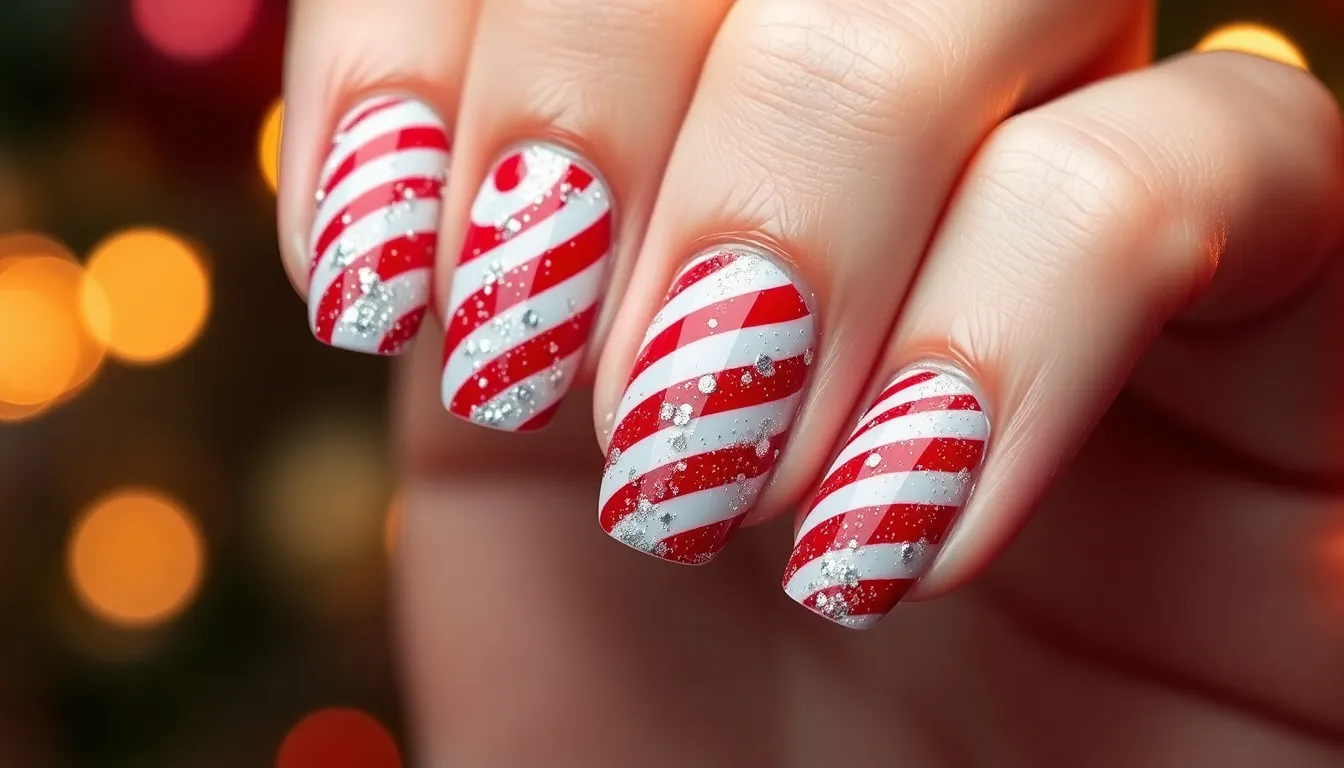
Glitter candy cane nails transform the traditional holiday design into a dazzling masterpiece that catches light from every angle. This sparkling variation adds glamour and festive cheer to your manicure while maintaining the classic red and white stripe pattern.
Silver Glitter Accent Stripes
Silver glitter accent stripes elevate your candy cane nail design with luxurious metallic touches that create stunning visual contrast. We recommend starting with your base red and white stripes using traditional polish techniques. Apply the main candy cane pattern first, allowing each color to dry completely before adding the glamorous accent details.
Using a thin nail art brush, we carefully paint silver glitter polish as accent stripes alongside the existing red and white design. This technique works best when you place the silver stripes strategically between the main colors rather than overlapping them. The metallic shimmer creates depth and dimension that makes your nails appear more sophisticated and party ready.
Red Glitter Base with White Stripes
Red glitter base with white stripes offers a bold twist on the classic candy cane design by making the red component sparkle brilliantly. We start this variation by applying a layer of red glitter polish as the foundation color across the entire nail surface. Allow this base to dry thoroughly before proceeding with the stripe application.
Creating white stripes over the glittery red base requires steady hands and quality tools for the best results. We suggest using striping tape or nail guides to achieve perfectly straight lines that won’t smudge the glitter underneath. Paint the white stripes carefully with a steady brush stroke, ensuring even coverage that stands out against the sparkling red background.
Holographic Candy Cane Effect
Holographic candy cane effect creates an otherworldly rainbow shimmer that shifts colors as light hits your nails from different angles. We achieve this stunning look by incorporating holographic polish into either the red or white portions of the traditional stripe pattern. The holographic element transforms ordinary candy cane nails into a mesmerizing display of color and light.
Applying holographic polish requires exact techniques to maximize the color shifting properties that make this design so captivating. We recommend using the holographic polish for the white stripes to create maximum contrast against solid red sections. This approach allows the rainbow effect to pop dramatically while maintaining the recognizable candy cane aesthetic that makes this design so beloved during the holiday season.
3D Candy Cane Nails
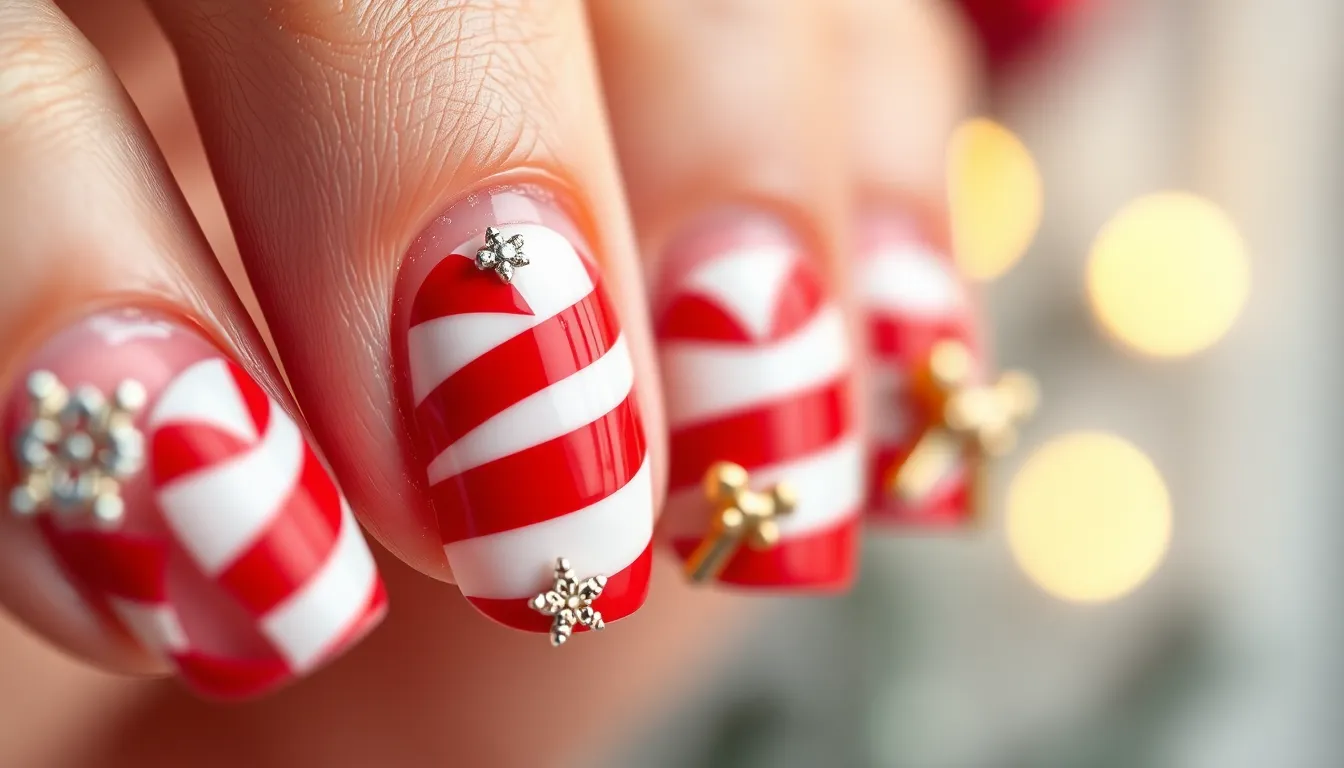
Creating dimension in your candy cane nails adds professional polish to this festive design. We’ll show you how to achieve sculptural effects that transform flat stripes into eye-catching, textured masterpieces.
Raised Stripe Texture Technique
Layering gel polish creates the foundation for dimensional candy cane stripes. We recommend starting with a white base coat and allowing it to cure completely before applying the textured elements. Building up thin layers of clear gel polish along designated stripe areas gives your nails raised texture without compromising durability.
Special texture gel provides an alternative method for achieving raised stripes. Apply the texture gel directly over your base color using a fine brush, creating smooth lines that follow the candy cane pattern. Curing each layer under LED light ensures the raised effect maintains its shape and adds lasting dimension to your design.
Sculpting gel offers the most dramatic dimensional results for candy cane nails. Mix small amounts of sculpting gel with red pigment to create colored raised stripes that stand out from the white base. This technique requires patience but delivers professional-quality results that rival salon work.
Candy Cane Charm Applications
Small candy cane charms enhance the festive appeal of your dimensional nail art. We suggest placing charms strategically on accent nails rather than every finger to maintain balance in your overall design. Nail glue provides secure attachment for charms, ensuring they stay in place throughout holiday festivities.
Holiday motif charms work beautifully alongside candy cane designs. Consider adding small snowflakes, holly leaves, or miniature bows to create a cohesive winter wonderland theme. These additional elements complement the candy cane pattern without overwhelming the primary design.
Metallic charms add glamour to your candy cane nails. Silver or gold accents create sophisticated contrast against the traditional red and white color scheme. Position these charms near the cuticle area or at the tip of your nails for maximum visual impact.
Gel Polish Dimensional Effects
Layering different gel polish colors creates depth in your candy cane design. We recommend using a white base coat, followed by carefully applied red stripes, then sealing with a clear top coat that enhances the dimensional appearance. This technique allows each layer to show through, creating visual complexity.
Holographic gel polish transforms ordinary candy cane nails into dazzling holiday statements. Apply holographic top coat over your completed candy cane design to achieve rainbow shimmer effects that catch light beautifully. The holographic finish enhances the dimensional quality while maintaining the classic red and white pattern.
Glitter gel polish adds sparkle to raised candy cane elements. Mix fine glitter directly into clear gel polish before applying to raised areas, creating textured stripes that shimmer with every movement. This combination of dimension and sparkle delivers maximum festive impact for your holiday manicure.
Ombre Candy Cane Nails
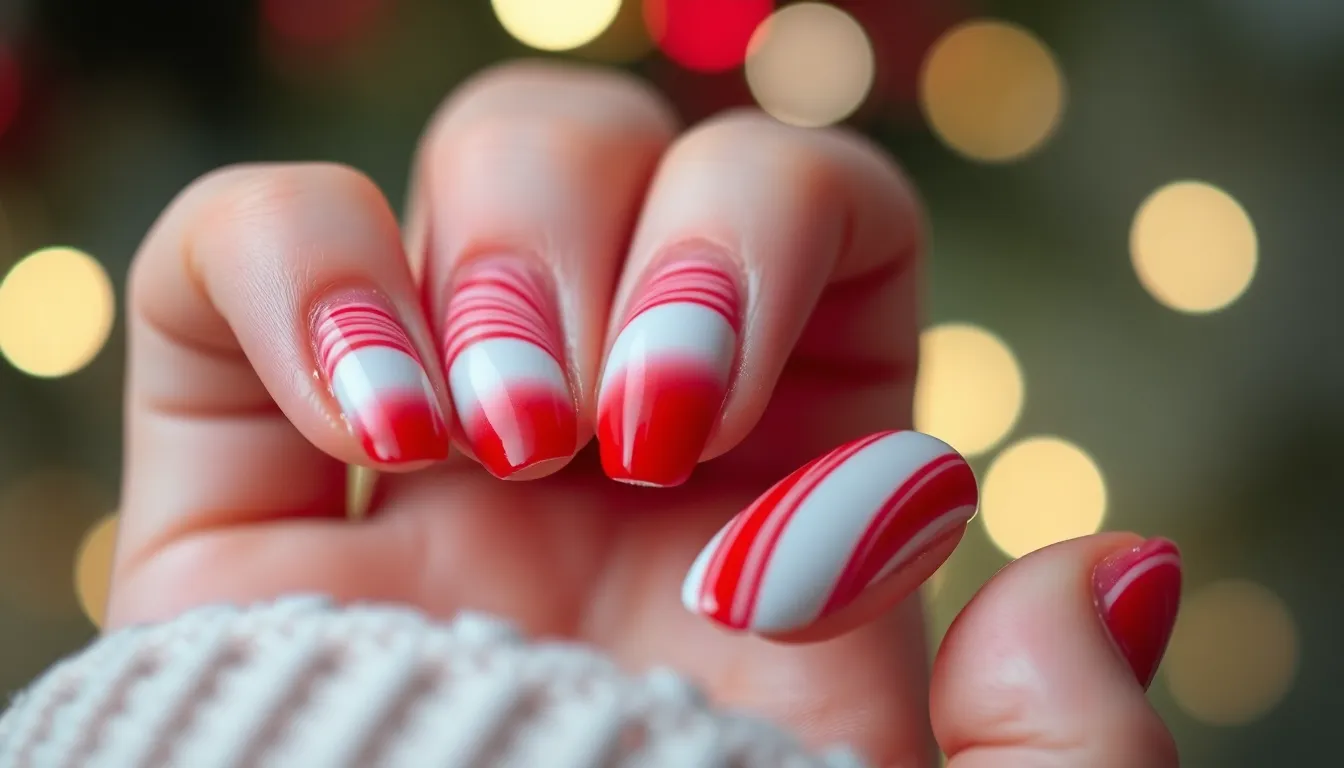
Ombre candy cane nails bring a sophisticated twist to the traditional striped design by blending colors in smooth gradients. We’ll explore how this technique creates stunning transitions that capture the festive spirit while adding modern elegance to your holiday manicure.
Red to White Gradient Stripes
Creating the perfect red to white gradient requires a makeup sponge and strategic layering technique. We recommend starting with an opaque red base at the cuticle area, then gradually blending white polish toward the nail tip using gentle dabbing motions.
Traditional candy cane stripes get a modern upgrade when you paint the first stripe in solid red, then mix increasing amounts of white into each subsequent stripe. This method creates a beautiful color transition that maintains the candy cane aesthetic while offering something fresh.
Achieving crisp gradient lines becomes easier with striping tape or stencils, though freehand painting with a thin brush allows for more creative control. Professional nail artists often use this technique to create seamless color transitions that look sophisticated and festive.
Layering is key to achieving the smooth fade effect – we suggest building up the colors gradually rather than trying to create the entire gradient in one application. Multiple thin layers produce better results than attempting to achieve the full effect with heavy polish application.
Pink Candy Cane Ombre Design
Pink candy cane ombre designs offer a softer alternative to traditional red, ranging from delicate pastels to vibrant fuchsia tones. We love how this variation maintains the festive spirit while providing a more subtle, wearable option for those who prefer gentler colors.
Blending white and pink follows the same sponge technique as the classic red version, but the results feel more romantic and feminine. Sweet pastel pinks create an elegant look perfect for holiday brunches, while bold fuchsia delivers drama for evening events.
Stripe incorporation can happen in two ways: painting them directly over the ombre base or subtly working them into the fade itself. We find that incorporating the stripes into the gradient creates a more cohesive, modern appearance than simply painting them on top.
Color intensity varies dramatically depending on your pink choice – soft baby pink creates a dreamy, whimsical effect, while hot pink delivers bold impact. Both approaches capture the candy cane motif while offering distinct style personalities.
Multi-Color Fade Technique
Multi-color fade candy cane nails incorporate additional hues like gold, green, or other pastels for a truly customized holiday look. We’ve seen stunning results when artists use sponges to dab multiple colors side by side, ensuring smooth transitions between each shade.
Creative customization extends far beyond traditional holiday colors with this technique. Emerald green fades, rose gold accents, and even purple gradients can create candy cane inspired designs that feel fresh and contemporary.
Application method involves creating the ombre base first, then adding candy cane stripes using gel liner or fine brushes in complementary colors. This approach allows for endless creativity while maintaining the recognizable candy cane structure.
Professional finishing requires gel or regular polish topped with a glossy coat for maximum holiday shine. Cleanup after each step ensures crisp lines and professional results, while the multi-color fade technique offers unlimited possibilities for personal expression within the candy cane theme.
Minimalist Candy Cane Nails
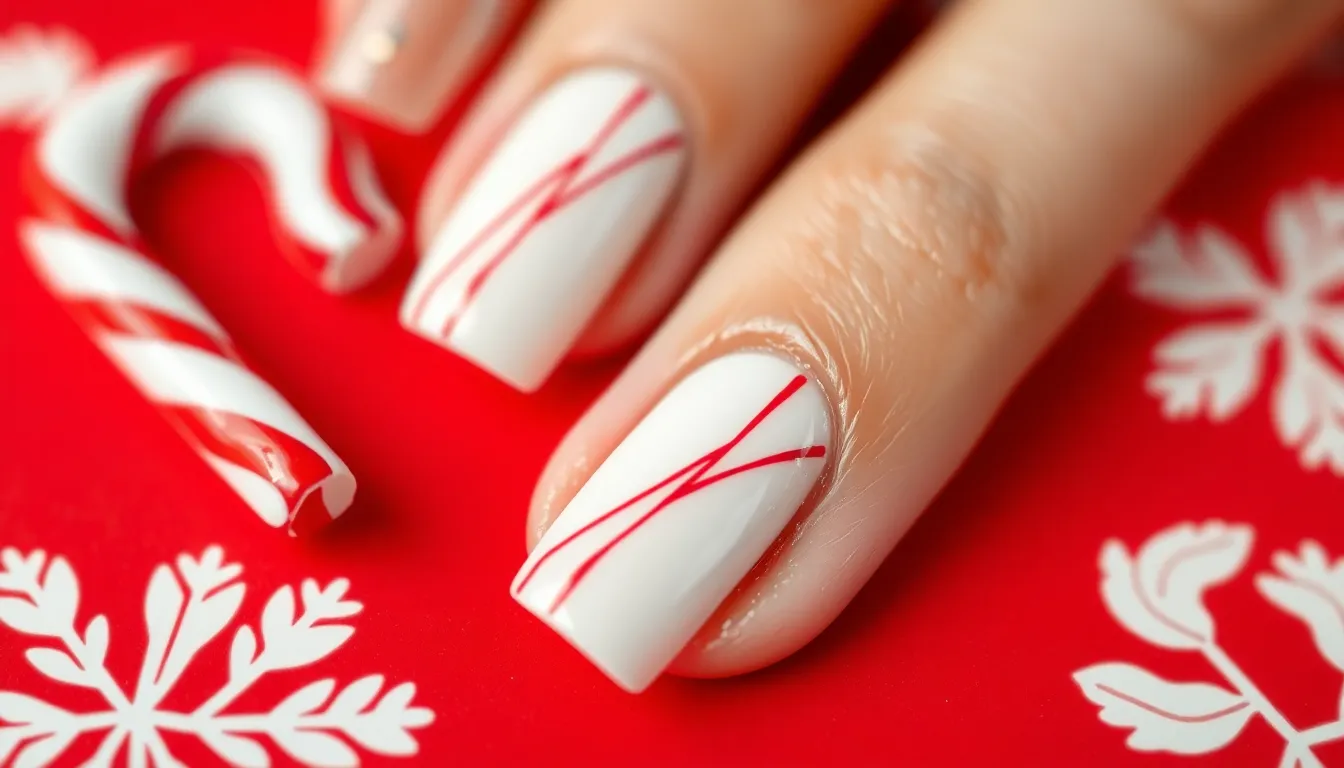
Sometimes the most elegant holiday nail looks come from embracing simplicity rather than adding layers of complexity. Minimalist candy cane nails focus on understated elegance using thin, irregular stripes in the classic red and white color scheme.
Single Accent Nail Design
Creating a single accent nail candy cane design offers the perfect balance between festive spirit and everyday wearability. We recommend applying the candy cane pattern to just your ring finger while painting the remaining nails in a solid coordinating color like classic red or crisp white. This approach adds holiday flair without overwhelming your overall look, making it ideal for workplace appropriate manicures or subtle seasonal styling.
Start by painting all nails with your chosen base color, then focus on creating thin diagonal stripes across only one nail per hand. The contrast between the detailed accent nail and clean solid colors creates visual interest while maintaining sophistication throughout the holiday season.
Thin Line Candy Cane Pattern
Ultra thin alternating red and white lines define this refined candy cane technique that prioritizes precision over boldness. We create these delicate stripes using a fine detail brush or striping tape, applying them at diagonal angles across the nail surface for authentic candy cane appearance. The key lies in varying the stripe widths slightly to add visual texture while keeping each line crisp and clean.
Begin with a white base coat, then use a steady hand to paint thin red diagonal lines across the nail. Allow each stripe to dry completely before adding the next one, ensuring clean edges and preventing color bleeding between sections.
Negative Space Stripe Style
Negative space candy cane designs embrace the modern trend of showing bare nail while creating maximum impact with minimal polish application. We strategically place just a few crisp stripes over clear or nude base polish, leaving most of the natural nail exposed for an airy, contemporary effect. This technique works particularly well for those who prefer subtle nail art or want to showcase healthy natural nails.
Use striping tape or nail stencils to mask off exact sections before applying your colored polish, then carefully remove the tape while the polish is still slightly wet. The result creates perfectly straight lines with clean edges that define the candy cane pattern without overwhelming the nail bed.
Holiday-Themed Candy Cane Nails
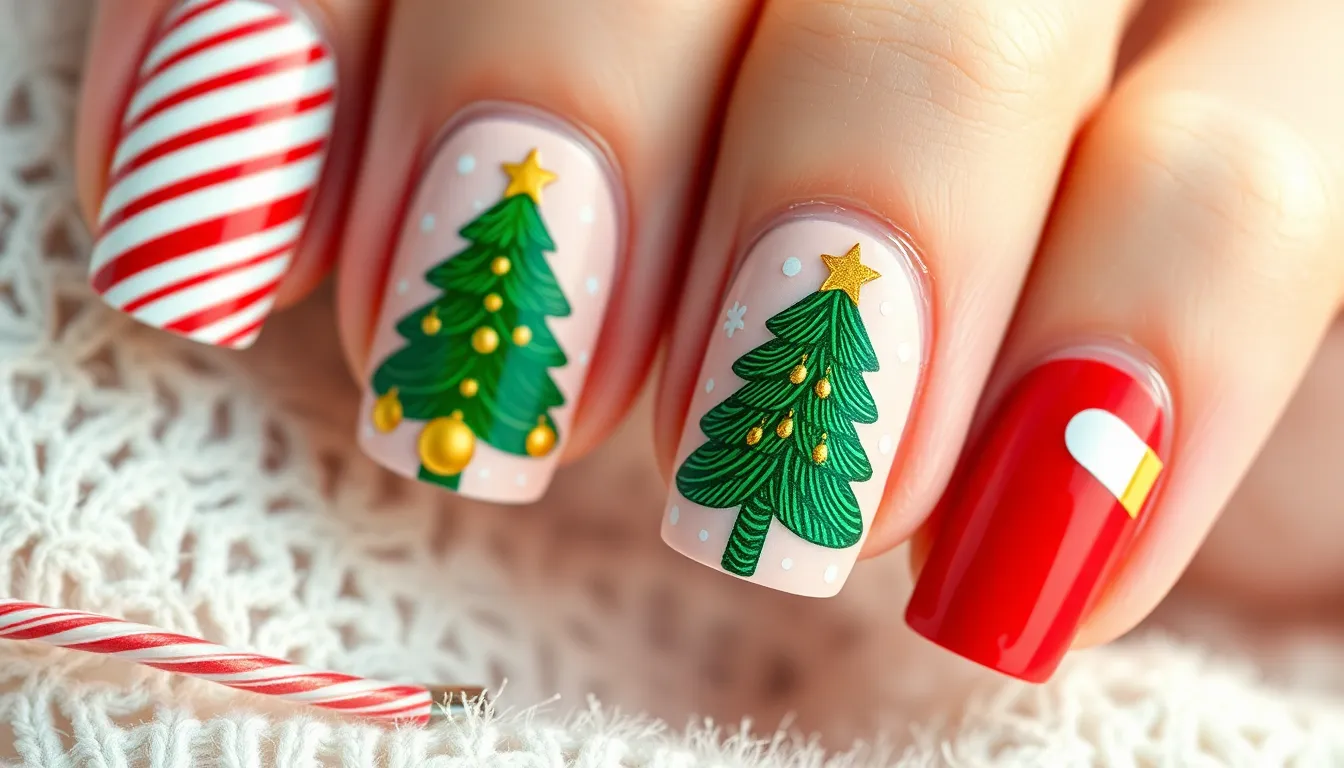
Holiday-themed candy cane nails combine the classic striped pattern with festive Christmas elements to create truly magical manicures. We’re showcasing designs that transform traditional candy cane stripes into comprehensive holiday celebrations on your fingertips.
Christmas Tree and Candy Cane Combo
Christmas tree and candy cane combo designs merge two iconic holiday symbols into one stunning manicure. We start with candy cane stripes on three fingers, then add detailed Christmas trees to the remaining nails using green polish and a fine nail art brush. The contrast creates visual interest while maintaining festive cohesion across all fingers.
Small gold or silver dots can represent ornaments on the Christmas trees, complementing the red and white candy cane stripes perfectly. We recommend alternating the tree placement with striped nails for balanced composition. This design works exceptionally well when the Christmas trees feature subtle shading techniques that add depth without overwhelming the candy cane elements.
Snowflake Accent with Stripes
Snowflake accent with stripes elevates traditional candy cane nails by incorporating delicate winter motifs. We apply the classic red and white diagonal stripes as the base design, then add intricate white snowflakes over select striped sections using dotting tools or fine brushes. The key lies in strategic placement to avoid cluttering the overall design.
Metallic silver snowflakes create particularly striking effects against the red portions of the candy cane stripes. We suggest limiting snowflakes to one or two accent nails to maintain visual balance. Clear holographic top coat can make the snowflakes shimmer subtly, adding extra winter magic to your candy cane base design.
Santa Hat Candy Cane Design
Santa hat candy cane design combines the jolly spirit of Santa with classic holiday stripes for a playful manicure. We create this look by painting traditional candy cane stripes on most nails, then transforming one accent nail into a Santa hat shape using red polish with a white fluffy tip. The white “fur” portion can extend slightly onto adjacent striped nails for seamless integration.
Tiny black dots represent Santa’s hat buckle or face details, while maintaining the candy cane aesthetic on surrounding fingers. We find this design particularly effective when the Santa hat nail serves as the focal point among more subtle striped companions. Adding a small rhinestone to the hat tip creates an elegant finishing touch that catches light beautifully.
Tools and Techniques for Perfect Candy Cane Nails
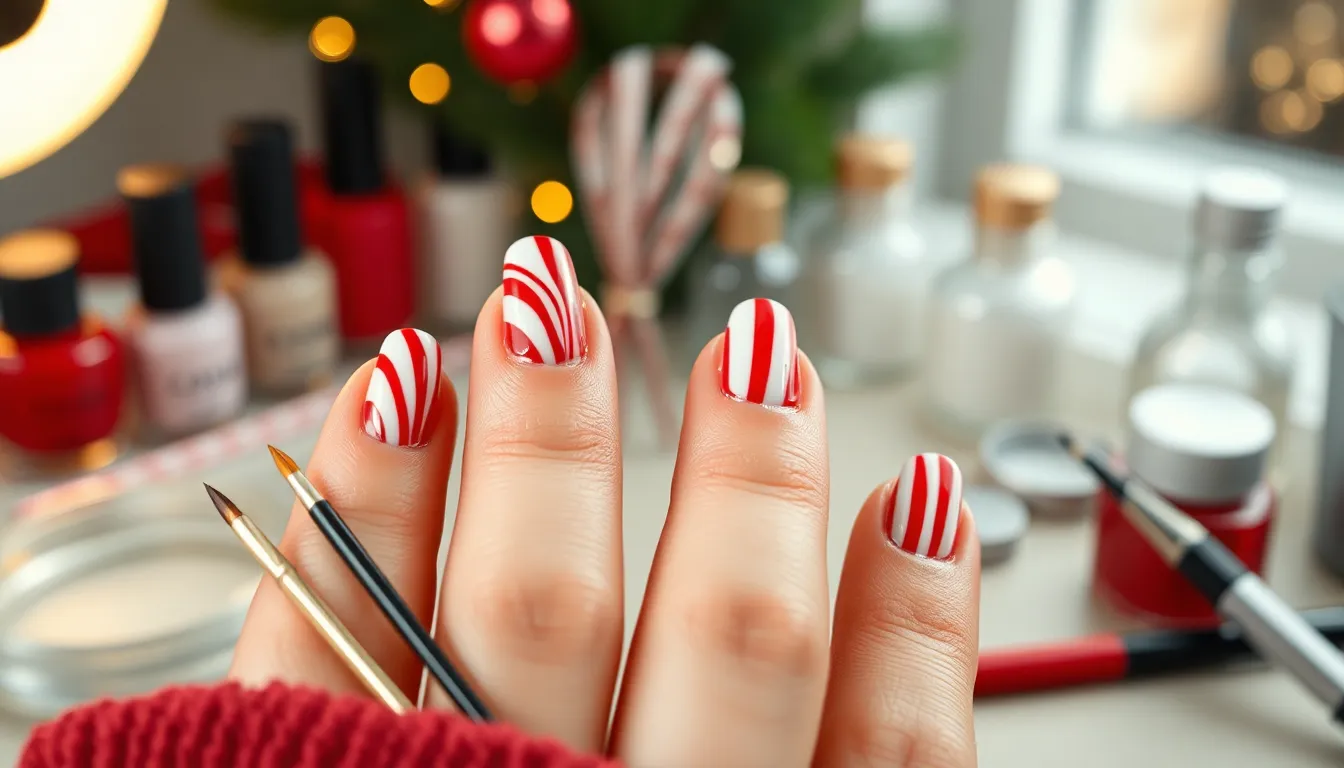
Mastering candy cane nails requires the right tools and techniques to achieve those crisp, festive stripes. We’ll explore the essential equipment and methods that’ll help you create professional-looking results at home.
Essential Nail Art Brushes
Pointed drawing brushes serve as our primary tool for creating both thick and thin candy cane stripes. These versatile brushes allow us to paint precise lines and intricate details that make our nail art designs stand out. We can control line thickness by adjusting pressure and brush angle during application.
Small pointed brushes excel at outlining candy cane patterns and adding delicate finishing touches. These precision tools help us clean up edges and create sharp definition between stripes. We use them to perfect those tiny details that transform amateur attempts into professional-looking manicures.
Detailing brushes with ultra-fine tips enable us to add texture and dimension to our candy cane designs. These specialized tools work perfectly for creating gradient effects within stripes or adding subtle highlights that catch the light.
Striping Tape Application Method
Step 1 involves applying striping tape diagonally across each nail, alternating between small and large gaps to create our signature thick and thin stripe pattern. We position the tape carefully to ensure consistent spacing across all nails, creating a cohesive candy cane effect.
Step 2 requires painting the exposed nail areas with our chosen polish colors, using larger gaps for thicker red stripes and smaller spaces for thinner accent stripes. We apply polish in thin, even coats to prevent bleeding under the tape edges.
Step 3 demands careful tape removal while the polish remains wet to avoid smudging our perfectly straight lines. We peel the tape at a 45-degree angle, working slowly to maintain crisp edges that define our candy cane pattern.
Preparation techniques ensure our base coat dries completely before applying any striping tape to prevent lifting or smudging. We clean each nail surface with rubbing alcohol to remove oils that might interfere with tape adhesion.
Hand-Painted Stripe Techniques
Direct painting methods challenge us to create stripes using only nail art brushes without tape assistance. This advanced technique requires steady hands and practiced brush control but offers unlimited creative freedom for custom stripe patterns.
Dot techniques provide beginners with an accessible entry point into candy cane nail art by painting red and white dots in zigzag formations. We connect these dots to form stripe-like patterns that mimic traditional candy cane designs without requiring perfect straight lines.
Freehand striping lets us create organic, slightly imperfect lines that add handmade charm to our candy cane nails. We load our brush with polish and draw continuous lines from cuticle to tip, embracing natural variations in line thickness.
Touch-up methods help us perfect our hand-painted designs using small brushes to correct uneven areas after the initial application. We keep a cleanup brush dipped in acetone nearby to quickly fix mistakes before they set permanently.
Conclusion
We’ve explored the endless possibilities that candy cane nails offer for creating stunning holiday manicures. From classic diagonal stripes to dimensional 3D effects and sophisticated ombre gradients there’s truly a style for every skill level and preference.
The beauty of candy cane nail art lies in its versatility – whether you’re drawn to minimalist designs for everyday wear or bold glitter variations for special occasions you can customize these looks to match your personal style. The techniques we’ve covered give you the foundation to experiment and create your own unique interpretations.
With the right tools and a bit of practice you’ll be creating professional-looking candy cane nails that capture the festive spirit perfectly. These timeless designs will keep your manicure looking fresh and celebratory throughout the holiday season and beyond.
Frequently Asked Questions
What are candy cane nails?
Candy cane nails are festive nail art designs that mimic the classic red and white striped pattern of candy canes. They typically feature alternating red and white stripes applied diagonally, vertically, or in curved patterns across the nails. This holiday-themed manicure is perfect for the Christmas season but can be worn year-round for a playful, eye-catching look.
How do you create basic candy cane nail stripes?
Start with a white base coat, then apply red striping tape diagonally across each nail for the classic look. For beginners, try vertical stripes instead. You can also hand-paint stripes using a fine brush or create curved stripes for a swirling candy cane effect. Always seal with a top coat for durability.
Can you make candy cane nails without striping tape?
Yes! You can hand-paint candy cane stripes using a fine nail art brush and steady hand. Start with dots and connect them for beginner-friendly lines, or try freehand striping for a more organic look. A pointed drawing brush works best for creating precise, clean lines without tape.
What are French tip candy cane nails?
French tip candy cane nails combine the classic French manicure with festive candy cane stripes. Apply red accents diagonally across white tips, or try a reverse French design where candy cane patterns are added to the tips of a solid base color. Double French tips layer two distinct tips for added visual interest.
How do you add glitter to candy cane nails?
Incorporate silver glitter accent stripes alongside traditional red and white patterns, or use a bold red glitter base with white stripes. For a modern twist, try holographic polish to create a rainbow shimmer effect. Apply glitter between base and top coat layers for best adhesion and longevity.
What are 3D candy cane nails?
3D candy cane nails add dimension through layered gel polish for raised stripes or sculpting gel for dramatic effects. You can attach small candy cane charms, holiday motifs, or metallic accents. Gel polish dimensional effects using holographic and glitter formulas create depth and sparkle for standout holiday nails.
How do you create ombre candy cane nails?
Use a makeup sponge to blend red and white polish for a smooth gradient effect. Start with white at the tip, blending to red at the base. For softer looks, try pink candy cane ombre. Multi-color fades can incorporate gold or green while maintaining the recognizable candy cane stripe structure.
What are minimalist candy cane nails?
Minimalist candy cane nails feature thin, irregular stripes for understated elegance. Try a single accent nail design where only one nail has the candy cane pattern, or create ultra-thin alternating lines. Negative space styles showcase bare nails with subtle candy cane stripes for a contemporary, refined look.
Can you combine candy cane nails with other holiday themes?
Absolutely! Popular combinations include Christmas tree and candy cane designs, snowflake accents with stripes, and Santa hat candy cane patterns. These merged designs enhance the festive spirit by incorporating multiple holiday elements while maintaining the classic red and white striped candy cane foundation.
What tools do you need for perfect candy cane nails?
Essential tools include pointed drawing brushes for precise lines, small brushes for outlining, detailing brushes for texture, and striping tape for consistent spacing. You’ll also need quality base coat, red and white polish, and top coat. A makeup sponge helps with ombre effects, and nail art charms add 3D elements.

