We’ve all been there – staring at our bare nails wondering how to make them look stunning without spending hours at the salon or mastering complex nail art techniques. The truth is you don’t need professional skills or expensive tools to achieve gorgeous nails that turn heads and boost your confidence.
Simple nail ideas are having a major moment and for good reason. They’re quick to execute perfect for busy lifestyles and surprisingly versatile. Whether you’re heading to the office planning a weekend getaway or prepping for a special occasion these effortless designs deliver maximum impact with minimal effort.
We’ll show you how to transform your nails from basic to beautiful using techniques that anyone can master. From classic French tips with a modern twist to minimalist geometric patterns and subtle color combinations – you’ll discover that stunning nails are just minutes away.
Classic French Manicure With a Modern Twist
The timeless French manicure remains a nail art staple, but we’re elevating this classic design with contemporary updates that maintain its elegant simplicity.
Traditional French Tips
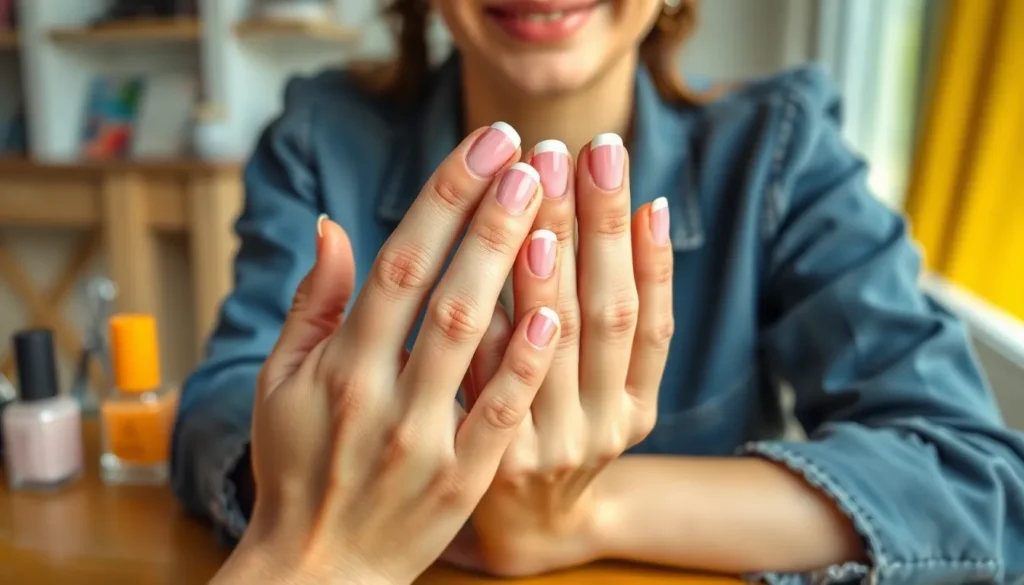
Perfect the classic white tip technique by starting with a nude or clear base coat that matches your natural nail tone. We recommend using nail guides or tape to create clean, curved lines at the tip of each nail. Apply thin coats of white polish, building up opacity gradually rather than attempting full coverage in one stroke.
Shape considerations make a important difference in achieving that polished look. Oval and almond nail shapes work best for traditional French tips, as they naturally complement the curved white line. Square nails can also work, but require more precision when painting the tip line.
Finish with a high gloss top coat to seal the design and add that signature French manicure shine. This step not only protects your work but also helps blend the color transition for a seamless professional appearance.
Colored French Tips
Swap white polish for vibrant alternatives like soft pink, coral, or even metallic shades to create a fresh take on the classic style. We’ve seen stunning results with colors like dusty rose, champagne gold, and sage green that maintain sophistication while adding personality.
Seasonal color choices keep your French tips relevant year round. Spring calls for pastel blues and lavenders, summer embraces bright corals and yellows, fall showcases deep burgundies and oranges, while winter sparkles with silver and deep blues.
Multiple tip colors create an artistic gradient effect when you alternate shades across different nails. Try using three complementary colors from the same family, such as light pink, medium pink, and rose gold for a cohesive yet varied look.
Reverse French Manicure
Flip the design by placing color at the cuticle area instead of the nail tips for this trendy variation. We start with a clear or nude base, then carefully apply a thin line of color along the moon of the nail near the cuticle.
Geometric reverse designs work exceptionally well with this technique. Create half moons, triangular shapes, or even straight lines across the base of the nail using contrasting colors against your natural nail tone.
Metallic accents elevate the reverse French when applied as the base color element. Gold foil, silver chrome, or holographic strips create eye catching designs that photograph beautifully and catch light throughout the day.
Solid Color Nails That Make a Statement
 1")
Sometimes the most impactful nail designs are the simplest ones. Solid color manicures offer endless versatility while maintaining that effortless elegance we’re all seeking.
Neutral Nude Shades
Neutral nude shades remain our go-to choice for creating timeless nail looks that work with any outfit. These versatile colors like beige and soft pink complement every skin tone while providing that polished, professional appearance we need for work or special occasions. We love how nude shades elongate the fingers and create a clean, sophisticated finish that never goes out of style.
Beige tones work particularly well for everyday wear since they’re subtle enough for conservative workplaces yet chic enough for evening events. Soft pink shades add just a hint of femininity without being overwhelming, making them perfect for those who want color without the commitment of bolder hues.
Bold Single Colors
Bold single colors transform ordinary nails into stunning focal points that demand attention. Vibrant shades like red, orange, and purple create dramatic impact with minimal effort, proving that simple doesn’t mean boring. We’ve found that these statement colors work best when applied in two thin coats for even coverage and maximum color payoff.
Red remains the ultimate power color for nails, instantly elevating any look from casual to glamorous. Orange brings energy and warmth to your manicure, while purple adds an unexpected twist that’s both sophisticated and playful. These bold choices require confidence but deliver maximum impact for those ready to make their nails the star of their look.
Seasonal Color Choices
Seasonal color choices help us stay current with nail trends while embracing the mood of each time of year. Summer 2025 brings us gorgeous pastel shades including lilac, peach, and yellow that perfectly capture the season’s warmth and freshness. These lighter tones reflect sunlight beautifully and complement summer wardrobes filled with whites, creams, and flowing fabrics.
Spring 2025 introduces us to nature-inspired colors like lavender, soft pink, and green that mirror the season’s blooming flowers and renewed energy. Lavender offers a sophisticated alternative to traditional purples, while soft pink provides that fresh, romantic feel we associate with springtime. Green shades bring an unexpected earthy element that pairs beautifully with the season’s natural awakening.
| Season | Popular Colors | Best For |
|---|---|---|
| Summer 2025 | Lilac, Peach, Yellow | Warm weather events, beach vacations |
| Spring 2025 | Lavender, Soft Pink, Green | Fresh starts, garden parties, everyday wear |
Minimalist Nail Art for Beginners
 2")
Minimalist nail art emphasizes simplicity and elegance through clean lines, soft shades, and strategic use of negative space. We’ll explore three approachable techniques that create stunning results without requiring advanced skills or expensive tools.
Single Accent Nail
Choosing one nail to highlight creates instant visual interest while keeping your overall look sophisticated. We recommend selecting your ring finger as the accent nail and painting it with a bold color like deep emerald or classic gold while keeping the remaining nails in a neutral shade.
Adding small motifs transforms your accent nail into a focal point without overwhelming the design. You can apply delicate gold stars using a small brush or create tiny geometric shapes that complement your base color perfectly.
Balancing your accent nail with the rest of your manicure ensures a cohesive appearance. We suggest using colors from the same family or choosing complementary shades that enhance rather than clash with your primary polish choice.
Thin Line Designs
Creating thin line patterns requires only steady hands and a fine brush or striping tape for guidance. We find that simple vertical stripes along the nail bed create an elegant elongating effect that works beautifully on shorter nails.
Applying chevron patterns adds modern geometric flair to your minimalist design. Start by drawing a thin line from one corner of your nail to the center, then mirror it from the opposite corner to create a clean V shape.
Using thin lines for a contemporary French manicure offers a fresh take on the classic style. Replace the traditional thick white tip with a delicate line just above your nail’s natural curve for an understated yet polished appearance.
Dot Patterns
Placing dots strategically across your nails creates playful designs that remain sophisticated and wearable. We recommend using a dotting tool or the rounded end of a bobby pin to achieve perfectly circular shapes every time.
Arranging polka dots in uniform rows creates a classic pattern that works with any base color combination. Space your dots evenly across each nail, leaving enough negative space to maintain the minimalist aesthetic.
Building gradient dot designs involves varying the size and opacity of your dots from cuticle to tip. Start with larger, more opaque dots near your cuticle and gradually decrease both size and color intensity as you move toward the nail tip for a subtle ombre effect.
Natural and Nude Nail Looks
 3")
When we want to create effortless elegance, natural and nude nail looks offer the perfect balance of sophistication and simplicity. These understated styles enhance our natural beauty while maintaining a polished appearance that works for any occasion.
Clear Coat Shine
Clear coat applications deliver instant sophistication by adding protective shine directly to our natural nails. We can maintain nail health while achieving a glossy finish that prevents peeling and enhances our nail’s natural appearance. Applying this transparent layer creates a professional look that complements any outfit without competing for attention.
Benefits include protection from daily wear and an improved nail appearance that looks effortlessly put together. This approach works especially well when we’re short on time but still want our nails to look intentional and cared for.
Subtle Pink Tones
Subtle pink applications create soft, understated elegance using light pastel shades that complement most skin tones. We can achieve this look by selecting gentle pink hues that enhance rather than overpower our natural coloring. These delicate shades pair effortlessly with various outfits and work perfectly for both professional settings and casual occasions.
Advantages of pink tones include their versatility and ability to elongate our fingers while maintaining a feminine touch. The soft nature of these colors makes them ideal for everyday wear without appearing too bold or attention grabbing.
Matte Nude Finishes
Matte nude applications offer sophisticated simplicity by combining nude colored polish with a matte topcoat for a non shiny appearance. We can create this modern look by first applying our chosen nude shade and then sealing it with a matte finish that eliminates gloss. This technique adds contemporary edge to classic nude colors while maintaining professional appropriateness.
Benefits of matte finishes include their ability to hide smudges and streaks while creating a luxurious, velvety appearance. The sophisticated touch of this non glossy finish works particularly well for those who prefer understated elegance over traditional shine.
| Application Tips | Benefits |
|---|---|
| Apply thin layers | Faster drying and smoother finish |
| Use quick dry topcoat | Speeds drying process and adds protective shine |
| Layer matte over nude | Creates sophisticated, non glossy appearance |
Easy Geometric Nail Designs
 4")
Geometric patterns offer endless possibilities for creating stunning nail art with just basic tools and techniques. We’ll explore three fundamental geometric designs that transform simple nail polish into eye-catching manicures.
Simple Stripes
Vertical stripes create the illusion of longer, more elegant fingers while remaining incredibly easy to execute. We recommend using striping tape to achieve perfectly clean lines without the need for advanced brush control skills. Horizontal stripes work equally well for those preferring a wider nail appearance, and you can customize the width by adjusting the spacing between each line.
Color combinations make all the difference in stripe designs, with contrasting pairs like navy and white or black and gold delivering the most dramatic impact. We suggest starting with two colors maximum to master the technique before experimenting with multi-colored patterns. Bold colors paired with neutral bases create sophisticated looks that work for both casual and professional settings.
Triangle Accents
Triangle shapes add geometric interest to your nails while requiring minimal artistic skill to achieve professional-looking results. We place triangles at different positions on the nail to create varying effects: tip placement creates a modern twist on French manicures, while base placement draws attention to the cuticle area. Mid-nail triangles serve as striking focal points that break up solid color backgrounds.
Color variations within triangle designs offer unlimited creative possibilities, with each triangle featuring a different shade for playful, multi-colored effects. We recommend using nail polish brushes or small detail brushes to paint precise triangle shapes, though nail stickers provide an excellent alternative for beginners. Metallic triangles against matte base colors create particularly striking contrasts that catch light beautifully.
Half-Moon Shapes
Half-moon manicures deliver classic elegance with a vintage-inspired twist that never goes out of style. We create these designs by painting a curved shape at the nail base, leaving the natural nail color visible or applying a contrasting shade. This technique works particularly well with nude base colors and bold accent colors like deep red or navy blue.
Accent colors make half-moon designs more visually striking, with the contrast between base and accent shades determining the overall impact. We suggest using small brushes or even household items like tape or stickers to create perfectly curved half-moon shapes. The technique adapts easily to different nail lengths and shapes, making it accessible for everyone regardless of their natural nail characteristics.
Quick Glitter and Shimmer Options
 5")
Adding sparkle to your manicure doesn’t require advanced skills or lengthy application times. These glitter and shimmer techniques transform simple nail designs into eye-catching statements.
Glitter Accent Nails
Glitter accent nails create instant glamour by highlighting just one or two nails per hand with sparkly polish. We recommend choosing your ring finger or thumb for maximum impact while keeping the remaining nails in a complementary neutral shade.
Apply a clear topcoat over the glitter to seal the sparkles and prevent chipping throughout the week. This technique works particularly well for special occasions when you want subtle elegance without overwhelming your overall look.
Choose glitter colors that coordinate with your base polish for a cohesive appearance. Silver glitter pairs beautifully with cool-toned bases, while gold complements warm shades perfectly.
Subtle Shimmer All Over
Subtle shimmer polish applied to all ten nails delivers cohesive elegance with understated sparkle. We suggest selecting shimmer shades that complement your skin tone for the most natural and flattering effect.
Light champagne and pearl tones work wonderfully for fair skin, while rose gold and bronze shimmers enhance medium to deep complexions. These shades provide just enough sparkle to catch the light without appearing overly flashy.
Apply shimmer polish in thin, even coats to prevent streaking and ensure smooth coverage. Two light layers typically provide better results than one thick application.
Gradient Glitter Tips
Gradient glitter tips create a sophisticated ombre effect by concentrating sparkle at the nail tips and gradually fading toward the cuticle. We recommend using a makeup brush to gently sweep glitter polish from the tip downward, creating a seamless transition.
Start with a light application at the tip and gradually decrease the intensity as you move toward the nail base. This technique requires patience but produces stunning results that rival professional salon work.
Blend the glitter while it’s still wet for the smoothest gradient effect. Seal with a quality topcoat to maintain the gradient’s integrity and extend wear time.
Two-Tone Color Combinations
 6")
Two-tone nail designs create striking visual impact using just two contrasting colors. These combinations offer endless possibilities while remaining simple enough for beginners to master at home.
Complementary Color Pairs
Complementary colors sit opposite each other on the color wheel and create vibrant nail art when paired together. Blue and orange combinations produce stunning contrast that catches attention, while red and green pairs offer bold sophistication perfect for holiday seasons. We recommend starting with softer versions of these complementary pairs to achieve more wearable everyday looks.
Purple and yellow create another striking complementary combination that works beautifully for spring and summer designs. These color relationships naturally draw the eye and make even simple nail designs appear more professional and intentional.
Ombre Effects
Ombre effects blend one color seamlessly into another, creating gorgeous gradient transitions from darker tips to lighter cuticles. Start with a darker shade at your nail tips and gradually blend it into a lighter tone using a makeup sponge or layering technique. This method requires patience but produces salon-quality results at home.
Popular ombre combinations include deep burgundy fading to soft pink, navy blue transitioning to sky blue, or classic black melting into gray. We suggest practicing the sponging technique on a nail wheel or fake nails before attempting it on your natural nails to perfect your blending skills.
Color Block Designs
Color block designs divide each nail into distinct sections painted with different colors, creating modern geometric looks. Use striping tape or painter’s tape to achieve crisp, clean lines between color sections. Diagonal blocks work particularly well for creating ever-changing visual interest.
Try painting half your nail with one color and the other half with a contrasting shade, or create vertical strips using two complementary tones. Remove the tape while the polish is still slightly wet to prevent peeling and ensure sharp edges. These designs add contemporary flair to simple manicures and can be customized with any color combination that matches your style.
Seasonal Simple Nail Ideas
 7")
Seasonal nail designs let us embrace nature’s changing palette while keeping our manicures effortlessly simple. We can easily adapt our nail art to match each season’s unique mood and colors.
Spring Pastels
Pastel tips and moons create the perfect delicate look for spring’s fresh energy. We apply soft pastel shades to nail tips and half moon areas for an understated elegance that complements blooming flowers and warmer weather.
Floral accents enhance pastel colored nails with subtle botanical touches. Small daisy dots or simple leaf strokes transform basic pastel manicures into spring inspired artwork that captures the season’s renewal spirit.
Gradient pastels blend soft pinks, lavenders, and mint greens for dreamy spring vibes. We create seamless color transitions using makeup sponges to dab colors together while they’re still wet.
Summer Brights
Wavy stripes bring playful energy using bright colors like pink and red across our nails. We create flowing wave patterns with thin brushes or striping tape for designs that mirror summer’s carefree spirit.
Neon drips transform neutral base colors with vibrant green and pink accents. These fun drip effects start at the cuticle and flow downward, creating ever-changing summer looks that catch sunlight beautifully.
Pink and orange gradients combine two of summer’s hottest shades for vibrant color combinations. We blend these warm tones using sponge techniques to achieve sunset inspired manicures perfect for beach days.
Fall Earth Tones
Nude and brown shades embrace autumn’s natural palette with sophisticated simplicity. We layer different brown tones from taupe to chocolate for rich, earthy manicures that complement fall fashion trends.
Leaves and acorns add minimalist seasonal touches to earth toned base colors. Simple leaf outlines or tiny acorn shapes create subtle fall themed designs without overwhelming our natural nail canvas.
Burnt orange accents capture autumn’s signature color on one or two accent nails. We pair this warm shade with neutral browns and creams for seasonal contrast that feels both modern and timeless.
Winter Jewel Tones
Snowflake designs feature delicate patterns in rich jewel tones like sapphire blue and amethyst purple. We create simple snowflake shapes using dotting tools and thin brushes for winter elegance that sparkles like fresh snow.
Glittering tips add festive sparkle to jewel toned base colors at nail tips. This technique transforms deep winter shades into celebration ready manicures perfect for holiday gatherings and New Year events.
Emerald and ruby combinations pair classic jewel tones for sophisticated winter looks. We alternate these rich colors across our nails or use one as an accent shade against the other’s deeper base.
Tools and Techniques for Simple Nail Art
 8")
Creating stunning nail art doesn’t require expensive equipment or professional training. We’ll show you how to achieve beautiful designs using basic tools and straightforward techniques that anyone can master.
Essential Nail Art Tools
Nail file and buffer serve as the foundation for any manicure by creating smooth, shaped nails that hold polish longer. We recommend starting with a medium grit file for shaping and finishing with a fine buffer for smoothness.
Striping tape transforms ordinary manicures into professional looking designs by creating perfectly straight lines and geometric patterns. Simply apply the tape where you want clean edges, paint over it, and remove while the polish remains wet.
Nail stickers and decals offer instant intricate designs without requiring freehand painting skills. These pre made designs range from simple patterns to complex florals and can be applied directly to dry base color.
Dotting tools create perfect circles and dots for playful patterns using specialized implements or common household items. Toothpicks, bobby pins, and even pencil erasers work effectively as makeshift dotting tools.
Thin brushes enable detailed work and fine lines that elevate simple designs into artistic masterpieces. Art supply stores offer small detail brushes that work perfectly for nail art applications.
Basic Application Methods
Striping tape technique requires applying tape to create boundaries, painting over the exposed areas, then removing the tape while polish stays wet for crisp lines. This method works best when you press tape edges firmly to prevent bleeding.
Dotting tool technique involves dipping your chosen tool into nail polish and pressing it onto the nail surface to create uniform dots. Varying the pressure creates different sized dots for ever-changing patterns.
Nail sticker and decal application starts with peeling the design from its backing, placing it carefully on the nail, then sealing with a clear top coat. We suggest applying stickers to completely dry base polish for best adhesion.
Time-Saving Tips
Prep the nail by ensuring your base coat dries completely before applying any designs to prevent smudging and ensure crisp results. Rushing this step often leads to messy, unprofessional looking manicures.
Use nail stickers as your go to solution for achieving intricate designs quickly without artistic skills or lengthy drying times. These ready made designs can transform simple manicures in seconds.
Practice with simple designs like dots, stripes, or single accent nails to build confidence before attempting more complex patterns. Starting with basic techniques helps develop steady hands and proper polish consistency knowledge.
Conclusion
We’ve shown you that achieving stunning nail art doesn’t require professional skills or expensive salon visits. With just a few basic tools and simple techniques you can create beautiful manicures that rival any professional design.
From classic French tips to geometric patterns and seasonal colors these simple nail ideas prove that elegance comes from creativity not complexity. Whether you’re drawn to minimalist nude shades or bold glitter accents there’s a perfect look waiting for you to try.
Remember that practice makes perfect and confidence grows with each design you create. Start with one technique that appeals to you most and gradually expand your skills. Your nails are your canvas and now you have all the knowledge needed to make them truly shine.
Frequently Asked Questions
What are the best simple nail designs for beginners?
French tips, solid colors, and single accent nails are perfect for beginners. These designs require minimal tools and can be completed in minutes. Start with classic French manicures using nail guides for clean lines, or try highlighting one nail with a bold color while keeping others neutral for an easy yet stylish look.
How long does it take to create simple nail art at home?
Most simple nail designs can be completed in 10-15 minutes. Quick techniques like solid colors, dot patterns, or glitter accent nails are especially fast. Using quick-dry topcoats and applying thin layers helps speed up the process while ensuring a professional-looking finish.
What tools do I need for basic nail art?
Essential tools include nail files, striping tape, nail stickers, dotting tools, and thin brushes. These basic items allow you to create French tips, geometric patterns, dots, and lines. You don’t need expensive professional equipment – most designs can be achieved with household items and basic nail polish.
Which nail colors are best for different seasons?
Spring features soft pastels like lilac and peach, while summer embraces bright neons and vibrant shades. Fall showcases earth tones including nude and brown colors, and winter highlights jewel tones with metallic accents. Neutral nudes work year-round and complement any outfit or occasion perfectly.
How can I make my simple manicure look more professional?
Focus on proper nail prep, apply thin layers for smoother coverage, and use quick-dry topcoats for a glossy finish. Clean up edges with a small brush dipped in nail polish remover. Practice steady hand movements for geometric designs, and consider matte finishes for a sophisticated, modern appearance.
What are the easiest geometric nail designs to try?
Simple stripes, triangle accents, and half-moon shapes are the most beginner-friendly geometric designs. Use striping tape for clean lines, create triangles at nail tips or bases, and try curved half-moon shapes at the cuticle area. These patterns require minimal artistic skill but create impressive results.
How do I create a perfect French manicure at home?
Use nail guides or striping tape to achieve clean, straight lines across the nail tips. Apply a neutral base coat, then carefully paint white tips. For modern variations, try colorful tips, reverse French (color at cuticle), or add subtle shimmer. Practice steady hand movements for the best results.
Can I create nail art without artistic skills?
Absolutely! Simple designs like dot patterns, single accent nails, and solid colors require no artistic ability. Use tools like dotting pens, nail stickers, and striping tape to create clean designs. Start with basic techniques and gradually build confidence before attempting more complex patterns.


