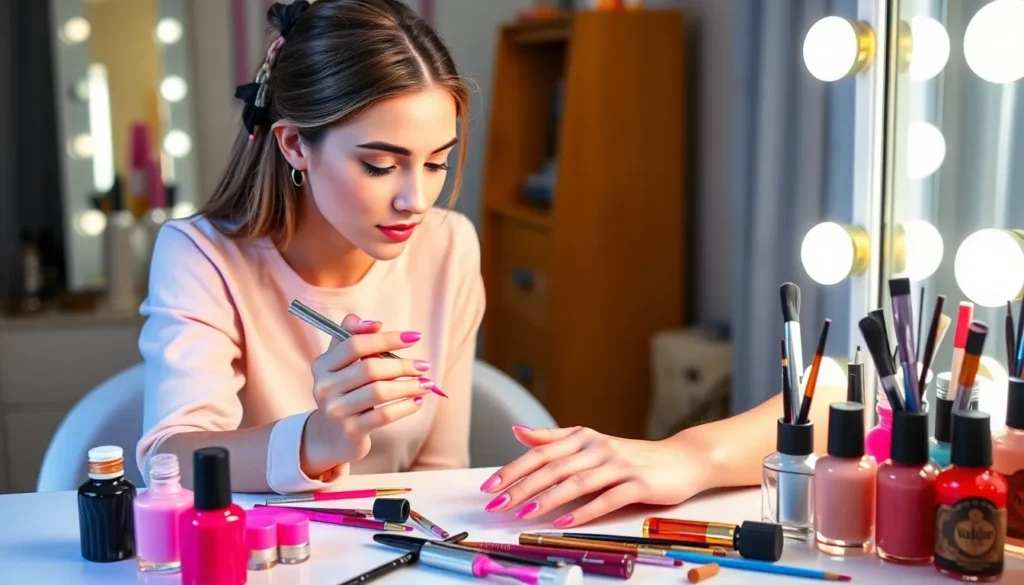
We’ve all been there – staring at our plain nails and wishing we had that perfect salon look without the hefty price tag. The good news? You don’t need to be a professional nail artist to create stunning manicures at home. With just a few basic tools and some creativity you can transform your nails into miniature works of art.
DIY nail art isn’t just about saving money – it’s about expressing your unique style and having fun with endless possibilities. From simple geometric patterns to intricate floral designs we’ll show you how to master techniques that’ll have everyone asking where you got your nails done.
Whether you’re a complete beginner or looking to expand your nail art skills we’ve gathered the most creative and achievable DIY ideas that’ll elevate your manicure game. Get ready to discover tricks that professional nail techs use and learn how everyday household items can become your secret weapons for gorgeous nails.
Simple Nail Art Techniques for Beginners
We’ll help you master three essential nail art techniques that require minimal tools and deliver stunning results every time.
Dotting Tool Designs
Dotting tools create perfect circles and patterns without requiring steady hands or artistic experience. We recommend starting with bobby pins or toothpicks if you don’t own professional dotting tools yet.
Basic polka dots work beautifully on any base color. Dip your dotting tool into contrasting polish and gently press onto your nail surface. Create uniform spacing by placing dots in a grid pattern or scatter them randomly for a playful look.
Flower petals form easily using the dotting technique. Place five dots in a circle formation then add a center dot in a different color. We suggest using white or yellow for the center and bright colors like pink or purple for the petals.
Gradient dot patterns add depth to your manicure. Start with large dots at the cuticle area using your dotting tool then gradually decrease the size toward the nail tip. This technique works exceptionally well with metallic polishes over dark base colors.
Tape Strip Patterns
Tape creates clean geometric lines and shapes that look professionally done. We use regular scotch tape or specialized nail striping tape for the best results.
Straight line designs require placing tape strips across your nail after applying base color. Paint over the tape with your accent color then remove the tape immediately while the polish remains wet. This prevents peeling and ensures crisp edges.
Triangle patterns form when you place two tape pieces at angles on your nail. We recommend creating triangular sections at the nail tip or along one side for a modern geometric look. Metallic gold or silver polish works particularly well for these designs.
Chevron stripes develop by placing tape in zigzag patterns across your nails. Remove every other section of tape then paint the exposed areas. This creates alternating chevron stripes that look complex but take only minutes to complete.
Sponge Gradient Effects
Sponge techniques produce smooth color transitions that mimic expensive salon ombre manicures. We use makeup sponges or kitchen sponges with fine textures for the best blending results.
Two color gradients start with painting your lighter shade as the base coat. Apply both colors side by side on your sponge then dab onto your nail with gentle patting motions. The colors blend naturally where they meet on the sponge.
Sunset effects combine three or more warm colors like yellow orange and pink. Paint horizontal stripes of each color on your sponge then press onto your nail from cuticle to tip. We recommend building up the color gradually with multiple light applications.
Glitter fade techniques add sparkle to any gradient design. Apply your gradient base then use a clean sponge to dab glitter polish from the nail tip upward. This creates a natural fade effect that catches light beautifully.
Creative Color Combinations and Patterns

Now that we’ve covered basic techniques, let’s explore advanced color combinations that transform ordinary manicures into stunning artistic statements.
Ombre and Sunset Blends
Ombre nails create seamless color transitions that rival professional salon work. We blend different colors smoothly using makeup sponges or small cosmetic brushes to achieve this gradient effect. Start with your lightest shade at the cuticle and gradually work toward the darkest color at the nail tip.
Sunset blends capture nature’s most beautiful moments on your fingertips. We recommend using warm colors like orange, pink, and yellow to mimic authentic sunset effects across each nail. Apply the lightest yellow near your cuticle, blend orange through the middle section, and finish with deep pink or coral at the tips.
Color layering intensifies the gradient effect when we apply thin coats and blend while polish remains slightly wet. This technique prevents harsh lines and creates those smooth transitions we see in professional work.
Geometric Shapes and Lines
Striping tape delivers perfectly clean lines without requiring steady artist hands. We place the tape over dried base color, paint over it with contrasting polish, then remove the tape while the top coat stays wet. This method works for straight lines, diagonal patterns, and complex geometric designs.
Polka dots remain timeless classics that we create using dotting tools or household alternatives. We dip the tool into contrasting polish and press gently onto the nail surface to form perfect circles. Varying dot sizes across nails creates visual interest and modern appeal.
Abstract designs let us experiment with unconventional tools for unique patterns. We’ve discovered that earrings work excellently as dotting tools, creating different sized circles and interesting textures that traditional tools can’t achieve.
Marble and Swirl Techniques
Marble nails achieve sophisticated stone like effects through strategic color swirling. We create this look by swirling multiple colors directly on the nail surface or using crumpled plastic wrap to press mixed colors onto wet base polish.
Water marbling produces intricate patterns when we drop different colored polishes into room temperature water. The colors spread and create organic patterns that we transfer to our nails by dipping them through the design.
Swirl patterns develop when we use dotting tools or toothpicks to mix colors while they’re still wet. We drag the tool through different colored drops to create flowing, organic designs that look complex but require minimal skill to master.
Seasonal Nail DIY Ideas for Year-Round Style

Adapting your nail art to match the seasons keeps your manicure fresh and exciting throughout the year. We’ll explore stunning designs that capture the essence of each season using techniques you’ve already mastered.
Spring Floral Motifs
Pastel colors set the perfect foundation for spring nail art, with mint blue and sage green creating that coveted fresh seasonal look. Creating delicate flower petals becomes effortless when you use nail art pens to draw small curved lines radiating from a central dot. Dotting tools work beautifully for making tiny flower centers and adding dimensional details to your floral patterns.
Butterfly designs bring whimsical charm to spring manicures through simple oval shapes that form the wings. Detail brushes allow you to add intricate wing patterns and delicate antennae that complete the butterfly effect. Building these motifs on pastel bases creates depth while maintaining that light, airy spring aesthetic.
Summer Beach Themes
Seashell designs capture summer’s coastal vibes when drawn with nail art pens using gentle curved lines and spiral patterns. Oceanic colors like deep blues and seafoam greens instantly transport your nails to a beachside paradise. Layering these shades creates the illusion of ocean waves lapping against the shore.
Wave patterns emerge beautifully when you use the sponge gradient technique with blue and white polishes. Adding tiny dots of white polish mimics sea foam and gives your beach themed nails realistic texture. Combining these oceanic elements creates a cohesive summer look that’s both refreshing and sophisticated.
Fall Leaf Patterns
Leaf motifs showcase autumn’s beauty through strategic use of nail art pens in rich oranges, deep yellows, and warm reds. Drawing leaf shapes becomes simple when you start with an oval base and add pointed ends with delicate vein details. Stickers offer an alternative approach for achieving perfectly shaped leaves without requiring advanced artistic skills.
Acorn designs add charming seasonal touches through small oval shapes topped with textured caps created using dotting tools. Layering these autumnal elements across different nails creates a cohesive fall theme. Browns and golds serve as excellent accent colors that tie the entire autumn palette together beautifully.
Winter Holiday Designs
Snowflake patterns bring winter magic to your nails through intricate designs created with nail art brushes and steady hands. Using dotting tools, you can create perfect symmetrical snowflakes by making six dots around a center point and connecting them with thin lines. White polish on dark bases provides the most striking contrast for these delicate winter motifs.
Holiday colors like rich reds and deep greens instantly evoke festive cheer when applied as base coats or accent details. Combining these traditional colors with metallic gold or silver accents elevates your holiday nail art to celebration ready status. Striping tape helps create clean candy cane patterns and geometric holiday shapes that maintain professional looking edges.
Budget-Friendly Nail Art Using Household Items

Creating stunning nail art doesn’t require expensive tools when common household items can produce professional-looking results. These budget-friendly techniques transform everyday objects into powerful nail art tools.
Toothpick Detail Work
Toothpicks serve as versatile dotting tools for creating precise small details like dots or lines on your nails. We can use different colors to create intricate patterns such as flowers or abstract designs by simply dipping the pointed end into nail polish. The wooden texture provides excellent control for fine detail work, making it perfect for outlining shapes or adding delicate accents to larger designs.
Creating polka dot patterns becomes effortless when we use the pointed end for small dots and the blunt end for larger circles. Swirling techniques work beautifully by dragging the toothpick through wet polish to form marbled effects or feathered patterns.
Plastic Wrap Textures
Plastic wrap creates unique textured effects that resemble natural marble patterns on your nails. We apply a base layer of nail polish, then crumple the plastic wrap and press it onto the polish before it dries completely. This technique produces organic, stone-like textures that add depth and visual interest to any manicure.
Different crumpling methods yield varying results – tight crumples create fine textures while loose folds produce broader pattern variations. Layering multiple colors with this technique creates complex, multi-dimensional effects that rival expensive textured polishes.
Band-Aid French Tips
Band-Aids function as excellent guides for painting straight lines needed for perfect French tips. We position the adhesive strip just below where we want the tip line, then paint over the exposed nail area for clean, precise edges. This method eliminates the need for expensive nail guides while achieving salon-quality results.
Curved Band-Aids work particularly well for creating natural-looking French tip curves that follow your nail’s shape. Removing the Band-Aid while the polish remains slightly wet prevents peeling and ensures crisp lines every time.
Newspaper Print Transfer
Newspaper creates fascinating print transfers that give nails a unique vintage aesthetic. We apply a clear base coat, place a small newspaper clipping onto the wet polish, then quickly remove it to transfer the text pattern. This technique works best with light-colored base coats that allow the newsprint to show clearly.
Different newspaper sections provide various text densities and font sizes for customized looks. Sealing the design with a clear top coat protects the transferred print and adds professional durability to this creative household hack.
Advanced DIY Nail Techniques for Skilled Artists

For those ready to elevate their nail art skills beyond basic techniques, we’re diving into sophisticated methods that create truly stunning results. These advanced techniques require patience and practice but deliver professional quality designs that’ll impress everyone.
Water Marble Designs
Water marble designs create mesmerizing swirled patterns that look like precious stone surfaces. We start by filling a small container with room temperature water and carefully dropping different colored nail polishes onto the surface. Using a toothpick or thin tool, we manipulate the polish drops to create intricate patterns before dipping our prepared nail into the design.
Essential steps for water marbling:
- Drop polish colors one at a time into the center of the water
- Create patterns by dragging a tool from the center outward
- Protect surrounding skin with tape before dipping
- Transfer the design by slowly inserting the nail at an angle
The key to successful water marble designs lies in using polishes that spread easily on water and working quickly before the polish becomes too thick to manipulate.
3D Nail Art Elements
3D nail art elements add dramatic dimension and texture to our manicures using sculptural techniques. We build raised designs using gel or acrylic materials, creating everything from delicate flowers to geometric shapes that stand out from the nail surface. Rhinestones, studs, and nail jewelry enhance these dimensional effects for maximum impact.
Popular 3D elements include:
- Sculpted roses and leaves using acrylic gel
- Geometric pyramids and cubes for modern looks
- Layered butterfly wings with translucent materials
- Textured dots and beads for subtle dimension
We recommend starting with simple raised dots before progressing to complex sculptural elements. Always seal 3D designs with a quality top coat to ensure durability and protect the raised elements from catching on clothing.
Hand-Painted Miniature Artwork
Hand painted miniature artwork transforms nails into tiny canvases for detailed artistic expression. We use fine brushes and steady hands to create intricate patterns, realistic flowers, or even miniature industry scenes directly on the nail surface. This technique requires the most skill but produces the most personalized and artistic results.
Successful hand painting techniques:
- Practice brush control on nail wheels before working on actual nails
- Use thin consistency polish for smooth brush strokes
- Paint designs in layers, allowing each to dry completely
- Create depth with shading and highlighting techniques
We suggest beginning with simple line work and gradually building complexity as brush control improves. Fine detail brushes size 0 or smaller work best for intricate miniature artwork, and using a nail art palette helps control paint consistency for precise application.
Essential Tools and Supplies for DIY Nail Art

Creating stunning nail art requires the right tools and supplies to achieve professional-looking results. We’ll explore the must-have items that make the difference between amateur and salon-quality designs.
Basic Brushes and Dotting Tools
Nail art brushes serve as the foundation for intricate designs and detailed painting work. Available in various sizes, these specialized brushes allow us to create precise lines, delicate florals, and complex patterns with professional accuracy. Fine-tip brushes excel at detailed work, while broader brushes help with base coverage and bold strokes.
Dotting tools create perfect circles and consistent patterns across our nail designs. These versatile instruments come in different tip sizes, enabling us to make tiny accent dots or larger focal points. Ink pins work exceptionally well as affordable alternatives, offering the same precision and control as professional dotting tools for creating various dot sizes and decorative elements.
Nail stampers transfer clean, crisp designs onto our nails with minimal effort. These tools excel at creating simple shapes and repeating patterns that would be challenging to paint freehand, ensuring consistent results across all ten nails.
Quality Base and Top Coats
Base coats protect our natural nails from staining while promoting better polish adhesion. This essential layer creates a smooth foundation that prevents color bleeding and extends the life of our manicure. Quality base coats also fill minor ridges and imperfections, creating an ideal canvas for nail art application.
Top coats seal our completed designs while adding brilliant shine and durability. These protective layers prevent chipping, extend wear time, and maintain the vibrancy of our nail art for days longer than unprotected polish. Fast-drying formulas save time while ensuring our designs stay pristine throughout the curing process.
Specialty Polishes and Effects
Metallic polishes add luxurious shimmer and sophisticated effects to our nail art creations. These specialty formulas reflect light beautifully, creating eye-catching accents and dramatic focal points that elevate simple designs into professional-quality manicures.
Glitter and holographic finishes provide stunning visual impact with minimal effort required. These specialty polishes create dimension and sparkle that catches light from every angle, transforming basic manicures into show-stopping nail art.
Gel and acrylic polishes offer superior longevity compared to regular nail lacquer. These advanced formulas provide chip-resistant wear for up to two weeks, making them ideal for intricate designs that require extended durability.
Nail stickers and decals deliver quick enhancement options without requiring advanced artistic techniques. These ready-made designs save time while adding professional touches to our manicures, perfect for creating complex patterns or detailed imagery that would be difficult to paint by hand.
Step-by-Step Nail Prep for Long-Lasting Results

Proper nail preparation forms the foundation of any successful DIY manicure and directly impacts how long your nail art will last. We’ll walk you through the essential steps that professional nail technicians use to ensure your at-home manicures rival salon quality results.
Cuticle Care and Shaping
Shape your nails first using an emery board to create the desired silhouette before applying any products. Filing creates a smooth surface that allows polish to adhere better and prevents chipping along the nail edges.
Soften cuticles by applying a cuticle remover and letting it sit for the recommended time on the product packaging. Gently push back the cuticles using a wooden or metal tool to prevent polish from lifting at the base of your nails.
Remove excess dead skin carefully with cuticle nippers if necessary, but avoid cutting too close to the nail edge to prevent injury. Clean cuticle lines create a professional appearance and help your nail art designs look more polished.
Buff the nail surface using a nail priming emery board in the direction of nail growth to smooth out imperfections and ridges. This step ensures your base coat will apply evenly and your nail art will have a flawless finish.
Proper Base Application
Apply base coat immediately after completing your nail prep to protect the natural nail and enhance polish adhesion. Base coats create a barrier that prevents staining and helps extend the life of your manicure by up to several days.
Use thin coats rather than thick applications to avoid bubbling and ensure proper drying between each layer. Two thin coats of base typically provide better coverage and durability than one thick application.
Seal the nail edges by running the brush along the tip of each nail to prevent water from seeping underneath the polish. This technique helps prevent lifting and chipping at the most vulnerable areas of your manicure.
Drying and Curing Tips
Clean the nail surface thoroughly with a lint-free wipe to remove oils and residue before applying gel polish for optimal results. Any remaining oils can prevent proper adhesion and cause premature lifting.
Apply gel polish in thin layers and cure each coat under a UV or LED lamp according to the manufacturer’s exact instructions. Most gel polishes require 30-60 seconds under LED lights or 2 minutes under UV lamps.
Moisturize cuticles and nails with oil after completing your manicure to maintain nail health and flexibility. Regular moisturizing prevents the cuticles from becoming dry and cracked, which can detract from your finished nail art.
Allow adequate drying time between coats of regular polish, typically 2-3 minutes, to prevent smudging and ensure each layer cures properly. Rushing this step often leads to dented or smeared designs that require complete removal and reapplication.
Trendy Nail DIY Ideas Inspired by Social Media

Social media platforms have revolutionized nail art inspiration, bringing fresh ideas and innovative techniques directly to our fingertips. We’ve compiled the most popular DIY nail trends that are taking Instagram, TikTok, and Pinterest by storm.
Instagram-Worthy Negative Space Designs
Negative space manicures create stunning visual impact by strategically leaving portions of your natural nail exposed. We start by applying a quality base coat to create our clean canvas, ensuring the nail surface is completely smooth and protected.
Strategic placement of nail polish transforms ordinary manicures into artistic masterpieces. We recommend using stickers or tape as precise guides to achieve clean lines and professional looking results. The contrast between polished and natural areas creates an effortlessly chic aesthetic that photographs beautifully under any lighting.
Sealing your design with a high quality top coat protects both the polished areas and exposed nail surface. This final step ensures your negative space creation maintains its crisp appearance and prevents chipping around the design edges.
TikTok Viral Nail Challenges
Nail art challenges on TikTok have introduced creative techniques using everyday household items that deliver professional results. We’ve seen incredible gradient effects achieved with eyeshadow palettes, while fine tip markers create intricate detailed designs that rival salon work.
DIY nail hacks continue trending as creators share innovative material combinations that produce stunning effects. We incorporate water decals for precise patterns, pearl powder for lustrous shine, and foil flakes for eye catching textured backgrounds. These accessible materials make high end nail art achievable for everyone.
Viral challenges encourage experimentation with unconventional tools and techniques that push creative boundaries. We find that following these trends helps develop new skills while creating unique manicures that reflect current social media aesthetics.
Pinterest Board Favorites
Floral designs dominate Pinterest boards with their timeless appeal and versatility across seasons. We create summer flower motifs using soft pastels and vibrant bright hues that capture the essence of blooming gardens. These delicate patterns work beautifully for both casual and formal occasions.
Ombré effects and colorful tips represent another major Pinterest trend that’s perfect for DIY enthusiasts. We blend pink, orange, and blue shades to create seamless color transitions that add depth and dimension to any manicure. The gradient technique offers endless color combinations to match personal style preferences.
Animal print patterns have gained important popularity, with cow print and Dalmatian inspired designs leading the trend. We achieve these bold patterns using contrasting colors and strategic dot placement that creates authentic animal print aesthetics. These playful designs add personality and make strong fashion statements.
Additional trending elements include chrome tips for subtle sophisticated shine and gingham florals that perfectly capture summer vibes. We combine these patterns with traditional floral motifs to create unique designs that stand out in Pinterest searches.
Nail Care Tips to Maintain Your DIY Manicure

After putting effort into creating stunning nail art, we want our manicures to look fresh and last as long as possible. Proper maintenance techniques can extend the life of our DIY designs while keeping our nails healthy.
Daily Maintenance Routines
Moisturize cuticles using oils or creams to prevent dryness and maintain the polished appearance of our manicure. Daily hydration keeps the skin around our nails soft and prevents unsightly hangnails that can detract from our nail art.
Apply a quick-dry top coat as needed to refresh the shine and seal in our designs. Weekly reapplication of top coat helps prevent chipping and maintains that glossy finish we love from fresh manicures.
Check for chips and minor damage during our morning routine to catch problems early. Small imperfections are much easier to fix when we address them immediately rather than waiting for them to worsen.
Store nail tools in a clean, dry place to prevent contamination and maintain their effectiveness. Proper tool storage ensures our equipment stays in good condition for future touch ups and new manicures.
Touch-Up Techniques
Use a tiny brush or toothpick dipped in polish to fill in minor chips with precision. These small tools allow us to target exact areas without disturbing the surrounding nail art.
Fix small imperfections with a dotting tool or even the post of an earring for ultra precise application. Creative use of everyday items helps us achieve professional looking repairs without specialized equipment.
Reapply a thin layer of top coat over the repaired spot to blend the touch up seamlessly with the existing manicure. This final step ensures our repair work looks natural and maintains the overall appearance.
Create neat French tips using a makeup sponge wrapped in plastic to achieve curved lines, then fill in any gaps with polish. This technique produces clean, professional looking results that rival salon quality work.
Removal Best Practices
Remove polish using acetone free remover for natural nails to prevent excessive drying, or choose acetone for gel or stubborn polish that resists gentler removers. Selecting the right remover protects our nail health while effectively eliminating old polish.
Soak a cotton pad in remover and press onto the nail for 10 to 15 seconds before gently swiping to remove color. This soaking method softens the polish and reduces the scrubbing needed for complete removal.
Avoid scraping or peeling off polish as these aggressive methods can damage the nail plate and leave our nails weak or ridged. Patience during removal preserves nail health for future manicures.
Wash hands and apply cuticle oil after removal to restore moisture and prepare nails for the next manicure. This final step neutralizes any harsh chemicals and nourishes our nails back to healthy condition.
Conclusion
We’ve explored countless ways to transform your nails into stunning works of art without very costly or leaving your home. From simple dotting techniques to sophisticated water marble designs you now have the knowledge to create professional-looking manicures that reflect your personal style.
The beauty of DIY nail art lies in its accessibility and endless possibilities. Whether you’re reaching for household items like toothpicks and plastic wrap or investing in quality tools and specialty polishes you can achieve remarkable results with practice and creativity.
Remember that proper nail preparation and maintenance are just as important as the artistic techniques themselves. By following the care tips we’ve shared your manicures will stay vibrant longer and your nails will remain healthy throughout your DIY journey.
We encourage you to experiment with different seasonal themes trendy social media designs and advanced techniques as you develop your skills. Your nails are the perfect canvas for self-expression so have fun and let your creativity shine!
Frequently Asked Questions
Can I really achieve salon-quality manicures at home?
Yes, you can achieve professional-looking results at home with the right techniques and tools. The key is proper nail preparation, using quality base and top coats, and practicing basic techniques like dotting, tape patterns, and gradient effects. With patience and practice, DIY manicures can rival salon quality.
What basic tools do I need to start nail art at home?
Essential tools include basic brushes, dotting tools, quality base and top coats, and various nail polishes. You don’t need expensive equipment – household items like toothpicks, plastic wrap, and band-aids can create stunning effects. Start with these basics and expand your collection as you develop skills.
How can I make my DIY manicure last longer?
Proper nail preparation is crucial – shape nails, care for cuticles, and apply a quality base coat. Use thin polish layers, seal with a good top coat, and allow proper drying time. Maintain with daily cuticle moisturizing and quick touch-ups when needed.
What are some easy nail art techniques for beginners?
Start with dotting tool designs for perfect circles, tape strip patterns for clean geometric lines, and sponge gradient effects for smooth color transitions. These three techniques require minimal tools and create impressive results that build confidence for more advanced designs.
How do I create seasonal nail art designs?
Adapt designs to reflect each season: spring florals with pastels, summer beach themes with oceanic colors, fall leaf patterns in warm hues, and winter snowflakes with metallic accents. Use nail art pens for details and coordinate colors with seasonal palettes for cohesive looks.
Can I use household items for nail art?
Absolutely! Toothpicks create detailed dots and swirls, plastic wrap produces marble textures, band-aids help with precise French tips, and newspaper creates vintage print transfers. These budget-friendly alternatives make nail art accessible without expensive specialized tools.
What’s the difference between regular and gel polish for DIY manicures?
Gel polish offers superior durability and longer wear time but requires UV or LED curing. Regular polish dries naturally but may chip sooner. Gel provides a glossier finish and is ideal for intricate designs, while regular polish is easier for beginners and quick changes.
How do I fix mistakes or touch up my nail art?
Keep small brushes handy for precise repairs. For minor chips, apply a thin layer of matching polish and seal with top coat. Use makeup sponges for French tip touch-ups. Address damage early to prevent further chipping and maintain the overall design integrity.
What are the most popular nail art trends right now?
Current trends include negative space manicures, TikTok viral techniques using eyeshadow gradients, Pinterest favorites like floral designs and ombré effects, and minimalist geometric patterns. Social media platforms constantly showcase new creative techniques using everyday items for unique results.
How should I remove nail polish without damaging my nails?
Use acetone-free removers for natural nails and gentle soaking methods. Avoid harsh scraping or peeling. Soak cotton pads with remover, place on nails, and gently push off polish. Follow with cuticle oil and moisturizer to restore nail health after removal.


